How to attach metal to wood with screws

In order to attach metal to wood with screws, you’ll need a drill, screwdriver, drill bit, saw and clamps. First, use the saw to cut the metal into the desired shape. Next, use the drill bit to make a hole in the metal that is slightly smaller than the screw. Finally, use the clamps to hold the metal in place and screw in the screws.
Choose the right screws for the job
Choosing the right screws for the job is important. You wouldn’t want to use a screw that’s too small or too large, would you? The same principle applies when it comes to creativity. You need to use the right type of thinking for the task at hand. Trying to create using evaluative thinking will only lead to frustration and a lack of productivity.
There are different types of screws for different applications. The most common type is the flat head screw. These have a wide, flat surface that sits flush with the material they’re being used on. They’re perfect for most general purposes, like attaching wood to metal or drywall to studs.
If you need a screw that can go into tight spaces, then you want to use a pan head screw. These have a smaller diameter than flat head screws, so they can fit into tighter areas. They’re often used in electrical work or when space is limited.
When you need a lot of holding power, go with a hex head screw. These screws have a six-sided head that allows you to use a wrench for extra torque. They’re great for heavy-duty jobs, like attaching beams or plywood to walls.
There are also specialty screws, like deck screws and lag screws. Deck screws are designed for outdoor use, so they’re made to resist corrosion. Lag screws are used to secure wood to wood and are often used in framing applications.
Now that you know the different types of screws, it’s time to choose the right one for the job. Keep these tips in mind and you’ll be sure to find the perfect screw every time.
Drill pilot holes for the screws
It’s frustrating when you don’t have the right tools for the job. You can try to make do, but it never works out as well as you hope. The same is true when it comes to creativity. If you want to be more creative, you need to have the right tools for the job. And that means having a process in place that allows for creativity to flow freely. In this post, we will discuss one such tool – pilot holes.
Pilot holes are small holes drilled into a surface before inserting a screw or nail. The purpose of pilot holes is to prevent the screw or nail from splitting the wood as it is being driven in. When driving in a screw or nail without a pilot hole, there is a risk of the screw or nail splitting the wood, which can cause the fastener to come loose and/or damage the surrounding area.
Pilot holes should be slightly smaller in diameter than the fastener being used. For example, if you are using a #8 screw, you would drill a 7/64” pilot hole. This will allow for the screw to be driven in without splitting the wood.
In general, it is best to drill pilot holes before inserting any type of fastener. However, there are certain situations where a pilot hole is not necessary. For instance, if you are using a very small screw or nail, the risk of splitting the wood is minimal. In addition, if you are driving the fastener into a soft wood (such as pine), a pilot hole is not required.
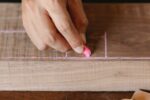
Now that we’ve discussed what pilot holes are and when to use them, let’s talk about how to drill them. The first step is to determine the diameter of the pilot hole you need. As mentioned above, this should be slightly smaller than the diameter of the fastener you will be using. Once you know the diameter of the pilot hole, select the appropriate drill bit.
Next, position the drill bit on the surface where you will be making the pilot hole. It is important to make sure that the drill bit is perpendicular to the surface; otherwise, the pilot hole will not be straight. Once the drill bit is in position, start drilling slowly. Apply just enough pressure to keep the drill bit from slipping, but don’t apply too much pressure or you may break the drill bit.
Continue drilling until the desired depth is reached. For most screws and nails, this will be 1/2” to 3/4” deep. Remove the drill bit from the pilot hole and proceed with inserting your screw or nail.
Pilot holes are an essential tool for any project that involves screws or nails. By taking the time to drill pilot holes, you can avoid splitting the wood and ensure a tight, secure fit
Drive the screws into the wood
It’s a common misconception that only highly intelligent people are creative. In fact, research shows that once you get beyond an I.Q. of about 120, intelligence and creativity are not at all related. That means that even if you’re no smarter than most people, you still have the potential to wield amazing creative powers. So why are so few people highly creative? Because there are bad habits people learn as they grow up which crush the creative pathways in the brain. And like all bad habits, they can be broken if you are willing to work at it.
Apply pressure to the screwdriver to keep it from slipping
It’s a common problem: you’re trying to tighten a screw with a screwdriver, but the screwdriver keeps slipping and you can’t get it to stay in place. Here are four ways to apply pressure to the screwdriver so that it won’t slip:
1. Use your thumb: Place your thumb on the end of the screwdriver opposite the tip. This will give you more control and keep the screwdriver from slipping.
2. Use a rubber band: Wrap a rubber band around the handle of the screwdriver to give you more grip.
3. Use a clamp: If you have a small clamp, you can place it around the screwdriver handle to give you more leverage.
4. Use pliers: Another option is to use pliers to hold the screwdriver in place while you turn the screws. This can be helpful if the screws are particularly tight or if your hands are slippery.
With any of these methods, be sure to hold the screwdriver firmly so that it doesn’t slip and cause you to injure yourself.
Use a wire brush or steel wool to clean off any corrosion on the screws
It’s happened to all of us. We go to tighten a screw or bolt, and we find that the head is so corroded that the screw won’t budge. In some cases, even if you can get the screwdriver or wrench onto the head, it just slips off. What can you do in this situation?
One option is to use a wire brush or steel wool to clean off the corrosion. This will take some elbow grease, but it should allow you to get a good grip on the screw.
Another option is to use a product like WD-40 or Penetrex. These lubricants will help to break down the corrosion and allow you to turn the screw.
If all else fails, you may need to resort to using a drill. First, use a small bit to drill a pilot hole into the center of the screw. Then, switch to a larger bit and drill out the rest of the screw. You can then remove the debris with a screwdriver or other tool.
If necessary, use a washer to help distribute the load on the screw
It’s a common misconception that only highly intelligent people are creative. In fact, research shows that once you get beyond an I.Q. of about 120, which is just a little above average, intelligence and creativity are not at all related. That means that even if you’re no smarter than most people, you still have the potential to wield amazing creative powers. So why are so few people highly creative? Because there are bad habits people learn as they grow up which crush the creative pathways in the brain. And like all bad habits, they can be broken if you are willing to work at it.
Use a lock washer or nut to keep the screw from backing out
Using a lock washer or nut to keep the screw from backing out is an easy way to make sure your project stays together. Here’s how to do it:
1. Place the lock washer or nut on the screw before you put it through the hole in the object you are fastening.
2. Tighten the screw until it is snug against the object.
3. Use a wrench or pliers to twist the lock washer or nut clockwise, which will tighten it against the screw and keep it from coming loose.
4. That’s it! Your screw is now secure and won’t back out over time.
Apply Loctite or another thread locking compound to the screws
It’s a good idea to apply Loctite or another thread locking compound to the screws on your bike. This will help keep them from coming loose and causing problems while you’re riding.
There are a few different types of Loctite, so be sure to choose the right one for the material of your screws. The wrong type could end up making things worse!
Once you’ve applied the Loctite, give the screws a few turns until they’re nice and tight. Then sit back and enjoy your ride!
If you have any questions, be sure to ask a qualified bike mechanic. They’ll be able to help you out and make sure you’re using the right products for your bike.
Use caution when working with power tools
If you’re going to be working with power tools, it’s important to take caution. This is because power tools can be very dangerous if used incorrectly. Here are some tips to help you stay safe when using power tools:
– Always read the instructions before using a new power tool. This will help you understand how the tool works and what safety precautions you need to take.
– Wear the proper safety gear. This includes things like eye protection, gloves, and ear protection.
– Be aware of your surroundings. Make sure that there is nothing in the way that could potentially get caught in the tool or injure you if something went wrong.
– Take your time. rushing through a job can lead to mistakes, and when power tools are involved, those mistakes can be dangerous.
By following these safety tips, you can help to ensure that your next project goes off without a hitch. Stay safe out there!
Be aware of your surroundings to avoid injury
Most people are aware of the dangers that come with being careless while walking or driving. But what about when we’re in our own homes? We can be just as careless there, and sometimes the consequences are even worse. In this post, we’ll discuss some of the most common ways people injure themselves in their own homes, and how to prevent them.
One of the most common ways people injure themselves in their own homes is by falling down the stairs. Most staircases have a handrail to help keep us safe, but if we’re not paying attention, it’s easy to miss a step and take a tumble. If you live in a home with stairs, be extra careful when going up or down them, and hold onto the handrail whenever possible.
Another common injury occurs when people trip over something that’s left out in the open. It could be a pair of shoes in the middle of the floor, or a toy that’s been left out in the living room. Whatever it is, if it’s in your way, take the time to move it before you walk by. It only takes a second, and it could save you from a nasty fall.
Finally, one of the most dangerous things in any home is sharp objects. Knives, scissors, and other sharp tools should be stored in a safe place where they can’t be reached by children or accidents. If you’re using a sharp object, be sure to pay attention to what you’re doing and put it away as soon as you’re done.
These are just a few of the most common ways people injure themselves in their own homes. By being aware of the risks and taking precautions, we can all help to prevent accidents and keep ourselves safe.
Follow the manufacturer’s instructions for your tools and screws
Most people know that following the manufacturer’s instructions is important when it comes to tools and screws. But many people don’t realize that this same principle also applies to their own creativity. Just as you need the right tools and screws for a project, you also need the right mindset and habits for creativity. In this blog post, we’ll discuss eight bad habits that can hold you back from being creative and how to break them.
1. Not taking time to warm up: Just as you wouldn’t start running a marathon without warming up first, you shouldn’t start a creative project without doing some sort of mental warm-up. This could be something as simple as brainstorming for 10 minutes or doing a quick sketch. The goal is to get your mind thinking creatively before you start your project.
2. Working on too many things at once: Trying to juggle too many projects at the same time will only hold you back from being creative. When you’re stretched thin, it’s difficult to focus on any one thing and give it your all. Instead, try to focus on one project at a time and see it through to the end.
3. Not taking breaks: It’s important to take breaks when you’re working on a creative project. This allows your mind to rest and rejuvenate so you can come back to the project with fresh eyes. Breaks also give you time to step away from your work and come up with new ideas.
4. Working in the same place all the time: If you always work in the same place, you’ll start to feel creatively blocked. Sometimes, all you need is a change of scenery to jumpstart your creativity. So try working in a different location, whether it’s a different room in your house or a coffee shop down the street.
5. Trying to be perfect: The quest for perfectionism will only hold you back from being creative. When you’re too focused on making something perfect, you’re less likely to take risks and experiment with new ideas. Instead of striving for perfection, focus on producing something that’s good enough.
6. Not finishing what you start: It’s easy to get excited about a new project and start working on it with lots of energy and enthusiasm. But this enthusiasm often fizzles out before the project is finished. If you want to be more creative, it’s important to see projects through to the end. This will not only boost your creativity, but also give you a sense of accomplishment.
7. Working in isolation: You might think that you work best when you’re alone, but this isn’t always the case. When you work in isolation, you miss out on the benefits of collaboration. So try working with someone else on a project or joining a creative group. This can help to stimulate new ideas and give you feedback on your work.
8. Giving up too easily: It’s normal to feel frustrated when you’re working on a creative project. But it’s important to push through this frustration and not give up too easily. If you give up at the first sign of difficulty, you’ll never reach your full potential as a creative person.
If you find yourself falling into any of these bad habits, don’t despair. These habits can be broken with a little effort and determination. By making some simple changes to your routine, you can start to see a difference in your creativity. So don’t wait any longer, start breaking those bad habits today!
Check local building codes before beginning any work
If you’re planning on doing any home improvement work, it’s important to check with your local building codes first. Depending on where you live, there may be specific regulations that you need to follow in order to ensure that your work is up to code. By taking the time to research these regulations before beginning your project, you can help avoid any costly delays or problems down the road.
So, what do you need to know about local building codes? Here are a few things to keep in mind:
1. Check with your local authorities before beginning any work. They will be able to tell you what specific regulations apply in your area.
2. Make sure that any contractors or other workers you hire are familiar with the local building codes. This will help ensure that they do the job properly and in compliance with the law.
3. Be prepared to make changes to your plans if necessary. Local building codes can sometimes be strict, so it’s important to be flexible and willing to make adjustments if need be.
4. Keep up with any changes to the building code. These can happen from time to time, so it’s important to stay up-to-date on the latest requirements.
How to attach metal to wood with screws
Building codes are important to follow because they ensure that your home improvement projects meet safety standards. By checking with your local authorities and following their guidelines, you can avoid any costly mistakes or problems down the road. Make sure to be flexible and prepared to make changes if necessary, and keep up with any updates to the building code. With these tips in mind, you’re ready to start your next home improvement project!