How to build a simple bookcase
Building a simple bookcase is a task that can be accomplished by anyone with basic carpentry skills. In this article, we will provide you with the steps necessary to build your own bookcase. We will also provide you with a materials list and some tips for completing the project.
Building a simple bookcase involves creating four main components: the top, the bottom, the sides, and the shelves. To start, you will need to cut the wood for these pieces to size. Once the pieces are cut, you will then need to assemble them using nails or screws.
The first step is to create the top of the bookcase. To do this, you will need to cut two pieces of wood to the same length and width. These pieces will be the top and bottom of your bookcase. Once you have these pieces cut, you will need to nail them together at the corners.
The next step is to create the sides of the bookcase. For this, you will need to cut four pieces of wood to the same length. These pieces will be the sides of your bookcase. Once you have these pieces cut, you will need to nail them together at the corners.
The next step is to create the shelves for the bookcase. To do this, you will need to cut six pieces of wood to the same length and width. These pieces will be the shelves for your bookcase. Once you have these pieces cut, you will need to nail them together at the corners.
The final step is to finish the bookcase by adding a piece of trim around the top and bottom. You can also add some decorative details to the sides of the bookcase if you like.
Building a simple bookcase is a task that can be accomplished by anyone with basic carpentry skills. With a little bit of time and effort, you can build a beautiful and functional piece of furniture for your home.
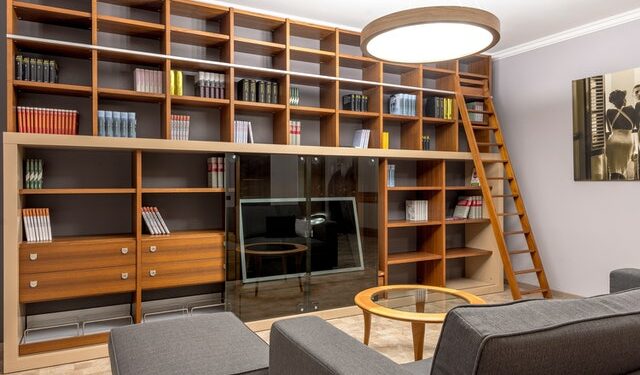
Choose the right bookcase for your needs
When it comes to home decor, one of the most versatile pieces of furniture you can own is a bookcase. Not only does it provide storage and display space for your books, but it can also be used to showcase your favorite photos, decorative items, or even plants. If you’re looking for some simple tips on how to build a bookcase, you’ve come to the right place.
Here are a few things to keep in mind as you get started:
1. Decide on the size of your bookcase. This will depend on the amount of space you have available and the number of items you want to store. If you’re tight on space, consider a smaller, wall-mounted bookcase.
2. Choose the material you want to use. Bookcases can be made from wood, metal, or even plastic. Consider the look you’re going for and select a material that will complement your existing furniture.
3. Assemble your supplies. In addition to your chosen material, you’ll need a measuring tape, saw, hammer, nails or screws, and sandpaper.
4. Cut your wood to size. If you’re using wood, use a saw to cut it to the desired width and height. Remember to measure twice and cut once!
5. Assemble your bookcase. Once you have all of your pieces cut to size, it’s time to put it all together. If you’re using wood, you may need to use a hammer and nails or screws to attach the pieces. If you’re using metal or plastic, you can simply snap the pieces together.
6. Add your shelves. Once your bookcase is assembled, it’s time to add the shelves. Measure and cut pieces of wood or other material to fit snugly inside your bookcase. Attach them securely so they don’t sag under the weight of your books.
7. Sand and paint or stain your bookcase. If you’re using wood, you’ll want to sand it down to create a smooth surface. Once it’s sanded, you can paint or stain it whatever color you like.
8. Add your books and other items. Once your bookcase is complete, it’s time to start filling it up! Arrange your books by height or color for a stylish display. Then, add in any other items you’d like to showcase, like photo frames, plants, or sculptures.
Assemble the bookcase according to the instructions
Building a simple bookcase is a great way to add some extra storage space to your home. Not only that, but it can also be a fun project to do with friends or family. In this blog post, we will show you how to build a simple bookcase using just a few basic tools and materials. So let’s get started!
Add shelves and decorations as desired
Building a bookcase is a great way to organize your books and add some extra storage to your home. Here’s how to do it:
1. Measure the space you want to use for the bookcase and cut the boards to size. You can use any type of wood you like, but I recommend using something that is sturdy and will last a long time.
2. Attach the boards together using screws or nails. I recommend using screws so that you can disassemble the bookcase if you ever need to.
3. If you want, add some extra support to the bottom of the bookcase by attaching a piece of wood to the underside of the shelves. This will help to keep the bookcase from tipping over if it gets too heavy.
4. Add shelves and decorations as desired. I like to use two or three shelves for my books, but you can add more or less depending on your needs. You can also add some decorative touches like paint or stain to make the bookcase more personal.
How to build a simple bookcase
Building a simple bookcase is a great way to add storage and organization to any room in your house. In this article, we’ve shown you how to build a basic bookcase using just a few pieces of wood and some basic tools. If you follow our instructions, you should be able to have your new bookcase built in no time!
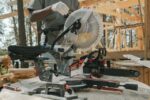
Tools and Materials Needed:
-Tape measure
– level
– saw ( either a hand saw or power saw)
– drill
– screwdriver ( either a manual or power screwdriver)
– wood screws
– sandpaper
– paint or stain (optional)
Cutting the Pieces:
The first step is to cut all of the pieces for your bookcase. For a basic bookcase, you will need four side pieces, six shelves, and two support braces. You can have these pieces cut at a hardware store or use a saw to cut them yourself. If you are using a power saw, be sure to wear proper safety equipment.
Assembling the Bookcase:
Once you have all of your pieces cut, it’s time to start assembling your bookcase. Begin by attaching the side pieces to the shelves. Then, add the support braces to the back of the bookcase. Once everything is securely in place, you can sand down any rough edges and paint or stain your bookcase if desired.
And that’s it! Your new bookcase is now complete. Enjoy your extra storage space and be sure to show off your handiwork to all of your friends and family.