How to Build a Wardrobe DIY | The Ultimate Guide | 2023

If your bedroom is lacking in a storage, you have probably found yourself shopping around for a new wardrobe. However, a decent ready-built wardrobe can be incredibly expensive, especially if you opt for one made from solid wood. If you are even halfway confident with undertaking DIY projects, you should think about building your own wardrobe.
Not only are DIY wardrobes generally cheaper to produce than the cost of buying one brand new, they also allow you to be flexible when it comes to dimensions and storage capacity. Need some pointers for putting together a DIY wardrobe at home? Our guide is on hand to provide you with all the information you need to produce a beautiful bespoke wardrobe with all the storage you will ever need.
Planning Stages
Before you rush out to buy tools and materials, you should first sit down and think about what you need from a wardrobe. Dimensions will ultimately determine how big or small your wardrobe will be. If you want to produce a free-standing wardrobe that can be used in other spaces in the future, you can be a little more flexible when it comes to producing your wardrobe build plans.
However, you will want to keep some basic pointers in mind. For one, thing about ceiling height. Not every house has the same ceiling height, so keep things within a reasonable range to ensure you can use your home-made wardrobe in further interiors in the future.
If you are looking to make use of an awkward space in your home, you are probably thinking about built-in wardrobe solutions. These can be a practical way of making use of unused space, but they are a permanent solution. You will have to dismantle a built-in wardrobe if you wish to use the space it occupies for other things in the future. You can of course build a free-standing wardrobe with an unusual shape to occupy an awkward recess.
Regardless of what type of wardrobe you are looking to make, you will need to consider storage and organisation. Any good wardrobe should provide you with sufficient hanging space for garments. Think about how many clothing items you need to hang in a single space.
If it is a considerable amount, you will need to draft plans for a wide wardrobe with multiple sections. Do you need to hang long garments, such as jackets and dresses? If so, you will want to produce a plan with space for this. This may limit you from adding additional drawers and shelves for other items. With less internal beams and shelving, you may also need to rethink the kinds of materials you are using to build your wardrobe.
If you have very little storage furniture in your bedroom, it is always a good idea to add some shelving space within a wardrobe. Many wardrobes include at least one shelf above or below the hanging space. You may also want to add drawers to the base of your wardrobe. However, if you are not particularly experienced when it comes to DIY projects, you should keep drawer designs simple.
Building the Main Structure
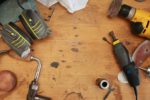
When building a wardrobe, you have two main approaches to consider when planing and building your structure. You can build a wooden frame made from planks of timber or hardwood first, before cladding with thinner panelled material. This type of structure is fairly sturdy and will allow you to keep your material costs to a minimum. Another option is to use much thicker pieces of sheet material, such as plywood or thick MDF. If you opt to use sheets of material, you can be more flexible when it comes to adding shelving and compartmental storage.
Provided you have measured screw holes precisely, putting together a DIY wardrobe made from sheet material is also fairly straightforward. Once you have built the frame of the wardrobe, added any additional shelving and cladding, you should add in a hanging rail. Make sure you pick a high-quality one that will cope with a significant amount of weight. If you want to apply a painted or papered finish to the interior of your wardrobe, now is the time to do it.
Adding Doors & Drawers
Some people prefer an open wardrobe for easy access to their garments, while others prefer to conceal their stored items with doors. If this is your first furniture build project, you should aim to keep doors and drawers to a minimum. It can be difficult to achieve a perfect finish when using two or more doors, so try and keep your hanging section to a single space. Any door will need to be held in place by at least two hinges, although three is ideal. Pick heavy-duty hinges that include a minimum of three screw holes to ensure they remain firmly in place. You may also want to measure screw holes for apply handles or door knobs now.
Drawers can prove fairly difficult for the less experienced DIY enthusiast. If this is your first project, avoid drawer designs that include runners. Instead, measure the space you would like to place a drawer and build a simple tray-like crate that. Make sure you apply a secure base material to your drawer frame. You may also want to apply a smooth felt base to ensure the drawer glides smoothly in and out of your wardrobe frame. You can cut out a recessed groove into the drawer front to serve as a handle for a more contemporary look.
Applying Finishing Trims
If you would like a more traditional aesthetic, you can think about adding wood trims and mouldings to the exterior of your wardrobe. These are very affordable and easy to work with. If you need to make any cuts and adjustments to your trims, use a coping saw as this will result in fewer splinters and damage to delicate pieces of wood. Avoid using screws when applying these trims to your wardrobe as drilling and driving can damage the integrity of the material. Instead, use a heavy-duty adhesive that will keep such material locked firmly into place against the main frame and cladding of your wardrobe.
Paints, Stains & Varnishes
If you have used high-quality hardwood or softwood material, you can apply a lacquer or varnish to your wardrobe for a beautiful finish. However, if you have instead opted to use MDF and sheet material, you are limited to a painted finish. When applying paint to such material, use a paint pad or roller to apply the finish. Avoid adding too much paint to these surfaces as it can be difficult to remove excess finish without leading to warping of the base material.
Fixtures & Hardware
Once you have assembled you wardrobe fully and added any drawers and doors to it, you can think about finishing touches. Premium hardware can transform a DIY project into something truly spectacular, so don’t be afraid to spend a little bit more on door handles and drawer knobs. Make sure you have carefully measured screw holes for hardware prior to drilling into your wardrobe, otherwise you will need to patch up the damage later and reapply any finishes. When fixing handles and knobs into place, you should also use machine screws. These will ensure a flush fit and minimise the chance of hardware loosening over time.