How to build a wood kiln
Building a wood kiln is a great way to heat your home and save money on your heating bill. A wood kiln can be built relatively easily, and it only takes a few hours to get it up and running. In this article, we will show you how to build a simple wood kiln using materials that are readily available at most hardware stores.
What You’ll Need:
-4×8 sheet of plywood
-2×4 lumber
-1/2 inch thick insulation board
-Tarp
-Stove pipe kit
-High temperature caulk
-Construction adhesive
-Screws
Building the Kiln Base:
1. Cut the plywood into four equal pieces using a power saw. These will be the sides of your kiln.
2. Cut the 2×4 lumber into eight equal pieces. These will be used to construct the frame of your kiln.
3. Assemble the frame by screwing the 2×4 pieces together with screws at each joint. Make sure that the frame is square by measuring the diagonal dimensions.
4. Place the frame on top of one of the plywood sides and trace around it with a pencil. This will be used as a guide for cutting out the door opening.
5. Cut out the door opening using a power saw.
6. Place the other three pieces of plywood on top of the frame, aligning them with the edges. Screw them into place with screws at each joint.
7. Cut a piece of insulation board to fit snugly inside the frame. This will help to keep the heat in your kiln.
8. Cover the outside of the kiln with a tarp, securing it in place with construction adhesive and screws. Be sure to leave an opening at the top of the kiln for the stove pipe.
Building the Kiln Door:
1. Cut two pieces of plywood to fit the opening of the door. Make sure that they are slightly smaller than the opening, so that they will fit snugly inside.
2. Cut a piece of insulation board to fit between the two pieces of plywood. This will help to keep the heat in your kiln.
3. Assemble the door by screwing the plywood and insulation board together with screws at each joint. Be sure to leave an opening at the top of the door for the stove pipe.
4. Install a handle on the door for easy opening and closing.
5. Caulk around the door opening to seal it tightly.
Installing the Stove Pipe:
1. Cut a length of stove pipe to fit from the top of the kiln to the chimney or other exhaust vent.
2. Install the stove pipe through the opening at the top of the kiln, securing it in place with screws.
3. Seal around the edges of the stove pipe with high temperature caulk to prevent heat loss.
Your wood kiln is now complete and ready to use!
To operate it, simply build a fire in the stove and let it burn for several hours until the kiln is heated up to your desired temperature. Then, load your wood into the kiln and close the door. The fire will continue to burn, heating the kiln and drying out the wood. When the wood is dry, you can remove it from the kiln and use it for whatever purpose you desire. Thanks for reading, and we hope this article has been helpful!
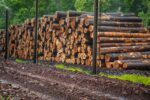
A wood kiln is a type of oven that is used to dry out wood. The benefits of using a wood kiln include the ability to kill pests and mold, as well as helping to preserve the wood. If you are interested in building a wood kiln, there are a few things you need to consider before getting started.
The first thing you need to do is decide what size kiln you want to build. The size of the kiln will determine how much wood you can dry at one time. You also need to consider the type of wood you want to use. Some woods are better suited for drying in a kiln than others.
Once you have decided on the size and type of wood, you need to gather the materials. You will need wood for the frame of the kiln, as well as boards to create the walls. You will also need a door that is big enough to allow the wood to be placed inside.
Once you have gathered all of the materials, you can begin building the frame of the kiln. The frame should be made out of sturdy lumber that is resistant to rot. Once the frame is complete, you can attach the boards to create the walls. Make sure that the door is securely attached and that there are no gaps around it.
After the kiln is built, you need to cure it before using it. Curing simply means allowing the kiln to dry out completely. This can take a few days to weeks, depending on the size of the kiln. Once the kiln is cured, you are ready to start drying wood.
There are a few things you need to keep in mind when using a wood kiln. First, you need to make sure that the wood is completely dry before putting it in the kiln. If there is any moisture left in the wood, it could cause the kiln to catch fire. Second, you need to monitor the temperature inside the kiln carefully. The temperature should not get too high or too low, as this can damage the wood.
If you follow these tips, you should be able to use your wood kiln successfully. Drying wood in a kiln is a great way to preserve it and keep it looking its best. With a little bit of planning and care, you can build your own wood kiln and start enjoying the benefits of dried wood.
Things you need to consider when building a wood kiln
Building a wood kiln is a great way to heat your home and save money on your energy bills. However, there are a few things you need to consider before you start construction. In this post, we will outline the most important factors to keep in mind when building a wood kiln.
1. Location
The location of your wood kiln is important for two reasons. First, you need to make sure that the kiln is close enough to your home so that the heat generated can be easily transferred. Second, you need to consider the direction of the prevailing winds in your area. The last thing you want is for your kiln to be blowing smoke and fumes into your home!
2. Size
The size of your wood kiln will depend on two things: the amount of wood you want to be able to burn, and the space you have available for construction. If you are only planning on burning a few logs at a time, then a smaller kiln will suffice. However, if you want to be able to burn larger quantities of wood, then you will need a larger kiln.
3. Ventilation
Proper ventilation is essential for any wood-burning appliance, and this is especially true for kilns. The fumes and smoke produced by the burning wood need to be able to escape, or else they will build up and eventually cause problems. Make sure that your kiln has adequate ventilation before you start using it.
4. Insulation
Insulating your wood kiln is important for two reasons. First, it will help to keep the heat in, making your kiln more efficient. Second, it will protect your home from the high temperatures generated by the fire. There are many different insulation materials available, so make sure to choose one that is appropriate for use in a high-heat environment.
5. Combustibles
You need to be very careful about what you put inside your wood kiln. Only burn clean, dry wood that has been properly seasoned. Avoid burning treated lumber, garbage, or other materials that could release harmful fumes into the air.
By following these tips, you can be sure that your wood kiln is safe and efficient. If you take the time to plan ahead and build your kiln correctly, it will provide you with years of trouble-free operation.
Tips for using your wood kiln successfully
Building your own wood kiln can be a fun and rewarding experience, but it’s important to do your research first so that you know what you’re getting into. In this post, we’ll give you some tips for using your wood kiln successfully.
1. Make sure you have the right materials.
2. Choose the right location for your kiln.
3. Make sure you have adequate ventilation.
4. Use a moisture meter to monitor the moisture content of your wood.
5. Don’t overheat your wood, or you may damage it.
6. Keep an eye on your fire, and make sure it doesn’t get too hot.
7. When you’re done firing, allow your wood to cool slowly so that it doesn’t crack or warp. With proper care and attention, your wood kiln can provide you with years of enjoyment!
How to build a wood kiln
Building your own wood kiln is a great way to save money, and it can be a fun project too. With just a few simple tools and supplies, you can build a kiln that will let you dry lumber at home. Follow the instructions in this article to get started.
1. Choose a location for your kiln. It should be close to where you will be using the lumber, and it should be on level ground.
2. Cut two pieces of 4×4 lumber to the same length. These will be the sides of your kiln.
3. Cut four pieces of 2×4 lumber to the same length. These will be the front and back supports for your kiln.
4. Nail the 2x4s to the 4x4s, forming a rectangle. Make sure that the corners are square.
5. Drill a hole in each side of the rectangle, about midway up from the bottom. These holes will be for ventilation.
6. Cover the top of the kiln with plywood. Nail it in place around the edges.
7. Place a piece of galvanized hardware cloth over the ventilation holes. This will keep insects out while still allowing air to flow.
8. Cut two pieces of 2×4 lumber to the same length. These will be the top supports for your kiln.
9. Nail the 2x4s to the sides of the kiln, on top of the plywood.
10. Cover the front and back of the kiln with plywood panels. Nail them in place around the edges.
11. Cut a door in one of the side panels, using a saw. The door should be big enough to allow lumber to be loaded into the kiln.
12. Hang a curing thermometer on the inside of the kiln, near the door.
13. Place your wood kiln in a location where it will get plenty of sunlight and fresh air.
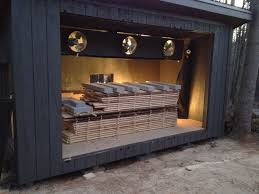
14. Load the kiln with green lumber, and close the door.
15. Check the thermometer regularly, and add more lumber as needed to maintain a temperature of 110 degrees Fahrenheit.
16. After two weeks, open the kiln and allow the lumber to air dry for two more weeks before using it.
Now that you know how to build a wood kiln, you can dry lumber at home anytime you need it. This can be a great way to save money, and it’s also a fun project to work on. With just a few simple tools and supplies, you can build a kiln that will let you dry lumber at home. Follow the instructions in this article to get started.