How to carve hardwood
Wood carving is a form of woodworking that involves the creation of art objects from wood. The term also encompasses the small, decorative objects that are often made from wood inlays. Carving is a very old art form, dating back thousands of years.
It is still practiced today by both professional and amateur woodworkers alike.
There are two main types of wood carving: relief carving and figure carving. Relief carving involves the creation of images that are raised above the surface of the wood, while figure carving involves the creation of three-dimensional figures. Both types of carving can be done using a variety of tools, including chisels, gouges, knives, and power tools such as grinders and routers.
The first step in learning how to carve hardwood is to select the right piece of wood. The type of wood you use will depend on the type of carving you want to do. For relief carving, a softer wood like basswood or butternut is a good choice. For figure carving, a harder wood like maple or oak is better. Once you’ve selected the right piece of wood, use a sharp knife to trace the outline of your design onto the surface.
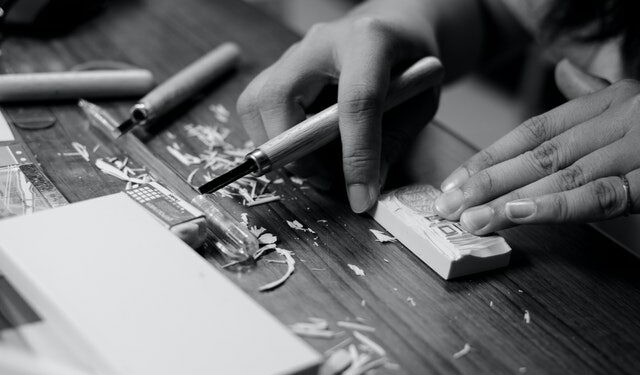
Next, use a chisel or gouge to carve out the rough shape of your design. Start with the larger details first and then work your way down to the smaller ones. When carving, always carve away from yourself and keep your fingers well away from the blade.
As you carve, regularly stop and check your progress from all angles to make sure you’re happy with the way it looks.
When you’re finished carving, sand the surface of your hardwood project using progressively finer grits of sandpaper until it’s smooth. You can then apply a finish of your choice, such as varnish, oil, or wax.
Choose the right type of wood
Wood carving is a type of woodworking that involves the creation of art objects from hardwoods. The choice of wood is critical to the success of any wood carving project. In this post, we will discuss the different types of wood that are best suited for wood carving and why.
The first step in choosing the right type of wood for your project is to identify the hardness of the wood. The Janka hardness test is the most common way to measure the hardness of a piece of wood. The test measures the force required to embed an 11.28mm steel ball into the wood. The results are measured in pounds-force (lbf).
The next step is to determine the grain of the wood. The grain can be either straight or spiral. Straight grain is easier to carve, but spiral grain can be more interesting visually.
Some woods are better suited for certain types of carving than others. For example, basswood is a good choice for beginners because it is soft and easy to carve. Butternut is another good choice for beginners because it is relatively soft and has a straight grain.
Hardwoods, such as oak and maple, are better suited for more advanced carvings. These woods are harder to carve but can produce more detailed and intricate designs.
Once you have selected the type of wood you want to use, the next step is to prepare it for carving. The first step is to cut the wood into the desired shape. If you are using a hardwood, it is best to use a band saw or scroll saw to make precise cuts.
After the wood is cut to size, it needs to be sanded smooth. A belt sander or orbital sander can be used for this task. The goal is to create a smooth surface that is free of any imperfections.
Once the wood is sanded, it is ready to be carved. The best way to start carving is to sketch out your design on the wood. This will help you visualize the finished product and make sure that all of your cuts are going in the right direction.
When you are ready to start carving, there are a few different tools that you can use. Chisels, gouges, and knives are all common carving tools. Each tool has a different purpose and can be used to create different types of designs.
Chisels are used for cutting straight lines and removing large chunks of wood. Gouges are used for creating curved lines and shaping the wood. Knives are used for more detailed carving and can be used to create very intricate designs.
After you have carved your design, the final step is to apply a finish. This will protect the wood and give it a nice shine. You can use a clear varnish or a stain depending on the look you are going for.
Wood carving is a great way to express your creativity. With a little practice, you will be able to create beautiful works of art. Just remember to choose the right type of wood for your project and take your time while carving. If you rush, you may make mistakes that cannot be fixed.
Cut the wood to the desired size
Anyone can learn how to carve hardwood with a little bit of practice. In this blog post, we will discuss the basics of how to get started.
First, you will need to select the right piece of wood. It should be free of knots and other imperfections. Next, cut the wood to the desired size. You can use a hand saw or power saw for this step.
Then, use a chisel and mallet to begin carving away the excess wood. Be sure to wear safety goggles and gloves while doing this step. Take your time and go slow – it’s better to make a few mistakes than to ruin the entire piece of wood.
When you are finished carving, sand down the surface until it is smooth. If you want, you can apply a finish such as varnish or paint to protect the wood from scratches and moisture damage.
With a little bit of practice, anyone can learn how to carve hardwood. Just follow these simple steps and you’ll be on your way to creating beautiful pieces of art.
Drill a hole in the center of the wood
In order to carve hardwood, you’ll need to drill a hole in the center of the wood. This will allow you to insert the blade of your carving knife. Be sure to use a sharp knife, as dull knives can be more dangerous and are more difficult to use.
Start by sketching out your design on the piece of wood. This will help you visualize what you’re trying to carve. Then, use a ruler or straight edge to draw lines through your design, making sure that the lines are evenly spaced. These lines will be your guide for carving.
Use a sharp knife to start carving along the lines that you drew. Be sure to go slowly and carefully at first. You can always remove more wood, but you can’t put it back once it’s been removed. As you carve, try to keep the blade at a consistent angle so that your carvings are even.
When you’re finished carving, sand the edges of your hardwood piece smooth. You can also stain or paint your carving, if desired.displayed her
Insert the carving tool into the hole
When it comes to woodworking, carving is one of the most popular and versatile techniques. There’s just something about taking a piece of wood and transforming it into something beautiful that appeals to many people. But carving can be a little intimidating for beginners, especially if you don’t know where to start.
In this post, we’ll show you how to carve hardwood using a few simple steps. We’ll also provide some tips on how to get started, so you can begin creating your own masterpieces right away!
What You’ll Need
Before you start carving, there are a few things you’ll need to gather. First, you’ll need a piece of hardwood. This can be obtained from a lumberyard or woodworking store. Second, you’ll need a carving tool. There are many different types of carving tools available, so it’s important to choose one that is suited for the type of carving you want to do.
Third, you’ll need a sharpening stone. This is used to keep your carving tools sharp and will help prevent them from getting dull during use. Finally, you’ll need some sandpaper. This will be used to smooth out the carving after you’re finished.
Getting Started
Now that you have all of the necessary supplies, it’s time to get started! The first thing you need to do is decide on the design you want to carve into your hardwood. This can be anything from a simple shape to a more complex pattern. Once you have a design in mind, use a pencil to trace it onto the wood.
Next, it’s time to start carving. Begin by inserting the carving tool into the hole at the top of the design. Then, start carving downwards towards the bottom of the hole. Continue this process until you’ve carved out the entire design.
Once you’re finished, use the sandpaper to smooth out any rough edges. And that’s it! You’ve now successfully carved a piece of hardwood.
Tips for Success
Here are a few tips to help you get started with carving:
-Start with a simple design. Carving complex designs can be frustrating and may result in mistakes. It’s best to start with something simple and then work your way up to more complicated designs.
-Use a sharp carving tool. A dull carving tool will make carving more difficult and can even cause injuries. Be sure to keep your tools sharpened with a sharpening stone before each use.
-Be patient. Carving takes time and patience. Don’t get discouraged if it doesn’t look perfect at first. With a little practice, you’ll be able to create beautiful carvings in no time!
Now that you know how to carve hardwood, it’s time to get started on your next project! Use these tips and techniques to create unique and one-of-a-kind pieces of art. And don’t forget to have fun!
Carve out the desired shape using slow and even strokes
It can be challenging to carve hardwood, but with the right techniques it can be a very rewarding experience. Here are four tips to help you get started.
1. Use a sharp knife – A sharp blade is essential for carving hardwood. If your knife is not sharp enough, it will just tear the wood instead of cutting it cleanly. You can use a variety of different knives for carving, but a straight-edged knife or a chisel is typically best.
2. Start with softer woods – If you’re just starting out, it’s best to begin with softer woods like pine or basswood. These woods are much easier to carve than harder woods like oak or maple.
3. Use the right tools – In addition to a sharp knife, you’ll also need a few other tools to get started. A gouge can be very helpful for carving out larger areas, and a rasp can be used to smooth out the surfaces.
4. Take your time – Carving hardwood takes patience and practice. Don’t expect to get it perfect on your first try. Just take your time and enjoy the process.
Sand down any rough edges
Woodworking is a popular hobby for people of all ages and experience levels. There are many different ways to approach woodworking, but one of the most important aspects is the selection of the right tools for the job. In this post, we’ll discuss one of the most basic tools in woodworking: the chisel. We’ll cover how to use a chisel properly, as well as some tips on how to get the best results from your work.
Chisels are one of the most basic and essential tools in woodworking. They come in a variety of sizes and shapes, but they all serve the same purpose: to remove material from wood. Chisels are typically used to create joints between pieces of wood, or to carve out detailed features such as grooves or recesses.
When using a chisel, it’s important to keep two things in mind: the direction of the grain and the condition of the edge. The grain is the direction that the fibers run in the wood, and it’s important to always cut along the grain. Otherwise, you risk splitting or shattering the wood. The condition of the edge refers to how sharp the chisel is. A dull chisel will require more force to use, and it’s more likely to cause damage to the wood.
There are a few different ways to hold a chisel when using it. The most common is to grip it with your dominant hand near the top of the handle, with your index finger extended along the back of the blade. For more precision, you can grip the chisel closer to the blade, but be careful not to put your fingers in the way of the cutting edge.
When striking a chisel with a mallet or hammer, always strike perpendicular to the cutting edge. Hitting at an angle can damage the edge, and make it more difficult to control the chisel. It’s also important to striking with enough force to get the job done, but not so much that you risk damaging the wood or the chisel.
One of the most important things to remember when using a chisel is to always keep the cutting edge sharp. A sharp chisel will require less force to use, and it’s less likely to cause damage to the wood. You can sharpen a chisel with a file or a sharpening stone, but it’s important to follow the manufacturer’s instructions carefully so you don’t damage the blade.
With these tips in mind, you’re ready to start using a chisel like a pro! Experiment with different techniques and find what works best for you. And don’t forget to always keep your cutting edge sharp for optimal results.
Carving hardwood is a challenging but rewarding woodworking project. With the right tools and a little practice, you can create beautiful carved designs in hardwood boards.
The first step in carving hardwood is to select the right tools for the job. A chisel is an essential tool for carving, and you’ll also need a mallet or hammer to strike the chisel. You’ll also need a sharpening stone or file to keep the chisel blade sharp.
Once you have your tools, you’re ready to start carving! Begin by finding the direction of the grain in the hardwood board. It’s important to always carve along the grain to avoid splitting or shattering the wood.
Next, use the chisel to carve out a groove or recess in the wood. Apply gentle pressure at first, and increase the pressure as needed. Remember to keep the cutting edge sharp for best results.
As you become more comfortable with carving, you can experiment with different techniques and tools. There are many different ways to approach woodworking, so find what works best for you and have fun!
Finish with a sealant or lacquer for protection
The first thing you need to do is select the right tools for the job. You will need a saw, chisels, and other carving tools. Make sure you have sharp blades on your saw and chisels, as this will make the carving process much easier.
Next, you need to select the piece of hardwood you want to carve. If you’re not sure what type of wood to use, ask someone at your local hardware store for guidance. Once you have your piece of hardwood, it’s time to start carving!
Start by sketching out your design on the piece of wood. This will help you visualize what you want your final product to look like. Then, begin
When carving hardwood, it is important to choose the right type of wood. The best type of wood to carve is a softer wood, such as balsa or cedar. Hardwoods, such as oak or maple, are more difficult to carve and require more time and effort.
The size of the piece of wood you are carving will also affect the difficulty of the project. Smaller pieces of wood are generally easier to carve than larger pieces.
To begin carving, drill a hole in the center of the piece of wood. This hole should be slightly smaller than the diameter of your carving tool. Insert the carving tool into the hole and begin carving out the desired shape using slow and even strokes.
As you carve, periodically check the progress of your work and sand down any rough edges. Once the carving is complete, finish with a sealant or lacquer for protection.
How to carve hardwood
Carving hardwood can be a challenging but rewarding project. If you are new to carving, it is best to start with a soft wood, such as balsa or cedar. Hardwoods, such as oak or maple, can be more difficult to carve and require more time and effort.
=>The size of the piece of wood you are carving will also affect the difficulty of the project. Smaller pieces of wood are generally easier to carve than larger pieces.
=>To begin carving, drill a hole in the center of the piece of wood. This hole should be slightly smaller than the diameter of your carving tool. Insert the carving tool into the hole and begin carving out the desired shape using slow and even strokes. As you carve, periodically check the progress of your work and sand down any rough edges. Once the carving is complete, finish with a sealant or lacquer for protection.
Seal the wood with a clear lacquer or polyurethane to protect it from moisture and wear.
Carving hardwood can be a fun and challenging project. With the right tools and some practice, you can create beautiful works of art. So get out there and start carving!