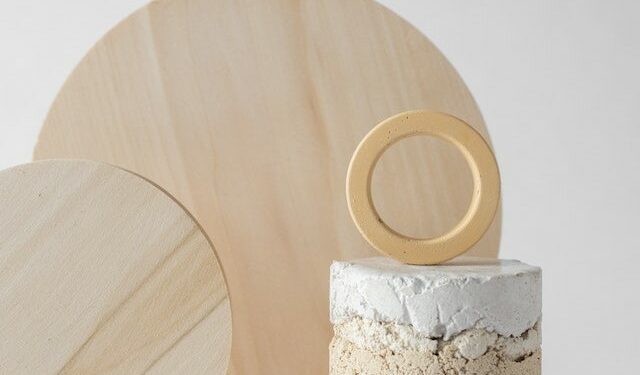
How To Cut A Perfect Circle With A Jigsaw
Humans, have you ever tried how to cut a perfect circle with a jigsaw? You may have heard that it is impossible, but this is not true! It actually is pretty simple and everyone can do it, as long as you follow my tips.
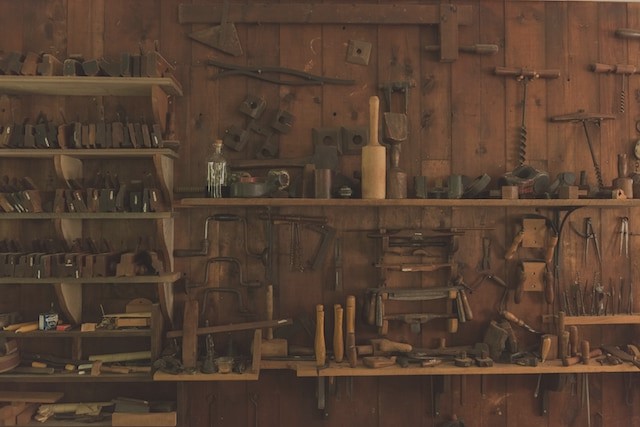
First, you must getting ready. Make sure you have the right materials: a jigsaw, a pencil, a set square, and a marker. Also choose a piece of wood or whatever material your circle will be cut from.
Once you’ve acquired all the materials and readied the wood, the next step is to make markings. If you want to be precise and cut a perfect circle, use a set square to draw two parallel lines on the wood. Make sure they’re spaced out correctly, then use a pencil and ruler to mark out the desired circumference of your circle. Make sure not to draw too accurately and leave a margin for error.
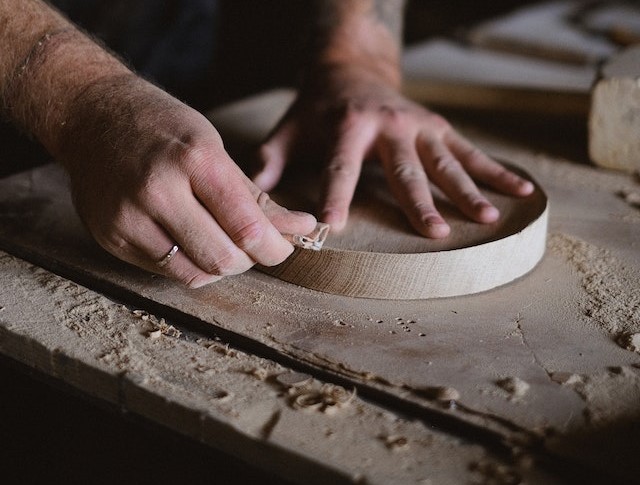
Now it’s time for the fun part — cutting the circle. Start by preparing your jigsaw. Make sure the blade is sharp and secure it firmly in the machine. Then cut the first half of the circle by following your marked lines, if the blade wanders from the line just move it back gently. Then come to the other half, flip the wood and cut in a reverse direction, carefully following the same line. Repeat this until the circle has been cut.
Once the cutting is completed it’s time to check the accuracy of your cut. Compare the two halves, you should see that they match perfectly in terms of size and shape. If they don’t, use sandpaper and other materials to get the circle just right.
You are done. Finishing up is the last step! Wipe the wood down with a cloth to make sure any remaining sawdust is removed. And that’s it! You’ve now cut a perfect circle with your jigsaw. Wow, you can even impress your friends with your newly acquired skill. Good luck and have fun!
Getting Ready
Are you ready to make the perfect round shapes with your jigsaw? Well, before you get started, you need to make sure that your work area is ready and equipped with the essential tools.
First thing’s first, you need to gather your materials. These include a heavy piece of cardboard or stiff paper, a large compass or a template of a circle, a thin blade jigsaw, sandpaper, a black marker, and safety gloves.
Now that you have every item ready, you should also get your body ready for the task. Make sure to wear comfortable clothes and shoes that you can easily move around in. Put on your protective gloves and get that thinking cap ready for some serious work!
Also, for added safety and convenience, you should ensure that your workspace doesn’t have any unnecessary clutter. Working in a neat and orderly area will help you concentrate better and complete the task with ease.
Don’t forget to plug in your saw and check to see that the saw blade is tightened and ready to be used. And if you don’t have a jigsaw, y’all know I got you! Hey, before someone knocks on your door, that jigsaw will be with you, I promise!
And that’s roughly it. Now you’re all set to start the actual work. Now if you don’t cut that perfect circle, don’t get mad at me, alright? I’m here to help, not take the fall! So let’s get started, shall we? It’s time to cut that perfect circle!
Make Markings
Alright, alright, alright! So you wanna know how to cut a perfect circle with a jigsaw? It might seem daunting but with a little bit of careful preparation and a bit of practice you can have any circle shape swirling in no time! The first step you need to get right is to know how to make the necessary markings on the material you are using.
To begin with, you need to decide where exactly you want your circle to be. After that, you have to use a compass and draw the circumference of the circle. Now, if you don’t have a compass, no worries! You can use a simple cardboard tube or even a roll of tape to measure the necessary distance from the center point of the circle. Be sure to mark the starting and the ending point of the circumference too for easy reference.
Now, you will have make some markings. Take a pencil and mark dots around the circumference. The number of dots will depend on the size of the circle. Make sure to keep the distance between them equally spaced. As a general rule, the larger the circle, the more dots you need. If your circle needs 8 or less dots, then it is best to have the distance between them around an inch, while if it requires more dots, then it should be around half an inch. That’s it! You have made the markings. Now get ready to start cutting the circle!
Cutting the Circle
Right then, now it’s time to put the jigsaw to work. Are you ready? Here’s what you’ll need to do-
First, prepare the jigsaw. Connect it to an electric outlet (), and get the right blade. A scroll saw blade works best as it has finer teeth and cuts with almost no vibration which translates to more accurate curves. Once you choose the blade, attach it to the jigsaw. This blade will help you in cutting the perfect curved shape of your circle.
Next, mark the center point of the piece of wood you want to cut. This will help the jigsaw make a good entry point. You can draw a small circle with the help of a compass for that purpose. Now make a tiny hole in this center with the help of a drill and insert the blade of the jigsaw through it. Make sure the blade is firmly in place and turn on the jigsaw. Get ready for a little bit of shake and rattle as the blade passes through the material.
Once the blade is firmly in place, start cutting the first half of the circle. Move the jigsaw slowly, using the markings as your guide. The jigsaw should be moved in slow and controlled manner, so that the cut is accurate. By pressing the base of the jigsaw steadily against the material, you can reduce the chances of any rough edges. This will also ensure that the curve is smooth and neat.
Once the first half of the circle is cut, turn off the machine and flip the piece of wood on its other side. Then insert the blade again through the center and start the jigsaw again. Now trace the same curve, following the markings this time too, and cut the second half of the circle.
Once the circle is cut, evaluate the accuracy of the cut. See if the two halves match up and the curves are symmetrical. Be patient and go slowly if any adjustments are needed. If absolutely necessary you can also tape and glue the two halves together to get an even perfect cut.
Once everything is perfect, you can get ready for the finishing step. Polishing and sanding the edges of the circle can give it a professional finish.
Prepare the Jigsaw
Welcome to the wonderful world of sawing circles! That’s right, you don’t need to be a handyman to do something like this. In this section, we’ll cover how to properly prepare the jigsaw before cutting any circles!
So let’s get to it. First, make sure you’re equipped with exactly what you need before starting. You’ll need a jigsaw, saw blade, clamp, electromagnetic drill and clamps. Additionally, make sure your jigsaw is properly sharpened and adjusted so that it’ll deliver the best results. You don’t want to be using the same jigsaw that you use to trim the lawn, you know.
Once you have your tools ready, it’s time to set up the jigsaw. For this part, you’ll want to place the saw blade perpendicularly to the surface of the material. Make sure it’s pushed all the way up against the edge so that it’ll deliver the most accurate cuts.
Now, it’s time to clamp the jigsaw. When clamping the jigsaw to the material, make sure the side of the saw that you’ll be cutting on is facing outward. Also, ensure that the clamp is tightened securely and firmly, so that it doesn’t move around more than necessary.
After the jigsaw is in place, it’s time to activate the electromagnetic drill. This will ensure the jigsaw is running at the correct speed. Just make sure to use the same drill all the way throughout the cutting process, so that the jigsaw cuts at the same speed throughout the whole circle.
There you have it! Now you know how to prepare the jigsaw properly. Who would have thought anything so difficult could be so easy? Now it’s time to get to cutting them perfect circles and let your creative juices flow. Stay tuned for the next section!
Cut the First Half
The first step of cutting a perfect circle with a jigsaw is to prepare the jigsaw by following the instructions that come with it. With a reliable jigsaw ready, it’s time to make the first cut: the first half of the circle.
Step 1: Take any straight edge and use it to draw a straight line cutting through the center of the circle. This line will be your starting point and will help you maintain accuracy while cutting.
Step 2: Once you’ve drawn the line, position the jigsaw on the left side of the circle so that the blade follows the line exactly. Place your left hand on the jigsaw handle and the right hand on the blade guard. Slowly start to move the jigsaw up and down, increasing the speed and pressure as you go. Don’t worry if you can’t cut the circle in one go—you can always start from where you left off after taking a break.
Step 3: Once you’ve made it halfway through the circle, slowly reduce the pressure and stop the jigsaw. You should now have a perfect half circle!
Now that you’ve cut the first half of your perfect circle, you have to be extra careful and precise when cutting the other side. The slightest mistake could loosen the jaw of the blade and result in an imprecise cut. See how easy it is to cut a perfect circle using a jigsaw? Now, let’s move on to the next step and finish this perfect circle!
Flip and Cut the Second Half
So you made a beautiful cut with the jigsaw on one side of the circle now it’s time to flip it over and do the other side! Yup, it’s a bit tricky on the flip side, but don’t worry, I got you!
Oh, and you know what I always like to say – practice makes perfect!
Now, the first thing you wanna do is put a clamp on the side of the circle you just cut. This is gonna help you make sure you don’t break your work in half. Now next you’ll want to line up the blade with the same markings you made earlier and make sure you’re doing it in the same direction.
Once you’re sure, let the blade sink in and make sure it’s cutting through the circle in a straight line. Ah, can you see it? A perfect arch going through the center of that circle like a king’s bridge over a river.
Now, you gotta be mindful of the pressure you’re pushing down on the jigsaw. Too much pressure and it’ll just give you a weird shape. Not enough pressure and it won’t reach the other side of the circle. It’s like Goldilocks and The Three Bears. You know, finding the pressure that’s just right!
I know this is totally nerve-wracking, it always freaks me out a bit too. Now, finally, once you have the start of the arch cut, you can start to make it wider and wider, just like when you’re cutting the first side of the circle.
Ta-da!! You are now done with the second half of the circle. You might wanna take a few steps back and take a look at your handywork. I’m sure you’ll be pleasantly surprised with the results. And proud that you used patience and precision to create a perfect circle with a jigsaw!
Check the Accuracy
Alright, so you made it to the crucial step of ensuring your circle is perfect!
Now what you want to do is check the accuracy. It’s important to be thorough and make sure you measure the circle twice. All you need is a flexible ruler or a measuring tape to do this.
Once you have your ruler or tape, you’ll want to measure the circumference of the circle from one point on the edge to the same point. You’ll want to make sure that the gap is cut in the same size as the first cut. This isn’t something you want to be off by a few millimeters, especially if you want it to look perfect.
Now that you’ve checked the accuracy of the circle, it’s time to see how it looks compared to that awesome sketch you made! Remember, if you messed up, it’s okay! You can always take the jigsaw and start all over again.
It’s time to finish up this perfect circle.
Finishing Up
Hey, so you’ve done it! You’ve successfully cut a perfect circle with your jigsaw, congratulations! You deserve a pat on the back – or maybe a meal at your favorite restaurant!
Now that the cutting is finished, there are just a few finishing touches to take care of. First and foremost, cleaning up. Make sure to clean off any sawdust that’s accumulated on your table or on the ground, and give the jigsaw a good wipe down as well.
Next, if your project involves wood glue, now is a great time to apply it so the pieces will stay together. Otherwise, you can use some glue for good measure just to be safe.
Finally, for a nice polished look, you can sand down the edges of the circle to smooth out any rough spots. This isn’t necessary, but it’ll make the project look much more professional.
And that’s it! You’re done! You did it! You cut a perfect circle with your jigsaw!
If you’re feeling ambitious, why not try out a few more shapes? You can use your jigsaw to make all sorts of impressive creations that are sure to impress your friends and family. Give it a try and get sawing!