How To Cut A Perfect Joint For Your Woodworking Project

Joinery is an essential aspect of woodworking, and achieving a perfect joint is a skill that can take years to master. Whether you’re making furniture, cabinetry, or other woodworking projects, the quality of your joints can make all the difference in the finished product.
In this article, we’ll take a deep dive into the art of cutting a perfect joint. From simple butt joints to more complex mortise and tenon joints, we’ll cover the tools and techniques you need to create precise, strong connections that will stand the test of time.
With step-by-step instructions and helpful tips, we’ll guide you through the process of measuring, marking, and cutting your joints with confidence. Whether you’re a beginner or a seasoned woodworker, this guide will help you improve your skills and take your projects to the next level. So grab your tools and let’s get started!
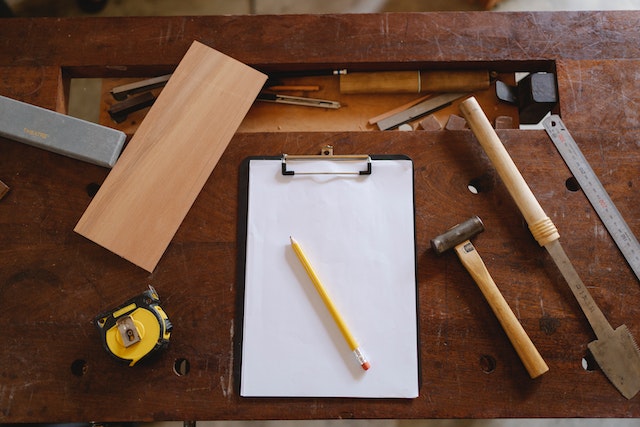
Gather Supplies
Alrighty folks, if you’re here it’s cause you want to learn how to cut the perfect joint for your woodworking project, am I right? Well, let me show you the way!
First things first, before you start sawing and sanding away, you got to gather all the necessary supplies for the job. Now you can find your tools and supplies at your local hardware store or you can order them online. Just make sure you double check what exactly you need before you buy anything!
So, the supplies you’ll need include tools, like a saw, chisel and hammer, as well as wood. Your choice of wood should depend on the project you’ll be working on, but generally a strong and durable wood like spruce or oak is a great choice.
You want to make sure you have a decent amount of wood, enough to get your joints cut, sanded and finished. It’s always better to have too much than too little! Now, some of you might be thinking of just using a ruler and that’s totally fine, but if you want to take things up a notch, you can also get yourself some tuning gauges and marking knives.
Lastly, if you’ll be using a router for your project, it’s important you invest in a decent one for the sake of accuracy and safety.
Alrighty folks, now that you have all your supplies gathered, it’s time to get your hands dirty and get to work! In the next section, we’ll look at how to measure and mark your wood before you start cutting your joints.
Tools
When it comes to woodworking and crafting, every project requires some tools! Before you embark on cutting a perfect joint for your project, make sure you’ve got all the tools you need. You’re going to need a few essential tools to complete the task, but don’t worry – you won’t need a whole arsenal of weapons for this.
First things first – you’re definitely going to need a saw. It doesn’t matter if it’s a hand saw or a power saw; just make sure you’ve got a reliable and sharp saw that can accurately and safely cut the wood. You don’t want to use a dull blade that could easily break while cutting. And if it’s your first time, make sure you’re extra careful and follow all safety procedures so you don’t accidentally cut off your finger. Just remember, the right saw is the key to success!
Secondly, you’ll need some chisels, depending on the shape of the joint you’re trying to make. If you’re not sure what type of chisel to use, or if a chisel is necessary at all, head to the hardware store and ask the experts for help. They can give you the answers you need, and they’ll know exactly what type of chisel you should use.
And lastly, you’ll need a good quality wood glue and some clamps to hold the pieces together while the glue dries. However, you can also use nails to secure the pieces if you don’t have clamps. Just make sure you select the right size and type of nails to ensure the wood pieces are bound properly.
That’s it! These are the tools you’ll need when it comes to cutting a perfect joint for your woodworking project. Now that you have the right tools, you’re ready to move onto the next step – measuring and marking the wood. Good luck!
Wood
Ah, wood. Wood, wood, wood. Is there anything more beautiful? The perfect building material, firm, lightweight and, hello, it smells great! When it comes to woodworking projects, the right kind of wood is essential – and you’re gonna want to stock up!
Let’s start with the basics: hardwoods and softwoods. Hardwoods, like oak, maple, cherry, and mahogany, are unsurprisingly harder, denser, and heavier than softwoods, like pine and cedar. Softwoods are highly affordable, making them a popular choice for those of us on a budget. Hardwoods, however, often come in more interesting colors and grain patterns. (Hey, if you’re gonna go through all the effort of making something beautiful, why not make it look nice, too?)
The type of wood you choose is entirely dependent on the project you’re working on and the look you’re aiming for. Remember, different types of wood behave differently when it comes to cutting and finishing. And, of course, some wood is more expensive than others – so, it pays to ask around and do your research!
When it comes to woodworking, the quality of the wood you use really matters. As with most of the materials you’ll be using, try to go for the highest quality wood you can afford. It’s better to buy a bit more wood than you need so that you have plenty of material to work with. After all, no one wants to make a mistake and have to start again!
Finally, always make sure to store your wood properly; keep it sealed in a dry and cool area or outside, where the materials are safe from moisture and pests. When it comes to woodworking, it’s best to be prepared!
Alright, it’s time to get to work! The perfect joint for your woodworking project is just a few steps away – grab your supplies, measure, mark, and cut, and you’ll be well on your way.
Measure and Mark the Wood
Ah, now measure and mark the wood! I know what you’re thinking – what’s the point? Does it REALLY matter?
When it comes to getting a perfect joint, it’s all in the details. You need to measure and mark the wood precisely. Get it wrong and you could end up with a poor fit between the pieces. That would be no bueno, my friend.
So, let’s get started. First, you need to prepare your wood. Give it a good clean and make sure it’s free of dirt, dust, and other debris. That’ll help ensure that you get accurate measurements.
Next, you’ll want to measure twice and mark the wood at least twice. You want to make sure your measurements are accurate, so always check at least twice to ensure accuracy. Make sure to measure from the same spot each time to ensure the best accuracy.
Once you’ve got your measurements and marks down, you’re ready to start cutting your joint. Don’t worry, it’s not as hard as it sounds! So take a deep breath, grab your tools and let’s get started!
Prepare the Wood

Let me introduce you to one of the sacred rules of any woodworking project; measure twice, cut once! But that isn’t the only saying that you should live by, as there’s another related one for when you’re starting out with your project; prepare the wood.
If you want to cut a perfect joint for your woodworking project then you need to ensure that the wood you’re working with is the right type and is properly prepared.
The first thing you need to do is make sure that the wood is free of any knots, splinters, and other blemishes. If you’re planning on adding a finish to your project, then you’ll want to sand the surface and make it as smooth as possible. Otherwise, any imperfections will show through the finish.
The next thing to consider is that the wood needs to be cut to the right size. That means taking the right measurements to ensure that the wood is the right length, width, and thickness for your project. This is especially important for the parts that need to join together, as the pieces need to be cut precisely to ensure the perfect joint. So make sure to use a good measuring tape and to double check your measurements.
Once you’ve measured and cut the pieces, it’s also important that you make sure the edges are straight and square. If the edges are not precisely square, then you won’t be able to get a tight joint. To make sure the edges are square, use a square for accuracy.
Preparing the wood for a woodworking project may seem like an unimportant step, but it’s actually the foundation of your project. If you take the time to measure and prepare the wood properly, then you will be well on your way to cutting a perfect joint.
Measure Twice
Two important words of advice: measure twice! This is so important when it comes to woodworking projects, and especially when you’re cutting a joint. You want to make sure that every single measurement is right, and that means…measuring twice! That’s right – measure, then measure again. That’s rule one. Rule two: you want to sketch it out first so that you get the recognition of what your joint will look like when it’s cut.
Now then, let’s get to the measuring! The important thing is that you are precise with your measurements. When slicing a joint, you don’t want a lot of extra space leftover. Anything more than a 96th of an inch makes a difference. Basically, you are cutting a puzzle piece – fit in the rest of the pieces and Magic! You have a perfect joint! But it takes precision to get that desired result.
So, in order to get those precise measurements, you’ll want a reliable device for your measuring. A tape measure should do the trick. Or if you can get your hands on one, try using an electronic measuring instrument – it’s much more accurate than a regular ruler or tape measure. Then, mark your wood with a pencil so that you’ll know exactly where the measurements are.
Now, while you’re measuring, make sure to note the relative size of each piece you’re cutting. It’s essential that all of the pieces are the same size, as even the slightest mismeasurement can throw off the joint. When in doubt – measure again!
As for the length you measure? That depends on what type of joint you’re cutting. A joint that goes through the width will measure the length of the wood. For an angle joint, the length of the joint will be twice the length of the wood. Last but not least, a dad or box joint will be half the size.
Measuring is a crucial part of cutting a perfect joint and is an important preparation step in any woodworking project. Stop trying to rush! You should be comfortable with your measurements, because if they’re not right…well, you know what happens then. Make sure to measure twice (more if you need to!) and you’ll be well on your way to creating a perfect joint for your woodworking project.
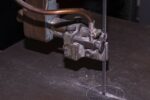
Cut Your Joint
Ok, let’s cut to the chase: let’s get cutting already! That’s right, it’s time to create the perfect joint.
First, we need to ensure that our saw is sharp, and if we’re off-center by a tiny bit, it’s a bad time for our project. So make sure that it’s good and sharp, or else you’ll have some serious problems.
Now, when you’re cutting the joint, remember that we’re not going for a perfectly straight line here. We’re actually looking to cut a recess in the wood so that when the two pieces are joined together, they’ll stay there snugly. This isn’t a competition, so don’t worry too much about precision here.
If you have a router, break it out because this is where it comes in handy. Test out the router on a piece of scrap wood to make sure that it’s cutting our joint evenly. Once you’re happy with the results, you can move ahead with the actual project.
Now, it’s time to line up the wood and start making cuts. Start off with a shallow cut and as you go, steadily increase the depth. Make sure that you don’t go too deep because you’ll be left with a hole in the wood and a joint that none too secure.
Once you’re done making the cuts, test them out by putting the two pieces of wood together. If everything fits nicely, great! If not, you can always adjust the depths and try again or simply break out the sander and smooth down any rough edges.
And that’s it! You’ve successfully cut the joint for your woodworking project! Now it’s time for the next step. Sand and smoothen the joint to make sure that everything looks perfect.
Creating the Joint
Creating the perfect joint can seem daunting, but don’t worry; it’s not as hard as it looks. In order to get started, you’ll want to grab a few basic tools, the right type of wood, and the necessary supplies.
Once you have everything you need, the first step is to measure and mark the wood. You’ll want to make sure the measurements are precise and accurate, so take the time to make sure you have everything right. After that, you can start cutting your joint.
When it comes to creating a joint, you’ll want to get creative and think outside the box. You can use a combination of various saws, planes, chisels, and mallets to create whatever sort of joint design you’re envisioning. Experiment with different cuts and angles to figure out what’s best for your project.
When you’ve achieved the joint you’re aiming for, the next step is to edge pare. Edge pare is a process of refining the joints and making sure that the cuts are perfectly flush. To do this, you can use a plane and a chisel to carefully shave away any excess wood, and then use a mallet to recreate the angles on the wood pieces.
Take your time and be patient when creating your joint; getting it right takes practice. Eddie Murphy himself would be proud of how hard you worked to get this special joint just right.
Now you have a beautiful, perfectly crafted joint that you can use as part of your woodworking project! The next step is to sand and smooth it, and you’ll be ready to give it the “Eddie Murphy touch.”
Follow these simple steps and you’ll have your perfect joint in no time. Soon you’ll be able to show it off to the world and enjoy all the compliments coming your way. You have the skill; now it’s time to use it!
Edge Paring

Alright, edge paring. We’re almost done now! Now that the joint has been made and is ready for it, it’s time for edge paring. It’s a fancy sounding phrase that simply means smoothing out the edges of the joint.
For this, you need something very specific: a router. That’s right, a router. A router is a tool used for trimming and shaping the edges of wood. They usually come with a bunch of different sized blades so you get a really clean cut. It’s important to get the right size joint for your project, so make sure you have the right size router bit selected.
Once you have your router bit ready, all you need to do is line it up and run it along the edges of your joints. You want to make sure every edge is nice and smooth and all the wood is flush once the router bit passes over it. If you’re pushing the bit too fast, you may end up burning the wood, so make sure to take your time and pay attention to your router.
The last thing you need to do is sand down the edges of your joints. With the proper sandpaper, you can make the edges look like glass. This is a great way to get a professional grade finish for your project. Just don’t overdo it – too much sanding can make your wood look dull, so be careful with those sanding strokes.
And there you have it – successfully edge paring your wood joints! With that last step, you are well on your way to a clean and professional looking woodworking project.
Sand and Smooth
Alright, folks, don’t gonna lie to ya. It’s work time! Now that you have your perfect joint all cut out, it’s time to make it right. What we need to do here is make sure that that joint is nice and smooth. You won’t believe how much smoother your joint will look at the end of this process.
First, grab your sandpaper and some sanding block if you have one. Sanding blocks help you to get an evener and smoother surface. Now, this isn’t going to be easy, so don’t expect it to be a walk in the park. It will take some elbow grease and maybe a few beers for motivation. Gets your hands nice and rough and go for it. Get into those crevices and just make sure everything is nice and smooth. Work at it until it looks perfect.
Now when you’re done, it’s time to give it the finishing touch. Grab your steel wool and get to work. Steel wool is great for creating a nice, polished look. Just make sure you don’t push too hard on the joint or you could end up with a bigger joint than you wanted. Just take your time and make sure it looks great.
And that’s it! You have now the perfect joint for your woodworking project. You can be proud of the hard work you put into it and the end result. Take a step back and admire your work. Congratulations! You have just created a piece of art with your own two hands.
Now go out and show off your handiwork. Everyone will be impressed how perfect your joint is and how much time and patience you put into it. You deserve it. You are now a professional woodworker.
Sanding
Aye-yo! Time for some sandin’. As you may know, sanding your joint gives the piece a smooth and neat finish. All you need is some sandpaper and a sanding block. That’s right – a sanding block. Don’t go usin’ your bare hands – that’s a no-no! Gloves can help too, if you got ’em.
Now, depending on the type and size of your joint, you may want to use different sized sandpaper. Don’t worry if you don’t know what size to use, your local woodworking store advisor can help you figure that out. Start with some coarser sandpaper with a grit of 60 or 80. Sand those edges against the grain and then increase the grit size as you go. Working your way up in graded sizes will get your joint super smooth.
Now don’t rush this part. Take your time and sand with even and steady strokes. Whether it’s a dovetail joint or a mortise and tenon joint, work from the top, bottom, and sides – make sure you get those corners too! And don’t forget the areas that don’t meet up – make sure those are sanded too. Another thing, make sure you brush off any dust from the other side of your piece as you sand.
And if you have any pesky splinters or divots, use an extra fine grit of 220 or 320 to make sure they’re smooth before you move on. There’s nothing worse than having a pretty piece of woodworking with a splinter right in the middle.
So once you’re done sanding, give it a quick brush and check it out. Does it look the way you wanted? Perfect! Then congrats – you’ve done your sanding! Now you’re ready to let your masterpiece shine!
Finishing Touch
Ah, the finishing touch! You’ve made it to the very end of your project. You have the perfect joint ready to go, and you can’t wait to show it off to all your friends and family.
But wait! Before you start showing it off, there’s one more step. And that step is adding the Finishing Touch. You see, it’s just like baking a cake. Just because it looks perfect on the outside doesn’t mean it’s finished.
First, you want to give the whole thing a light sanding. A quick touch-up with some sandpaper will help smooth out any rough edges or splinters that may have been missed in the cutting process.
Next, you want to apply a finish. This can be anything from a light coat of varnish to a heavy coat of lacquer. If you want your joint to last and look nice for years to come, you want to use a finish that is appropriate for your type of wood.
One final step is to buff it all out and give it a nice shine. This is where the Eddie Murphy magic comes in. Take a soft cloth and give your joint a few passes over the surface. You can use a bit of wax or furniture oil, if you like, or just keep it simple with a good shining cloth.
You can do it all in a few steps and have yourself a joint that looks perfect and will last for years. It’s like you just hired an expert to do your woodworking project. Except you did it all yourself! That’s the power of the Finishing Touch.
And there you have it. You’ve just taken the time and effort to produce a perfect joint for your woodworking project. Now go ahead and show it off and make all your friends and family jealous.
And You’re Done!

That’s it, you’ve done it! Now pat yourself on the back for a job well done because you’ve just learned how to cut a perfect joint for your woodworking project.
After you’ve gathered your supplies, you’ve measured and marked your wood and cut your joint. Finally, you sanded and gave it the finishing touch. You should be proud, as this is no small feat. You have just accomplished something that a novice woodworker would not be able to do.
Now with your finished, perfect joint, you can move forward with the rest of your woodworking project. You’re on the road to becoming a master woodworker. In fact, you’re the king of the cut! Your project won’t only look great, it will be crafted with the best joint possible.
Your jointing skills will be the envy of your home state and you’ll be the star of the next woodworking fair. Not only that, but you might also get invited to join a woodworking club and share your newfound jointing skills and knowledge of woodworking.
But no matter what direction your woodworking project takes you, you can always look back on this moment and know that you have mastered one of the basic skills necessary for woodworking. So, go ahead and take a bow, you deserve it!