How To Use A Jigsaw For Detailed Woodworking Projects

Ah, the jigsaw – the superhero of detailed woodworking projects. With its ability to make precise cuts and navigate tight corners, it’s like the Batman of power tools (minus the cape and cool gadgets). But mastering the jigsaw takes more than just a few YouTube tutorials – it takes practice, technique, and a little bit of know-how. That’s where we come in.
In this article, we’ll walk you through the steps how to use a jigsaw for detailed woodworking projects like a pro. From choosing the right blade to perfecting your technique, we’ll have you cutting curves and intricate shapes like a seasoned pro in no time. So grab your safety gear and get ready to unleash your inner woodworking superhero – it’s time to learn how to use a jigsaw!
The Right Tools
If you’re serious about woodworking, you’ll need the right tools in your workshop. And I’m here to tell ya, gettin’ the right tools ain’t no joke! Especially when it comes to usin’ a jigsaw. First things first, ya gotta make sure you demand high quality when it comes ta gittin’ your jigsaw. C’mon now, you don’t want one o’ those cheapo jigsaws, right? Get one that’s powerful, reliable, and gonna last ya for many years. Then, you gotta make sure you got the right blades for that jigsaw.
Well let me tell you, blades are like the ammunition for your jigsaw. So you gotta be picky about the blades you use, because the wrong ones can result in some really regrettable cuts. And don’t forget the accessories! You’re gonna need a clamp to keep your project in place and some good eye protection so you don’t damage your vision! And I’m telling you, your jigsaw ain’t gonna work its best if you don’t got all these pieces in place. So don’t forget these points when you’re getting that jigsaw!
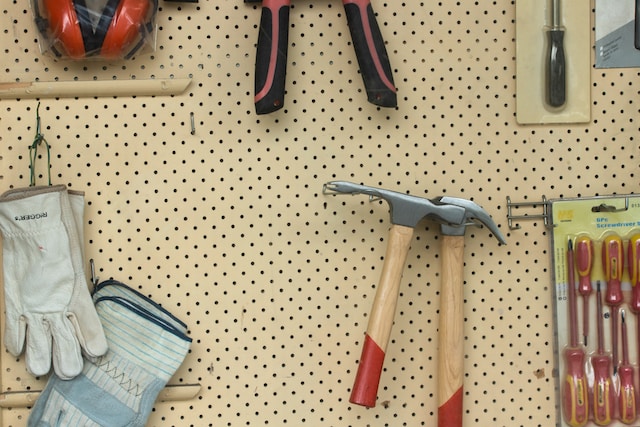
Ensure you Have a High Quality Jigsaw
If you want to do some woodworkin’, you betta make sure you got the right tool for the job. That’s why you need to start with a top of the line jigsaw. Not just any old saw is gonna do the trick, ya know. That piece of junk you found at the hardware store won’t be cutting it. You’re gonna need a saw that’s got enough power to get the job done and cut through them tough pieces of wood.
But before you go out and buy the first saw you see, take a few minutes to do some research. Read reviews about different jigsaws and find out what other people have to say. Take a look at the specifications, especially the motor power and blade speed. You want a saw with a motor that’s strong enough to power through and a blade that can move fast.
Once you pick out a jigsaw, you gotta make sure you get it with the right type of blades. Make sure they’re compatible with the saw and strong enough to do the job without breaking or bending. A variety of different blades can be used with almost any jigsaw and you’ll want to keep a few extras on hand, just in case.
Another thing to consider is the type of accessories you get with your saw. Make sure they fit properly or they may be a safety hazard. Accessories like a dust collector, beam guide and saw stand will make your job even easier and more precise. Your saw will also need clamps or a vice to keep things in place as you cut.
So, if you wanna make sure you have a jigsaw that can handle just about any kind of woodworking project, do your research and get one with the right motor and blade speed. Also, make sure you get the right blades and accessories to get the job done safely and accurately. That way, you’ll be set up for success and your projects will be done with precision.
Acquire Proper Blades

Hey there woodworking enthusiasts! In order to make those detailed projects come to life, you’ll need to ensure you have the right blades for your jigsaw. Don’t skimp out here! High quality blades will make a significant difference in how your project turns out. Now, you’ll want to make sure you have a variety of blades with different types of teeth.
Let’s go over some of the blade types and sizes you might want to acquire:
First, you’ll want to get some jigsaw blades with straight teeth. The right fit will depend on the thickness and type of material you’re cutting. Generally, blades with 13-18 teeth per inch will do the trick for most hardwoods.
Now, for those projects calling for more intricate cuts, you’ll want to look for blades with either a reverse or a scrolling type tooth pattern. A reverse blade is particularly useful when cutting circles or curves. The reverse pattern creates a smoother cut on the entry side, which equals fewer splinters and a more precise cut overall.
You’ll also want to have some blades that have multiple sizes of teeth. A combination blade works well when cutting materials with various thicknesses. That way you don’t have to constantly switch blades.
Lastly, for specialty projects, you might want to invest in one of the more expensive blades, such as the Japanese teeth variety. They make the perfect choice if you want to make precise, extra-fine cuts with a perfectly clean edge. Plus they’re super durable and won’t wear out easily.
When it comes to blade size, make sure to get the right size that matches the holes on your jigsaw. A size 5 T-shank will work in most jigsaws, but double-check the specs before making a purchase.
A good rule of thumb when shopping for blades? Buy more than you think you need! Pick up a few of the various types discussed here, and some extras for good measure. You might end up needing them for special projects down the line. You’ll be happy you already have them on hand.
There you have it! Now you’re ready to head on over to the hardware store and get the blades you need to take your woodworking projects to the next level. Good luck (and have fun!) woodworking.
Get the Right Accessories
When you’re ready to start working on those detailed woodworking projects, the right jigsaw accessories can make the job a lot easier. Accessories, such as clamps, guides, and stabilizers, can help you make precision cuts, allowing you to craft unique shapes or curves with your jigsaw.
First, let’s talk clamps. Clamps are great for holding your wood in place while cutting and they can be easily adjusted to fit different shapes and sizes of wood. Clamps also help keep the blade steady, so you get the most accurate cuts possible.
Next up, guides. Guides are great for helping you make straight cuts. All you have to do is line up your guide and follow the line, and then you can make a perfect cut every time.
Now for a real game-changer… stabilizers. Stabilizers attach to the jigsaw and help steady the blade while you’re cutting. That way, the blade won’t vibrate or shake and you can make more precise cuts.
Finally, you may want to pick up a jigsaw table or saw stand. A table or stand will give you a stable work surface and allow you to cut and maneuver larger pieces of wood. Plus, you can move the table around and adjust it to fit the shape of the wood you’re cutting.
As you can see, having the right accessories can make a big difference. And when it comes to detailed woodworking projects, having the right tools is key. Get the correct accessories and your jigsaw will help you make amazing projects in no time.
Preparing Your Wood

Welcome back, everyone! I hope you’re all having a wonderful day, because it’s time to start prepping your wood for the detailed woodworking project you’ve got your sights on. The first, and arguably one of the most important steps in any woodworking project is the preparation of the project’s wood.
Let’s start with the basics: Once you have your wood for the project, you need to make sure to cut it to the right size. Use a jigsaw to make the adjustments you want, depending on the size and shape you desire. Cutting the wood is the easy part, but you also want to make sure the wood is secure while you’re using the jigsaw. So, how do you do that?
Well, the best idea is to use a clamp and clamps down the wood so no slips or movements occur while you’re making your cuts. More clamps will be needed if you’re cutting a very wide piece of wood. Make sure that the clamps are tightened enough, but not too tight where the wood is damaged.
Next, you’re going to need to set up your jigsaw for the job. Start by examining the saw and its blades. You want to make sure that the blades are clean and free from any build up or damage. Also, check the power cord of the jigsaw, to make sure it is not frayed or damaged. If you need to replace the blade, be sure to take the necessary precautions for safety.
Now it’s time to adjust the baseplate and make sure that it sits flush to the wood. You’ll also want to adjust the depth of the blade to make sure it doesn’t protrude through the bottom of the wood. Also, adjust the speed of the jigsaw, to make sure it is running at the right speed for your project.
And there you have it! With these simple steps you should be good to go and ready to start cutting your wood with a jigsaw. Just take the necessary precautions to make sure everything is secured, and you should be good to go. I’ll meet you in the next step, where we will discuss how to make those complex cuts you might find in many woodworking plans. See you then!
Prepare the Wood for Cutting
I know you are excited about cutting up some wood and getting your project done. You’ve bought your fine jigsaw with some good quality blades and accessories. But before you just jump right in, you’ll need to learn how to prepare the wood for cutting.
Now every project is going to require something a bit different, so make sure you understand what type of jigsaw cuts you will be making before you begin your project. And if you don’t know, that’s ok. I’m here to help.
When you are preparing the wood, you’ll want to make sure that it’s clean and free of debris. You don’t want any dirt, dust, or other particles getting caught in your jigsaw as it is working. And besides, you wouldn’t want to have a gritty wood surface for your projects. So give it a good thorough cleaning and make sure it’s dirt and dust free.
You will also want to make sure the wood surface is flat and level. This way, you’ll get a more accurate cut. If the wood is warped or uneven, then you may end up with goofy looking cuts. And we don’t want that.
Once the wood is cleaned and prepped, you’ll want to measure and mark the wood for where you want to make your cuts. This will also help you to make your cuts as accurate as possible so don’t forget this step. This is particularly useful if you are making detailed or intricate cuts.
Now, after all of your preparation is finished, you can go ahead and set up your jigsaw. Make sure the blade is designed for the type of cuts you’ll be making and that the blade is correctly locked into the jigsaw. And don’t forget to have some appropriate eye protection in place.
So that’s it. Go out there and make some woodworking magic. I’m sure your projects will be looking out of this world.
Set Up Your Jigsaw
So you’ve got your jigsaw, and the other tools that you need, and now- wait, don’t jump right into it yet! Before you start cutting up wood, you need to properly set up your jigsaw. I always like to get my tools ready before I jump into any project- it helps to save time!
First things first- make sure your jigsaw is firmly and securely mounted to the work surface. This doesn’t just mean clamping it down- use clamps to keep it stable, and make sure it won’t move around while you’re using it. Additionally, make sure that the area you’re working in is clean and uncluttered. I learned the hard way that working with a lot of random stuff around me just leads to messes and missed cuts. Nobody wants that.
Now you can move on to setting up your blades. Different blades require different levels of tension- use the instructions that came with your jigsaw to set the tension correctly. Consult your jigsaw’s manual if you need help here. I generally like to pre-fit a few blades just in case I need one later, that way I don’t have to mess around when I’m in the middle of a project.
One more thing- if you’re using a circular saw, make sure you open up the guard when setting it up. Again, this is more of a safety thing than anything else, so make sure you’re aware of what you’re doing here.
And that’s about it for setting up your jigsaw! Once you get the hang of it, it’s pretty easy. Once your jigsaw is properly set up and clamped into place, you’re ready to start cutting up some nice lumber! Good luck!
Create Complex Cuts
If you’re looking to create more intricate details in your woodworking projects, you have to have the right tool. That’s where a jigsaw comes into play! A jigsaw can make those complex curves and detailed shapes that you just can’t get with anything else. Now, of course, using a jigsaw isn’t always easy. It can take some practice to get things just right. Luckily, I’m here to show you how it’s done!
So, first thing’s first, let’s talk about how to make those curves. One of the best things about jigsaws is that you can make really smooth curves with them. All you have to do is make sure you have a steady hand and the right blade. You can adjust the cutting angle to find just the right fit and shape that you need. And that blade is important – make sure it has enough teeth to make the cut, but not too many, or else the cut won’t be smooth.
Of course, you don’t have to limit yourself to curves. With a jigsaw, you can get really creative with your woodworking projects. You can cut circles, ovals, and all kinds of other shapes. For larger circles, you can trace a line with a compass and then cut it out with your jigsaw. Be careful, though – if you make the cut too deep, you’ll end up with an imperfect shape.
When you’re really feeling creative, you can even make unique shapes. You just need to draw the shape you want on the wood and then slowly cut it out with your jigsaw. Make sure you’re taking your time and keep the blade steady for smooth cuts. You can also use a hacksaw or a coping saw for intricate shapes, but a jigsaw is the best choice for making complex cuts.
So there you have it! With a jigsaw and the right blades, you can make all kinds of complex shapes and curves with your woodworking projects. Just keep in mind that you have to take your time and practice makes perfect! Now grab your jigsaw and start creating those detailed masterpieces!
Create Curves
Hey! So if you’ve managed to get the the jigsaw and blades collected, now’s the time to practice using them to create curves in your woodworking project. This is a bit trickier, but not by much.
For starters, you’ll want to make sure you have some sandpaper handy – and keep a vacuum nearby to clear away the sawdust. Once you have those items taken care of, you can plug in your jigsaw and select a curve-cutting blade.
Then, press the jigsaw to the wooden surface and begin cutting along the line you’ve drawn out. As you do so, move the jigsaw along slowly and steadily and make sure you hold on tight. Be sure to cut the wooden surface from left to right, and so, from the inside of the curve out towards the outside.
It’s okay if the cut isn’t perfect – you can always patch it up with a bit of sanding and some patience. Keep at it until the curve comes to a close – and with each successive try, you’re sure to get better and better.
Hey, here’s a pro-tip to keep in mind – you don’t always have to stay within the lines! If you’re really looking to get creative and express yourself, feel free to go a little more rogue with your curves. Just use some masking tape to create curves that can add some interesting texture to your project.
In the end, these curves will help add dimension and texture to your woodworking projects – creating pictures, decorative frames and other wild, unpredictable shapes. And believe me, they’re sure to be a real conversation starter once you’re done.
So go forth and create those curves – your woodworking project won’t know what hit it!
Cut Circles
Ah, circles. Do you feel like your woodworking skills aren’t complete because you don’t know how to cut circles with a jigsaw? You’re in luck, because cutting circles with a jigsaw can be a breeze once you get the hang of it.
For starters, make sure you have high quality blades. Get something with a deep-set or wavy-toothed pattern for tougher materials. You want something durable, but not too thick, so it cuts a perfect circle.
Now it’s time to prepare the wood for cutting. If you’re working with thicker wood, make sure to get it down to a thin enough layer first, otherwise cutting circles might be impossible. A drill press is great tool for this.
Once you’re ready to cut, there are a few tricks to keep in mind. The jigsaw is going to be used like a pencil – gently guiding it along the circle you want to cut. Position your board to keep the jigsaw steady, and start slowly. As you guide the jigsaw along, slowly tilt the blade so it remains engaged with the wood while following the line. And don’t forget to use a vacuum to keep your work area clean!
Circles can be hard to create unless you’re a master woodworker, but with a jigsaw and the right tools, you can create the perfect circle in no time. Now go take your creativity to the next level and start cutting out those circles!
Make Unique Shapes

Well folks, now it’s time to get creative! We’re gonna learn how to use our jigsaw to make some unique shapes for our detailed woodworking project.
Now look, this is where we get to show off all that our hotshot jigsaw can do. First, make sure to have a good selection of blades, so you’ve got all the options you need to make those unique shapes.
For starters, you can use a scroll saw blade to cut out any detail you need on your project. So if you wanted something like intricate inlays, cursive letters, or other symbols, try using a scroll saw blade to make that happen!
Also, by using a saber saw blade, you can get some really tight turns for all those wacky shapes you’re looking for. Make sure you switch up the speed of your saw as you go, depending on the kind of shape you wanna make.
Heck, maybe you got some ideas that don’t even require blades at all! Try using a sanding disc on your jigsaw to shape out all sorts of curves. You can get some really beautiful results, and in no time you’ll be getting in on that sweet woodworking action.
By following these easy steps, you’ll be using your jigsaw to make some unique and hard-to-replicate shapes in no time! Just remember that safety first, so you keep yourself and your tools in great shape. Now go out there and whip up something amazing!”
Utilize Other Blades
Greetings, folks, and welcome to the fourth chapter of our jigsawing journey! Earlier, we talked about the tools, preparing the wood, and creating complex cuts. Now it’s time to dive deeper, and let’s just jump right into it, shall we?
Let’s talk about utilizing other blades with your jigsaw. This is a vast topic, so let’s divide it into subheadings for greater understanding.
First off, we have general purpose blades. Now, these blades have teeth pointing in an alternating direction, which allows for smoother cuts and exceptional accuracy. Many of these blades have a unique “universal” design, meaning they’re capable of cutting both metal and wood.
Second, we have specialty blades. As the name implies, these are blades now used for specific and intricate cuts. These blades are highly specialized and are used for specific types of projects, such as doing detailed inlays or intricate curves.
Finally, we have reciprocating blades. These blades provide more control than general purpose blades, creating smoother and faster cuts. These blades are great for cutting thin materials, like plywood or laminates.
So there you have it! Now that we’ve discussed other blades you can use with your jigsaw, it’s time to move onto the next step. Keep your blades sharp, store them safely, and above all else, show that jigsaw some love and care. Until next time, folks!
General Purpose Blades
If you thought the jigsaw blade you were using before was good enough, you ain’t seen nothing yet! General purpose blades can do just about everything you need in woodworking projects. I don’t want to sound like a TV infomercial, but you’re gonna love what this type of blade can do.
When it comes to cutting curves, circles, and angles, general purpose blades work like a charm. We’re talking straight cuts in faster than the speed of light here! Now, if you want to jazz up your project just a bit, you can even use general purpose blades to etch or engrave the wood, adding a bit of extra detail to your piece.
But that’s not all folks! General purpose blades are also great for cutting thicker materials, like fiberglass or plexiglass. Who knew that a little blade could work so hard?
Now of course, I’m sure you’re wondering about safety. You shouldn’t be too worried about that – general purpose blades are designed for heavy-duty cutting, and they can take a bit of a beating. Just make sure you wear the appropriate safety equipment – goggles, gloves, dust masks – while you’re using the blade.
So there you have it. General purpose blades. Your new best friend when it comes to woodworking projects. Don’t be afraid to break ’em out when you need some extra oomph!
Specialty Blades
Heeeyyyy, what’s going on y’all? Welcome to my piece on using a jigsaw for the best of your woodworking projects. Now hold your horses, I know what you’re thinking: “Man, why would I need specialty blades for woodworking?”. Listen, it’s like I always say: it ain’t no good if you don’t have the tools to match. Let me take you through how some of these specialty blades can come to your aid.
Specialty blades are specifically designed for a certain type of material, making them unique compared to your standard blade. An example of this would be a scroll saw blade. Your normal blade is “chunky” and needs to be held securely in place during the cutting process. Scroll saw blades, on the other hand, can move quickly and make intricate and precise cuts. Other specialty blades are diamond blades which are appropriate to cut through ceramic and stone as well as laminate blades which are designed to cut through wood.
You should also note that specialty blades have a range of shapes and sizes. I recommend investing in a range of blades so that you can handle any material that comes your way. If you get yourself a couple of specialty blades, they will last a lifetime, so don’t fear investing a bit extra in them. Plus, with the extra variety, you’ll really be able to show off your skills to your family and friends.
So there you have it, y’all. Specialty blades are a must for a jigsaw if you want to take your woodworking to the next level. Don’t be shy, it might cost ya a few extra bucks, but it will pay off in the long run. Now, pop your blades in, let loose and show everyone what they’re missing!
Reciprocating Blades
Oh boy… I can already tell you’re getting way more serious about your woodworking projects. If you’re looking to shave off more time and get more precise cuts, then you’re gonna need to look into getting some reciprocating blades. They’re a game-changer, fo’ sho’.
Reciprocating blades are pretty much the same as regular jigsaw blades, except they’re designed to take on tougher and denser woods. These blades can really up the ante when it comes to cutting through material. So if you’re working with anything from pine and oak to walnut or teak, then reciprocating blades can help you get the perfect cut.
The way reciprocating blades work is that instead of using small, incremental cuts like with normal jigsaw blades, they move in a much faster, reciprocating motion. This helps with speeding up the cut process, as well as being more precise when it comes to the sizing and shape accuracy.
Now you don’t have to worry about having to do extra sanding, either. Make sure you’re always using a sharp reciprocating blade and your cuts will come out smooth and accurate every single time. Just make sure to replace your blades when they start to get worn down. Nobody likes a wobbly blade!
And don’t forget to store your blades in someplace safe every time you finish up with your woodwork project. Put your blades in a place where kids won’t be able to get to ‘em – and don’t forget to label them so you know what type of blade you’re working with. Otherwise you’ll make a few cuts with the wrong blade and you’ll be like, “What the?”.
So in conclusion, if you’re looking to take your woodwork game to the next level, then think about investing in some reciprocating blades. Just remember to always keep your blades sharp and your woodwork projects on point. Now get to work and happy cutting!
Finishing the Project

Ah, finishing the project. Definitely the most rewarding part; it’s the moment when your hard work finally starts to pay off. It’s like having a baby, but with a woodworking project!
To make sure your woodworking project looks its best, you have a few tasks to take care of. First and foremost, make sure you smooth out any rough edges. Absolutely no sharp corners or jagged edges should ruin the look of your project. To do this, you’ll need to go over the pieces with a sander or even a rasp. For smaller projects, you can get away with a couple of files.
Once the edges are nice and smooth, take some sandpaper to eliminate any imperfections. We’re not just talking about chips and cracks, but also small variations in the grain that can make the project look a bit off. Usually, 220-grit sandpaper will do the trick. Again, for smaller sections of the project, you can try using a small block of sandpaper and some elbow grease – it pays off!
Finally, apply finishes. Whether you’re looking to retain the natural look of the wood or add a splash of color, this is the part where you get creative. You can apply a sealer, stain, or even some varnish to make sure the wood is well-protected. Again, make sure you do a few test patches to make sure the finishes look good so that your final product looks its best.
And there you have it! Once you finish everything up, your detailed woodworking project is ready for the world to admire. Care for your tools, keep the blades sharp, and store them safely – then get ready to start a new project. Now you are a master jigsaw-er, so let your creative juices flow!
Smooth Out Edges
If you’ve been working hard on a woodworking project, the last thing you want is that it doesn’t look as good as your effort deserves. This is where your jigsaw comes in and can help you put the finishing touches on your project.
Start by grabbing a few clamps, some sandpaper and your jigsaw. A little word of caution; be sure you wear eye & hearing protection before you fire up the jigsaw.
Make sure the piece you are working on is securely clamped down. Sandpaper can also help your jigsaw blade to stay in place. Remember, the less your jigsaw moves around the better your cut will be.
Now, it’s time to start jigsawing. Move the jigsaw tip back and forth along the edges making sure to not pause in one spot too long, as this will cause the blade to overheat and dull the blade. When it’s time to move on, gently lift the blade and adjust the piece to continue in a different area.
While jigsawing through your project, keep a can of compressed air nearby in case the blade clogs up with wood shavings. Don’t just blow on it, because all that will do is spread the wood shavings around, this is where the can of compressed air is a savior.
When it’s time to round the edges, put your jigsaw in the appropriate setting and work slowly. The slower you jigsaw, the smoother the edges will be.
Finally, be sure to use the appropriate blades for whatever kind of wood you’re dealing with. If you think heavier blades will do the job better, feel free to go for it. But for most projects, lighter blades with multiple tooth settings will yield the best results.
Once you’ve finished up with your jigsawing, smooth out any rough edges with sandpaper. You don’t want your project to look uneven and may have to take a few passes over the same spot to get it how you want it.
When you’re finished, stand back, admire your work, and be proud of the work you’ve done. Now you know how to use a jigsaw to make detailed woodworking projects that look amazing and last for a long time.
Sand Out Imperfections
When it comes to woodworking, using a jigsaw for complex cuts and intricate shapes is great, but you still got to take it a step further and make sure the edges are smooth and even. That’s why it’s important not to forget about sanding out any imperfections when completing a woodworking project!
If you want a really fine finish, then you’re going to need to sand out small crevices and bumps. You can use a sandpaper block or a piece of sandpaper wrapped around something like a popsicle stick. Whatever you’re using, be gentle and make sure that you’re sanding in the same direction as the grain of the wood.
Get yourself a light touch, and sand away any raised surfaces and bumps. This way you can get a smoother finish so that your hard work is worth it and the end product looks great!
Don’t be afraid to sand out a little too much, you can always reattach the piece of wood or fill in the gaps with some putty if you take off too much material.
Most of your sanding should be done with a fine-grade sandpaper so you don’t create bigger scratches and imperfections, but you can use a coarser paper to remove heavier gouges and scratches. Just remember to always follow the same direction as the grain when sanding.
When you’re done, you can move on to sealing and finishing your project. Sanding is an important part of your woodworking project, but it can make all the difference in the look and feel of the finished product. Don’t forget to take your time when sanding out imperfections and enjoy showing off your masterpiece!
Apply Finishes
Ah! Now it’s time for the fun part: applying the finish to your project! This is when your creativity really comes into play. Whether you’re looking to add a glossy lacquer to a tabletop or a matte wax finish to a cutting board, a homemade jigsaw piece can be transformed into a gallery-ready piece of art with the right finishes.
To help bring that dream you imagined to life, you’ll want to make sure to do a few things in order to prep your project for its finishing touches. Before you reach for a can of polyurethane, take a little extra time to sand down the surfaces of your piece. It only needs to be up to 220-grit sandpaper, but this will allow you to make the most out of your finish.
Once you’ve sanded your project and it is smooth to the touch, lightly wipe it down with a cloth to remove any sanding dust. Now, you’re ready to pick up that brush and begin your personal signature of finishes. Depending on the look you’re aiming for, whether it’s a glossy or matte sheen, use small concentrated circles to evenly apply the finish. With most finishes, you can apply several coats if needed.
If you’re feeling extra creative, consider adding a decorative touch, such as applying a color wash, to your project. This can be done by wiping off a layer of paint after you’ve applied a coat of your polyurethane. For extra pizzazz, embed small decorative pieces like jewelry, metal charms or leaves into the finished piece.
Once the finish has had time to dry (check the label of the finish to see what it recommends), your project is ready to show off! Invite friends and family over to your new masterpiece and bask in the glory of having made something so beautiful with your very own jigsaw. Congratulations!
Finishing Up

So you’ve just completed your detailed woodworking project with your trusty jigsaw. Congratulations! You are one step closer to being a Certified Woodworking Wizard. But before you can pass on your jigsaw knowledge to anyone else, you need to make sure you finish up properly.
Firstly, you should keep your blades as sharp as possible. This way you can ensure that your every cut will be precise. You can sharpen your blades using either a whetstone or specialized power tool. Make sure to replace blades once you notice any signs of wear and tear.
Now that you’ve maintained your blades, it’s important to store the jigsaw and blades safely. You want to ensure that nothing gets lost or broken. Invest in a case for your jigsaw and dedicated compartments for your blades. This can make it easier to find the blade you need for your next project.
Lastly, you should also care for your tools. Make sure to clean your jigsaw after every use. Wipe off any sawdust or dirt that may have gotten on its exterior. Oiling the joints can also help keep your jigsaw in peak condition.
By following these simple steps, you can make sure that you are able to use your jigsaw on all your projects. Investing a little time in the maintenance and storage of your jigsaw and blades can go a long way in ensuring the success of your projects.
Now get out there and show the world your woodworking wizardry!
Keep Blades Sharp
Hey fellas, if you’re looking to use a jigsaw for some of your detailed woodworking projects but don’t know how to keep your blades sharp, look no further.
First things first: you need to get yourself a quality jigsaw and the appropriate blades for your project. Once you have that all set, you ready to go about keeping your blades sharp.
When it comes to sharpening the blades, think of it this way: you’re basically giving those blades of yours a touch up, just like when I give my always-overly-eager hair line a trim.
Now that we’re on the same page about the whole sharpening shebang, let me give you a few tips on how to keep your blades as sharp as possible.
First order of business: KEEP the blade clean. Dust and dirt can clog up the blade and block the path of your job, so make sure your blade’s clean and smooth. You can use a steel brush and some lubricant to get the job done, but don’t use any abrasives or you might be saying goodbye to those blades.
Second order: use a file. A flat, fine-toothed file can help get rid of any clogs or otherwise unwanted bits clinging onto your blades, like part of your neighbor’s tree that your cat decided to bring you as a gift (yes, I did have to remove a wooden spoon from Lionel’s mouth the other day).
Third and last order of the day: use an abrasive stone. This is a very necessary tool if you’re looking to really give your blades a thorough sharpening. Before you get starting, however, make sure the stone you have is not too hard for your blades. If it’s hard enough, it’ll wear down your blades more than you’d like.
Follow these steps, use some common sense, and your blades will remain sharp and as good as new after every project.
That’s it from me. Yo know what they say, if hand tools are gonna be used, they need to be handled with care and sharpness. Alright, now I’m going to go back to working on my latest project. See y’all!
Store Jigsaw and Blades Safely
It’s always important to practice proper tool care, and that includes storing your jigsaw and blades safely. After all, properly storing your jigsaw and blades will help them last even longer than if you didn’t store them properly.
Let’s start with your jigsaw. You know you don’t want to put it away in your toolbox can all pointy edges and blades. That just doesn’t make sense. After you’ve finished your project, take the time to carefully put your jigsaw away, blade removed and stored in a different location. You can also get special jigsaw holder that keep the saw safe in one place and the blades in another.
Now, onto the blades. Make sure you never store a blade in the jigsaw. They are sharp and can easily cause injury. The best thing to do is to keep the blades in a protective holder where they won’t slice through anything. You can also get a blade carrying case which will help keep those blades safe, and make them easier to carry.
Finally, keep everything clean. You don’t want rust or grime to build up on your blades and jigsaw, so make sure you wipe everything down with a cloth and some soapy water from time to time.
So there you have it, proper jigsaw and blade storage. It’s not too hard. And trust me, if you take the time to properly store your tools and blades, you’ll have them for much longer and be able to enjoy your woodworking projects for even longer.
Care for Your Tools
All right, now that you’ve finished your project and you’re ready to bask in the glory of your hard work at the completion of a job well done, don’t forget one of the most important steps: caring for your tools. It will help keep them in top condition for all of your future projects.
To start, make sure you keep your jigsaw—and all of its blades—clean. A good wiping down with a dust cloth after every use is always a good habit to get into, and make sure you store them in a dry place away from heat and moisture. If you can, avoid storing them in plastic as this can cause rust and other damage, and just in general, avoid letting them get exposed to the elements.
Also, you will likely be collecting a variety of blades over the course of your woodworking projects, and you’ll want to be able to find them quickly the next time you need one. Keep them organized by type and number to save yourself time and reduce the risk of buying duplicate blades.
When it comes to your blades, it pays to keep them sharp. A dull blade can not only make the job take longer, it can also affect the quality of your finished product. Invest in some sharpening tools and research the best practices for honing your blades for the most precise cuts.
Finally, if you ever need to replace any parts of your jigsaw, or even the jigsaw itself, make sure you get replacements from a reliable source to ensure the quality of the component. All of your careful preparation and skill won’t be worth much if the parts you’re using are subpar.
At the end of the day, remember that your jigsaw is the workhorse of your woodworking shop and the quality of your projects depend on taking good care of it. Make sure to always keep it clean, organized and protected, and keep your blades sharp, and you’ll have many successful projects behind you.