The Top 5 Essential Woodworking Techniques Every Woodworker Should Know

Woodworking is an art that requires skill, patience, and a little bit of magic (OK, maybe not magic, but it sure feels like it sometimes). But whether you’re a seasoned pro or a beginner just starting out, there are a few essential techniques that every woodworker should have in their toolkit.
These techniques are the building blocks of woodworking, the foundation upon which all other skills are built. They’re the secret sauce that takes a simple piece of wood and turns it into a work of art.
In this article, we’re going to take a deep dive into the top 5 essential woodworking techniques every woodworker should know. From basic joinery to advanced carving techniques, we’ll cover it all. So grab your tools and get ready to level up your woodworking game!
Choosing the Right Tool for the Job
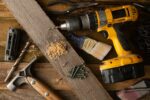
Hey, everyone! So you know there’s no one-size-fits-all tool when it comes to woodworking – you gotta pick the right one for the job. Whether you’re sawing wood, driving nails, or drilling holes, you better make sure you choose the right tool.
Let’s start with saws. There are lots of different types of saws, and they’re all made to do different things. A handsaw is perfect for cutting curved shapes and making detailed cuts, while a jigsaw can cut straight lines quickly. A chainsaw is great for cutting large pieces of wood, while a coping saw is ideal for making very fine cuts. Choosing the right saw for the job will save you time and energy – plus it’ll make sure your project turns out the way you want it to!
Now let’s talk about hammers. You probably already know that there are different types of hammers for different tasks – a claw hammer for driving nails, a ball peen hammer for shaping metal, and a sledgehammer for driving stakes. But did you know that there are also different sizes of hammers, each of which is made for a different purpose? A light-weight hammer is perfect for less-demanding nailing jobs, and a heavy-duty hammer is best for tougher jobs.
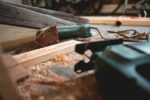
And finally, let’s talk about drills. When it comes to drills, you have lots of options. A powerful cordless drill can make short work of heavy-duty drilling jobs, while an electric drill is perfect for more precise tasks. A variable speed drill is great for drilling into wood, while an impact driver is perfect for drilling into brick and concrete. Whichever one you choose – just be sure to use the right size drill bit for the job!
With all of the different types of tools out there, it can be tough to know which one you need to get the job done right. But by taking the time to choose the right tool and researching the correct size, you’ll be well on your way to success!
Choosing the Right Saw
Ah, so you wanna be a woodworker, eh? Well, the first thing you need to know is how to choose the right saw, because half the battle of woodworking is having the right tool to get the job done.
Let’s start simple. What are the most common types of saws? There are table and miter saws, circular saws, reciprocating saws, and jigsaw saws. Now, each saw has its own specific function and is used for different types of cuts and materials.
Table and miter saws are great for making long, straight cuts and accurate miter or angled cuts. These saws are also quite versatile, offering cut depth and angle adjustability for maximum precision.
Circular saws are similar to table and miter saws but offer versatility in maneuverability. With a range of saw blades, you can use this type of saw for making crosscuts, rip cuts, and bevels with accuracy.
Reciprocating saws, often referred to as a Sabre saw, offer the best mobility and portability of any saw. This type of saw is used to make cuts through materials that are awkward or hard to reach. With the right saw blade and some patience, you can make an accurate cut with this saw.
Finally, there is the jigsaw. This saw is ideal for making intricate, curved cuts in materials like wood and plastic. It’s also the best saw for making openings and shapes in materials.
When choosing a saw, think about the types of projects you’ll be working on. Will you need plunge cuts, bevel cuts, or blind corner cuts? If so, the right saw for that job would be a table or miter saw. If you anticipate needing to make curved or intricate cuts in materials, then a jigsaw is the best saw for that job. If you’re looking for ultimate portability and mobility, a reciprocating saw will do the trick.
So, choose your saws wisely and make sure it’s the perfect fit for the job you need to do. Now, let’s get to work!
Choosing the Right Hammer

Choosing the right hammer is essential for any woodworking project. Not all hammers are created equal. Without the right one, you might risk damaging the wood and yourself!
Can you imagine pounding away with a hammer that’s too heavy or lightweight for the job? Not only would the wood take forever to nail but your hand would be in terrible shape afterward. Heck, if you’re using a tool that’s too heavy; you might even break it. No one wants that!
I’m appealing to all the experienced and novice woodworkers out there. Do yourself a favor and pick a hammer that’s well balanced. This means it should feel comfortable in your hand and the head should be heavy enough to get the job done without you having to bear down too much.
Now when it comes to the head itself, you’ll have several things to consider. First, the length. Longer heads mean more leverage, which is great for hammering nails. Shorter heads provide more control. Furthermore, when it comes to weight, few areas need to be determined. Heavier hammers generate more force, while lighter hammers allow the user to swing it with more accuracy.
Then there are the different types of heads available. Claw, ball-peen, framing and weight hammers; they all have their own uses. Depending on the job you’ll require one of these. For instance, a claw hammer is generally used for basic carpentry tasks, while a ball-peen hammer is better for more complicated jobs such as riveting and finishing.
But that’s not all. You also need to consider the material. Steel hammers are strong, but prone to rust. Aluminum hammers are lightweight, but potentially shatter if you are not careful. Finally, rubber or plastic hammers provide a cushion, but the head could be too lightweight for some tasks.
Finally, you need to decide whether you want a straight or curved handle. Curve handles are easier for beginners, as it helps to absorb shock. But straight handles are preferred by hardened carpenters as they aid precision.
Whether you’re just starting out in woodworking or have been carving away for years, the right hammer is essential. So choose wisely and don’t forget to take into account your budget. There’s no one-size fits all when it comes to devices so make sure you pick the one that fulfills your needs.
Choosing the Right Drill
When it comes to choosing the right drill for the job as a woodworker, it can seem a little daunting. You know what they say, the devil is in the details. But don’t worry, I’m here to help.
First and foremost, let me start off by saying there’s nothing wrong with using a cordless drill. It’s a great tool that can be used for things like drilling pilot holes for wood screws, driving screws, and even drilling dowel holes. However, if you plan on doing more intricate tasks, like drilling holes in difficult to reach places or performing delicate work, then you may want to consider a corded drill.
Corded drills offer more control and power than a cordless drill, and allow you to easily regulate the torque, speed, and depth of the drilling so you can make precise holes. On the other hand, cordless drills are great for casual woodworkers who don’t need to use a drill too often.
When it comes to choosing the size and shape of the drill bit, you’ll want to take into consideration the type of wood you’re drilling. For example, if you plan on using softwoods, like pine or red oak, then you won’t need a heavy-duty drill bit. A smaller drill bit should suffice, as long as it’s sharp.
However, if you plan on drilling hardwoods, like maple or walnut, then you’ll need a larger and stronger drill bit. It’s important to know that the larger the drill bit, the more power you’ll need to get the job done. So if you plan on using a larger drill bit, it’s best to invest in a corded drill for more control and power.
Finally, when selecting a drill bit, remember to choose one that’s suited for the type of wood you’re drilling. If you’re drilling hardwoods, such as maple or walnut, then you’ll want a carbide-tipped drill bit. However, if you plan on drilling softwoods, then you’ll need a twist-type drill bit.
Now that you know the basics of choosing the right drill for the job, it’s time to get to work. So pull out your power drill, sharpen those drill bits, and get ready to craft something amazing. With a little patience and practice, you’ll be a master of the power drill in no time.
Learning the Basics of Woodworking

When it comes to woodworking, there is so much to learn for woodworkers of all levels. From the experienced woodworker to the beginner, the basics can be overwhelming. But, with a few simple tips from this guide to woodworking, you can quickly gain the skills and knowledge to become an expert woodworker.
The first step in woodworking is to learn the different types of wood. This is especially important for a beginner since some woods may be easier to work with and require less tools than others. For example, pine is a common lumber choice due to its affordability and range of workability. Oak and maple are also popular choices, but they require more tools and experience to work with.
Once you’ve picked out the type of wood you’re going to use, it’s time to learn how to measure and mark it. This is one of the most important steps to take when making furniture, and it’s important to know how to do it correctly. Using a tape measure, pencil, and square are the must-have tools for measuring and marking wood.
Reading plans for woodworking projects is also a must. Plans provide you with the measurements and construction details you need to build a piece, so it’s important to follow the instructions. If something doesn’t look right, don’t hesitate to ask an experienced woodworker for some help.
Finally, no woodworking project is complete without safety precautions. Always keep safety in mind whenever you’re working with sharp objects, power tools, or working with woods that are super hard. In addition, never leave tools lying around, and only use them when you have to.
See, woodworking isn’t as intimidating as it seems, even for a beginner! With my tips, you can quickly get started on your first project and become an expert woodworker in no time! So what are you waiting for? It’s time to get started and begin building something amazing!
Learn the Different Types of Wood
Hey now, you woodworkers out there! I bet you all been anxious to jump into your woodworking projects. But first, y’all gotta learn the basics — Like, when you’re shopping for wood, what the heck should you be looking for?
Ya’ll need to know the different types of wood, and believe it or not, you ‘bout to get a count down. I don’t mean me rapping, I’m talking about the different types of woods out there. So here we go, from five to one, learn the different kinds of wood before you even make a list.
Number five, let’s go with pine. It’s the least expensive and easy to find, that’s why it’s on this top 5 list of mine. Pine’s soft enough to be shaped, but keep in mind, when you’re working with this wood, you gotta watch the knots or your project be ruined in a jiffy.
Number four is the hardest of them all, it’s called oak, and when it comes to woodworking, it’s tough and strong like a rock. You can find red, white and both, they’re all made of the same stuff, but I recommend, if you don’t want to spend a lot of bucks, forget the red, and just choose either the white or the oak.
Number three is the soft one, it’s called poplar, you’ll know when you spot her, cuz the color will be the same all over. This type of wood is the cheapest of the list and it’s good for beginners, just don’t use this one for furniture, cuz it’ll just break like eggs in a blender.
Number two is cedar, it’s not the strongest but it will get the job done. It’s great for projects both inside and outside, plus it molds in different shapes, so you can carve away or drill multiple holes.
The number one wood, is the most expensive and it’s the one that I’d recommend. It’s called mahogany, it comes in a variety of shades, plus it’s made to last, so it’s worth every penny you’ll pay.
So now y’all know, the different types of wood, just remember my list before ya hit that store. Cuz when it comes to woodworking, ya have to have the beginner’s luck, and the more ya know, the more your projects will boast with the right type of wood, get the job done in no time flat.
Learn How to Measure and Mark Wood

Ah, measuring and marking wood. Many a novice woodworker has taken on a project that was too complex for them to handle, because they didn’t know their way around a measuring tape. Having a solid grasp of measuring and marking tools is integral for any woodworking project. Not to worry, though – I’m here to break it down for you!
To measure your wood, you’ll need a good-quality, high-contrast tape measure. You’ll be using it to measure length, width, and depth accurately, so it’s essential that you choose one that is durable and easy to read. From 12 to 25 feet is a good start, as this will cover most standard woodworking projects.
Marking tools are equally important when working with wood. Woodcarving needs require some serious precision, so you’ll want to invest in a range of marking tools such as a combination square, a marking knife, a pencil, and an awl. You’ll be using the combination square to set straight lines and to mark angles. The marking knife is essential for delicate cuts and fine details. A mechanical pencil is key for making accurate lines, and the awl is great for creating starting holes for nails and screws.
Of course, you’ll also need some more general tools for measuring and marking. These include a straightedge for setting straight lines, small rulers for taking measurements, a protractor for creating angles, and a caliper for measuring thickness.
If you understand the basic concepts of measuring and marking, you’ll soon be flying through your woodworking projects like a pro! With the right tools on-hand, you’ll be able to accurately measure, mark, and cut wood to perfection. Now, let’s move on to the next step!
Learn How to Read Plans
If you want to become a real woodworking champ, you’re gonna need to learn to read a plan – it’s non-negotiable! The blueprint is your roadmap to becoming a woodworking boss. It’s where you’ll find all the essential information you need to finish your project in one piece – literally!
First of all, let’s start off with the materials. Want to build a chair? You need corner braces, dowels, screws, glued-planks, the whole deal. You’ll find out what you need to get your project going in the blueprint.
Secondly, let’s move onto measurements, because you know size does matter! Directions for exact measurements in your plans will keep your project from being a skewed disaster. You don’t want your chair looking more like a roller-coaster car – know what I mean?
Thirdly, don’t forget about markings! Pay very close attention to anything that looks like a dash and a dot – this usually means ‘connect these two pieces’, so keep a sharp eye out for those. Get your pencils and rulers ready – it’s time to mark up the wood!
Finally, don’t forget why it’s called ‘plans’. Plans show you how the project is supposed to work – how different pieces fit together, and how they eventually form one structure. When you’re a woodworking pro, it’s easy to make a chair look like it came out of IKEA – but when you look closely at what’s actually supporting this chair, the intricate details show how the plan was essential to the project’s success.
Anyway, reading a plan is like reading a road-map – you gotta look closely at the details, or else you’ll find yourself on the wrong side of town. Now that you know what you’re looking for in a plan, you should feel comfortable putting that blueprint down and deciding where you want to take your project. From seat braces to measurements, you have everything you need in the plan to make it a success. So have fun! And break out the saw when you’re ready to get started.
Learn About Safety Precautions
If you’re gonna become a pro in the world of woodworking, then the most important thing you must remember is to always stay safe. Don’t let a careless accident put you out of commission for weeks at a time. If I taught you one thing when it comes to getting your woodworking project done, it’s safety first.
First off, you always want to use the proper safety equipment. Wear safety goggles to protect your eyes from sawdust and chips, and investing in a good pair of work gloves can help protect your hands when cutting into tough pieces of wood. If you’re gonna be working with power tools, make sure you have the right hearing protection in place because those damn things can get loud.
When cutting wood, remember to point the blade or saw away from your body so you don’t accidentally cut yourself. And never forget to secure the wood you’re cutting or working with by using clamps and other fasteners. You don’t want your wood piece flying off and causing some serious injury. On the same note, make sure you keep your work area clear so you’re not tripping over stuff when you’re working.
Clean your workshop regularly, and if you ever come across an old tool that has rust or something, throw it out immediately. In a pinch, you can use some sandpaper and oil to clean up rusty tools, but learn about the basics of tool sharpening and maintenance if you can. Dull tools can cause more harm than good when you go to work on your vision.
And of course, the most important thing to remember is to stay focused while you work. It’s easy to get distracted and forget to use safety precautions, so be sure to take your time, take a few breaths and make sure you’re focusing on what you’re doing. Woodworking is the perfect blend of art and science, so if you take it slow, use proper safety equipment and always remain focused, you’ll have many successful projects under your belt before you know it.
Proper Woodworking Joints
When it comes to proper woodworking joints, here at Wood Workshop our motto has always been ‘practice makes perfect’. And there’s certainly no secret that with the right technique the end results can be spectacularly beautiful and structurally sound. To that end let’s have a look at some of the different types of woodworking joints and a few tips to help you on your journey to joint-making greatness.
To begin with, let’s start with the four most common types of woodworking joints: lap joints, mortise and tenon joints, dowel joinery and tongue and groove joints.
Beginning with lap joints, this type of joint is formed by overlapping two pieces of wood and then secured with either nails or screws. This type of joint is perfect for large projects like chairs and tables, as the joint is made with two fairly large pieces of wood and requires very little precision in order for it to be secure.
Next up is the mortise and tenon joint – the old favorite of furniture makers. A mortise and tenon joint is created by cutting a cylindrical mortise into one piece of wood and then cutting a matching tenon to fit snugly within the mortise. This type of joint is perfect for those who are looking for a strong and trustworthy joint.
Dowel joinery is often considered the most economical style of joint when it comes to woodworking. When properly executed, this type of joint can offer high levels of strength and stability. The dowel joint is created by drilling small holes into the corners of two separate pieces of wood, and then inserting small dowels. This type of joint has been used since the middle ages and is one of the most dependable methods of joining wood.
Finally, the tongue and groove joint is often used to join two pieces of wood together with a more seamless look than the other types of joints. This type of joint is created by cutting a slot into the side of one piece of wood and then cutting a tongue into the side of the other. The tongue fits snugly into the slot and the two pieces of wood are securely held together.
Of course, there are many more types of woodworking joints to choose from, but these four main types are the ones that most woodworkers are familiar with. Now that you have a general overview of the different types of woodworking joints, it’s time to practice, practice, practice in order to complete all your woodworking projects!
Learn the Different Types of Joints

Listen up my woodworking pals! If you want to become a master woodworker, you’ve gotta start somewhere. And the first step is understanding the different types of wood joints.
To build something strong, you need to know which joints will do the trick. So, let’s take a look at some of the most commonly used joint types!
First up is the butt joint. This is when an end of two pieces of wood meet up, butched against each other. You can add nails or screws for extra reinforcement. It’s a great starter joint for those just starting out.
Next up is the dowel joint. This is where you drill a hole in both pieces of wood, and insert a round piece of wood (called a dowel) to connect them. It’s one of the strongest joints, and can be a great way to give your project a professional finish.
The biscuit joint is also pretty popular with woodworkers. It’s a fancy way to connect two pieces of wood, and also gives a nice professional finish. You’ll need a biscuit joiner – like a router – to make this one.
The mortise and tenon joint is another popular woodworking joint. This is one of the strongest joinery methods, and it’s an excellent way to join two pieces of wood together. It’s traditionally used in furniture making, but can be used in many other projects too.
Finally, the tongue and groove joint is also very common in woodworking projects. This is where one piece of wood has a groove and the other piece has a tongue. When you fit them together, it forms a strong joint that looks and performs great.
Now that you know the different types of wood joints and when to use them, it’s time to get out your tools and start woodworking! Have fun, and don’t forget to take all necessary safety precautions. Happy woodworking!
Learn How to Make Mortise and Tenon Joints
Oh Hey Guys! I’ll be teaching ya’ll about the must-know Woodworking Technique. Today, I’m gonna be visiting an old favorite of mine: the Mortise and Tenon Joint! Don’t worry, this shouldn’t take too much elbow grease; I’ll make sure that ya’ll won’t be too sweat over this one.
Mortise and Tenon Joints are one of the oldest, strongest joints around. It’s a simple joint to learn, as long as you use the right tools and techniques. A Mortise and Tenon joint is formed by a mortise, which is nothing more than a hole, being cut into one piece of wood, and the tenon, which is a tongue-like cut, attached to the other piece of wood. That tenon is then pounded or forced into the mortise.
The first thing you should do is measure your pieces of wood accurately. You need to be exact, otherwise, the joint won’t hold. Use a good drill and saw to create your mortise and tenon joints. A keyhole saw is great for creating the mortise and a chisel is great for creating the tenon.
You’ll also need a mallet or hammer to finish up the joint. Apply pressure to the tenon and hit it with your mallet or hammer until the tenon and mortise meet.
The last step is to apply glue or some kind of adhesive to the joint to ensure that it stays tight. Wait for the glue to dry completely before you move the piece, or else the joint won’t stay.
And that’s it! Now you know how to make a Mortise and Tenon Joint. You don’t have to be an Einstein in Woodworking to do this; just be careful, use all the right tools, and take your time! Like I said, this one isn’t too difficult, so use it and stick with it; trust me, you won’t regret it. Now, go out there and put this knowledge to the test! Good luck, everybody.
Learn How to Make Dowel Joinery
Ah, dowel joinery. Now, this is an essential skill you don’t want to be missing out on when you’re a woodworker. It’s one of the best ways to join two pieces of wood together, and it’s pretty simple, once you get the hang of it.
First and foremost, make sure you know what type of wood you’re dealing with. Different types of wood require different types of dowel joinery. Once you know what type of wood you’re using, it’s time to get out the dowel jig. This is a simple device that will help you drill straight and even holes for your dowels.
When you have your jig set up, mark the spots where you want the joint. Measure twice and drill once! Next, get ready to do a little bit of doweling. Take your wood dowel stock and make sure it fits tightly into the drilled holes. If it doesn’t, then you’ll need to start over.
Once the dowel is snugly fit, it’s time to use your dowel joinery clamp. Place it on either side of the joint, and clamp it down. This will help keep the dowel in place while you secure it with glue. Once it’s clamped down, create a little bit of pressure by using a block of wood. Then, use your glue to seal the joint.
And there you have it – your very own dowel joinery! Now, once your project is complete, you’ll have a solid, durable joint that will last you years. So, once you have a little bit of practice, you’ll be a dowel master in no time!
Learn How to Make Tongue and Groove Joints
If you’re a serious woodworker, then there’s no doubt you’ll want to know how to make Tongue and Groove Joints. This type of joint is often used to join two pieces of wood together so that they fit snugly and provide strength.
The first step in creating this joint is to mark the groove on the work piece. To do this, you’ll need a marking gauge and a marking knife. Mark a line on the board along the length that you want the groove to end at.
Next, use a chisel to cut the groove. To cut the groove, make a series of cuts from one side of the board toward the middle. The goal is to make the width of the groove the same as the width of the tongue.
Once the groove is cut, you can begin cutting the tongue. To do this make a series of cuts from the center of the board out toward the end. The tongue should match the width of the groove you cut earlier.
Once both the groove and tongue are cut, it’s time to assemble them. For this you’ll need some clamps to hold the two pieces in place while you glue them together. Be sure to use a strong woodworking adhesive to ensure a strong bond.
Once the pieces are glued together, you’ll need to clean up the excess glue. An area rug cleaner should do the job. You can also use a razor blade to make sure everything is clean and flush.
And there you have it! Your pieces should be secure and tight fitting when you’re done. This is just one of the essential woodworking techniques all woodworkers should know, so practice this one and then add it to your woodworking arsenal!
Finishing Techniques

As a woodworker, learning the right finishing techniques is key when it comes to creating beautiful and long-lasting wooden pieces. After all, you’ve spent a lot of time and effort in your craft and it wouldn’t make sense if you didn’t finish off the job with a bang!
First of all, let’s make sure we’re properly prepping the surface before we get started. That includes hand-sanding it smooth, filling any cracks and splits, and making sure it’s level. Once that’s done, we can start thinking about adding a finish.
Staining and finishing are the two main techniques involved in giving wood a nice polished look. Staining helps to bring out the wood’s natural beauty and can also be used to give it a certain color if you’re trying to match something. To apply the stain, first you’ll need to give it two coats. Then, buff it out with a clean cloth.
After the stain is applied, you can add a protective finish over top. This is usually a polyurethane finish, which works well for most projects. You’ll want to apply a few coats to the surface one coat at a time, wait for it to dry, and then buff out between coats. Don’t forget to add the final topcoat, too!
If you’re looking for something a bit more creative, there are plenty of other finishing techniques to choose from. There’s hand-rubbing with wax, aging wood with vinegar, applying patinas, or even experimenting with colored dyes for a unique look. Most of these techniques require some practice and experimentation to get the desired results, but they’re worth it in the end!
So there you have it! These are the top five essential woodworking techniques that every woodworker should know. Whether you’re just starting out or you’ve been at it for while, Finish it correctly and you’ll be well on your way to creating masterpieces with your own two hands!
Learn How to Stain and Finish Wood
Hey everyone, look at me! I’m talkin’ about staining and finishing wood, and if you wanna be a professional woodworker then you’re gonna want to pay attention!
First thing’s first, when it comes to staining and finishing wood you need to choose the right kind of stain. You want a good one, because a bad one can make a huge mess. You want to make sure it’s the right color and it looks great when you apply it.
Once you’ve got the right kind of stain, the next step is to sand down the wood so that the stain can be absorbed evenly. You want to make sure that you don’t just apply the stain without sanding it first, because otherwise it won’t look as good.
After sanding the wood, you’ll need to remove any dust and debris, and then you can start applying the stain. Make sure you do this in a well-ventilated area and use protective gear, because you don’t want to be breathing in any of the fumes.
Once you’ve applied the stain, you’ll need to let it dry for a few hours before you can start applying a finish. Before doing this, make sure to use a clean cloth to wipe away any excess stain.
After that, you can start applying the finish. You want to make sure that you apply it evenly and that you don’t miss any spots. When applying the finish, you want to make sure that you don’t use too much, because that can lead to a blotchy and uneven finish.
After the finish has been applied, you’ll need to let it dry for at least 24 hours before you start sanding it. When sanding the finish, you want to make sure go with the grain and that you don’t press down too hard, because it will damage the finish.
Once you’ve sanded the finish and you’re happy with it, you can buff it up to make it shine. Then, all you have to do is admire your handiwork and be proud that you now know how to stain and finish wood like a professional woodworker!
Learn How to Apply a Polyurethane Finish
Are you having a difficulty in taking your woodworking projects to the next level? You feel like something is missing and there is a need to enhance your woodwork further? Well, if this has been at the back of your mind, then you have come to the right place. It is time to learn the all important skill of applying Polyurethane finish to your projects and make your results stand out from the rest of the mediocre work by the competition.
First of all, before getting started one must be aware of the fact that it is important to use an appropriate quality Polyurethane product for the purpose of a smooth, desired finish of the project. To ensure that, pick a product that is best-suited for the job.
Next is the important trick to select the correct brush for the purpose since applying a polyurethane finish requires a specific brush-type — a natural- or synthetic-bristled brush is the best choice.
As the preparation step, make sure you have removed all of the surface dust, any burrs, raised wood fibers that formed while working, etc., by sanding the surface properly. Painters tape can be used to mask off any part of the wood that polymer doesn’t have to be applied. Also make sure to wrap the brush in cellophane to prevent it from drying if a break needs to be taken in the middle of staining or between coats.
Prepare a suitable work area with adequate ventilation and proper lighting to work in comfortably. Do make sure to wear the necessary gloves to protect your hands from the irritation caused by Polyurethane.
So just get started now!! Pour some polyurethane into a pan and brush onto the wood until it’s fully covered. Work brushing the polyurethane from open grain wood sections to closed grain wood sections. After this job is done, smooth the surface with a foam brush. Once you are done, let the surface to dry first until the finish is dry to the touch.
And then, came the most important part, applying the finish. Follow the instructions on the can and make sure to work fast. Do not stop in the middle; keep working along until the entire surface is finished.
In case of sudden imperfections or streaks forming, as a rule of thumb sand again with a fine-grit sandpaper and start all over! Read the instructions on the can and follow it faithfully and practice makes perfect.
So folks, this is how you can apply a Polyurethane finish to your woodworking projects and make them stand out from the crowd. Go ahead and give your projects that shiny new look!
Advanced Woodworking Techniques
As the old proverb goes ‘the master of woodworking can create anything with wood’, and as woodworkers, it’s important to have all the advanced woodworking techniques at our disposal.
So, let’s take a look at the top 5 advanced woodworking techniques that every woodworker should know.
Do you want to make an impressive dovetail joint? Well, you’ll need to master the art of making dovetail joints, which is a very difficult skill to acquire. However, the good news is that once you’ve mastered it, you can show off your impressive work to the world. To start off, you’ll first need to learn the correct angles and measurements and slowly practice until you get it right.
Learn the Tenon and Mortise joint technique if you want to join wooden pieces together smoothly. All you need to do is cut some mortises and tenons (protruding pieces of wood) and fit them together – Voila! You’ll be amazed at how smooth and sturdy the joints are.
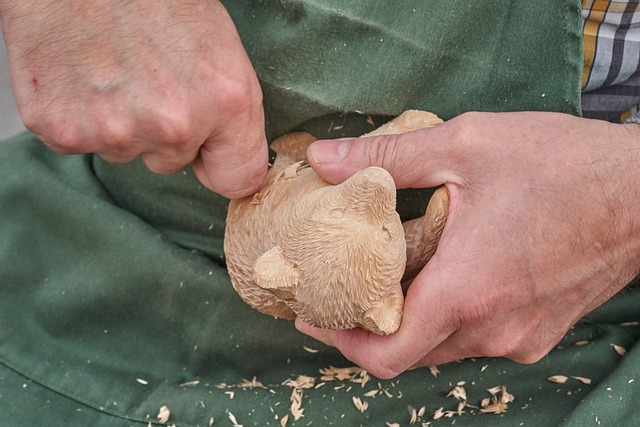
Have you always wanted to make something more creative? Give inlay and carving techniques a try! This technique is great for creating intricate designs with wood. There are several different tools available for doing inlay and carving, and all you have to do is choose the one that suits your needs and get started.
The professional look of your projects can be improved significantly with moldings and shapes. Moldings and shapes allow you to easily create unique shapes for your projects, and all you need is a saw and router. Just cut the pieces and use a router to create beautiful edges and curves.
Finally, don’t forget to learn how to make the perfect finish. Staining and finishing wood can elevate a project from mediocre to exceptional. You’ll need to have the right tools and materials, and practice on some scrap wood until you get the perfect finish.
These are just some of the advanced woodworking techniques that every woodworker should know. So, if you want to level up your woodworking game, it’s time to start mastering these techniques!
Learn How to Create a Dovetail Joint
Ahhhh the dovetail joint. Nothing quite says, “Look what I can do with my wooden masterpiece” quite like it! It’s a traditional favorite of woodworking enthusiasts everywhere, and mastering the skill of creating it is something that all woodworkers should set as a goal.
Now, I’m not gonna lie: it takes some practice to get this one just right. Learning how to create a perfectly crafted dovetail joint is a part of woodworking that everyone should spend some time on. Fortunately, there’s some simple steps to get you ready for this challenge.
First and foremost, you’re gonna need to have the right tools for the job. You’ll need a dovetail saw, a chisel, some clamps and a marking knife. You’ll also need some patience, as the dovetail joint isn’t always the quickest to do.
The technique for making a dovetail joint is actually pretty straightforward. First, you’ll need to cut the both boards you wish to join into the appropriate shape – usually rectangular, with the walls joined by a bevel at an angle. Now it’s time to use your marking knife to mark the two ends of the boards, making sure that they line up parallel along their length.
Next, you’ll use your saw to cut both the tail and the pin – the distinctive angles that make up the dovetail joint. Make sure the angles are shaped properly, as they must fit together perfectly in order for the joint to be secure.
Once that’s done, you can use your chisel to pare the edges of the boards for a clean fit. Test the fit before continuing, as it’s always easier to adjust the fit than have to redo the joint.
Finally, apply some wood glue and clamp the boards together, making sure you add enough pressure to remove any excess glue. Then allow the glue to dry, and the dovetail joint is complete!
It is a bit of an art form to make a perfect dovetail joint, so don’t get discouraged if it doesn’t come naturally. Keep practicing and you’ll be Dovetail Dave in no time! There’s no better feeling than standing back and admiring a unique dovetail joint you’ve just created. Give it a try and make that woodworking masterpiece a reality!
Learn How to Make Tenon and Mortise Joints
Hey everyone! When it comes to woodworking, learning how to make tenon and mortise joints is an essential skill every woodworker should possess. Tenon and mortise joints are also known as “interlocking” joints and are an ideal form of joinery for joining two pieces of wood together.
The tenon is a piece of wood that is attached to the end of one piece of wood and fits into the end of the other piece, forming a solid and secure joint. The mortise joint is the opposite by having a small hole cut into the end of one piece of wood so that the tenon can fit snugly into it.
The first step to making a tenon and mortise joint is to accurately measure the dimensions of the tenon. You have to use a handsaw or a circular saw to cut the shape of the tenon out of the end of the wood piece. Next you will use a chisel to clean up the edges and make them smooth.
Then you’ll need to create the mortise joint. To do this, measure the opposite end of the wood and make sure it corresponds to the size of the tenon. You’ll then use a drill with the appropriate size bit to make a hole for the tenon to fit into. Once you’ve created the hole, use a chisel to clean up the edges.
The last step is to insert the tenon into the mortise joint. Since the tenon and mortise need to fit together perfectly, you may need to adjust the size of either piece to get the perfect fit. Once everything fits snuggly, you can use a hammer to tap the pieces together and secure them.
Making a tenon and mortise joint takes time and practice, but the results are worth it! If you learn how to make these joints, you’ll be able to build sturdy, secure furniture, and other woodworking projects. Who knows, maybe soon you’ll be making some of my famous chairs!
Learn How to Do Inlay and Carving Techniques
Hey there, woodworkers! Welcome me, your woodworking mentor – to teach you about all the incredible inlay and carving techniques. Now, inlaying is a fun way to create stunning pieces of furniture, but you need the right tools and knowledge to make your masterpieces.
To get started, you’ll need a fret saw, chisels, and sharpening stones. Now, the fret saw is a very important tool because it allows you to make precise cuts in the wood. You’ll also need various chisels and sharpening stones because they will help to sharpen the edges and keep them precise.
Also, when it comes to inlaying, you’ll need to know the different types of inlay materials to use. You have the option of using veneers, laminates, and different types of wood inlays. Each type of material has its own unique characteristics and will affect the finished look. For example, veneers are much finer than most other materials and can create high-end details, such as intricate designs.
Once you’ve chosen your materials, it’s time to start carving and cutting. You’ll need to use a variety of cutting tools, such as a saw, chisel, router, file, and sandpaper. It’s important to know the different types of chisels so you know when to use each one. You also need to create precise lines when cutting the wood in order to get a smooth and even finish.
Finally, you have to know how to finish your inlaid piece. You can stain, paint, or varnish the piece and seal it with a polyurethane finish. This will give it more protection and will create a lasting finish.
So, there you have it! To be successful in woodworking and create beautiful pieces you must master the art of inlay and carving. Keep practicing and soon you’ll be creating stunning furniture and décor to show off to your friends! All right, now let’s get to work!
Learn How to Make Moldings and Shapes
If learning how to make moldings and shapes seems intimidating, never fear! It’s actually pretty easy once you know what you’re doing. Let’s start with the basics. You’ll need to first decide what type of molding is right for your project. You’ll find a vast array of options out there, including crown molding, baseboards and chair railings. Once you’ve made your selection, you’ll begin to shape and cut the molding. Now here’s the secret: using a miter box makes the job easier and helps guarantee accurate miter cuts.
A miter saw is also an option, particularly if you’ll be working with larger and longer pieces of molding. With this saw, the blade and shoe can both flip and bevel, so you can miter your molding and then bevel the edges and cut out notches if needed. Moving along, the next step is to measure, mark and add a stoppage strip so you’ll get a tight and secure fit. Make sure to mark the wall correctly so that your moldings look level when you attach them. You don’t want any gaps, so take your time and check your measurements twice.
When it comes to cutting around windows, doorways and other areas, use a coping saw and practice on scrap wood first. That way, when it comes time to making the cut in the actual molding, you’ll feel like an old pro. Now it’s time to glue, predrill and then use finish nails to attach the moldings to the walls. I suggest that you cover your newly-installed moldings with plastic wrap so you don’t accidentally get joint compound, paint or other materials on them.
Finally, fill in the nail holes or cracks with appropriate putty and, if you want, sand away rough spots and paint the moldings with a glossy or semi-gloss paint. See, wasn’t that easy? Now you’re a molding and shape expert! Just imagine what you can create!