How To Make A Perfect Double Dovetail Joint For Your Woodworking Project
Hey there and welcome to my tutorial on how to make a perfect double dovetail joint for your woodworking project! If you’re like me, you love doing your own woodworking projects — you probably get a thrill from creating something with your own two hands. I’m about to show you how to get that perfect double dovetail joint for whatever woodworking project you have in mind.
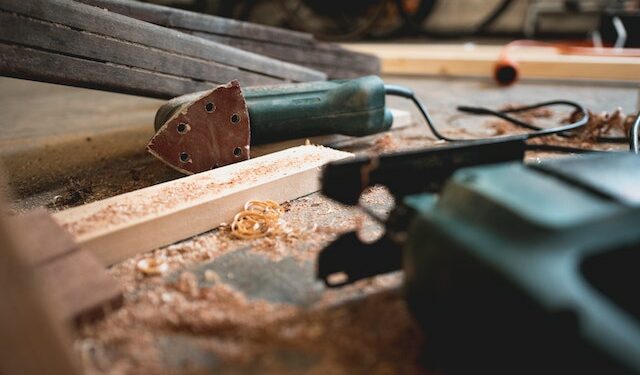
First things first, you’re going to need to gather your materials. Depending on the project, you may need some of the following: wood, chisels, sharpening stones, dovetail saw, glue, clamps, a mallet, and maybe some sandpaper. Take your time and make sure you have everything you need — because you know what they say: Measure twice, cut once!
Once you have all your tools, it’s time to cut your tail boards and pins. You’ll want to measure and mark the boards, then use your dovetail saw (or chisel) to make the cuts — be sure to keep the angles of the cut exactly on the mark. This will require a steady hand and plenty of patience. If you don’t want to mess up, take your time and you’ll get that perfect double dovetail joint in no time.
Once you’ve cut your pieces, it’s time to secure the tail boards. To do this, you’ll use your clamps and your glue. Put the pieces together and use the clamps to apply pressure — you want to make sure everything is tightly secured. Let the glue dry for a few minutes, then move on to the next step.
Now, it’s time to fit the pins. Make sure everything is lined up exactly as it should be — this part requires a steady hand and patience! If you find any gaps, you can use a wooden mallet to tap the pieces into place — this will ensure a snug fit without risking damage to the pieces.
Once everything is fitted together, you’re almost done! The next step is to apply the glue and secure your double dovetail joint. Put the pieces together and use the clamps to ensure everything is glued together. Let the glue dry, then you are ready to enjoy your project!
Well, there you have it! You just learned how to make a perfect double dovetail joint for your woodworking project. With the right materials and some practice, you’ll be making double dovetail joints like a pro in no time. So go on, create something beautiful!
Gather Materials

Ah, the most exciting step of any project – gathering materials! No matter the project, it always begins with a trip to the hardware store. It’s where you get to scope out all the cool stuff and dream up the projects you can build with it!
When it comes to making a perfect double dovetail joint for your woodworking project, you’ll need some essentials before you can get started. Of course you’ll need wood for your project, but there are a few other materials to pick up as well. First up is a high quality chisel set. A chisel set will come with a few different sizes so you can customize your joint to the size you need.
You’ll also need a saw for cutting the wood. A dovetail saw is perfect for perfectly cutting the tail boards. If you don’t have a dovetail saw, you can use a regular saw, just make sure it’s very fine and sharp. A good quality saw blade will ensure clean and crisp cuts.
You’ll also need a ruler and pencil to help you make accurate measurements. If you want to get exact measurements, it’s best to use a combination square or protractor. This will help you to measure out the angles and depths of your boards.
Finally, be sure to get some sandpaper or sanding blocks. You’ll need to sand the boards and pins down to get the perfect joint. You may also want to pick up some glue to help secure the boards together.
So there you have it, the materials you’ll need to make a perfect double dovetail joint for your woodworking project. Make sure to double check your measurements, cut your boards, and finally, don’t forget to enjoy the fruits of your labor.
Measure Twice, Cut Once
Ugh, if I learned just one thing in woodworking class it’s measure twice, cut once! This sounds easy enough but I have definitely cut too many pieces of wood to count. I mean, it’s a real shame when you put in all that hard work and end up with a piece that doesn’t fit.
Let’s make sure that doesn’t happen with your double dovetail joint. First and foremost, get yourself a good tape measure and something to mark the wood with. The last thing you want to do is cut the wrong length. Take your time and measure along the full length of each piece before you mark them.
Get a couple clamps as well, to keep everything in place. When you’re sure of the length of the pieces, mark the cut line and take a deep breath because you’ve gotta make the most accurate cut. Now here comes a point about saws that you need to remember.
Crosscut saws are the most ideal choice for this type of joint because they cut straight and the blade has fewer teeth making the cut much smoother. Now if your blade is dull, discard it and buy yourself a new one before you start. Just make sure that it’s installed properly and tightens up firmly.
Put on some safety glasses and ear protection, no need to risk an accident or going deaf! Hold the wood firmly and use a light pressure as you guide the blade through. Go slowly and make sure that your cut is straight.
After you cut each piece, don’t move on just yet. This is the perfect time to double check the length. Compare each piece with a caliper and adjust the length if needed. Use a chisel to clean up any saw marks, and you are ready to move on to step 3!
Cut Your Tail Boards and Pins

In Step 3 of How to Make a Perfect Double Dovetail Joint for You Woodworking Project, it’s time to start cutting. Now you wanna be sure you make all your cuts carefully, because in this project, precision is the name of the game!
Before you start cutting, make sure you have the right instruments at hand. You’ll need a high-quality saw that’s specifically designed for woodworking projects; an undercut saw with a long blade will do the trick. You’ll also need a marking knife to help identify and label the parts as you make your cuts.
Now, let’s start cutting. To make your dovetail joint, you’ll cut both tail boards and the pins. To do this, start by laying out the parts on a flat surface. The tail boards must be at a 90-degree angle from each other, and the pins should be at a 45-degree angle. Now take your saw and cut along the lines you marked with your knife. Make sure you cut gently and evenly; don’t rush your work!
With your tail boards and pins cut, you’re ready to move on to the next step. Here, you’ll take your tail boards and secure them to the woodworking project. Now, if you’re feeling a bit naughty, now is the time to show off your creative flair — feel free to design your joints how ever you like!
And that’s it for Step 3 of How to Make a Perfect Double Dovetail Joint for You Woodworking Project. As long as you remember to measure carefully and cut slowly and evenly, you should have no trouble crafting a perfect dovetail joint. Now, onto Step 4!
Secure the Tail Boards
Now that you’ve measured twice and cut once, stepped up your safety game, and cut those tail boards and pins, it’s time to move on to the next step: securing the tail boards. Don’t let the name trip you up, this is actually one of the easier steps of the joint-making process.
You have the option of two different ways to secure those tail boards. You can either use a hammer, hammering each end to secure the board firmly in place, or you can use glues and clamps.
If you feel like you’re up for an All-American-style hammering session, grab yourself a fine finish hammer and push out those pins. When hammering, a good tip is to stand the board upright so you have a better view of what you are really doing. Now, let that carpenter inside of you take over, and nail it!
But if hammering isn’t your style, don’t worry, you have other options. You can also get the job done with wood glue and a clamp. After applying the glue, hold one end of the board to the tail with your finger tips, and then secure it with a clamp. If you’re using a glue that takes a while to set, make sure you leave the clamp on for at least an hour before you move on with assembly. Be careful not to get too impatient though! If you rush the process, you risk weakening the joint and ultimately making the dovetail less than perfect.
So now you know two ways to secure the tail boards during your project. Hammering might be faster, but if you can manage your time, the glue and clamp technique is sure to make for a superior finish. Whichever way you choose, don’t forget to be patient and take the time to get it perfect. You don’t want to be like Prince Akeem in Coming to America when he found himself standing in the exact same place even after jumping off a tower.
By following these steps, you will make sure that your tail boards are firmly secured and that you can create the perfect dovetail joint for your woodworking project. Sure, it takes a bit longer and requires extra patience, but that’s what separates the Tracey Edmonds Joint-Masters from the ordinary weekend woodworkers.
Fit the Pins
Oh yeah, here we go! Time for step five, the big time, essential for getting your Dovetail Joint picture perfect: fitting the pins.
Now, there are a few different techniques, but I’m gonna keep it simple so that even a rookie like you can do this. First thing’s first, gather your tools: a chisel and a mallet for strikes. Now it’s time for the fitting part:
Take your first pin and place it end-first into the tail gap. Tap the very edge of one side of the pin with the mallet and chisel. You want to make sure that the top of the adjoining tail is flush with the pin edge. Then, move your chisel and mallet around the entire circumference of the pin to check its fit. When it’s snug, you can move on to the other side.
Shifting to the other side of the joint, you should be able to slide the second pin right into place without much trouble; if you can slide it easily into the space, great! The key here is to get everything snug, but without it being overly loose or being pinched too tight.
Now, this isn’t rocket science, so just continue testing the fit of the pins around the joint until everything’s nice and snug. You don’t want too much wiggle room, but you don’t want the pins to be so snug that you can’t move them around.
When you’re satisfied with the fit, give everything one last tap, and you should be golden! Now you can assemble the joint and revel in the masterpiece that you just crafted. Pretty amazing, huh? So stand back, admire your work, and get ready to show it off. You’ve earned it!
Assemble and Enjoy
You’ve done it now! All the careful measuring and precise cutting has paid off–you’re finally ready to assemble your perfect double dovetail joint. This is definitely a thrilling moment–you’ve achieved success! But don’t get too complacent yet, no…it’s time to check for the final accuracy of your work.
Take a piece of scrap wood in the same type of wood used in the joint and gently tap it against the joint. If it fits snuggly, that’s a sign of success. If there are any noticeable gaps or spaces, that’s a sign you need to go back and tweak your joint.
Once your joint passes this test, it’s time to revel in your craftsmanship! Put the two pieces together and admire the beautiful shape of the joint. It’s so perfect, you could almost look into it like a reflection on a still pond.
Congratulations! You’ve just made a perfect double dovetail joint. It’s time to show off your handiwork. Show off your project to prove that you’ve mastered a difficult woodworking skill.
To really put the nice touches on your project, make sure to sand down any edges and corners. Invest in a good-quality finish to protect the joint from moisture and wear, as well as bring out its natural beauty.
Now… no matter what kind of project you’re going to use this joint for–a desk, a box, a table, or anything else–you can be sure that it will be a perfect fit thanks to your hard work and dedication.
No matter what kind of woodworker you are–a beginner, amateur, or professional–you now have a skill that can be used to make beautiful projects. As you become more experienced with your craft, you’ll find that double dovetail joints can be used in almost any project. And better yet, the more you practice, the better you’ll get.
As you go on to create more furniture and projects with double dovetail joints, you’ll think back to that very first double dovetail joint fondly. It’s a momentous occasion, a certificate of journeyman woodworking in your pocket. You’ve become a master of the craft! Now go forth, and enjoy the fruits of your labor!