How To Make A Perfect Dado Joint For Your Woodworking Project
Do you wanna know what makes a woodworking project really stand out? The secret’s in the dado joint! What’s that, you say do you want to know how to make a perfect dado joint for your woodworking project? It’s a joint used to join two pieces of wood together – and it’s gonna look awesome once you master it. Here’s your guide to making a perfect dado joint for your woodworking project so you can shake up your carpentry game and make something lasting.
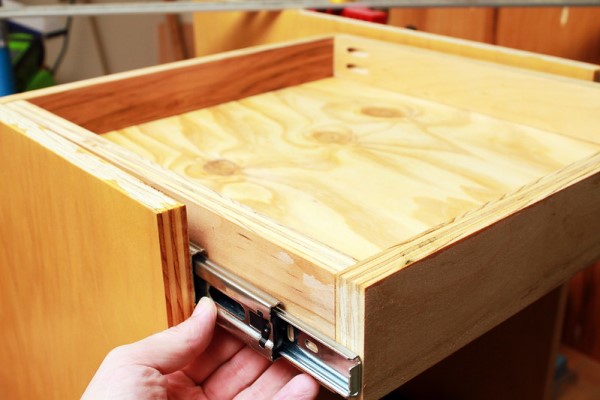
First things first – what is a dado joint? It’s essentially two pieces of wood that are joined together to form a right angle. The most common way of creating a dado joint is by cutting grooves in the wood and then “stacking” the pieces together. It’s a pretty robust jointing technique, so it’s perfect for furniture, cabinetry, and all sorts of other projects.
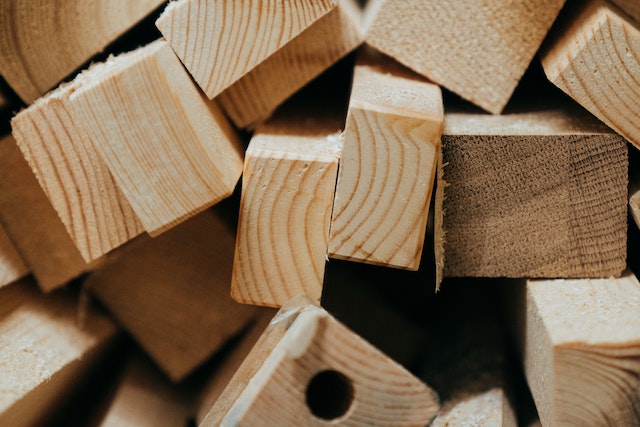
Alright, now that you know what it is, let’s talk about what you need for dado jointing. You’ll need a long rail, a dado bit, a round-over bit, and a backing board to cut the grooves into. You’ll also need some clamps to hold the pieces together when you join them.
Now that you’ve got your materials, let’s move on to the steps for making a dado joint. Here we go!
Step One: Cut the Grooves. Use the dado bit to cut two parallel grooves into the long rail at right angles. The distance between the two grooves should be the same as the thickness of the backing board. Don’t forget to use the round-over bit afterwards to smooth out any rough edges.
Step Two: Join It Together. Clamp the backing board to the rail and align the grooves. Secure the joint with wood glue and a few finishing nails.
Step Three: Fitting the Joint. To check if your joint is fitting correctly, place the two pieces onto either end of the backing board. If it’s a tight fit, you’re good to go.
Finally, here are a few tips and tricks for ensuring that your dado joint is as perfect as possible.
Tip One: Keep the Wood Flat. As you’re drilling your grooves, make sure you keep the wood nice and flat – otherwise, you won’t get the right angles.
Tip Two: Use a Guide Block. If you’re having trouble keeping your drill in place, try using a guide block to keep it steady.
Tip Three: Use Light Pressure. Apply light but consistent pressure to the drill when you’re cutting. This will help keep you in control of the operation.
Tip Four: Sand the Joint. After you’ve drilled the grooves, sand down the area using a fine grit sandpaper. This will further smooth out the joint and make it look really neat.
Tip Five: Apply an Exterior Finish. No matter what type of finish you’re using, make sure you apply it to the outside of the joint. It’ll help protect it from moisture and other damage.
There you have it! All the advice you need to make the perfect dado joint for your next woodworking project. So get out there and start working on it – and the next time you show off your carpentry skills, make sure to tell everyone where you got your dado jointing advice – from Eddie Murphy!
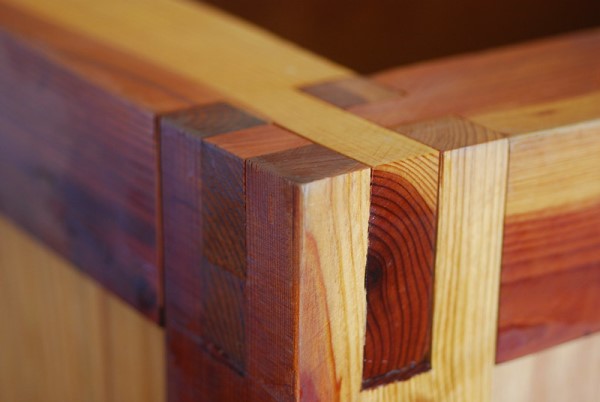
What is a Dado Joint?
Ah man, so you’re trying to make a perfect dado joint? Well, first thing’s first, you’re gonna need to know what a dado joint is and why it’s so important.
Let me tell you, my friend, a dado joint is kind of like a hug between two pieces of wood. Unlike a butt joint, which uses glue and maybe a few nails or a screw, a dado joint has grooves cut into it, so it’s a bit more secure. The grooves also make it a lot easier to put your woodworking project together.
See, a dado joint is basically three-parts. The first is the groove, which is basically a shallow hole, made in one piece of wood. The second part is the tab, which is like the fingernail of the joint. It fits into the grooves. And finally, the third part is the tenon, which is the shoulder of the joint and locks everything in place.
And when it’s all said and done, you’ve got yourself a tight, sturdy joint with very minimal effort and no glue required.
But before you can get your dado joint looking perfect, you’ll need to get the right tools and materials. Keep reading and I’ll tell you what you’ll need and how to get started.
Materials Needed for Dado Joint
Well, if you want a perfect dado joint for your woodworking project, you’re gonna need the right materials! What kind of materials we talkin’ about here? Let me tell ya. First, you’re gonna need a fingertip or dado saw, along with clamps to hold things together, masking or painter’s tape, a square, and some wood glue.
You’re also gonna need a chisel, a router, a set of chisels, and some sandpaper. But that’s just the beginning. If you’re aiming for a dado joint that’s extra special, you’re gonna need more specialized materials, like plywood, doweling, shims, drill bits, and maybe even some kind of special jig.
Speaking of jigs, if you want to avoid mistakes and get this joint just right, you should get familiar with a jig saw or a router jig. Those two tools will help you perfectly align your pieces and save a whole lot of time in the long run. So, make sure you have everything in place before you start, since you don’t want to have to stop in the middle and run to the store.
Of course, you can always change up your materials list depending on the joint you’re building and the complexity of the woodworking project. Just keep in mind that if you’re serious about making a perfect dado joint, make sure you have everything you need before you get started!
Steps for Making a Dado Joint
Ah yeah, I’m here telling you the steps to making a dado joint, the perfect solution for all your woodworking project needs. So like, if you’re feeling creative and have a hankering to be a Jack of all trades, take a gander and listen up.
You will need a jigsaw, a marked ruler, a saw grinder and some chisels, which I’m sure you’ve got lying around your man cave. Got everything? Alright, let’s move on to the next step.
First, the cutting of the grooves. You just take that jigsaw, line it up to the lines you previously marked on the ruler, then take that saw grinder to make nice smooth and even cuts. Once you finish the cutting part, thank goodness, now onto the joining together part.
You just need to chisel the wood around the previously cut grooves and, viola! Your wood is ready to join together. Take the two pieces of wood and line up the previously cut grooves and join them together using some wood glue or nail.
Alright, you’ve finished the first two parts and it’s time to fit your joint. Make sure that the two pieces of wood line up properly and here’s a pro tip: get a small piece of sandpaper, it just gives that extra finesse and makes sure your joint is nice and snug.
And there you have it! That’s everything you need to make a dado joint. Obviously, that’s not all there is to it since there are important, key details like keeping the wood flat when cutting, using light pressure when chiseling and not overworking the joint with the sandpaper. But that’s a conversation for another day!
So hey, thanks for taking the time to listen, maybe the next time your woodworking project comes around you’ll know that much more about making the perfect dado joint for your needs.
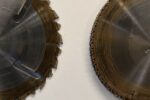
Cutting the Grooves

Hey everyone! It’s me, and I’m back with some woodworking tips and tricks. This time I’m going to show you how to make a perfect dado joint for your woodworking project.
First things first, let’s talk about what a dado joint is. It’s a kind of woodworking joint that is characterized by a bunch of rectangular cuts made in the edges of two boards. When the two boards are put together, the end result is a joint that is incredibly strong.
Now that you know what a dado joint is, let’s talk about the materials you’ll need to make one. You’ll need a saw, a router and some clamps. If you don’t have a router, you can use a drill press to make the cuts. You’ll also need some extra wood to make the filler pieces.
Now that you’ve got all your materials ready, it’s time to start cutting the grooves. Start by measuring the length of the boards you’ll be using for your dado joint. Use the saw to cut grooves in the edge of the boards on both ends. The grooves should be the same width and depth on both boards.
Now that you’ve cut the grooves, you’ll need to make sure the edges fit flush. If the edges don’t line up perfectly, you’ll need to use a router or a drill press to widen the grooves. This will help ensure that the joint fits perfectly when you join the two pieces of wood together.
That’s it for cutting the grooves. Be sure to use the router or drill press with light pressure, so that you don’t damage the quality of the wood. As long as you take your time, you should have perfectly cut grooves that will make a strong and secure dado joint.
Now that you’ve got that down, it’s time to join the two pieces together. Stay tuned, and I’ll show you how to do that next.
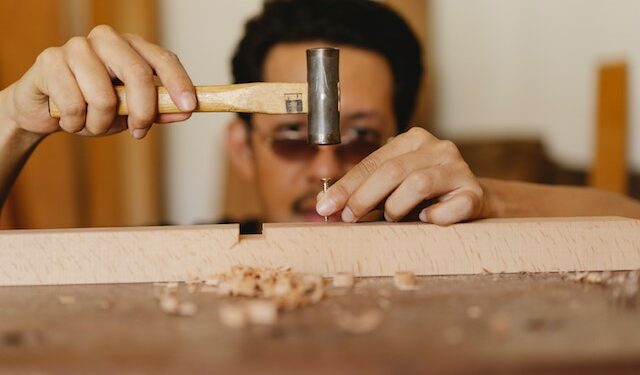
Joining It Together
Well, here we are. You’re about to join your wood pieces together for that woodworking project of yours. You’ve prepared the pieces with the right material, cut the grooves, and fit the joint. Now, this is where the magic happens, friends!
To join the pieces together, start by aligning one of the pieces with an end of the grooves. Then lower the piece into the grooved boards. Make sure you secure that piece in place with a couple of clamps.
Time to grab the glue. Now, you don’t want to drown your joints in a vat of glue, so be sure to just use a thin layer. Once you’ve glopped the glue on, spread it around the groove and dowel with a damp cloth. You don’t want all the glue to get on the fingers of your woodworking gloves. Trust me, learned that lesson the hard way.
Now, take the other piece and repeat the same steps of lining it up with the grooves and lowering it into place. Secure in place with a few more clamps.
After you have both pieces in place and secure, grab a mallet and gently tap the pieces together until the dowels fit nicely into the grooves. This action should be slow and steady. Don’t be going crazy up in here. Don’t want no broken wood pieces now. That’s just a waste of material.
And that’s it, you’ve officially joined two pieces of wood together! Look at you go. You just successfully made a dado joint! Give yourself a pat on the back.
Now, before you get too ahead of yourself, remember to check the joints afterwards. You’ll want to make sure the joint is tight, otherwise you’ll have to repeat the steps or try another joint.
Fitting the Joint
Ah, fitting the dado joint! This is where the money is! Now that you’ve got the grooves cut and the pieces of wood joined together with glue, it’s time to put it to the test and see if it fits!
The key here is to remember to use light pressure as you fit the pieces together. You don’t want to force it too much or you could damage the joint. Have the patience of a saint, and it’ll come together.
Now that you got ’em together, it should look like you’ve got one sharp-lookin’ joint there! Next, you want to make sure you sand down any rough edges so that everything lines up nice and smooth. Even if you think it looks pretty dang perfect already, trust me, you don’t want to skip this part. It’ll work out better in the long run.
After you’re done sanding and all the pieces are fallin’ right where they oughta, the last step is to apply an exterior finish. Whether it’s varnish, tung oil, or paint, it’ll do wonders in protecting your woodworkin’ masterpiece.
Now that you’re done, you can stand back and admire your far-than-perfect dado joint. Pat yourself on the back for me, okay? You earned it.
Tips and Tricks for Perfect Dado Joint
Hey everyone. We’re continuing our rundown of how to make the perfect dado joint for your woodworking project. So far, we’ve gone over what a dado joint is and the materials you’ll need. Now let’s get down to the tips and tricks for success.
First, make sure you keep the wood flat while working with it. But don’t get too close—you don’t want to end up with a dado joint that doesn’t quite fit. Having a flat surface is seminal for creating a successful dado joint.
Second, use a guide block to make sure the wood gets cut in the right places. This helps make sure the result is perfect, with no ill effects.
Third, use light pressure when cutting. This way, you won’t run the risk of cutting too deep, which could disrupt your dado joint.
Fourth, sand the entire joint thoroughly. This way, it looks good and fits in perfectly with the rest of your work.
Fifth and finally, apply an exterior finish to the dado joint. This will ensure it looks beautiful and adds a professional touch to the project.
So there you have it—all the tips and tricks for a perfect dado joint. Now you have the info to kickstart your project and make it look perfect. From all of us at the woodworking department, have fun and good luck!
Keep the Wood Flat
When it comes to making a perfect dado joint, one of the most important steps is to make sure you keep your wood as flat as possible throughout the whole process. If it’s not kept flat, you can end up with gaps or misaligned joints. Now, you may be tempted to use clamps to keep it flat, but that won’t help if the surface isn’t the same on the inside and outside. So, what should you do? Enter the trusty old straight edge.
You’ll want to be sure to measure twice and cut only once, so make sure you measure the wood and mark it to get as close as possible to your desired measurement. Then, take your straight edge and place it along the wood. Lift the edge a little bit and sweep it across the whole surface. If the surface is flat, the straight edge will slide without any noticeable bumps. However, if it’s not flat, you’ll feel some bumps as the edge moves.
If you do find any bumps, it’s time for you to use a hand plane or an orbital sander to flatten out the surface. When you do, start with one side first, make sure it’s flat, then move onto the other side and make sure it’s just as flat. Don’t forget to use a sanding block along the edges too. If the wood is the same on the inside and outside after you’re done, you can be sure that the wood is flat and ready for the next step.
And that’s how you keep the wood flat in order to make a perfect dado joint. All it takes is a straight edge and a bit of patience. But, trust me, if you take your time and follow this advice, your finished product will be a work of art that can be admired for years to come.
Use a Guide Block
When it comes to making a perfect dado joint, precision is key. But how are you supposed to be precise if you’re using a chisel, saw or other tools?
Enter the guide block!
Think of the guide block as your favorite spongebob sidekick, Patrick Star, who was always there to support you. The guide block is like Patrick, but for your dado joint. He’ll be your ally urging you on to success every step of the way.
Guide blocks make it easier for you to create dado joints with precision. Ultimately, let’s get one thing straight—they’ll be your best friend when trying to make a dado joint perfect.
So, let’s get into the nitty gritty of how to use the guide block.
First, you want to mount the guide block to your woodworking bench. The goal is to make sure the block is firmly mounted and won’t move around or slip at all. When it’s firmly attached, it’ll provide a stable surface for you to work with.
Be sure to check the guide block’s level as you mount it. That way, it won’t wobble or move as you saw, chisel or drill into the wood. It’s best to use a spirit level to check if you can’t get it perfectly straight.
Next, position your wood on the guide block. Make sure the area you’re about to start sawing or chiseling is lined up perfectly so the joint will turn out perfectly.
When it’s properly aligned, clamp it down. This will ensure that it won’t slip or move around as you make the joint.
Now it’s time to start sawing or chiseling away. As always, take your time while doing this. You want to be sure to make a clean cut without any mistakes. The guide block will allow you to make perfect and precise cuts every time.
When you’ve finished making the joint, take a look at it. Does it look perfectly aligned? If not, then it’s time to get out the guide block and start again.
Always remember that the key to making a perfect dado joint is precision. With the help of the friendly little guide block, you’ll be able to achieve that level of precision and make the perfect dado joint. It may take some practice, but with the help of your trusty assistant, anything is possible!
Use Light Pressure
Alright, y’all, listen up. When it comes to making good dado joints for your woodworking project, there’s one rule that can’t go unchecked: always use light pressure! For real, don’t forget, this is wood here, not sheet metal!
Put the force, in a word, to easy. You don’t need to be applying an Olympic hammer thrower’s amount of force when you’re making cuts or putting the joint together. The right amount of pressure is always the lower amount; you don’t need to be using your full strength here, just the touch of a loving sensitive woodworker.
This means when you’re using your tools, you want to make sure you keep the blades and bits tensioned lightly and balanced, and don’t be cranking ‘em like you got a beef with the wood. Otherwise, you might wind up with cuts that either don’t go entirely through the wood, or cut too deep, which can put the whole project in danger.
I can’t stress enough how important this step is for this project. With light pressure, you don’t want to be scraping the wood away, but with just the right amount you can get smooth surfaces that look great in whatever project you’re making. Nobody wants a mismatched joint or an uneven cut.
So, light pressure! Like, don’t forget, otherwise you’ll just have a disaster on your hands. And remember, this is wood you’re working with, so it’s pretty fragile. To get the perfect dado joint, light as a feather!”
Sand the Joint
Ahhh, sanding. Sanding the dado joint is a critical step in making sure it ultimately fits correctly and creates that perfect seal.
As every woodworker knows, sanding is also a practice in patience. And as long as you take it slow and steady, you’ll get that desired finish.
So, to ensure that perfect dado joint, you should definitely take this step seriously. Take the sandpaper, get it nice and loose around your hands, and start sanding those joints.
You should be using a medium-grit sandpaper, at least one grade higher than what you used to cut the grooves. As you sand, you’ll want to sand in the direction of the grain. This will create a uniform finish and help to eliminate any bumps or lumps you may have from earlier cutting.
As you sand, watch for high and low spots. If you see any, be sure to go back and do some light reshaping.
But remember, the goal here is to create a uniform finish and make sure that the edges of the wood sit flush against each other.
You don’t want to take off too much material. You want to keep that pristine finish, while achieving a smooth even surface.
So, move your sandpaper in a straight line and don’t rush it. This is not something you want to hurry through! Take your time and make sure every inch is as smooth as glass.
When you start getting near the edges, use a lighter sandpaper. This will help ensure you don’t take off too much material and risk ruining the fit.
As you wrap up your sanding process, it never hurts to take a piece of clean, fine-grit sandpaper and give each corner a little extra love. This will finish the piece off nicely and make sure the joint is as sharp as possible when it’s time to move on to the finishing stage.
Once you’ve finished everything up, you should have a beautiful dado joint ready to go. The edges should look perfect, the angles should be aligned, and the fit should be ready for whatever finish you plan on using.
So, there you have it! Sanding a dado joint is the last step in creating a perfect piece of furniture. Use this advice and you’ll be able to make the best dado joint you’ve ever seen. Go get sanding, woodworker!
Apply an Exterior Finish
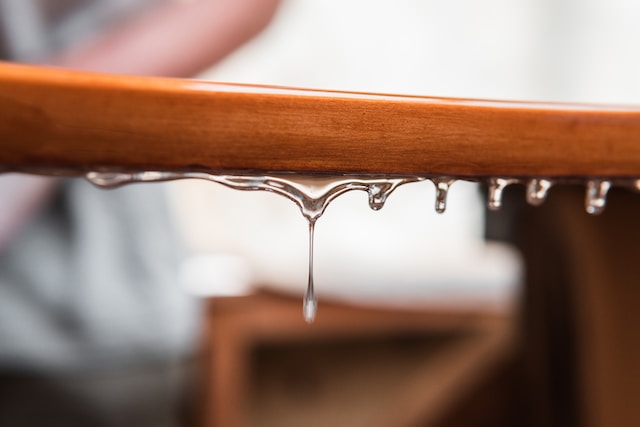
Hey, y’all! Applying an exterior finish to your dado joint is a vital step to ensure your woodworking project lasts. It’ll protect your beautiful work against the ravages of time! Who knows, it may even last long enough to outlast me!
To make sure your wood joint is well protected I recommend using a good, water-based sealer or a polyurethane top coat. Make sure you pick one specifically formulated for the type of wood you’re using, otherwise you’ll be all kinds of disappointed in the result.
It’s always a good idea to begin by sanding the wood a bit before applying the sealer or top coat. Be sure to sand in the same direction as the grain so you don’t get any scratches. You want the joint to be as smooth as possible, so sanding is essential.
Apply the sealer or top coat with a brush, going with the grain for a nice even coat. You can use a synthetic brush for this too since natural bristle brushes can often leave dust and dirt in your finish.
The last step is to wait for the sealer or top coat to dry. This typically takes 24-48 hours, but read the instructions on your product to make sure you’re giving it enough time to fully set.
Once your sealer or top coat is completely dry, you’ll be the proud owner of a dado joint that’s sure to last! Apply the finish with confidence and you’ll have a slick looking woodworking project that you can be proud of. Great job!