How To Use A Saw Safely
When working with saws, it’s important to prioritize safety to prevent accidents and injuries. Whether you’re a seasoned woodworker or just starting out, knowing how to use a saw safely can make a big difference in your workshop.
In this article, we’ll cover some essential tips and best practices for using a saw safely, including selecting the right personal protective equipment, setting up your work area, and handling the saw itself. Read on to learn more about how to keep yourself safe while working with saws.
Identifying a Saw
Ah well here we are now, y’all ready to learn what kinda saws there be out there and how to tell them apart? Yeah I thought so. This can be a tricky one sometimes – maybe you see something looks like a saw, but it ain’t! Like a jigsaw, now that thing looks like a saw, right? But it ain’t a saw, it’s a jigsaw. It got its own purpose. So it’s important to know what is what, alright?
Let’s start by what types of saws be out there. Now saws can be classified into two main categories, there be Power Saws and Manual Saws. These can both do the sawing work, but each one got its own advantage. Power saws got a motor that can make that sawing action pretty fast and efficient. Manual saws on the other hand, got a slower action but you don’t need no electricity, so it can be real handy in many situations.
Now within each category you got subcategories that each got its own features and characteristics. For the Power Saws, you got the Circular Saw, the Miter Saw, the Table Saw, the Power Jigsaw and the Reciprocating Saw. For the Manual Saws, you got good old classic Hand Saw, Coping Saw, Bow Saw, Hacksaw and Hack Saw. Each one got its own purpose, so pay attention to the type of saw you be choose to do your job.
Now, power saws got a motor, so they need electricity to run. It can be handy if you got an electrical socket or a generator nearby. It’s important to pay attention to the rating of the saw. They usually be rated in Amps and the higher the better. This let you know how powerful it gonna be.
So that sums it up – never go near a saw until you know what it is and what it can do. Pick the saw you need for the job, check the rating and you good to go. Remember to keep course in mind-there’s no use up for a saw if you don’t even know how to use it! So stay safe and we’ll talk about what it takes to use the saws safely later on. Alright?
Now you be ready to face off all the saws out there, so remember what you learnt here today and you be doing fine, alright? Alright, see you at the next lesson.
Types of Saws
Ah man, it’s time to use a saw. We’ve gotta figure out what kind of saw to use for our needs. Well, let’s start by talking about the different types of saws out there.
When talking about the different types of saws, we’ve got to first talk about hand saws. Man, we’ve been using these bad boys for centuries. Nothing too fancy here, just your standard raker, crosscut, and rip saws. We usually use ’em for rough cutting and they sure are affordable. You can bring one of these to the ol’ job site too.
But, if you’re looking for something more powerful or accurate, then check out a circular saw. These bad boys have been around for a while now and they sure get the job done faster. You plug ’em in for power and you can make your straight cuts in no time. But, if you’re looking to cut curves or angles, well then this ain’t your saw.
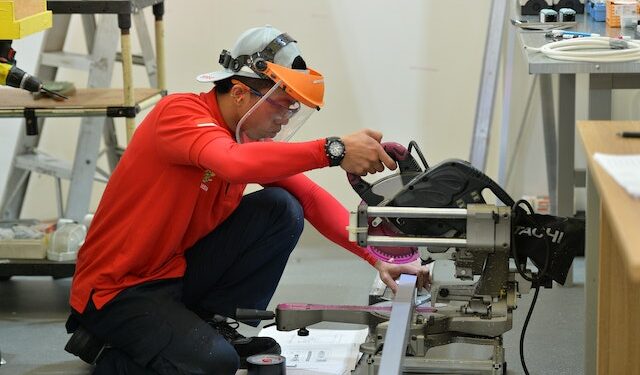
Next up is a miter saw. If you have a lot of angled cuts, then grab one of these babies. These saws will make radiused or beveled cuts really easy. Usually you can find them with a blade that swivels so you can dial in any angle you want. Plus, they don’t cost too much but be careful, they can be louder than a clown at a funeral.
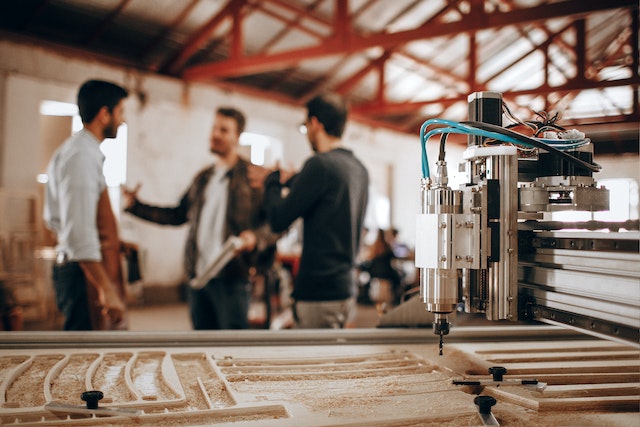
Now, if you need an even more specialized saw, then you can check out the table saw. These are usually used in workshops or factories and they can cut just about any shape you can think off. Plus, they’re praccical and can handle any type of material. But, if you don’t watch yourself, these bad boys can slice you up real fast.
And that about does it for the different types of saws. Now that we know the different saws out there, we can start thinking about what type of saw we need for our cut. So take your time and choose the best saw for ya and you’ll be done in no time.
Power vs Manual Saws
Ahh yes, the great debate when it comes to saws: Power vs Manual. Now, if you’re like me then you may be wondering “What’s the difference?” Well I’m here to tell you about it.
Manual saws are operated by hand and, as the name suggests, require manual effort, usually pushing or pulling strokes to cut through materials like wood. These saws are old-school, the dinosaurs of the saw world you might say. Some manual saws include the jigsaw, backsaw, and keyhole saws.
On the other hand, power saws are operated by electricity and usually require a more complicated setup than manual saws. These saws come with a variety of blades that make cuts possible depending on the type of saw you’re operating. Examples of power saws may include the circular saw, miter saw, jigsaw, and reciprocating saw.
Power saws are a great choice for those looking to make larger cuts in a smaller amount of time. With a power saw, you can make quick and intricate cuts. However, these saws require more skill and knowledge to operate than manual saws. Additionally, power saws are more expensive than manual saws, so make sure to consider your budget and why you need the saw before deciding which type to invest in.
Manual saws are a great choice for those doing small-scale woodworking projects. Manual saws have a smaller price tag than power saws and require far less setup. Though manual saws typically take longer than power saws, they can achieve similar results with some extra patience and effort.
In the end, the decision of which saw to choose comes down to your skill level, budget, and why you need the saw in the first place. Both types of saws can help you with your project but they each have their advantages and disadvantages and only you can determine which is best for your particular situation.
Dressing for Saw Use
Hey everyone, it’s your friend here. Now that you know how to identify and pick the right saw for what you’re looking to do, it’s important to dress and set up your workspace the right way.
When it comes to clothes, you don’t want nothing too baggy or loose-fitting because it can snag and get caught up on the sharp parts of your saw. Button up shirts are great, while hoodies and sweaters are not. It’s also important to wear pants or jeans, too. You don’t want wear shorts, because that saw can get hot and you don’t want to get burned.
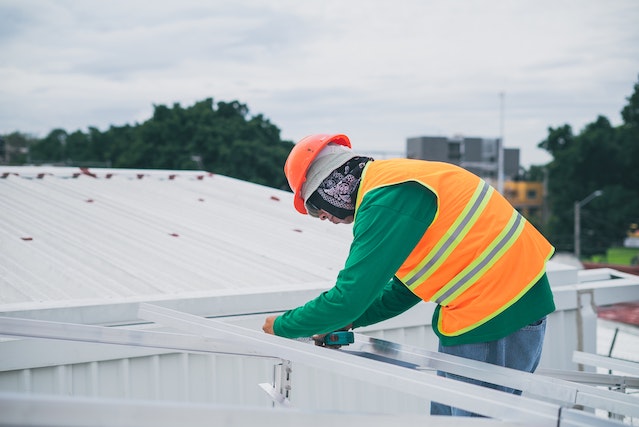
In addition to your regular clothing, there are certain pieces of protective gear that you should use when you’re sawing. Eye protection is a must. You don’t want sawdust flying in your eyes and blinding you. Plus, proper eye protection also helps you see better while handling your saw. For your ears, you may want to consider ear muffs or ear protection. Noise from the saw can be really loud, so it’s important to block out the sound.
Before you even start sawing, you should make sure that your workspace is organized and set up correctly. Make sure that there is enough lighting so you can see what you’re working on, and use sawhorses to support your cuts if necessary. This will help you make sure that you don’t accidentally saw into anything you don’t intend to.
Lastly, make sure your tools are organized, and put your saw away when you’re done using it. Don’t take any chances, and make sure your workspace is tidy and clean before you leave.
So there you have it: identify a saw, dress the right way and then set up your workspace. Now you’re ready to start sawing. Just keep in mind all of the safety tips we went over, and you’ll be all set to start sawing like a pro! See you soon!
Clothing
When preparing to get down and saw some stuff, you have to make sure you look the part. If you don’t dress for sawing success, you could be in for a world of problems.
First, you’ll want to make sure you’re wearing long-sleeved shirts and long pants. No short-sleeved shirts and no shorts – you want material covering your skin to avoid any possible sawdust rash.
And don’t think that just because you’re wearing long sleeves, you can skip the safety glasses. In fact, you should always wear safety glasses, as it’s always important to protect your peepers.
Avoid jewelry and anything that can get caught in the saw blade. If your locket or necklace catches the saw blade, it’ll be an expensive piece of jewelry you’ll be left with.
For footwear, strong shoes are the move – no open-toed sandals, flip-flops, or socks. Wear something sturdy that won’t move around, because you don’t need any surprise slips when sawing.
You won’t need any fancy garb – just something comfortable and lightweight, as too much bulk can cause distractions and make it hard to move around.
But on your head, don’t forget your hard hat. Yes, you’re going to look like an idiot with that big ol’ thing on your head, but it’s pretty important to have something protecting your skull.
Finally, make sure you bring an apron with pockets. There are tools you’ll need to grab quickly, and those pockets will come in handy.
So there you have it – the proper wear for safe sawing. Pick out your clothes and lace up your shoes, and you’ll be ready for your sawing adventure!
Protection Gear
Hey folks! When it comes to using saws, safety is key. So it’s important to always know the proper protection gear you need to go along with it. It might seem intimidating, but once you get the hang of it, it’s a piece of cake!
Before you start, you’ll want to grab some goggles and dust mask. Now you don’t have to get the full on Heath Ledger Joker mask of course, but a good dust mask is great for keeping your breathe and lungs safe from the dust and other toxins that come with saw use.
You’ll also want to make sure you have some good work gloves. This can help protect your hands if you slip while cutting, or something happens to the saw blades. Believe me, you don’t want to be one of those folks saying “Ouch! I’ll never do THAT again!”.
You’ll then want to invest in some good hearing protection. Believe me, saws can be very loud and if you don’t get some good ear protection, you will not be a happy camper after a while.
Finally, you’ll want to be sure you have a good pair of work boots to protect your feet. Getting something with steel toes or reinforced toe protection is great if you plan to use heavy or are working in a tight space.
That’s it! Now you should have everything you need to make sure you’re well protected when you fire up that saw. Yep, it’s not the most glamorous part of using saws, but it’s easily one of the most important! Go get ’em!
Setting Up a Workspace
Now that you know the type of saw you will be using, it’s time to start singing the Safety Song! Or, you know, dressing for saw use and setting up a workspace. So here’s the breakdown:
It all starts with clothing. You wouldn’t wear a three-piece suit to rock climb, so don’t wear it to use a saw either. Take off any jewelry or lose fitting clothes, roll up your long sleeves, tie back any long hair and make sure you got good shoes on to keep your paws protected.
Next, it’s time to grab some protective gear like safety glasses, a mask and earmuffs if you got em. Gotta stay safe out there! Now let’s get down to proper workspace setup.
First things first, remove any clutter in the area including obstacles and tools you ain’t gonna use. That way you won’t trip over anything and make a poor cut. Yikes. Call a friend to help hold the piece that your cutting if that’s an option here. Position your workspace so the tabletop surface is flush with your waist or lower so you can have better control.
Start the saw before you attempt any cuts and make sure your stationary to reduce the risk of slipping. If you’re still uneasy at this point, practice on scrap pieces of wood before you tackle that important job.
Well there you have it! Make sure your clothing, protective gear, and workspace are all taken cares of and you are good to get your saw singin’.
Operating the Saw
Do you want to learn how to use a saw safely? Well, it’s gonna take a little bit of skill and a little bit of knowledge. But i’m here to help break it down for you and make sure you don’t wind up like me after my latest attempt at sawing.
So, let’s talk about operating the saw; it’s important to remember a few safety procedures. Most importantly, make sure you always unplug the saw before working with it. When you’re ready, plug it in and let’s get this party started!
When it comes time to start up the saw, make sure you always hold it with both hands and keep the blade away from your body. Don’t get cocky, you don’t know what you’re doing. Oh, and never put your finger anywhere near the blade. Learn something from my mishap. If you mess up and your finger is still there, well you’ll be trying to count your fingers with your toes.
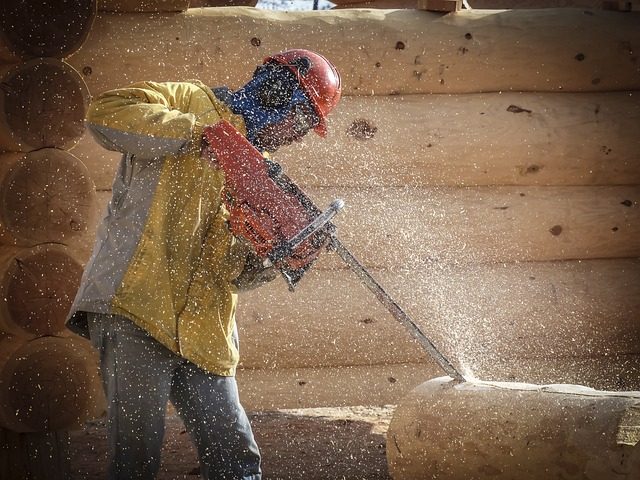
Now that you’ve got the saw safely powered up, it’s time to make some cuts. The trickiest part is learning the right technique to get the saw through your material. The majority of cuts are made with a forward motion and with the teeth pointing downwards. Whenever possible, it’s a good idea to clamp the material down to make sure the saw behaves itself. And it’s also important to note that when sawing with a power saw, you should use protective goggles to prevent debris from getting in your eyes.
When you have completed the cut, it’s time to wind down the saw. Before you unplug it, take time to inspect the blade for signs of wear or damage. Make sure you apply the brake to the saw so that the blade stops spinning when turning off the power. And, of course, never leave the saw unattended while it’s still plugged in.
There you have it, now you know how to operate the saw safely. And don’t forget to practice often, so you can become a sawing professional. Have fun, stay safe, and good luck!
Start Up Safety
When you’re about to use a saw, the first thing you’ve got to do is start it up. But it’s not quite as simple as just turning it on and starting your cut. You gotta think safety first, and there are some measures you should take to make sure your saw is in perfect working order.
First of all, check out the cord of the saw. If you’re working with an electric saw, you’ll want to make sure all the cords are in good shape and free of any frays or split ends. If they are, you’ll need to make sure the saw is correctly plugged in and the proper voltage is being applied. If it’s not, you might be in for some trouble.
Next, inspect the blade of the saw and make sure it doesn’t have any rust, chips, or broken pieces. If it’s a circular saw, you’ll want to check that the blade is secure and turned outwards so you don’t get cut.
When you’re ready to start the saw, make sure it’s in the off position so there’s no chance of it starting up on its own. A lot of people forget to check this, but trust me, you don’t want to get surprised when the saw unexpectedly powers up.
Finally, make sure the blade guard is in place and the switch is working properly. These two pieces of safety equipment are often overlooked, but your safety is paramount, so double check that the guard is sitting in its correct position.
So those are the steps you should take before powering up your saw. Just follow them, and you’ll be in a much better spot when it comes time to make your cuts. Happy sawing!
Procedures for Cuts

Now let’s go over the key procedures for making effective cuts with a saw. Be sure to pay attention and don’t be like a certain comedian, who has been known to make jokes about cutting wood with a saw (yup, that’s me).
First, you want to make sure that you are using the right type of saw for the job at hand. The type of cuts you want to make are determined by the type of saw that is best for the material. A circular saw is great for cutting sheet metal, while a jigsaw works best on wood.
Before making any cuts, check the alignment of the saw blade. Make sure it is in proper alignment and will make a straight cut. If not, adjust the blade before proceeding.
Once the saw is in proper alignment, put on your eye and ear protection. Your hearing is precious, so don’t take any chances. The noise from a saw is loud and can cause permanent damage.
Next, you have to make sure the material you are cutting is secured properly. If you don’t secure it, it can slip and you can end up with an inaccurate cut or an injury. You may want to use a clamp to hold the material in place.
Now it’s time to make the cut. With the saw blade in proper alignment, hold the saw firmly with both hands as you start the cut. Keep the saw parallel to the material you are cutting and move it along at a steady pace. Don’t rush it, take your time and make sure to support the material with your hand to minimize vibration.
Once the cut is complete, turn the saw off and wait a few seconds before lifting it away from the material. This prevents splinters from flying up and injuring you. If you have an adjustable blade, make sure to adjust it back to its starting position.
And that’s it! Your cut should now be complete. Now you can confidently move on to the next project! Just remember to always take the necessary precautions when using a saw and never assume anything. Safety is paramount when using a saw.
Finishing Cuts
Ahoy, mateys, it’s time to finish up yer long-dreaded project with a nice saw finish! After all that hard work, I’m sure you’re feelin’ quite sleepy. However, you’ll need to remain sharp and keep safety in mind when finishin’ yer cuts! Let’s cover some key points that will help you achieve a proper finish.
First things first, make sure there’s no excess power on that saw, else ye may be in for a mighty shock! Make sure ye have cut away all excess material, before settin’ sail on with the finish. Don’t forget; use gloves to protect yer hands, mateys!
When takin’ a look down the saw’s blade, make sure it is evenly cut, and there’s nothin’ that’s going to catch on yer material. Keep yer eye out for any interferences from chips, sawdust, or other sharp objects that may be nearby.
Once ya start ya sawin’ strokes, use a steady, even pressure, and swivel from side to side. Don’t prod that handle – the saw flies much better when steered and not pushed or pulled. If’n ya happen to lose control, stop yer saw and tighten the handle, then try again.
Once ya think ya have finished yer lingo, use a sandin’ block to smooth out rough edges. This will help ya achieve a clean and even finish, mateys. Now, usually this would be the end, but if ya want to add extra flair to yer finish, consider addin’ color to yer project with wood stains or finishin’ oils.
Don’t forget ta shut off yer saw completely and unplug it before stowin’ it away for the night, mateys! Give yer saw a good clean and make sure all parts are in excellent shape. Put away yer tools and workspace, lasciviously caress anything ye’ve made, and call it a night. Just because it’s a DIY project doesn’t mean it can’t be beautiful, savvy?
Follow all these steps and ye may be able to achieve a finish that’ll put ya in the same league as the Master Carpenters of the Seven Seas!~ Argh! Keep these guidelines in mind, matey and use common sense, when finishin’ yer cuts, so ye can rest peacefully, knowin’ ye’ve done a proper job from start to finish!
Maintenance
When it comes to saws, regular maintenance is a must – after all, no one wants to use a saw in less-than-optimal conditions. Here are few easy tips and tricks to keep your saw in top condition.
First and foremost – cleaning. Make sure to clean and wipe down your saw blade and machine surfaces regularly. Dirt and debris can accumulate and cause the saw to malfunction, so it’s best to keep it as clean as possible.
When it comes to storage, the best thing you can do for your saw is to keep it in a dry environment. Don’t leave it outside, and avoid storing it in damp areas.
If you notice any problems with your saw, address them immediately. If the issue seems to be something you can’t handle, call a specialist. Sometimes, the issue may not be something you can fix on your own – better to be safe than sorry!
Finally, don’t forget your blades. Many people make the mistake of not replacing the blades on their saws regularly. But having dull blades can be very dangerous, so replace them as soon as you notice that they’re getting worn down.
Remember, being safe with your saw starts with being responsible and taking the time to properly maintain it. Don’t skimp on these routine maintenance tasks and your saw will serve you well for years to come!
Cleaning
Are the blades of your saw looking a little dull? Nothing a little cleaning can’t fix! Cleaning your saw is essential for accurate cuts and a longer blade life, and it’s fairly simple to do.
First off, you’re going to want to gather your supplies: a brush, soap, oil, rags, and some sandpaper just to name a few. Now that you have your supplies ready, it’s time to get to cleaning!
Start off by removing the blade and brush away any sawdust or other debris that may have built up over time. This will help clear away anything that might have gotten lodged there, which can speed up the cleaning process.
Once the blade is clean, it’s time to give it a nice oil bath. To do this, simply put some oil on a rag and wipe down the saw blade. This will help prevent rust and keep it in good condition.
After that’s done, you can get the blade really shiny using soap and water. Give the blade a good scrub with some soap and then rinse off with water. Make sure to dry the blade well when you’re done, as water can cause rust on metal.
Finally, use some medium grit sandpaper to remove any burrs. This will smoothen out any rough edges, which will help make smoother, more accurate cuts.
Whew! You’re done with the cleaning process! Now your saw should be looking like brand new and ready for use. But don’t forget, cleaning should be a regular part of your saw-using routine to help maintain the blade’s life and accuracy. So keep those rags, brushes, and sandpaper handy for next time!
Storage
All right, so you’ve made the cuts, you’ve finished the project, and you’re ready to pack up shews and store away your saw. ‘But wait’, you may be thinking, ‘surely there’s something complicated involved when it’s time to store the saw’. WRONG!
When it’s time to store away your saw, you can do it just as easily as you can follow the steps of storing away a jelly donut (crumby AF, by the way). When you have your saw all cleaned up, all you need is someplace to put it.
Obviously, you don’t want to leave it out in the rain and the snow, so it will need to be kept indoors. Now, everyone knows that if you put a sharp object indoors, it’s a recipe for disaster. That’s why you need to think about the place you put it.
If you can, choose an area away from your work area and out of reach of children. Don’t put your saw on the floor, either. While that might be the most obvious place, you should hang it within reach, with the blade facing down.
The last thing you want is for someone to reach in your saw storage area and accidentally cut themselves. Not only would they need some first aid, but you’d also have to do some damage control to your saw storage area.
When you’re ready to start using the saw again, you’ll have to be just as careful when bringing it out of storage as you were when putting it away. So, don’t go running off with it, and make sure you’ve got everything you need to start using it before bringing it out into the open.
That’s it! We’ve made it, we’ve gotten through storage without making too much of a mess, and we can all rest easy now. With your saw securely stored away, you’ll be ready the next time you need to use it!”
Fixing Issues
When you’re working with saws, problems arise. That’s just the nature of things. You don’t have to be a master craftsman to know how to fix the issues that can come up when you’re using a saw. That’s why I’m here to tell ya’ll how to fix the most common issues.
Let’s start by talking about dull blades. It happens. Even with frequent use and maintenance, your saw blades can get dull. So what do you do? Well, it’s pretty easy to change the blade on a saw. Depending on the type of saw you’re using, you’ll either need a wrench or a screwdriver to remove the old blade and attach the new one. Make sure to always wear protective gear when you make these changes.
Let’s talk about sawdust. This can be a huge issue for some people, especially if you’re working in a small area. It might be necessary to invest in a vacuum designed specifically for sawdust. You can also just sweep it up regularly. If you’re using a miter saw, you can purchase a sawdust collector to help keep your work area clean.
Finally, let’s talk about jammed blades. This is probably the most common problem with saws. Fortunately, it’s pretty easy to fix. If the jam is due to a dull blade, you’ll need to replace it. If the jam is due to something else, you may need to remove the blade and clean it. You can also just turn off the power and use a pry bar to gently loosen the blade. Take your time and don’t force it.
So there you have it, Guide to Fixing Issues with a Saw! The key to remember is to always be careful and wear protective gear. Never force it and always replace dull blades. Good luck out there!