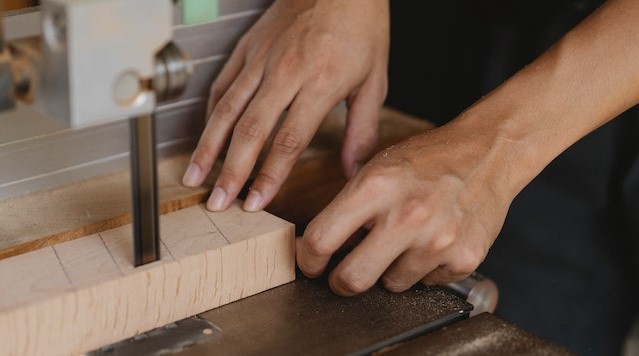
How To Make Angled Cuts With A Miter Saw

If you’re a woodworking enthusiast, you know that making angled cuts is a crucial skill to master. Whether you’re building a picture frame, a bookshelf, or a decorative trim for your home, getting those angles just right can be a challenge.
Luckily, a miter saw is the perfect tool for the job! In this blog post, we’ll be sharing our expert tips and tricks on how to make angled cuts with a miter saw, so you can say goodbye to wonky corners and uneven edges. So, dust off that saw and let’s get cutting!
Introduction to Miter Saw
So, what is a miter saw? Well, a miter saw is a tool that uses a blade with teeth, similar to a regular saw, as it cuts material with a forward and backward motion in a single cut. By following a guide, you can make accurate angled cuts with a miter saw.
What is the benefit of a miter saw? A miter saw allows you to make a wide variety of cuts quickly and accurately. For example, you can make long and short straight cuts, angle cuts, bevel cuts and miter cuts, plus more. By having a miter saw, you will save time and effort with accurate cuts. Or if you are just a beginner, you can easily learn how to make angles.
Common miter saw features include a compound miter saw which has the ability to make bevel cuts, such as tilting the saw to the left or right, as well as miter cuts, which entails angling the saw head left or right. There’s also sliding compound miter saws which offer a wider cutting range as this type of saw head moves back and forth as well as left and right. And there are also miter saw stands that provide support and stability during long cuts.
In conclusion, the miter saw allows you to make precise angled cuts with ease. Investing in one of these tools can offer you quick and easy angled results. You may find yourself quickly becoming the envy of other DIYers and professionals. So, go ahead and give it a go – you won’t regret it!
What Is A Miter Saw
Oh, man, if you’ve ever thought you had it tough, trust me, try having to make a straight cut without a miter saw. It’s no joke. I’m here to explain to you all about what a miter saw is and why you need it for all your demanding wood cutting needs.
First of all, let’s start off with the basics. A miter saw is a power tool that is used to make cuts in wood. It’s kind of like a big saw blade stuck in a bracket which can be moved back and forth to cut the wood. Sounds simple, right? Well, it should be but trust me, it is not as easy as it looks.
Basically, a miter saw is ideal for making angled cuts in lumber and molding. You can also use it to jigsaw a picture frame or cut a piece of crown molding, and it’s the ideal tool for all different types of angle and beveled cuts. You can even use a miter saw to make compound cuts, i.e. cuts with more than one angle.
Miter saws come in a variety of different sizes and shapes including 10-inch and 12-inch models, to even more powerful 16-inch and 18-inch models. No matter which size you choose, you will be amazed at the accuracy and precision that it can provide. And, most importantly, you won’t find yourself cursing at the saw after each cut!
So, now you know all about what a miter saw is, and why it is so important for your DIY endeavors. Whichever model you choose, you are sure to appreciate it for years to come! And don’t forget, always use safety goggles when using the miter saw to keep your eyes protected. OK, so enough talk, let’s get cutting!
What Is The Benefit of A Miter Saw?
When you hear the term “miter saw,” you might immediately think of a long-time comedian, and you’d be thinking of the wrong person! A miter saw is actually a type of power saw and it has some great benefits for those of us who want to make precision angled cuts.
People who want to make picture frames, trim fences, and crown molding, or build bookshelves will be happy to know about the miter saw! Making angled cuts, sometimes as small as 30 degrees and up to 50 degrees, can be a tricky task, but with the help of a miter saw, you can make these cuts accurately and quickly.
Another great benefit of a miter saw is that you don’t have to have a lot of room in order to use it. The miter saw takes up less space than a regular table saw. So if you have a smaller workshop, you can get the job done and will still have enough room to move around.
Using a miter saw is also much safer than using a circular saw. Because a miter saw has a blade guard, you don’t have to worry about your hand accidentally coming into contact with the blade, which can be a real safety hazard.
Another great benefit of using a miter saw is that you can make multiple cuts at once. With some saws, you can cut two pieces at the same time, which means that you don’t need to move the board around and you can get a perfectly aligned cut each time.
On top of all of that, the miter saw is great for giving you accurate bevels. You can make perfect 90-degree angle cuts or even angled bevels that are perfect for laying floor or tile.
So if you’re looking for a better way to make angled cuts without the hassle of a regular table saw, you should definitely consider getting a miter saw. With its versatility, accuracy and safety features, it’s the perfect tool for any project that involves making angled cuts.
Common Miter Saw Features
If you’re going to be making those sharp angled cuts, then you’d better know what kind of features a miter saw has. A miter saw looks intimidating, but it’s actually pretty simple. Before you start cutting, you need to familiarize yourself with the machine’s features.
Let’s start with the miter saw’s base or table. This is where you’ll place the piece of wood that you want to make the angled cut on. Depending on the size of the miter saw, there will be various sizes of stock that can be cut. Also, there may be a fence or edge guide on the miter saw’s table, which can help steady the stock against the blade for an accurate and precise angled cut.
On the table you may also find adjustable stops, these will limit the amount that the miter saw can be rotated. Basically, they give you the precise angle that you need without needing to measure it. They come preset at 0-degrees, 15-degrees, 30-degrees, 45-degrees and some also come with 60-degree settings.
If you look at the top part of the miter saw, you’ll find the arm, which is the part that holds the foot pedal and the saw blade. The arm can move left and right up to a certain degree, while the foot pedal lets you turn it more easily. This feature allows you to create beveled and mitered cuts, depending on the specific model of miter saw you have. Most miter saws can cut up to 45-degrees on each side, though some may be able to go even further.
You’ll also see the motor and saw blade, which provide the downward pressure for the cuts that you’re making. The size of the saw blade’s diameter will determine the size of board that it can cut through. Some saw blades can cut up to 12” while others can cut up to 16”.
Finally, on the end of the arm you’ll find the guard, which is the piece that shields your fingers from the saw blade. Additionally, some miter saws come with a dust collection port that connects to a vacuum, which sucks away any sawdust and debris when you’re cutting.
Now that you know all about the common features that are available on miter saws, you’re one step closer to mastering angled cuts with ease. All you need to do now is practice, practice, practice! Have fun and stay safe.
Mastering the Angled Cut

Hey folks! Now we come to the main event! Mastering the angled cut! This ain’t no thing to scoff at. You gotta have the right set up and know how to measure. No room for error here!
So let’s start out with setting up the miter saw. This obviously takes some trial and error and you gotta get it just right. Take your time, get it precise. If you’re off even just a smidge, your cut ain’t gonna be so hot.
After that, you gotta know how to measure for accurate cuts. You gotta double and triple check your measurements. Even compare them against a straightedge. This can be a make or break moment so don’t mess it up.
Finally, the moment of truth. How do you make the angled cut?? Good question. It’s all about your process. You gotta have a steady hand and some patience. When you’re finally ready, start slow. No real need to hurry it. Make sure you make smooth and consistent cuts when it happens.
Now you know what you don’t want to do. When you make angled cuts, don’t rush into it without practice. Don’t try to overcomplicate the process. Don’t forget to measure twice! I’m sure you can handle it, but don’t get too cocky.
That’s it folks! Take what I said to heart and start practicing with the miter saw. Now the things you make are gonna have nice angled cuts. Good luck out there!
Setting Up the Miter Saw
Ooh, look at you! You’re ready to get to work with that miter saw. Seems like you have a good plan for making some angled cuts. Well, before you can get to work, you need to make sure you set that miter saw up correctly. Don’t worry; I’m here to walk you through it.
Make sure you’re in a well-ventilated area, away from any flammable materials like solvents, paints and polishes. This is important, so don’t forget! Now, it’s time to unpack the miter saw and make sure you have all the necessary bits and bobs. Usually, these accessories include items such as scale rulers, saw blades, wrenches and clamps. Once you’ve checked you have everything you need, you can start to assemble the miter saw.
To start, position the saw blade in the miter saw table. Use a tool such as a wrench or spanner to tighten the blade in place. Once it’s secure, you can raise and lower the miter saw blade according created to the desired measurement. While the saw is in the upward position, line the miter saw table parallel with the scale ruler. This can be done either manually or with a precise digital angle-measurement tool. Just be extra careful to make sure it’s lined up properly!
The miter saw should also be attached to a stable workbench. This will not only provide a flat and safe surface for cutting, but it can help guide the saw when making angled cuts. That’s right, after all that preparation and setup, we’re almost ready to start making accurate angled cuts with the miter saw. Hold tight- this is going to get exciting!
How to Measure for Accurate Cuts
Do you want to make sure that your cuts are as precise and accurate as possible in your next DIY project? Why not try a miter saw? What’s a miter saw? Well, a miter saw is a hand-held tool used for making precise angled cuts in wood – you know, for when you want those inside corners perfect and stuff. They are great for making furniture, base moldings, decorative trim, and crown molding.
Before you begin to make any angled cuts with a miter saw, you need to make sure that the blade is perfectly aligned with your mark. Measuring for accurate cuts is essential – otherwise you might end up with an undesirable shape, size or an overall fit. Luckily, there are some tried and true methods you can use to get that measurement just right.
The first rule of proper measuring is to always make sure the saw is square. To check this, make a 90-degree angle on a piece of scrap wood. If the blade is not parallel to one of the edges, rotate the blade until it is. Then turn it off and check the cut. If it looks right, you have set up the miter saw correctly.
Next, you should measure the length of the piece you’re cutting. Measuring the length of the material is important for making sure that you get the perfect angled cut. To do this, measure the distance from the edge to the point where you want the cut to end. If the length is shorter than the blade will allow, adjust the blade accordingly.
Now that you’ve got the correct measurements, it’s time to make the cut. Use a speed square to confirm that the cut is right angles and make sure that the blade is lined up correctly with your mark. After that, you can turn on the saw, press the blade guard back and carefully lower the saw blade into the workpiece. And just like that, you’re done!
So next time you’re looking to add some perfect angled cuts to your project, don’t forget to measure for accuracy first. If you take your time and measure correctly, you’ll get the perfect cut every time. Now go get out there and show that miter saw who’s boss!
How to Make Angled Cuts

I’m here to show you how to make angled cuts with a miter saw. Now a miter saw is a really handy tool. It makes angled and beveled cuts with ease and accuracy, so you’re sure to get great results every time!
First you’ve got to make sure your saw is set up right. To do that, start by setting the saw blade at the desired angle to the table. Measure up from the blade and make a mark on the table so you know where to line up the workpiece. Then make sure the miter saw fence is set in the right position. You’ll want to make sure it’s perpendicular to the blade and parallel to the edge of the table.
Once your saw is set up correctly, you’ll need to measure for the cut. This is where accuracy is key. Start by measuring the distance between the saw blade and the fence, then measure the desired angle on the workpiece. This will tell you how wide to adjust the fence and how tall the fence should be set. That way, when you make the cut, you’ll get a clean, neat angle.
Now for the cutting. To make your angled cut, feed the workpiece into the saw blade on your miter saw. As you do this, make sure the workpiece is compatible with the saw blade. That way, it won’t jam or get caught and cause any damage.
When the cut is finished, the work will be marked with the angle you’ve chosen. Use that angle to adjust your fence for the next cut until you get the length and angle you need. Be sure to take your time and make sure your measurements are accurate.
So that’s how you make angled cuts with a miter saw. Just remember to check your setup, measure accurately, and make sure the workpiece is compatible with the saw blade. Now if you practice these steps, you’ll have no problem making perfect angled cuts with your miter saw every time.
What to Avoid When Making Angled Cuts
Ah ha! I have the answer. You’ve been wondering what to avoid when making angled cuts with your miter saw.
Well, let me tell you, if you want to be a master of the angled cut then it’s essential that you understand all of the pitfalls that come with this type of cutting.
First up you want to avoid using the wrong blade. This can lead to disaster and ruin your lumber. Always make sure that the blade is tightened properly and is the right size and type for your project.
The wrong type of blades and the wrong tension can cause lots of frustration and uneven cuts. You may also want to replace your blade too, as blunt blades can cause a lot of splintering.
Secondly, you want to make sure you’re setting your saw depth properly. Otherwise, you’ll be stuck in a world of tears and disappointment. If the saw depth is too deep, it can cause chunks of wood to be cut out. If it’s too shallow, then the blade won’t be able to make the same angled cuts.
Another thing to avoid when making angled cuts is not having the saw table level when you make the cut. Unevenness can cause your cut to be off, either angled more steeply or more shallowly than the required cut.
Finally, you want to avoid rushing your miter saw cuts. Slow and steady will always win the race. Take your time and pay close attention to the measurements and the angle of your cut. Rushed cuts can result in big losses.
So remember, pay attention to every step of the process when you’re making angled cuts with a miter saw. Blades, tension, almost level, and cut slowly are the tools of the trade so don’t be too hasty and you should be good to go.
Practicing with the Miter Saw

If you want to learn how to make perfect angled cuts with a miter saw, then you have to practice, practice and practice some more. You know what they say, practice makes the sawdust fly! Just kidding, practice makes perfect! While it’s true that you can learn the basics of how to make angled cuts with a miter saw from books and YouTube videos, nothing can beat some old-fashioned hands-on experience.
If you want to get some practice in, here are some tips. First and foremost, use the right type of saw blade. A miter saw blade with 80 teeth or more will give you the best angle cuts. Use a sharp blade that was made specifically for the type of wood you are working with.
Second, use a wood jig. A wood jig is a great way to make sure your cuts are accurate. Basically, it is a perfectly straight line that acts as a guide for the saw blade. If you follow the straight line, then you know your cuts will be precise and not angled.
Third, use a speed square. A speed square will help you line up the saw blade at the exact angle you need for your cut. If you don’t want to rely on guesswork for this step, you can use a protractor to measure the angle and be sure it’s accurate.
Finally, take it slow. After all, you don’t want to ruin the nice piece of wood you’re working with. Move the saw blade slowly and take your time to ensure the angle is perfect. As with any skill, it takes time and patience to get the hang of it. Don’t rush it! Keep practicing and eventually you’ll get it right.
Most importantly of all, have fun! Learning to make angled cuts with a miter saw isn’t rocket science. Just let your creative side take over and get creative with your projects. Once you get the basics down, you’ll be surprised at the works of art you can create with a miter saw. So don’t worry if it takes you a few tries to get the hang of it. Once you do, you’ll feel like an old pro!