How To Use Hand Planes For Woodworking
Hand planes are essential tools in any woodworker’s arsenal, and have been used for centuries to shape and smooth wood surfaces. They are versatile and efficient, allowing woodworkers to create intricate designs and precise finishes that simply can’t be achieved with power tools. But for those who are new to woodworking or haven’t had much experience with hand planes, the process of using them can seem intimidating.
That’s why we’ve put together this comprehensive guide on how to use hand planes for woodworking. We’ll cover everything from the different types of hand planes and their uses, to the proper techniques for sharpening and adjusting them.
By the end of this article, you’ll have the knowledge and confidence to incorporate hand planes into your woodworking projects and achieve a level of precision and detail that you never thought possible. So, let’s get started on mastering the art of using hand planes!
Benefits of Using Hand Planes
Hey there, woodworkers of the world. As you may have guessed, I’m gonna talk to you about the glorious world of Hand Planes. They’re great tools to have in your collection, and you should give ’em a try if you’ve never done so before.
So you’re probably wonderin’ what makes Hand Planes so darn good? Well, let me tell ya!
When it comes to versatility, Hand Planes really can’t be beat. With their adjustable blades, they can be used to create a variety of shapes and profiles, which makes them a valuable addition to your arsenal. And if you needed a custom shape or depth, you can achieve it with relative ease.
On top of that, Hand Planes offer an impressive level of precision. You can easily fine-tune your cuts, so much so that when used with a straightedge or template, you can create beautiful shapes and profiles with ease.
Finally, Hand Planes are extremely manageable. They’re light and small, and don’t require an elaborate setup process—just mount one on your workbench and get started!
So there you have it—the benefits of using Hand Planes: Versatility, Precision, and Manageability. With these tools, you’ll turn your woodworking projects into works of art. So go ahead, give ’em a try—you won’t regret it!
Versatility
Man, when it comes to woodworking there are a lot of tools to choose from, and it can all get confusing. So let’s talk about one of the best: Hand Planes. They’re awesome, you can use them for practically anything. Seriously, they are a champ when it comes to versatility.
If you’ve got a detached house, you might have to do some woodworking on the exterior. For that, hand planes are the perfect tool. You can use them just as well on a raw piece of wood or even on one where you’ve already added a finish. Plus, if you’re a furniture aficionado then you already know that hand planes make it easy to create curved lines, too.
Hand planes offer the same level of accuracy you’d get from a saw or a router,so no matter what your project entails you’ll get precise results. You can make uniform cuts, completely straight edges or smooth surfaces, the way you want. It just comes down to understanding the three main parts of the hand plane, the sole, the body or frame, and the iron.
Another great thing about hand planes is that you can use them on nails and other metal parts. If there’s anything you can’t cut with it then you can modify it with a file or a hammer, and make it fit your needs. This is one of the primary reasons why this tool is more of a blessing to woodworkers than any other.
Sometimes you might find it difficult to make a cut without harming the wood around it, when that happens all you have to do is pick up a hand plane, and make the cuts without the risk of causing any damages. The blades on hand planes are designed to make precise cuts, so no matter what you’re replacing, a wood window, a door frame, or anything else, you don’t have to worry about it shifting or fitting in wrong.
It doesn’t matter how large your project is, if you know how to use a hand plane then you’re golden. That’s why I always tell my home improvement friends to pick up one of these bad boys so they can handle any job I throw at them. At the end of the day, hand planes offer an unbeatable combination of maneuverability and versatility, which is why I’m so fond of those tools.
Precision
If you’ve ever used an electric wood planer, you know the frustration of trying to get that perfectly even line down a piece of wood. Am I right? It’s like an exercise in futility — no matter how careful you are, you just can’t seem to get it straight. Well, with a hand plane, that problem virtually disappears.
Now yes, you might still have a slight issue if the wood is wildly irregular, but thanks to its sophisticated design, the hand plane produces results that are way more precise and uniform. How? Well, what you are essentially doing is shaving down a piece of wood with a sharp blade — smooth, precise, and with minimal effort. The secret lies in the way the blade is held in place, and the way it interacts with the body of the plane.
The blade is usually held in place by a metal casing known as the lever cap. This lever cap operates by deflecting the force applied to the blade, essentially controlling the shaving action of the tool. As you press down, the lever cap deflects, pushing the blade deeper and shaving off more material. This level of control is what allows the user to achieve such precise results from hand planing — something that would be extremely difficult, if not impossible, to do with any other tool.
Now that’s not the only thing selling point for this method either. Power tools, as helpful as they are, tend to be overkilled in many situations. Plus, you have to take into account the cost and noise factor. With hand planes, you get less wear and tear on the wood, plus better accuracy, and all at a fraction of the cost and noise levels. In other words, if you want to invest in precision and quality, there’s no better way to go than with a hand plane.
Manageability
Humans are quite the handy species, and when it comes to the versatile use of hand planes for woodworking, it truly is a sight to behold. The beauty of hand planes is that they offer amazing manageability.
Picture it: you masterfully setting up your hand plane. You glide it over the wood surface and watch as it effortlessly whisks away the excess wood material that had been obstructing the wood’s natural beauty. It’s like a dream, except this time you get to live out the fantasy in real life.
You can’t help but smile as you adjust the different parts of the hand plane to get to the desired result. The sole can be moved if needed, the lever cap is adjustable, and even the iron is sharpened to perfection. It’s quite an amazing process and one that you soon get the hang of after some real hands-on experience.
And when it comes to actually using the hand plane, you don’t have to be a master craftsman to make quick work of whatever you’re trying to achieve. The hand plane is light enough to move around easily, allowing you to maneuver it accurately in those tight spots or along difficult curves.It’s ideal for the beginner or the expert, so long as the hand plane is managed properly.
The beauty of hand planes is that, when properly cared for, you can use them for years to come. Cleaning and lubricating the moving parts regularly will ensure maximum performance, but you only need to do it a few times a year. It’s a small price to pay for such versatile, accurate managed more in the world of woodworking.
So now that you know the benefits of hand plane manageability, it’s time to put it into practice. Muster up your nerve and step up to the plane to take full advantage of its incredible potential.
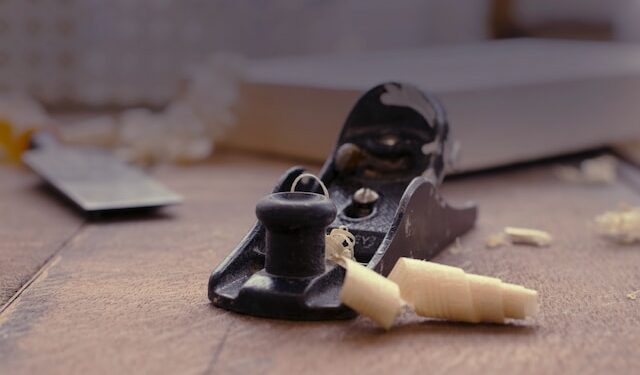
Parts of A Hand Plane
Welcome to the wonderful world of hand planes! If you’re gonna be using these tools, you gotta know all the parts of a hand plane, and trust me, I know them all!
The most basic is the sole. The sole is the flat surface and it’s pretty important since you’ll be moving it on the wood you’re planing. You want something good and flat to do the job.
The body or frame is also super important, it provides the rigidity for planing. Some of them come with wooden frames and some with cast-iron. Cast iron ones are more durable.
Next up is the iron. Now this one is what you’ll be doing all the magic with. It’s like a chisel but made for planing. These come in various forms, some are even interchangeable.
Lastly, the lever cap. This is what holds the iron in place, I mean, it’s kinda like a clamp. It’s also in charge of tension, so ya gotta make sure this is working well.
So now you know all the parts of a hand plane, time to get to business. Now they come with different shapes and sizes, so make sure you pick the right one for your project. Eddie Murphy’s here to help ya out, so just ask if you’re lost.
Sole
Ahoy woodworkers! By now you have heard of the many benefits of using a hand plane, and now it’s time to learn how to use one. We’ll start off by getting to know the parts. Here we go, first up is the sole.
Since a hand plane is normally an object shaped kind of like a brick, the sole is the bottom part of the brick where the sharp blade sits. It’s usually made of either cast iron or ductile iron and is sometimes dipped in oil to prevent rusting. In some cases, the sole will have a carved in profile or it might have a sole that’s flat and ready to be shaped into a specific profile.
The sole needs to have a flat, uniform surface with no bumps, cracks or pits. If the sole has any of these, it could cause impact on the wood, creating a rough finish. To achieve this smooth feel, it might require some sharpening or filing of the surface.
The sole can hold a few different types of planes. The most common are the smoothing planes which are like the jack planes except the blade is set so it doesn’t cut as deep as the jack planes do. It creates a smoothness more efficiently. There’s also the shoulder planes which are used to create the end of a board, to form a sharp angle, or even to shape corners.
The sole is also used to adjust the cutting angle of the blades. It can be done by tilting the plane at an angle or by moving the blade forward or backward to adjust the blade angle. This is helpful when a particular angle is needed.
Well, that’s the basics of the sole. You don’t need to be an expert on this part, just understanding its function and how to maintain it will be enough. We’ll now move on to learning the body or frame of the hand plane. Until next time!
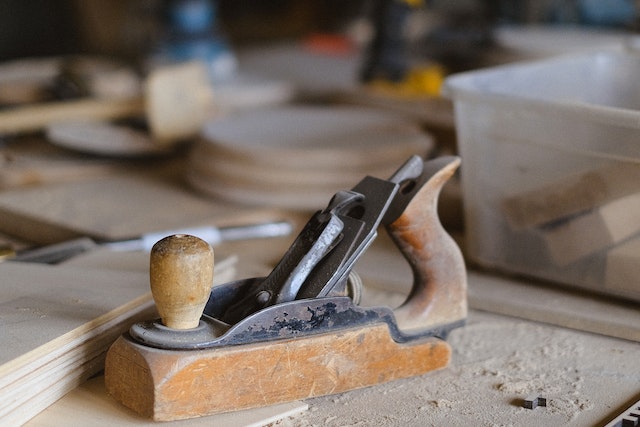
Body or Frame
Hey everyone! If you’re looking to get into woodworking, you’re going to need to get familiar with hand planes. Before we discuss how to use them, let’s take a look at the parts you’ll be using.
The body or frame is the long, rectangular piece of the hand plane. This is typically made of wood covered in a hardwood surface, like maple or beech. It also usually has two handles attached to the top and sides so that you can get a good grip on the plane.
The body also has a number of other parts attached to it, like the iron and the lever cap. They all connect to the frame through screws or rivets. The surface of the body frame is concave and the sides are curved, which helps you push the plane easily with one hand.
You should also be aware that the body frame of the hand plane is an integral part of the overall operation. The flat sole of the plane is typically made of either iron or steel, and it has to fit perfectly to the curve of the plane body. This helps ensure a smooth plane surface and allows you to effectively plane a wide variety of wood surfaces.
Even if you don’t know much about woodworking, you should be aware that the plane body is important. It has to be well-constructed and properly maintained in order to plane any type of wood effectively.
Iron
Let’s talk about the iron of a hand plane. Now here’s the thing, your iron is about as important as your weddin’ ring when it comes to getting a good job down with a hand plane. You see the iron is the actual cutting part of the plane.
Ok, so the iron is made of steel and it’s what does all the heavy lifting in the woodworking. It’s got a sharp bevel on one side, and it ranges in size from ¼ inch wide to 1 ¼ inch wide – which is pretty big if you ask me. It’s the size of the iron that’ll determine what type of hand plane it is – a block plane like I just mentioned has a much smaller iron, while a jack plane can get up to 1 ¼ inches wide.
Beside the size of the iron, it’s angled at 45 degrees right on the edge. And besides that, the rest of the iron has a slight shape, kind of like a small sword that you’d find in a museum or something. And when the whole thing is put together, that’s when it become one of the most important tools for woodworkers.
And in order to make sure that the iron is up to snuff, it’s got to be sharpened before each use – and if you’re a serious woodworker, it’s recommended you sharpen each iron after every single use. I don’t personally do that, but I suppose it can’t hurt any.
So the iron – that’s the most important part of your hand plane, so make sure it’s kept in good shape. For all of us that just want to do this for a hobby, just make sure you’ve got an extra sharpener or two laying around the house, and you’ll be fine.
Lever Cap
Ah, yes. The lever cap. In my experience, this has been the most confusing part of the hand plane for many woodworkers. Don’t let it confuse you! It’s actually quite simple. The lever cap is simply a metal plate, often made of brass, with a lever and a knob. The lever is connected to a screw that adjusts the amount of pressure applied to the iron.
So, when you want to plane a surface, you use your thumb to push down on the lever cap, pressing the iron against the wood. You then use your forefinger to adjust the tension of the lever and the knob to set the desired depth of cutting. The lever cap can also be used to control the positioning of the plane by loosening or tightening the lever.
This allows you to adjust side-to-side as well as depth, for a perfectly leveled finish. Oh, and sometimes you’ll have to remove the lever cap to re-sharpen or adjust the iron. But that’s not as complicated as it sounds. So now that you know the basics, it’s time to start exploring the world of hand planes! Good luck!
Types of Hand Planes

Ah yeah, so you wanna know the different types of hand planes and what they do, huh? Well, hang on to your hats, folks, and I’ll give you the scoop on what we got here.
First off, we got your block planes. These bad boys are designed for small corrections and adjustments, so they’re super lightweight and easy to maneuver. They’ll clean up any small irregularities in your woodworking project in no time flat.
Next, we got smoothing planes. These planes are the true finishers of the bunch! Smoothing planes will take the block planes’ work and bring it to a velvety finish. If you want professional results, look no further than a smoothing plane.
Jack planes are a little bit bigger than both the block and smoothing planes and can tackle a wider range of projects. You might think of these as the work horses of the woodworking world – they can do just about anything with wood.
Last, but certainly not least, we got the shoulder planes. The smallest of the four and works entirely on the shoulders and edges of projects. These are perfect for those detail edges and curves that make your project really stand out.
Now that you know the different types of hand planes, you can decide which kind you’ll use on your next woodworking project. You can mix and match different planes or stick with one or two – it’s totally up to you. All of these planes do their job well and will make your project look great!
Block Planes
Hey there fellow woodworkers, let’s talk about the block plane- one of the most commonly used and versatile hand planes out there. A block plane is relatively small, typically ranging in size from 6.3 cm to 10.2 cm in length and has a mouth that is adjustable to control the size of cut that it can make. It’s usually the go-to hand plane for many beginning woodworking projects because of it works well with small pieces and its ability to trim and sharpen edges.
Now, because of it’s size, it is easy to maneuver in the hands, which is one of its greatest advantages. But because of its small area, it’s not ideal for bigger surfaces- instead it’s best used for more intricate tasks and small areas. This makes it generally suitable for end grain, curves, and corners, closeted areas as well as preparing a piece of wood for a bonding surface.
Most block planes come with two handles; one that is located on the top of the plane, and the other at one end of the sole to provide users with more control and comfort when using the plane. This little guy can come in really handy!
So, now you know what a block plane is and what it can be used for. And if you’re thinking of adding it to your arsenal, make sure to pick one with a fully adjustable throat and that has handles so you can use it more efficiently. Oh, and don’t forget to sharpen the iron before use.
And there you have it! Block planes are handy tools that come in pretty handy when putting together projects- just remember to read the instructions so you can use it safely and to its best potential.
Smoothing Planes
Ahhhhhh smooth as a baby’s bottom! That’s the goal we’ll have when it comes down to planing and that’s what a Smoothing Plane is for! Smoothing planes are used as the last step in removing rough surfaces or to polish a surface that has already been planed. They are low-angle planes with a flat sole and a near vertical mouth. As their name implies, they are mainly used to smooth a planed surface and make it ready for the final finish.
Now speaking of design, let’s talk components! A Smoothing Planes typically has two primary parts – the frog and the plane itself. The frog is the piece that holds the iron in place and can be moved forwards and backwards. Now, the plane itself is where you find your handle and adjustable mechanism to move the iron and make minor adjustments to the plane’s angle-of-attack. When it comes to the blade– the iron is generally made of a superior grade of steel compared to other hand plane iron, to ensure it will stay sharp for a longer period.
Now that we’ve discussed the components and the design, let’s get to the nitty gritty – how to use this thing! To begin, it’s important to ensure that your Smoothing Plane is properly set up and adjusted, in terms of its blade being sharpened and the levers inside being adjusted. Once that’s done then we’re ready to go.
When beginning your journey into planing, it’s important to keep in mind that patience is key! Don’t rush the process, as the goal is to get a smooth finish and that can’t be achieved right away. Start off with a light cut, gradually increasing your cut until you begin to get a smoother finish. As you plane, make sure to use consistent and even strokes, moving back and forth along the surface of the wood and occasionally checking your progress.
Although it may take some time, the results that can be achieved with a Smoothing Plane are undeniably worth it! With a smooth finish and minimal tear out, you can achieve a professional look without having to break the bank. So what are you waiting for?! Grab your Smoothing Plane and get to work!
Jack Planes
Sure, I could talk your ear off about the Benefits of Using Hand Planes, or go into Parts of a Hand Plane like the Sole, Body or Frame, Iron, and Lever Cap – and perhaps talk about the Types of Hand Planes like Block Planes, Smoothing Planes, Shoulder Planes and some serious Setting Up and Adjusting.
But ya know what? Jack Planes are the real star of the show!
Jack what? Well, jack planes are the longest of the bunch and can plane longer boards in traditionally one pass. It usually has a blade length of 10 inch or more, which explains the extra leverage you can get as it helps level out rough surfaces. It’s also slightly thicker than other planes and is typically the workhorse plane of the group.
Besides the length, what makes a Jack Plane the plane of choice for pros? The adjustable mouth is one. It’s a small opening in front of the plane that you can adjust by a setscrew. The wider the mouth, the coarser the cut. The narrower the mouth, the smoother the cut. This is a super useful feature for making better cuts, since it allows you to control the amount of material that is removed from the surface.
And then there’s the massive ergonomic handle. It’s large and ambidextrous and makes it easier to push through rougher boards without worrying about your hands slipping off the handle. It also helps to keep your grip steady, which is especially helpful when planing longer boards.
Plus, ya know what? Jack Planes are made to take straight edges, however, with a bit of patience, you can tweak it to make curved edges, which can come in handy when creating furniture with curves.
So there ya have it! Jack Planes are the real stars of the show and you don’t want to overlook what they bring to the table! So keep your Jack Planes handy and start planing!
Shoulder Planes
When it comes to woodworking, shoulder planes can be a real lifesaver. Not only do they help you get into tight spots, but they also help you make precision cuts with ease. In this section, we’ll take a look at some of the key features of shoulder planes and the kind of projects they’re best suited for.
First off, let’s talk about the size of shoulder planes. On average, they tend to be smaller than other hand planes. This makes them ideal for getting into tight corners. They can also often be used for trimming joints after glue-ups, giving you the perfect finish.
When it comes to the design of shoulder planes, they tend to have a frog-like shape. This makes them great for removing thin slivers of wood, which can make all the difference in the overall look of your project.
Now let’s take a look at the actual parts of a shoulder plane. They usually have a flat sole and an adjustable frog, so you can adjust the iron. You’ll also often find a pair of lateral adjusting screws mounted to the base of most shoulder planes, allowing for precision adjustments.
When it comes to actually using the plane, it’s important to note that shoulder planes actually work best when used on end grain. That’s usually the most difficult grain to plane, so having a plane specifically designed to do so can really make the job easier. They’ll also give you the perfect finish when you’re doing detailed work, like trimming rebate joints or dovetails.
So if you’re looking for a plane that’s great for trimming and doing detailed work, then a shoulder plane might be the right choice for you. Just make sure you’re comfortable with the size and design of the plane and you’ll be ready to get to work!
Setting Up and Adjusting
First things first – sharpening the iron. You’ll need a honing stone for this one, so it might be worth investing in one before you dive in. To sharpen the iron, hold it at a 20-30 degree angle and just run the stone over it in a diagonal motion. Keep the pressure light, you don’t want to put too much strain on the blade. Once you’ve done a few strokes, check the edge of the blade – it should be nice and smooth.
Next, you’ll want to set the iron. This means making sure the blade is set at the right depth to make your cuts. To do this, simply turn the knob at the front of the plane until the blade comes up to the right depth.
Now, you’ll want to adjust the lateral blade. This means setting the blade at the right angle so your cut is nice and straight. To do this, turn the lateral adjustment lever at the back of the plane. You’ll want the blade to be parallel to the sole of the plane, so take your time and make sure it’s just right.
That’s all there is to setting up and adjusting your hand plane! Just make sure you’re gentle with your adjustments and you’ll have your plane ready to go in no time.
When you’re done with your project, it’s important to do some basic maintenance. Clean the sole of the plane with a clean cloth and make sure any debris is removed. This will keep the plane in top condition for your next project. You should also give the metal parts a light layer of lubrication so they don’t get rusty.
Finally, you can get to the fun part – using the hand plane. When you’re first starting, use long, light strokes to create your cut. If you’re not getting the right shape, don’t worry – you can make corrections as you go. Finish up with a few shorter strokes until your cut is just right.
That’s it! Now you know how to set up and adjust your hand plane so you can get to woodworking. Until next time, enjoy your projects, everyone!
Sharpening the Iron
When ya’ll pick up a hand plane, the blade that comes along with it probably won’t be sharp. That’s okay though, because I’m gonna show ya’ll how to sharpen the iron in no time. It could be beneficial to use a honing guide, but it’s not necessary.
First thing’s first, ya’ll should know that there are two sides to the blade – one side should be flat and the other should be beveled. Your honing guide should be set up accordingly. Now, it’s time to choose your sharpening stone. There are a few different kinds, but all I’m gonna say is choose the one that works better for ya’ll and the plane you’re working on.
The sharpening process consists of a few steps. While holding the iron in the guide, make sure it’s engulfed by the clamps firmly. Then, use a few strokes towards you in the single direction designated by the stone manufacturer. Make sure your angle is as close as to the one recommended when you bought the plane and then move on to the next side.
Now, it’s finishing time! Wash and dry the iron, and then use a honing compound with a cotton cloth to remove any burrs that could still be on the edge. This little trick will help to make sure your sharpening job is finished properly, and will look down onto your wood pieces with pride.
That’s it! You may need a few practice rounds to really get the hang of it, but once you do it you won’t want to use any other tool. I’m done talking, now get going and sharpen your plane iron just how I told ya’ll. Until next time!
Setting the Iron
Well, we’ve talked about the benefits of using hand planes and the parts that make them so awesome, now it’s time to learn about setting up and adjusting your hand plane. A key part of that is setting the blade.
You can tell it’s time to set the blade when you notice the blade looks like it ain’t ready to go slicing through any wood. First things first, crank the knob at the top of the plane to its lowest setting. You’ll want to do this so the blade is sitting flush with the sole of the plane.
Now it’s time to adjust the lever cap. The lever cap is gonna help determine how far the blade is sticking out. The higher the lever cap is, the more the blade will stand out. The lower it’s set, the less it will. It’s all personal preference, but you should aim for the blade standing around a 10th of an inch out of the plane.
Now that the lever cap is set, it’s time to adjust the sliding nut. This here is the fine tuning tool to your blade. The deeper you set the sliding nut, the more the blade will stick out of the plane. This way you can make more precise adjustments to your blade before you go planing.
Next, it’s time to adjust the wedge. To do this, you’ll want to tap the wedge gently with a mallet. This’ll drive the wedge up, which will bring the blade up as well. It’s all a balancing act, so you want to make sure the wedge is just a bit tight to hold the blade in place, but not so tight that the blade won’t move.
Once the wedge is set, it’s time to do a test run. Give the plane a few runs down some scrap wood, keeping an eye on how far the blade is sticking out as you go. If it looks too low, you can come back, loosen the wedge, and raise the blade up.
And there you have it, you’ve got your blade set! From here, you can start to make more precise adjustments and do your woodworking magic. Just make sure you do regular check-ins with the wedge and sliding nut so your edge stays sharp and the blade is always standing out just the right amount. Good luck with your hand plane endeavors!
Adjusting the Lateral and Depth
Alright everyone, we’re getting to the fun part! We’re adjusting the lateral and depth of the hand plane! First, let’s look at what lateral and depth are. Lateral simply means how far the blade is from the edge of the plane’s sole. Depth refers to how far from the edge of the sole the blade sticks out.
Now let’s do this! First, loosen the lever cap with a screwdriver. Turn it counter-clockwise until you feel it loosen up.
Next, bring the lever cap forward so you can access the iron assembly. You should be able to see the depth adjuster at the back of the assembly. Using a screwdriver, turn the depth adjuster to the desired depth. You can also use a depth gauge to make sure you have the right depth.
Once you’re happy with the depth adjuster, go to the lateral adjuster. This one is a little bit trickier. It looks like a flat head screw and you’ll need to use a screwdriver to turn it side-to-side until you get the desired lateral. Just remember to keep turning in the same direction for the lateral to stay consistent.
Once you’ve got the lateral and the depth set, it’s time to secure everything back together. Slide the lever cap back over the iron assembly and then turn it clockwise to tighten it. And congratulations! You’ve successfully adjusted the lateral and depth of your hand plane! All that’s left to do now is put it to use!
Maintenance

When it comes to using hand planes for woodworking, maintenance is key to making sure your tool gives its best performance! Taking good care of your hand plane will ensure it lasts for generations to come.
First thing’s first, let’s talk care of the sole. The sole is the flat bottom of the plane that supports the surface of the workpiece. It can get full of debris and dings over time, so it’s important to wipe down the sole with a soft cloth to keep it free of stuck-on particles. This will help retain its flatness and keep it true while you work.
It’s also important to keep the moveable parts of your hand plane lubricated. This will help keep them sliding smoothly instead of sticking and causing problems. A simple wiping of light oil over the metal moving parts of the plane, such as the blade and the blade adjustment screw, should do the trick.
Finally, never store your hand plane in a damp area. This can lead to the formation of rust on the metal parts and potentially damage the wood components of the plane. It’s best to store it in a dry and dust-free environment such as a drawer in your workshop.
Now you know how to keep your hand plane in top shape! Keeping up with your maintenance schedule and taking care of your valuable tool, you’ll be sure to get the most out of it and make some beautiful woodworking pieces!
Cleaning the Sole
Ha ha ha, welcome back my woodworking friends! We have reached the fifth part of our article, “How to Use Hand Planes for Woodworking”! Let’s dive into the topic of Maintenance, and more specifically, Cleaning the Sole.
It is very important to clean your woodwork hand plane after each use. This helps to remove debris, particles, and rust. You should also clean the hand planes at least once a month if you are a frequent woodworker, and once in a while if you use them less regularly.
You can use a soft cloth with some mineral oil to clean the hand plane’s sole. This will help keep microorganisms away and your tool looking attractive. Avoid using water and cleaning agents as these can damage the parts of the hand plane. Instead, wipe the sole with the cloth and oil to get it as clean as possible.
It is also important to remove rust on your hand plane’s sole. To do so, you might need a wire brush. However, make sure that you are using the appropriate wire brush for the metal of your tool’s parts. You don’t want to end up destroying your precious tool! After you are done, you want to make sure that you buff the metal with light oil such as 3-in-1 oil, WD-40, or even mineral oil.
It is important to remember that cleaning should not be done with strong chemicals or solvents as there is a danger of causing damage to plastic and rubber components of your hand planes. Make sure that you read the label of any product that you are using to clean with to know exactly how to proceed.
And that’s it my woodworking friends, that’s all you need to know to Clean the Sole. Until the next section of our article, I wish you happy woodworking!
Lubricating the Moving Parts
Time to get your woodworking project down with some slick lubrication! That’s right, folks – it’s no joke – you need to lubricate the moving parts of your hand plane so that it operates as smoothly as my smooth talkin’!
Before you start lubricatin’, it’s always best to clean the moving parts of any dust and debris. Just use a soft, lint-free rag. Don’t use any oil and prolly best to use distilled water – nothing with high PH levels or other contaminants.
Once all the dirt and grime is cleared out, you can start lubricatin’. For oil, I find that a light machine oil is your best bet. These oughtta be available at any of your local hardware stores. Now, don’t go too heavy on the oil – it’s just a light mistin’! Make sure to put oil on the lever cap, the lateral adjuster, the depth adjuster, and the cam lever on the frog.
Once you’re done mistin’ with the oil, it’s time to bring out the wax! Put a thin layer of wax over the bottom of the sole of your hand plane. I find paraffin or bee’s wax work just fine. This wax sticks best when it’s lightly warmed up, so prolly best to get some heat goin’ – a hairdryer or a heat gun oughtta do the trick!
It’s that easy, folks – with a few easy steps you’re on your way to a smooth-runnin’ hand plane. So don’t wait – get to lubricatin’ today!
Using the Hand Plane
If you’ve made it this far and you want to know how to USE a hand plane, you’re in luck!
Using a hand plane is an excellent way to bring out the beauty of your woodworking projects. First off, the initial planing requires the surface to be ready and free of machine marks. Start by setting the plane for the desired depth, establish the direction of the stroke and start it on the edge of the surface and hold the plane with both hands. As you push the plane forward, maintain an even pressure with your hands and keep the blade as flat as possible.
Making corrections is key to getting the perfect finish. If there are any high spots or cross-grain planing, you’ll want to adjust the depth of cut or angle of the plane. Any unevenness can be conveniently corrected using this hand plane.
And that brings us to the finishing up stage. For a superior finish, keeping your blade sharp is key. And make sure the depth of cut is low, so it leaves a smooth surface. After going over the entire surface, you can use a finer grit plane to achieve a flatter surface and refine it further.
Well, now you’ve got a better understanding of how to use a hand plane and get that smooth finish or your projects. So don’t be afraid to break it out and carve out a masterpiece!
Initial Planing
Now, one of the greatest benefits of using a hand plane is just how versatile it can be. Stick with me and I’ll show you how to make use of this classic tool and look like a boss out there in the workshop.
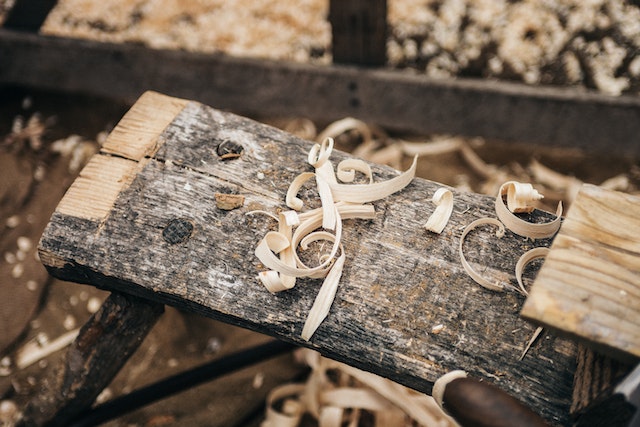
Let’s go over the basics and take things slowly. Using a hand plane on your projects starts off with initial planing. The first time you’re planing, there’s gonna be a bit of dust flying here and there and a lot of big shavings. But no worries, it’s all part of the process and you’ll have a smooth finish in no time.
Start by facing your plane at the back edge of the workpiece. Make sure you hold it at a slight angle so that you’re planing away from the edge rather than toward it. Also avoid going too slow or too fast , aim for a lightning quick stroke but with precise control.
Don’t forget the basics either. Keep your elbows tucked in and your eyes fixed on the plane’s edge to direct the stroke, and don’t force the plane along your wood. Adapt your technique to the grain of the wood you’re cutting. Moving your plane for pulling, or with the grain is usually best.
If you want to get a really smooth finish, go with a planing stroke close to the edge – don’t place your plane too far from it. And there you have it, planing down an edge in the blink of an eye! It may take a bit of practice to get the hang of it, but you’ll be an ace hand planer in no time.
Alright, keep up the good work, and don’t forget the safety precautions. Happy woodworking!
Making Correction
Workin’ with wood can be tricky business. Just when you think everything’s all lined up the way you want it, something goes wrong. That’s when it’s time to make a correction. You can use your hand plane to make the necessary adjustments.
Just make sure you’re prepared for the job – if your plane isn’t properly set up it won’t do you much good. Get the iron sharpened, make sure the lateral and depth are correctly adjusted, and clean and lubricate all the parts. Now you’re ready to make that correction.
Take it slow – don’t try to rush it. You can adjust the handle on the plane to get the blade to the correct angle – set it up to cut with the grain. Test it out on some scrap wood first. This will give you a feel for how the plane works and what kind of result you’re going to get.
Make sure you’re taking thin, even slices. It may be helpful to mark a line along the wood to guide your plane – you’ll be able to just run it down the center of the mark and get a perfect slice. If you’re not getting the right result, you may need to adjust the angle of the iron or the depth of the cut. Again, just experiment with it until it feels right.
You can also use your plane to smooth the wood – this is a great way to make sure everything’s nice and even. Just take long, smooth strokes with your plane and you will achieve a nice, polished finish.
Using hand planes for woodworking can take some time to get used to, but with a little practice you can achieve perfect results. Just remember – take it slow, make sure your plane is set up properly, and don’t be afraid to experiment. Good luck!
Finishing Up
Alright you guys, we’re almost there. Finishing up your project with a hand plane is the best!
First, it’s important to remember that quality of your project is in your hands, so use your common sense while planing. Don’t take too much material off at once, as this may leave dents or crater in the wood. If you can feel resistance when you plane, that’s a good sign it’s time to stop planing.
Now it’s time for light planing. Keep the plane angled slightly for a smoother finish. The back and forth movement of the plane will help you avoid any kind of ridges or groove.
Finally, you’ll need to use a card scraper in some areas of your project. This is because a plane won’t always be able to get into the nooks and crannies of your project. Adjust the iron as needed to reach any hard-to-reach area.
That’s it for planing, but it’s a good idea to sand the surface one last time. Use a gentle abrasive such as 150-grit sandpaper to smooth out any imperfections in the surface. This is important, as it can make the difference between a great project and an okay one.
Now, stand back and admire your work. You just used a hand plane, and the wood looks amazing! Who needs the power tools when you have a hand plane, am I right?
So there you have it, a quick and easy guide on how to use a hand plane for woodworking. You don’t need to be a seasoned woodworker to get good results with a hand plane. Give it a try and you’ll be surprised by how well it works. Good luck and happy planing!