How to apply wood putty
Applying wood putty is a process that helps to fill in the gaps and cracks in wood, while also providing a smooth surface for painting or staining. In this article, we will give you a step-by-step guide on how to apply wood putty like a pro.
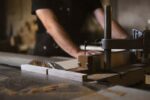
The first step is to clean the surface of the wood. You will want to remove any dirt, debris, or grease that may be on the wood. Once the surface is clean, you can then sand it down to create a smooth surface.
Next, you will need to select the right type of putty for your project. There are many different types of putty on the market, so it is important to select the one that best suits your needs. If you are working with a large crack or hole, then you may want to use a thicker type of putty.
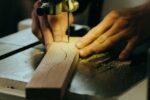
Once you have selected the right type of putty, you can then begin to apply it to the surface of the wood. If you are working with a small crack or hole, you can use a putty knife to apply the putty. For larger cracks and holes, you may need to use a putty gun.
Once the putty is applied, you will want to allow it to dry for the recommended amount of time. Once it is dry, you can then sand it down to create a smooth surface.
Now that you know how to apply wood putty, you can begin to fill in any gaps or cracks in your woodworking projects. With a little practice, you will be able to apply wood putty like a pro in no time!
Wood Putty Application Tips
Here are some tips to help you get the best results when applying wood putty:
– Make sure the surface of the wood is clean and free of any dirt, debris, or grease before you begin.
– Sand the surface of the wood before you apply the putty. This will help to create a smooth surface for the putty to adhere to.
– Apply the putty to the cracks or holes in the wood using a putty knife or putty gun.
– Allow the putty to dry for the recommended amount of time before sanding it down.
– Practice makes perfect! The more you practice, the better you will become at applying wood putty.
What is wood putty and what are its uses
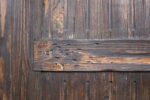
Wood putty is a type of filler that is used to fill in holes, cracks, or dents in wood. It is a pliable substance that can be molded to fit the area that needs to be filled, and it dries hard so that it can be sanded and painted just like the rest of the wood surface.
Wood putty is not meant to be used as a structural repair, so it is important to make sure that the area isstable before beginning the repair. If the wood is cracked or splitting, you will need to use a different type of filler or wood glue to stabilize the area before applying the putty.
How to prepare the surface for putty application
To prepare the surface for putty application, start by cleaning the area with a damp cloth to remove any dirt or debris. Then, use a piece of sandpaper to rough up the edges of the hole or crack so that the putty will have something to grab onto.
Next, apply the putty to the surface using a putty knife. Work it into the hole or crack, and then smooth it out so that it is level with the rest of the surface. Allow the putty to dry for at least 24 hours before sanding it down.
Once it is dry, use a piece of fine-grit sandpaper to sand down the repair area until it is flush with the rest of the wood surface. Then, wipe away any dust with a damp cloth and allow the area to dry completely.
You can then finish the repair by staining or painting over the area to match the rest of the wood surface.
Tips for avoiding common mistakes when applying wood putty
One of the most common mistakes people make when applying wood putty is not allowing it to dry completely before sanding it down. This can cause the putty to become gummy and difficult to work with.
Another mistake is not roughing up the edges of the hole or crack before applying the putty. This can cause the putty to slip out of the hole or crack, and it will not adhere properly to the surface.
Finally, be sure to clean the surface thoroughly before applying the putty. Any dirt or debris on the surface will prevent the putty from adhering properly.
How to apply wood putty
Applying wood putty can be a tricky process, but if you follow these tips you’ll be able to do it like a pro. Be sure to clean the surface thoroughly before applying the putty, and make sure that the area is stable before beginning the repair. Rough up the edges of the hole or crack with sandpaper, then apply the putty using a putty knife. Work it into the hole or crack, and then smooth it out so that it is level with the rest of the surface. Allow it to dry for at least 24 hours before sanding it down. Finally, finish off the repair by staining or painting over the area to match the rest of your wood surface.
When applying wood putty, be sure to:
– Clean the surface thoroughly before beginning the repair
– Make sure that the area is stable before starting the repair
– Rough up the edges of the hole or crack with sandpaper
– Apply the putty using a putty knife
– Work it into the hole or crack, and then smooth it out so that it is level with the rest of the surface
– Allow it to dry for at least 24 hours before sanding it down
– Finish off the repair by staining or painting over the area to match your wood surface.