How To Create A Beautiful Wood Burning For Your Project

Wood burning, also known as pyrography, is a beautiful way to add intricate designs and patterns to your woodworking projects. Whether you want to create a personalized gift or add some unique flair to your own work, wood burning is a skill worth learning.
In this article, we’ll go through the steps of how to create a beautiful wood burning for your project, including choosing the right wood, selecting the right tools, and some tips and tricks for achieving the best results.
Introduction
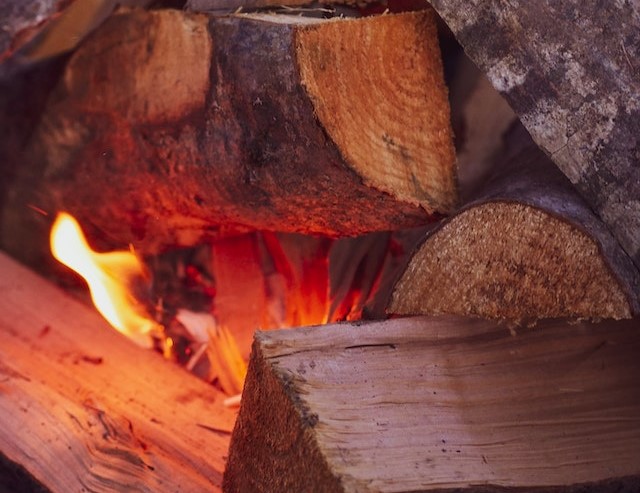
Ah, wood burning – the art of using a hot iron and fire to impress designs onto wood. There’s something about the smell of the burning wood and the stunning designs that it creates that makes it so special. With the right techniques, a little creativity, and some time, anyone can create beautiful wood-burning designs with ease.
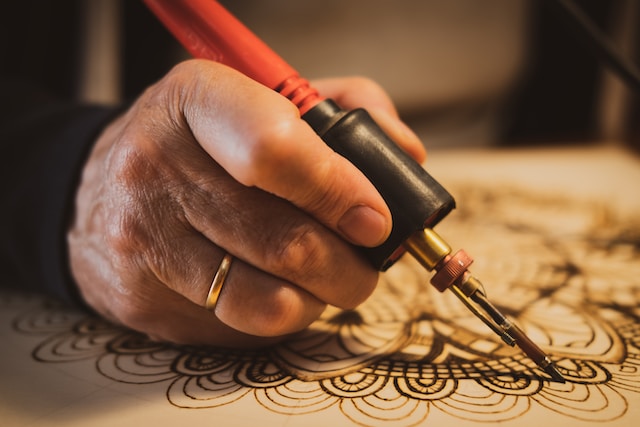
So, what is wood burning? Well, wood burning is the process of transferring a design or pattern on wood, by burning it with a wood-burning tool. This tool is quite similar to a soldering iron and works by using thermal heat to darken the design that’s been created on the wood. This process is frequently used to create decorative designs and patterns on a variety of different projects.
Wood burning requires a few inexpensive materials and tools that can be found at any craft store. First and foremost, you’ll need to decide on what type of wood you’d like to work with. Different types of woods can produce unique results, so it’s important to do your research. Then you’ll need to purchase your main tool, which is a wood-burning tool. In addition to these two items, you’ll need to pick up some wood burning tips and a selection of wood burning pattern designs.
Now that you understand the basics of wood burning, you’re just about ready to get started. Remember, with a little bit of creativity, patience, and practice, anyone can transform a piece of wood into a beautiful wood-burning piece of art!
What is Wood Burning
Have you heard about wood burning before? Guess what? Wood burning is a really fun way to create your own masterpieces out of wood! Let me tell you more about it.
Wood burning, also known as pyrography, is a craft of burning the design of your choice onto wood by using a hot tool. This craft has been around for centuries, and people all over the world have been using it to create amazing, unique artwork out of wood.
And it’s not just wood burning that you can do. You can also burn designs onto leather, gourds, even paper – and the possibilities are endless. You can also create 3D pieces with wood burning. The possibilities are endless with wood burning!
It’s easy to get started with wood burning. All you need are the basics like a wood burning tool and basic drawing or design skills. You can find wood burning kits at hobby stores, art supply stores, and even online.
To create your own wood burning piece, all you need is creativity. With a few pencils and some simple drawing skills, you can make something amazing out of wood! All you do is start with your idea, pencil it in, preheat the wood, and turn the project over to your hot tool.
Wood burning is fun, easy, and creates some really special keepsakes that can be passed down from generation to generation. So get out your hot tool, some wood, and let’s get started!
Materials
If you want to create a beautiful wood burning for your project, then you’ll need some supplies! Any project starts with the right tools and materials and this one is no exception. Here’s what you need:
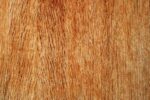
Wood: The first obvious thing you need for this project is wood! There are different types of wood that are more suitable for wood burning than others. Soft woods like basswood, pine, balsa, plain, and aspen are best for wood burning projects.
Wood Burning Kit: Once you’ve got your wood, it’s time for the wood burning kit. These kits come in all sizes and shapes, but the standard kit includes a burner, a selection of points with different shapes and sizes, a stand, and a heat shield.
Reference Pictures or Patterns: Lastly, you’ll need a reference picture or pattern you’d like to burn onto the wood. Look around the internet or magazines for ideas, or make your own. If you’re going for something intricate, look into stencils that can be placed onto the wood surface.
Now that you know what materials you need, the next step is to start preparing your project. Have fun and if you need any help, just give me a shout!
Wood
When it comes to woodburning your project, there’s no one-size-fits-all approach. Wood type, size and thickness all matter. You should select the wood carefully according to your design project’s specific needs. For example, if you’re creating a wall hanging, you’ll probably want to use a thin, flexible wood like basswood or balsa. For a sturdy spatula or box lid, use a bit thicker wood like walnut or pine. If the project needs a lot of intricate detail, opt for a harder wood like white poplar.
The most important thing when it comes to wood selection is to make sure the pieces are smooth and perfectly flat. You’ll have a hard time creating an even burn with a piece of wood that isn’t smooth and flat, so make sure to pick the best quality wood you can find.
Another important tip when it comes to wood selection is to select pieces of similar density. If you mix different density woods in a single project, you’ll have to adjust your temperature accordingly, which is time consuming.
Luckily, when it comes to wood for woodburning, there are lots of options. You can use scrap wood from your garage, or store-bought planks that come either unfinished or pre-sanded. You can even purchase woodburning blanks, which are pieces of unfinished wood with a layer of carbonized material on one side, making it easy and fast to create outlines and patterns with.
So, when it comes to wood, make sure you pick the best quality wood you can find and use pieces of similar density. If you want to make the job even easier, you can purchase wood-burning blanks specifically designed for woodburning. Happy woodburning!”
Wood Burning Kit
If you want to create a beautiful wood burning project, the first step is to get yourself a wood burning kit.
Before you go out and get the kit there are a few things you should consider. First, you need to choose the wattage according to your needs. If you’re looking to do more detailed work, then you might want a higher wattage. But, if you’re only going to burn shallow lines, then you don’t need a high wattage.
Another thing to consider when buying a wood burning kit is the type of tips and stencils that come with it. There are so many different types of tips and stencils and you need to make sure you get the ones you need for your project. For example, if you’re looking to do shading, then you’ll need a round or cone point tip. On the other hand, if you are looking to do detailed lines, then you should buy a chisel-point tip.
These tips can be made from metal, brass or aquarium tubing, so make sure you know what your project requires before buying a kit. Some kits come with a few different tips and stencils, while others come with just one. So make sure you are getting what you need for your project.
Another important thing to consider when buying a wood burning kit is the safety features. Many kits come with safety features such as temperature control and auto shut off, so make sure you go for the ones that offered the most safety features.
There are a few other things that come with the kit, such as the handle and the collar, so make sure you know what you’re getting.
Once you have chosen the right wood burning kit, you are ready to start creating some beautiful wood burning projects. Now go on and show off your skills!
Reference Pictures or Patterns

When you need inspiration for complex patterns, you can use reference pictures or patterns as a guide to making your project look beautiful. Whether it’s a classic logo, nature-inspired pattern, or intricate knot-work, using a reference or pattern will help make the creative process easier.
To get started, you should first find a pattern that you like. Pinterest and Etsy are great places to search for reference patterns. Depending on your project, you may want to think about the amount of detail you will need for the pattern. It’s important to only use patterns that you have the appropriate rights to and use for your project.
Once you have selected a reference pattern, you need to transfer it on to wood. Depending on the type of pattern you have chosen, you will need various tools, such as copiers,graphite paper, stencils, stippling brushes, or graphite powders. It’s important to follow the instructions for each tool to ensure your reference is transferred correctly.
When making your reference, don’t worry about making things perfect. Remember you will be burning over the reference, so all you need is a guideline. You can even use it just to make sure you don’t miss any details. If a mistake is made while transferring your design, you can always lightly erase it off or use a sharpie to fill in any gaps.
Once your reference is transferred, you are ready to begin wood burning. Reference pictures and patterns can add a lot of personality and detail to your woodburning project. When done correctly, you can create beautiful pieces that look like professional artwork. Now break out that woodburning kit and get to work on making something unique and beautiful.
Preparation
Gettin’ ready to create a beautiful wood burning piece can be a bit overwhelming, especially if you’re a beginner. But in this section, we’ll walk you through the preliminary steps of wood burning so you can start makin’ some burnt wood art!
The first step is to sketch your idea onto the wood. Don’t worry about being too precise or detailed; in fact, it’s actually better to start off with just a basic outline of what you want to burn. That way, you won’t waste any time trying to make perfectly precise lines, which can be a bit tricky without the right tools.
Once you’ve sketched out your idea, it’s time to pre-heat your wood. This is a crucial part of the process, since pre-heating the wood helps to make sure your burned design will be deeper and look better. All you need to do is pass a heated tool over the wood – a hot air blower works best here – in a series of passes until the wood is heated up enough. Just make sure you don’t heat it up too much or it could cause damage to the wood!
And that’s it – you’re now ready to start wood burning! To make sure you get the best results, be sure to take your time here. Have a look at our guide on choosing the right tool for the job and then get to work gradually adding those lines and shading to your wood piece.
So go ahead – get your wood prepped and ready and start wood burning! With the right preparation and a little bit of practice, you’ll soon be an expert and creating some truly amazing pieces. Good luck, and happy burning!
Sketch Your Idea
Before you begin creating your beautiful wood burning project, you’ll need to make a plan—literally! Before you take out your wood burning tool and start burning away, take a few moments to draw out a plan for your wood burning project.
If you’re feeling particularly creative, you can draw out a design from scratch. But don’t worry if you don’t have your own ideas—you can also find free designs online to trace. Consider drawing a simple flower, geometric figures, animals, or even just words or letters. So have fun with it and let your creativity run wild!
Start by taking a piece of paper and laying it on top of the wood. Then take a pencil and use it to lightly trace your design onto the wood. Don’t press too hard—you don’t want to cut into the wood! Trace around the outside line of the design, and don’t forget to include the smaller details too.
When you’re finished tracing the design, you’re ready to get started with the wood burning! Once you’ve mastered this step, you can even begin creating custom designs without the use of a paper template. Just make sure to practice beforehand!
Now that your design is ready, it’s time to finally begin burning! It may seem intimidating at first, but don’t worry—they don’t call it a wood-burning “passion” for nothing. With a bit of practice, you’ll soon be able to craft beautiful wooden pieces. So have fun, be creative, and make sure to take your time—your beautiful project will be worth the wait!
Pre-Heat Your Wood
Ahh, of course, the important thing you’ll need to do prior to getting all burnin’ and carvin’ on those pieces of wood! Don’t you want to make sure that your burning stays consistent and uniform? Of course you do.
So let’s talk about pre-heating the wood. You’ll want to make sure and do this part, cause if you don’t your wood won’t hold the burning and detailing as well, you feel me? And no one wants that.
This step can be done in a few different ways, you cold use a craft iron, BUT BE CAREFUL WITH THE HEAT! Or you can use heat gun, just make sure you don’t stay in the same spot too long. Shouldn’t be more than fifteen seconds at a time. That is, unless, you’re using a wood that has naturally occurring crevices, then you might have to spend a liiiiiittle bit longer in those spots.
The goal of pre-heating, like I said earlier, is to ensure that the wood holds the burning. This is done because the heat from pre-heating opens the grain and pores in a way that makes it easier for the burning tool to make the tacky burns that’ll turn out nicely.
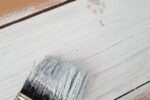
Once the wood is pre-heated, it should look like it has kind of a glassy sheen to it. You’ll want to test a spot on it with your burning tool (but not the same one you’ll be doing the entire project with) and make sure the heat has permeated through the wood. This is like applying a base coat of paint before putting on the finishing touches.
Once you do that, you’ll know your wood is good to go, and you can start to make your beautiful wood burning piece! Y’all ready? Let’s do it!
Burning
Well, this is the part where you really get to show off some of your technical wood burning skills. But don’t worry, even if you’re a beginner, you can still make a beautiful wood burning. Just like any skill practice makes perfect so don’t be discouraged if it doesn’t turn out perfect the first try.
Before you start, make sure you have a good steady hand and the right tool. You can choose from various temperature guns, an electric wood burner, a soldering iron, or a pyrography pen. Each tool is suited for different techniques so be sure to analyze your reference template to decide which tool is best for you.
Now that you have the right tool, begin by burning around the edges of your piece. You will want to make sure that you go slowly and follow the lines that you drew in the preparation section. Moving too fast will cause the burning to blur and make it look sloppy. When in doubt, practice on a scrap piece before going to the real thing.
Now it’s time for the fun part – shading and detailing. Make sure that you clean your piece once again before going into details. A steady consistent hand pressure is key in achieving neat lines, curves, and shading. If you’re still a beginner and aren’t confident with your own hand movements, you can always trace a pattern to help you the first few times.
Remember, this is where you get to show off your creative side, so most importantly have fun with it. Don’t worry if it comes out a bit different than you intended, practice and patience are the way to go! And when all else fails, call an expert or check out some tutorials online.
That’s it, you’ve made it and you did it. Pat yourself on the back and celebrate the end of this section. Now it’s time to move on to the next step – finishing.
Choose the Right Tool
Now that you’re all prepped, it’s time to finally dive into the burning stage! Yippee! Before you get too excited though, you have to take a step back and make sure you’ve got the right tool in hand for the type of design you want for your project. Wood burning works best with a tool that has a narrow, pointed tip, and you can find different tips in most wood burning kits on the market.
For example, if you’re planning on creating some delicate lines and cuts then you’ll need something with a pointed tip to safely get into tight corners. If you want heavier, thicker lines, then a rounder, wider tip is ideal. So don’t just start burning away, make sure you’ve got the right tip to get the job done.
To give you a little bit of an edge, I would advise you to only use wider tips when you’re more confident with your hand and the pressure you’re applying. This will help you stay on the safe side since wider tips have a tendency to burn deeper and wider than the more delicate tips. Not to worry though, you can always practice first on some scrap wood until you feel comfortable and confident.
Other than that, the best advice I can give to you is to not be afraid of trial and error. Don’t be afraid to experiment with the different techniques, tips, and tools and find out what works best for you. With a little bit of practice, you’ll master the art of wood burning and become the envy of all your DIY friends!
Start From the Outline
Ok, so you’ve gathered all of your materials, and pre-heated the surface, and are finally ready to start your wood burning project. It’s time to grab your wood burning kit and use it to create your masterpiece. Before you start burning, however, you have to have a plan. Drawing an outline of the image you want to create will help you make sure you have it all arranged correctly and give you a good starting point.
Now, you might think this is a huge tedious task, and it can be, but it doesn’t have to be. Using a sharp pencil, simply trace over your reference pictures or patterns to get started. You can even bend the tip of the pencil and use it to curve the lines or make them thicker or thinner in certain areas. Once you have the main outline down, you can start adding other details you want to include. Just make sure to use light pressure and keep your lines thin and faint.
Now that you know what your project looks like and have it all mapped out, it’s time to start burning. But before you go firing it up, you need to carefully mark off where you plan to add shades and details. That way, when you start burning, you’ll have a better idea of how to space out your lines and marks. It’s gonna take some practice, but I promise it’s not as complicated as it seems.
And that’s pretty much all there is to it. Just remember: if you don’t like how the project is turning out, don’t stress – you can always scrap it and start again! Good luck!
Burn Details and Shading
When it comes to wood burning, it’s all about the details! The idea is to make sure your design has shading and texture — and not just a flat burn. Easier said than done, right? Fear not, it’s really not as hard as it seems.
The key to adding details and shading is to always start with the darker shades first and gradually move your way up to the lighter ones. With this method, you can be more precise and even out unwanted bumps.
The main ways to add details and shading is to use either a skew tip, a flow point tip, or a shading tip on your wood burning kit. All of them have a sharp edge and work best when going with the grain of the wood.
The skew tip is ideal when it comes to adding wider lines, because of its slanted edge. It produces a V-shaped contour and works great for details such as outlining elements.
If you want to go for something with a finer edge, then the flow point tip is your best friend. Its edge is much sharper, making it perfect when it comes to creating thin lines and intricate shapes.
The last way to add details is with the shading tip. This is the go-to when it comes to getting that smooth transition from light to dark without any bumps. It produces a smooth gradation and is perfect for shading figures and making them look realistic.
Whatever tip you choose, be sure to practice before you start your project. Wood burning takes patience, so you don’t want to rush it. Take your time and enjoy the process. Now let’s break out those burning kits and get ready to design!
Finishing
So you’ve burned the design that you wanted into the wood, and now it’s time to get it finished so that you can start using it or display it. Finishing your wood burning is an important step to make sure that your design looks sharp and lasts a long time. Here’s what you gotta do!
First, you gotta remove all the shavings and residue that have been created while burning. Just use a vacuum cleaner or a soft brush to remove these safely. Then, once your wood is completely clean, apply a protective layer to make sure that the design is safe from dust and dirt. A clear sealant or spar urethane works well.
Once that’s done, let your wood piece dry and cool. It should take a couple of hours for it to be ready for use or display. As it dries, you’ll see the design get more and more defined and add an extra touch of beauty to your project. And that’s it! Congratulations! You’ve just created a beautiful wood burning for your project.
Remove Shavings and Residue
Hey everybody, have you ever been overwhelmed with shavings and residue when you’re wood burning? Well, don’t worry. Helping you out today is yours truly.
See, no matter how much you’re trying to concentrate, sometimes you can’t help getting a lot of shavings and residue everywhere. Now, these pieces of carbonized wood can actually take away from the beauty of your amazing wood burning art.
But don’t worry, I’m here to help you out! I’m going to teach you how to easily get rid of those pesky little shavings and residue. Let’s get started!
The first thing you need to do is get yourself a soft bristle brush. Now make sure you choose a brush that’s neither too hard nor too soft – you don’t want to damage your wood. Then, when you have your brush, simply use it to remove the shavings and residue from the surface of the wood burning.
A great way to make sure that you don’t leave any residue behind is to blow on your wood. This will help to blow away any particles you might have missed with the brush. When you’re done, these particles should be gone.
Finally, use vacuum to suck up any remaining pieces of residue. Now, if you don’t have a vacuum at home, you can also use your hands to carefully pick up the pieces of carbonized wood that are leftover.
Remember, when you’re removing the shavings and residue, be gentle and patient. This isn’t a race, and you want to make sure your wood burning looks absolutely perfect!
And that’s how you do it. Follow these simple steps and you’ll be sure to have the clean and beautiful wood burning you’ve been dreaming of. Until next time and I’ll see you soon!
Apply a Protective Layer
If you’re going to make sure your beautiful wood burning project lasts the test of time, it’s essential to use a protective coating. You don’t want to have all the hard work you spent creating the perfect piece of art go to waste, after all!
My recommendation is to finish your project off with a few coats of polyurethane. First, give the piece a light sanding with high-grade sandpaper and then make sure to wipe the surface with a cloth dampened with mineral spirits. Once that’s done, use a foam brush to apply the polyurethane.
You should start by applying a thin coat of polyurethane and then allow it to dry for 24 hours. Then follow up with a second coat and remember to make sure that it’s as even as possible. I recommend you to sand lightly between each coat with ultra-fine grit sandpaper – this will help the coats adhere better and reveal a smooth finish.
The type of polyurethane you use matters as well, because if the wood has been exposed to outdoor elements, you’ll want to use a polyurethane designed specifically for outdoor surfaces – just to be sure.
Once you’ve applied the correct number of coats of polyurethane, your piece is ready for any project or home décor display. Now, all you have to do is marvel at your beautiful work and enjoy the compliments it’s sure to garner – you deserve it!
Let the Piece Dry and Cool
After all the hard work you have done creating a beautiful wood burning, it is finally time to take the plunge, sit back, and watch it dry and cool.
It’s quite an exciting moment, there’s a lot of anticipation — and probably a little bit of terror! — that comes along with waiting for the wood piece to dry and cool.
But fear not, my young apprentice! This process is a cinch. All you need to do is to set the piece in a well-ventilated area, away from any direct sunlight and heat sources, and you should be good to go!
The cooling process should take up to around 24- 72 hours. I know this may seem like forever, but trust me, patience is a virtue. After all, it took the Ancient Egyptians over 20 years to build the Great Pyramids of Giza. If it took them that much time to build something so incredible, why should we be in a rush with a small wood burning?
So, during your waiting time, you can either mark the date and impatiently count the days, or you can make good use of your time by preparing ideas for your next wood burning project or maybe choosing colours for the piece.
You can even try exploring some new techniques. I mean, every creation process has moments of blockage, so why not look in the right direction where inspiration awaits.
Once your piece is cooled, you can go ahead and apply the protective layer. This will help guard the piece over time, allowing your artwork to last for a long while and stay in good condition.
However, there’s one thing you must pay attention to — and that is not allowing too much heat on your piece after the protection layer had been added.
Above all, be a proud creator of your work. Share your story with others and don’t forget to invite friends over to admire your latest masterpiece.
Now that you know all about the art of wood burning and its wonders, go ahead and create something beautiful and inspiring!