How To Make A Perfect Dovetail Joint For Your Woodworking Project

Dovetail joints are a classic woodworking technique used to join two pieces of wood at a right angle, often seen in drawers and boxes. While they can seem daunting for beginners, with the right tools and techniques, anyone can make a perfect dovetail joint.
In this article, we’ll go over the steps on how to make a perfect dovetail joint for your woodworking project, from measuring and marking your wood to cutting and fitting the joint together. So let’s get started on making that perfect joint!
Introduction to Dovetail Joints
Well, hello there, ladies and gents! If you’re new to woodworking, you probably don’t know too much about joint making yet. Not to worry. Today we’re going to discuss a popular staple among woodworkers: dovetail joints. When connecting two pieces of wood in your next project that requires a strong and aesthetically pleasing finish, a dovetail joint is the perfect choice!
Let’s start by discussing a few basics about dovetail joints. To start off, dovetail joints are a type of interlocking joint for connecting two pieces of wood. It’s a wooden joinery technique that is known for its strength and attractive appearance. The dovetail joint gets its name from the shape of the edges that interlock, which looks like a series of small triangles or dovetails.
Next, let’s discuss the different types of dovetail joints. There are two main types of dovetails: through dovetails and half-blind dovetails. Through dovetails are commonly used for boxes and cabinets. They are visible from both sides, because the joinery cuts extend entirely through the joint. Half-blind dovetails are used for making drawers and are visible from only one side, as the joinery cuts meet only halfway through the wood.
Before moving on, let’s go over the advantages of the dovetail joint. The main advantage of the dovetail joint is its strength. Thanks to the dovetail joint’s interlocking edges and surfaces, you won’t have to worry about the joint splitting or coming apart when connected to the other piece of wood. Not to mention, dovetail joints also have an eye-catching look that will bring your woodworking projects to the next level!
Now that you have a better idea of what a dovetail joint is, what types there are, and its benefits, let’s move on to the next section called Detailed Steps. Stay tuned for more woodworking tips and tricks!
Definition
Hey there, woodworkers and do-it-yourselfers! The first thing you need to know when it comes to working with dovetail joints is what they are. A dovetail joint is a series of wooden pins that create an interlocking pattern when they are connected. This joint is stronger than the wood it connects and is used to keep two pieces of wood together in a strong joint. It’s probably one of the most recognizable and popular types of joints used in woodworking.
Now that you know what a dovetail joint is, let’s look at the different types. There are two main types of dovetail joints: through dovetails and half-blind dovetails. A through dovetails are created by pinning two pieces of wood together, with the pins protruding from both sides of the joint. Half-blind dovetails are more intricate and involve only one side of the joint being visible.
Another important thing to consider is the advantages of using dovetail joints. Many woodworkers love using dovetail joints because they create visually appealing joints that are also very strong. Since the pins in the joint protrude from both sides, they help keep the two pieces of wood together, as opposed to other types of joints that could leave one side loose. In addition, dovetail joints also allow for a better visual presentation, since they can be seen from all directions.
So there you have it – a quick overview of what a dovetail joint is, the different types, and the advantages of using them in your woodworking projects. Now you are ready to dive into the actual making of a perfect dovetail joint. Don’t forget – measure twice, cut once!”
Different Types
Do you want to add some intricate styling to your woodworking project? Well, the dovetail joint will be your best friend while making it. A dovetail joint is the perfect way to add beautification, elegance, and strength to your woodworking creation. But, before you can make your perfect dovetail joint and be absolutely confident in your work, it’s crucial to know the different types of dovetail joint, what they look like, and how-to make each one.
Let me enlighten you on the diversity of dovetail joints. There are two main types of dovetail joints — through-dovetails, and half-blind dovetail — which differ in their look and where they’re used. We’ll start with the traditional through-dovetails, found in a lot of furniture pieces and boxes. Through-dovetail joints provide strength and rigidity to the joint, so it’s the perfect choice for strong and permanent pieces.
The other type of dovetail joint is the half-blind dovetail. As the name suggests, half of the dovetail is “hidden” on the side of the joint. This type of dovetail is more commonly used because of the aesthetics. Half-blind dovetail is perfect for when you don’t want the joint to be glaringly visible, but still want it to be aesthetically pleasing.
If that wasn’t enough, you can also get involved with some of the more interesting dovetail varieties. These include through-wedged dovetails, secret dovetails, half-lapped or full-lapped dovetails, and even sliding dovetails! If you ever want to get into more complex dovetail work, then these should definitely pique your interest.
So, now that you know the difference between the two main type of dovetail joints, you can start working on your woodworking creation with the peace of mind. Just make sure to choose the type that best suits the project at hand.
Advantages
There’s something special about the dovetail joint; it looks cool, it’s strong, and it says something. You put a dovetail joint on something, and it says that, hey, you put some effort into this project. You ain’t just some lazy dude! That’s why we need to talk about the advantages of dovetail joints, because they are AMAZING!
First up, if you use the right techniques, a dovetail joint is really, really strong. The tail parts of the joint interlock and fit against each other, with the whole joint glued together. So put this joint on something and it ain’t never gonna come apart. Ain’t that something? We can thank the ancient Egyptians for inventing a joint this strong.
Second, and I mean this in all the best ways, a dovetail joint looks cool. It is a visually impressive way to show off the craftsmanship of your project. A dovetail joint has nice lines and angles, often making it a feature of the piece. Plus, it shows that you have a real talent for making beautiful, intricate pieces.
Thirdly, dovetail joints are quick to make. Once you get used to making them, you can crank out a few in no time. Remember, there are several different types of dovetail joints and it’s up to you to determine which one will work best for your project.
And lastly, dovetail joints can be quite versatile. For instance, you can adjust the size of the dovetail joint depending on how thin or thick your wood is. Make them too thin and it won’t be as strong, but make them too thick and it could be too bulky. So you can customize the size of the joint to perfectly match the size of your project.
So there you have it, four awesome advantages of making dovetail joints. You not only get a strong, visually impressive joint, you can also speed up the process and even customize the size of the joint. Now that’s what I call a winner!
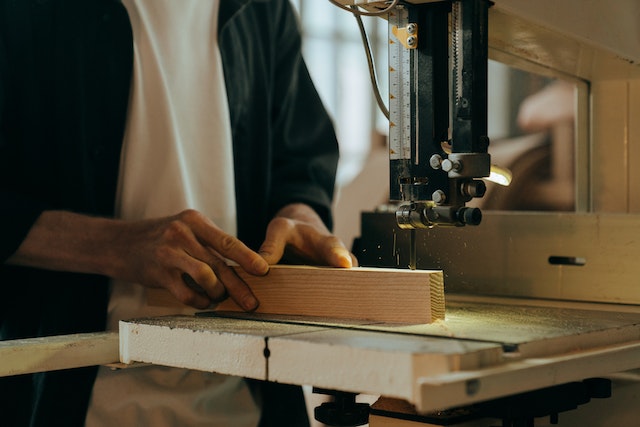
Detailed Steps
Hey there folks, let’s get dovin’ into how to make the perfect dovetail joint. As any experienced woodworker will tell you, you’ll encounter this joinery all across your projects, and making it really well can make all the difference between a good and a GREAT job.
First, let’s define a dovetail joint. Basically, it’s the kind of joint that looks like the tail of a dove when it’s finished — kind of like two matching puzzle pieces that you’d use for a wooden box or a cabinet.
Now, let’s get to the nitty-gritty and walk through the steps to making it. Step 1 is to measure and mark out the parts that you want to connect to each other. Make sure to draw the lines and mark it on both pieces of wood — trust me, this will make things much easier.
Next up is the cutting. Step 2 is to cut the tails onto one of the parts, and step 3 is to cut the pins onto the other. For each of these steps, you’ll need to gradually fan the cuts outwards if you want a nice, even joint.
Once that’s all done, it’s time to move on to the assembly. Step 4 is to dry fit the pieces together — you don’t actually want to use glue yet, just test the fit to make sure it’s nice and snug. If you need to make any adjustments, now is the time.
Finally, Step 5 is to glue and then clamp the two parts together. Now, the tricky part here is that you want to make sure to get an even clamping force so that everything stays level and in place.
Alright, that wasn’t so complicated, was it? Well now you have all the steps to make that perfect dovetail joint. Just remember to measure twice, cut once and use the right equipment, and it’ll be great in no time!
Step 1

Welcome to Step 1 of Dovetail Joints 101. Your woodworking project is depending on you to make the perfect dovetail joint, so you better pay attention!
According to the ancient woodworking masters, Step 1 begins with preparing the wood. Cut them to length, width, and thickness according to the desired shape. If needed, use a jointing plane or a planer to make sure the edges are smooth and straight.
Next, mark the exact center of the boards. Make sure to use a small marking tool that provides very precise measurements. Place both boards on the bench together to ensure their even lengths.
Now for the fun part. Trace out the outline for the dovetail using a template or a marking knife. For a classic ‘through-dovetail’ joint, simply draw two diagonal lines on each board, starting from the center. But for a half-blind dovetail, you’ll need to break up your lines with multiple smaller cuts.
After that, use a chisel and hammer to carefully cut into the wood around the lines. Follow the guidelines and go slow. It may be tedious, but sweat equity is what makes a dovetail joint look great!
Finally, use a coping saw to cut away the excess wood and make sure your joint has nice and sharp corners.
Now you’re ready to move onto Step 2.
Step 2
Y’all know what I’m about to say, measure twice, cut once! Now for your dovetailing project, you’re gonna need to cut some angles so you have to make sure y’all get them right. Step 2 is all about sawing the angles.
To make the angled cuts, all you gonna need is a saw and, if you can get it, a chisel. First off, you gotta figure out which angle it is you gotta make. For dovetailing, you gonna need a 75-degree angle.
Once y’all have the angle figured, cut your pins and tails first. That right there will give you some space. Y’all don’t want your saw getting stuck in them little crevices. With that being said, be careful about the width of your cut because when you put those two pieces of wood together, you wanna make sure everything fits nice and snug. Plus, check the depth of your cut and carve until ⅛ inch shy. And don’t forget, sometimes your wood is gonna have less or more resistance when cutting, just gotta use your best judgment.
I know it’ll be hard at first, but that’s what practice makes perfect right? You gonna have to do trial and error with y’all sawing angles. Make sure your angles are consistent, so try using a template if you can. Have ya saws set just right so you’ll have some uniformity.
Now if you missed by a little bit don’t worry, that’s why I said trial and error. But if you’re off by too much, it may be better startin’ from scratch. You don’t wanna push them pieces together and the entire thing be off. Cause if it does, that hard work you put in for all them cuts gone be for nothin’.
So be mindful when sawing, use the right equipment, an have patience. Perfect dovetail joints take a lot of time, so don’t rush it. Take your time an it’ll be all worth it when you get perfect joints like a professional.
Step 3
If you thought Step 2 of making a perfectly dovetail joint was hard, you might want to think twice before taking Step 3. This third step can be a real doozy. In Step 3, you need to cut the pins on the other piece of plywood. We told you – patience is the name of the game!
Now, the method for this is relatively similar to how we cut the tails in Step 1. Take the saw and cut away at the edge of the piece of plywood, slowly slicing off pieces that become the pins. Take your time here, since the shape and fit of the pins will make or break the quality of the joint!
Once you have your pins cut, it’s time for the fun part – putting the joint together! You’ll have to take the two pieces of wood and see how they integrate, using your chisel and mallet to adjust it according to your needs. Who said woodworking isn’t a jigsaw puzzle? Obviously, they hadn’t met you in Step 3 yet!
Once the pieces fit, use a bit of wood glue to help them stay put. The most important part of the process isn’t over yet, though. You need to test the joint’s strength. If any of the pins and tails don’t fit properly, it could affect the joint’s strength. To test, hold the two pieces of wood together and lightly push down on one edge. If your joint is made properly, the two pieces of wood should hold tightly together.
If your joint doesn’t hold together, don’t panic. Just dust yourself off and start the process of Step 3 once again. We’re sure eventually you’ll get it right! The key is practice and patience.
Step 4
Ah, so you’ve made it to Step 4, the all important bit of the dovetail joint. Many people make a huge mess at this step, but not you! Now, all you need to do is apply the glue, and fit the joint together with the tenon. Before you do that, you need to remember one of the easiest but most important rules of woodworking: measure twice, cut once.
Make sure all the fingers of wood fit securely together and it looks exactly as you pictured it. It’s time to get ready to glue the joint. Apply an even coat of wood glue on both sides of the joint. Take your time with this part, use an old tooth brush to rub down the wood and make sure the glue is reaching every part of the joint.
Once you’re done with that, grab your rubber mallet and test out the fit of the joint to make sure everything is a snug fit. If it’s not, it’s back to the drawing board. After you test out the fit, add clamps to both ends of the joint. Tighten the clamps into place, so the joint sticks out in its nice, perfect shape. Don’t forget to use protective pads to save your project from unnecessary dents and marks.
Step 5
It’s time to put the finishing touches on your gorgeous, glimmering dovetail joint. Now remember, you’ve come this far, so don’t sabotage it by cutting corners.
To complete the joint, take your chisel, sharpen it up like a razor blade, and slowly and carefully clean up any excess wood around the edges of the joint. Make sure to get all the little bits out of the way, otherwise your joint won’t look perfect.
Once you’ve gotten all the splinters and sawdust out of the way, it’s time to put some sealant on the joint. Take your favorite water-resistant sealant and brush it on the sides of the joint. This doesn’t just help to protect it for the future, it gives it a nice shine.
Give the sealant a few minutes to settle in and dry before you put the final touches on your masterpiece. Take your favorite stain, making sure you choose one that won’t clash with the existing wood.
Gently brush the stain on the sides of the dovetail joint and marvel at the beauty of your work. Take a step back and admire the way the wood shifts and shimmers with the light of your house bouncing off every edge and corner.
You’ve created something truly spectacular here; something that your grandkids will be proud to show off one day. Congratulations! Now all you need to do is show off your project to your friends and family.
Tips & Tricks
Welcome again to this amazing journey of learning how to make the perfect dovetail joint for your woodworking project! Now we’ve come to the end of our detailed instructions for the process, but before you start putting saw to wood, I want to make sure you’re well-equipped with certain tips and tricks to make the job easier — and end up with a result you’ll be proud to show off when the job is done.
First of all, let’s make sure you take ample time when planning the job. Measure twice, cut once, and you save yourself a lot of extra work in the end. Sure, it may take longer to make sure your plans are right, but it’s better to take the time now than to realize you cut something wrong when you’re halfway finished. And while we’re discussing plans and measurements, don’t forget to use the right equipment! Get the right tools for the detailed cuts that dovetail joints require, and you’ll end up with a much neater finish in the end.
Also, don’t be afraid of trial and error. You’re gonna make mistakes, and that’s This is part of learning how to make the perfect dovetail joint, and there’s no better way to learn than to do it yourself. The more mistakes you make, the better off you’ll be in the end. So make them and learn from them, and you’ll get better each time.
Finally, when you think you’re finished, it’s a good idea to make a checklist to make sure you’ve done a perfect job. Don’t just eye-ball it and think it looks good – compare it with the detailed instructions and make sure every single step was done properly. Take your time and really monitor your progress, and you’ll be sure to end up with an amazing dovetail joint that will take pride of place in your woodworking portfolio!
That’s it for this lesson in making the perfect dovetail joint for your woodworking project. Now go out there, measure twice, pick the correct tools, and make something amazing!
Measure Twice, Cut Once
Hey, who’s looking to give their woodworking projects a special touch? Look no further! Today I’m going to tell you about the importance of measuring twice, and cutting once when putting together your perfect dovetail joint.
Now, as any good woodworker knows, the key to a successful dovetail joint is precision, and this is where the classic saying of “measure twice, cut once” comes in. It’s how you go from wood chaos to wood perfection! By taking the time to accurately measure and mark the lines of where you’re going to cut, you avoid the mistake of cutting too much off the wood and ruining your perfect project – and you won’t be wasting good wood either.
To make sure your measurements and cuts are up to snuff, use the right tools, such as a ruler and a pencil. If you’re feeling fancy, you can use equip with a laser level for extra accuracy. But here’s a pro-tip: just remember to double-check your measurements and make any adjustments if necessary. This way, when you do make the cut you know you’re getting accurate results.
And hey, if you’re feeling extra adventurous, you can even try your hand at the “test cut”. A test cut is when you actually make the cut you plan on making for your joint, just on a scrap of wood instead of on your actual project. This is great way to make sure your measurements are perfect, and your cuts are exactly where they’re supposed to be.
So there you have it -measure twice, cut once, don’t be modest. If you take your time, double check your measurements and use the right tools, you’ll be making smooth and stylish dovetail joints in no time.
Trial & Error
So, you’ve decided to take on a woodworking project. Congratulations! You definitely want to make sure that your project is done well, but it takes practice – and a lot of it! Enter trial and error. Don’t be too hard on yourself if things don’t turn out as planned. You’ll only get better with practice, and it’s all part of the learning process.
When it comes to tackling up a dovetail joint, trial and error can really come in handy. It’s best to practice cutting a few on some scrap wood until you get the shape, fit and proportion the way they should be before doing the joint on your project. Depending on the way you’re doing the joint, you may have to go through a few iterations to get it just right.
When it comes to practice cuts, it’s best to go with something simple – a classic jig style joint. That’ll help you really learn the basics of cutting a dovetail before moving on to something more complex. Once you’ve got the basics down, you can start exploring different joint types, angles and shapes.
When cutting the different pieces of a dovetail joint, it’s especially important to take your time and get things as accurate as possible. A good set of marking gauges or a dovetail jig can come in extremely handy at this point. Measure twice and cut once! If your joint ends up being a little off or too tight, don’t be scared to junk it and start again. It’s better than ending up with a joint that is too loose or too sloppy.
It’s also important to keep in mind that some joinery techniques require that you cut away the waste. Again, start with some practice cuts and get a feel for the tool you’re using and how to move it efficiently. Even small adjustments can make a big difference.
At the end of the day, trial and error is only a part of the learning curve. Don’t be afraid to make mistakes – it only means you’re pushing yourself, and isn’t that the ultimate goal of a woodworking project, anyway? Once you get the hang of trial and error joint cutting, you’ll be amazed at the results.
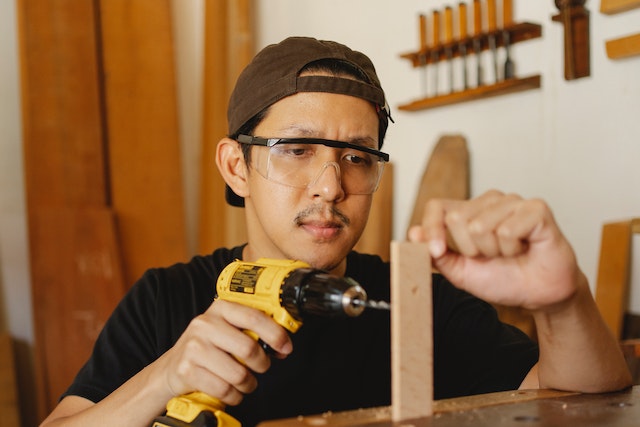
Use the Right Equipment
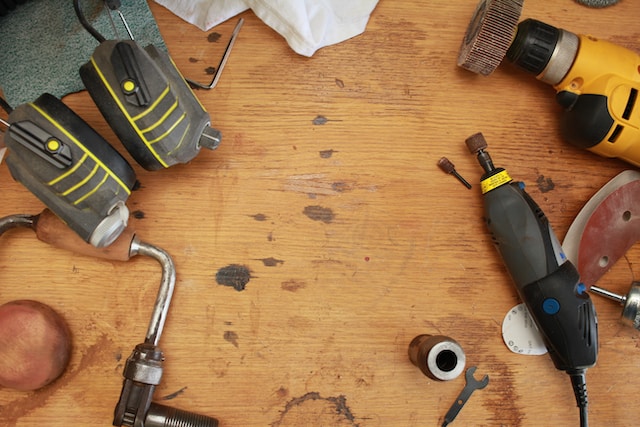
Okay folks, I’ve got some real talk for you: making dovetails without the right equipment is just like a mission impossible, an absolute no-no.
If you’re new to woodworking, it always pays to invest in the right equipment. Having the right tools will make your finished product look more professional and also save you time and energy in the long run.
For dovetail joints, you’re definitely going to need to invest in a dovetail saw. These are typically small saws that are used to get into tighter areas and make precision cuts. Get one with the thinnest blade that you can find, as the thinner the blade, the easier it will slide into tight areas for accurate cuts.
Next, make sure you get some chisels. Chisels come in different sizes, so make sure you get the appropriate size for the job. Aim for a set that contains both paring and mortise chisels, as well as a sharpening stone for regular maintenance.
You will also want to get a dovetail marking gauge. This is one of the most essential pieces of equipment for making dovetail joints, and without it you are likely to make mistakes. A good quality marking gauge will be accurate and will help you make fast, clean cuts more accurately.
Finally, the last thing to consider is the wood you’re going to be using. Make sure you get a wood that is tough and durable so that your joint holds up to wear and tear. You also have to take into account the type of wood and the parts you are cutting to ensure that they fit together without any problems.
So, don’t forget, use the right equipment when making dovetails… it’s a non-negotiable for perfect joints.
Final Checklist
Well, the first and the most important step to having a perfect dovetail joint is to be sure that you go through the final checklist. This may take some time, and it may feel incremental, but it’s worth having the extra peace of mind that the dovetail joint you’ve created is actually perfect.
First, you’ll want to ensure that everything is secure. This means taking a look at how your joint fits together and making sure that everything lines up and is snug. You also want to make sure that no parts are overhanging, as that can lead to loosening of the joint.
The next thing you’ll want to look for is whether or not your dovetail joint is symmetrical. A successful dovetail joint will have the same shape on both sides, so you’ll want to take a close look to make sure that yours does.
Finally, you’ll want to make sure that the actual joint is properly fit together. This means that the wood from both sides should fit together perfectly and there should be no gaps or ridges. If it looks as though something is wrong with the fit, you’ll need to go back and make the necessary adjustments.
Most importantly, don’t be too hard on yourself. Sometimes it may take several tries to get it right and it can be disheartening if you mess up. But don’t worry, just take your time and be patient – you’ll get it right eventually! And when you do, you’ll be able to walk around and proudly show off your perfect dovetail joint.