How To Create A Beautiful Wood Veneer For Your Project

Do you want to craft a beautiful wood veneer for your project, but don’t know where to start? Hey, don’t worry – I’m here to help you on how to create a beautiful wood veneer for your project! Creating a wood veneer isn’t as hard as it sounds! All you need is some plywood, wood veneer, glue, sandpaper and a few hand tools. With a few steps, it won’t be long before you’re admiring a beautiful wood veneer.
For the project, you’ll need some plywood, wood veneer, glue, sandpaper, a saw, a hammer and a hammer. You’ll also want to get some paint and some sealant to finish it off.
To begin the project, you’ll want to start by measuring and cutting your plywood to the desired measurements. Now, it’s time to start sanding your plywood to ensure the surface is smooth and even.
Now, it’s time to prepare the wood veneer. Make sure you pay close attention to the thickness of the veneer and cut it accordingly.
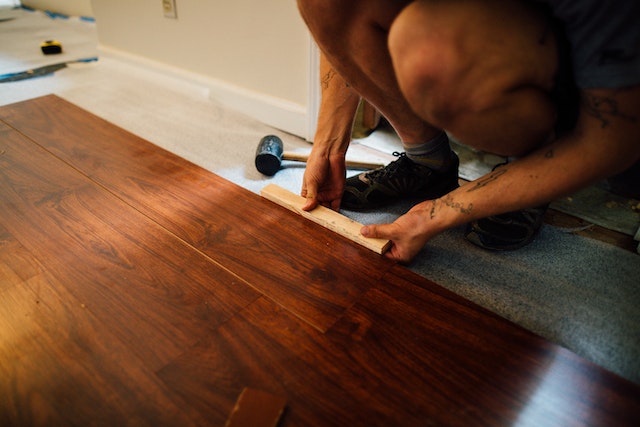
Once you have your veneer cut to the right size, you can go ahead and apply the glue to the plywood and then lay the veneer onto the glued surface. Place some weights onto the piece to hold it in place while it dries.
Once the glue has dried, you can go ahead and trim any excess veneer with a hammer and a chisel. Now, it’s time to vacuum the piece to remove any debris.
The next step is to apply a coat of paint or stain to the veneer to make it look even more beautiful. You don’t need to be too fancy with this as you just want it to look nice.
The last step is to finish the wood veneer with a coat of sealer to help protect it from the elements.
Now, all that’s left is to step back and admire your work! Congratulations, you have successfully created a beautiful wood veneer for your project! With your newfound skills, you are sure to be the envy of all your friends! So, go out there and create something stunning! Be sure to let me know how your project turns out!
What You’ll Need
If you’re anything like me, you’re all about wanting your project to look its best. Creating a beautiful wood veneer can help you achieve that. But, before you can make any progress on this, you’re going to need all the right supplies. So, here ya go!
First of all, you’ll need some plywood, preferably half an inch thick. Then grab yourself some wood veneer. It’s available in a variety of finishes and thicknesses at most hardware stores. You’ll also need wood glue, sand paper, a saw (either a jigsaw or a table saw will do), clamps, vacuum, and a sander. And, last but not least, you’re gonna need paint, to give your veneer a nice looking finish and sealant, to keep it looking good for years to come.
All these materials may sound like a lot, but trust me, it’s worth it for the clean, beautiful finish you’ll be able to achieve with your project. Now that you have all the supplies you need, it’s time to start the fun part – actually crafting the veneer!
This isn’t impossible either. In fact, with a little patience and some practice, you’ll be creating amazing wood veneers in no time! Good luck!
Preparation
Now it’s time to get ready for the fun part: creating a beautiful wood veneer for your project. This is actually a lot easier than you may think and once you get the hang of it, you can create stunning, intricate veneers for all kinds of projects such as furniture, cabinets, and frames. Before you get started, you’ll need to make sure you have the following items:
A sturdy workbench or table, some painter’s tape, clamps, glue, a paint brush and roller, a putty knife, a vacuum cleaner, a small saw, and of course veneer. We recommend using maple or cherry veneer for a professional-looking finish.
Once you’ve gathered all the materials, the next step is to break out your trusty measuring tape. Measure out the size of the plywood you plan to use for your project. Think carefully about the thickness of the plywood, too – it’s important to have a uniform thickness that matches the veneer.
You should also make sure the workspace is clean and free of debris before you start. This should go without saying, but it can be easy to forget in the excitement of the project.
Now that you’ve got all the tools and materials, and the workspace is ready to go, it’s time to start creating that beautiful wood veneer for your project! Follow the steps outlined below for best results.
Step 1: Measure and Cut the Plywood
The first step of creating a beautiful wood veneer is to measure and cut the plywood. You’ll need a tape measure and a saw to do this.
Before you start sawing away, make sure that you measure twice and cut once to ensure your wood is cut to the right size. Measure the wood and mark the measurements with a pencil.
Then, once everything is measured, you’re ready to cut.
I’d recommend a jigsaw for this step because it’ll give you the most control over the shape and size of your plywood. It’s also a great exercise if you’re feeling a bit overconfident. Just make sure to wear goggles and use the proper safety procedures.
Next, use a saw to cut out the pieces that you’ve measured. Just make sure you don’t saw off one of your fingers in the process. If that does happen, it’s better to start the process over again.
Once you’ve finished cutting your wood, you’ll need to sand it down. This process ensures that there are no sharp edges. And it’ll also give you a nice, smooth finish.
So, let’s recap: When creating a beautiful wood veneer, the first step is to measure and cut the plywood. Use a tape measure and saw to make sure the measurements are precise and then use a jigsaw to cut out your pieces. Finally, sand down any sharp edges to get a nice, smooth finish.
Follow these steps and you’ll have a beautiful wood veneer in no time! Good luck!
Step 2: Sand the Plywood
So if you my favorite readers have decided to create a beautiful wood veneer for your project your next step is to get to sandin’! Yup, you’ve got to make it smooth so the veneer will stick to the plywood like glue. The least but not least in terms of the prep work to get things right.
The tools you’ll need are, at the very least, a palm sander and some sandpaper. Start by sanding the surface with a 120 grit sandpaper. If the plywood is uneven and you want to create a smooth finish use a power sander as well. Sand with the grain so you won’t damage the wood. Sand all surfaces of the wood twice to make sure you don’t miss a spot.
When you are finished sanding, you’ve got to make sure no splintery or rough patches remain. So get a tack cloth and rub it to wipe away all the sawdust. You’ll repeat this step for each side of the plywood.
And if you are feeling extra fancy you can try to put something called a “filler putty”. It basically is a type of compound you can apply over certain spots of the plywood. Don’t forget that after using the putty let it dry for about 30 minutes prior to sanding it.
Once your plywood is free of any splintery, rough patches and you don’t see no filler putty around it’s time to move on to the next step. And you’ve just finished with the thankless job of sanding the plywood! I bet your hands are so tired that they need a nice bubble bath.
So when you are done don’t forget to wash those hands and start to prepare the veneer!
Step 3: Prepare the Veneer

Awww yeah! Now that you’ve got your plywood cut to size and sanded, it’s time to prepare the veneer. You’re going to need really high-quality veneer, so make sure you’re getting the best.
Now the first thing you wanna do is unroll the veneer on a clean, flat surface so you can see what you’ve got. Veneers come in all kinds of designs, and there’s usually more than one layer of wood, so what you wanna do is get to the root of the design, the base layer.
Once you’ve found the root of the design, you can start to plan out how you want the finished design to look. So take your time, look at it from different angles, and then get out a pencil and start sketching your design. Basically, you want to find a way to make the wood look like one piece, but you can also play around with adding a few different shades to the design to make it look more interesting.
Now before you get too carried away, remember that you’re going to be gluing the veneer to the plywood later on, so it’s important to have the edges straight. You can do this using a veneer saw. It looks kind of like a coping saw and it’ll help you make straight, even edges. Just remember to be extra careful when cutting veneer, because it’s delicate and easy to mess up.
Once the veneer is cut to the right size, you wanna make sure it’s dry and clean. You don’t want any moisture getting in when you glue the veneer to the plywood. So give it a good cleaning with a dry cloth and make sure it’s free of any dirt and debris.
And that’s about it when it comes to preparing the veneer. Now it’s time to move on to the next step, which is gluing the veneer to the plywood. So let’s get started on that!
Step 4: Glue the Veneer to the Plywood
Alright now, it’s time to get sticky with it! In this step, you’re going to glue your beautiful wood veneer to the prepared plywood.
First things first, make sure you buy the right glue. You can’t use regular old white glue, you need something specific like contact cement. It’s super strong and is specially designed for wood veneer. Trust me, you don’t want to mess around with regular glue and ruin your project.
Lay down some newspaper on the work surface, buy a brush and grab your container of contact cement. Now, spread some glue on the plywood. Make sure it is spread evenly – no skimping here. Then, with the brush, spread some glue on the back of your veneer. Now you’re ready to stick them together.
Press the veneer firmly to the plywood so that it is stuck in place. Flip it over and make sure the edges are properly lined up. Then flip it back over and press the veneer onto the plywood again, making sure the whole thing is glued down properly.
Give your project around 15-20 minutes to dry before moving onto the next step. That’s it – pretty simple! Now you have a beautiful wood veneer glued onto your project that is ready for the next step.
Step 5: Trim the Veneer Excess
Wow, you’re cruising right along with your wood veneer project. You’ve just hit the fifth step – Trim the Veneer Excess – and you’re feeling really proud of yourself.
You know the drill, right? You’ve been at it long enough to have the process down. Measure and cut the plywood, sand it down nice and smooth, prepare the veneer, glue it to the plywood, and now… trim the veneer excess.
You grab a utility knife, start trimming away, and it’s coming along… until you hit a snag. It’s not too bad at first, just a few little sticky-outy bits. But as you keep cutting, it just seems like there’s more and more of them. By the time you’ve trimmed away the last of the excess, you feel like you’ve been at it for hours.
Ah, well. You sigh, brushing away the wood shavings, and step back to survey your work. You know that sometimes this part takes a little finesse. But hey, at least you got it done, right? After all, you’re a master of wood projects, and nothing’s gonna get in your way!
Now, grab your vacuum and make that surface nice and dust-free so you can get to the fun stuff. Painting your masterpiece!
Step 6: Vacuum the Piece
Time to suck up all the debris from sanding and trimming – it’s vacuuming time! Vacuuming not only picks up all the sawdust but helps to raise the grain for a properly smooth finish. This is also a good time to make sure all the glue from the adhesion of the veneer and the plywood is secure.
An important aspect of vacuuming is that it ensures all the dirt and debris, as well as that nasty glue residue, will be picked up. This not only better prepares our piece for painting and finishing, but also improves its aesthetic value – no-one wants those nasty little globs of glue irking up the surface of our masterpiece. To vacuum the piece:
1.Begin by attaching the proper sized vacuum accessory to your vacuum hose. Make sure it fits snugly to avoid any air leaks.
2.Set your vacuum on the highest setting, or on a setting that won’t blow too much air.
3.Vacuum the entire piece, including all the sides and underneath, making sure to get into all the crevices. As you move the hose around the piece, be sure to keep a steady spot, so the movement won’t cause the pieces of veneer to separate from the plywood.
4.You may need to vacuum several times, in particular concentrating on those areas where glue has just been applied. The more of the dirt and debris that’s picked up, the better – and you don’t want it anywhere near your piece after you’ve painted and sealed it.
And that’s it – if you’ve worked your way through this process and are still standing, you’re ready to move on to painting and finishing the wood veneer. Congratulations, now you can enjoy your beautiful wood veneer project with peace of mind.
Step 7: Paint the Veneer
Time to paint the veneer! You’ve gone through all the steps and now, your wood veneer is looking spectacular! The final step in creating a beautiful wood veneer is to give it some color.
This part is fun! After all of that hard work, why not have a little fun and do something creative with color? With a few coats of paint, you can turn your dull piece of wood into something bright and full of personality.
To make sure your paint job looks its best, you will want to find the right type of paint. You’ll need to look for paint that is specifically formulated for wood surfaces. This will help ensure that the paint will stick and look its best.
Once you have your paint picked out, it’s time to start painting! The best way to do this is to use a paintbrush. You want to brush in the direction of the veneer so that the paint is evenly distributed. You can also use a roller if you’d like.
When you are finished, you should allow the paint to dry completely before moving on to the next step. This can take several hours, so you may want to plan accordingly.
Once the paint is dry, you should take a look to make sure you are happy with the results. If everything looks good, then you can move on to the next step. If the paint job needs a little bit more work, then you can add a few more coats of paint.
Congratulations! You’ve just painted your beautiful wood veneer. Not only did you get to have some creative fun, but you also made your project look amazing! Now you can move on to sealing and finishing it.
Step 8: Seal the Veneer
Well, if you’ve made it here, you should be proud of yourself! You’ve taken a piece of wood and made it into a beautiful piece of art. But before you can show off your piece to friends and family, you have to seal the veneer. Sealing the veneer will keep it looking amazing for years to come.
Before you begin to seal, make sure you have all your materials ready. You’ll need a brush or sponge and a sealant. If you’re using a brush, make sure it’s clean and you’ll need to avoid using metal brushes as they can scratch your veneer.
When you’ve got your materials ready, make sure you test the sealant on a scrap piece of wood first. Make sure the sealant you choose will give the finish you want before you apply it to the veneer.
Now we’re ready to seal! Starting from the edges, brush or sponge on the sealant in long, even strokes. Work your way in, making sure the whole piece of veneer is coated evenly. Depending on what kind of finish you choose, you may need to apply multiple coats. Allow each coat to dry before applying the next.
Once you’ve finished sealing, give the piece a good wipe down with a damp cloth. This will remove any excess sealant and will help the finish look even.
And that’s it! You’ve sealed your beautiful wood veneer and it’s ready to show off. Sealing your veneer well is one of the best ways to make sure your piece looks amazing for years to come. Good job!
Step 9: Finish with a Coat of Finish

Hey there! You’re almost done creating a beautiful wood veneer for your project! The last step is to finish it off with a coat of finish.
Before you start, make sure to put on some protective gear such as gloves to keep your hands from staining and a mask so you don’t inhale any fumes from the finish.
To begin with, make sure to mix your finish according to the instructions on the label. Next, apply a thin coat evenly with a brush or a painter’s roller. Try to create an even circulation and make sure you fill any tiny cracks in the wood with the finish. Once you’re done with the coat, let it dry as mentioned on the instructions.
When the first coat is done drying, you can start on the second coat. Just like the first coat, make sure it’s applied evenly and there’s no splotchy spots left behind. It’s also important that this coat is even as well as it will prevent any spots from becoming dry or sticky.
Once your coats are completed, you’re done with this step. Now you can sit back and observe your hard work. Who knew something like wood veneer could look so good?
Now that you know how to apply a coat of finish to your wood veneer, it’s time to get working on the next step. Your project just got one step closer to being complete and there’s nothing quite like seeing a project come together. To all you crafty folks out there, now go out and show off your skills!