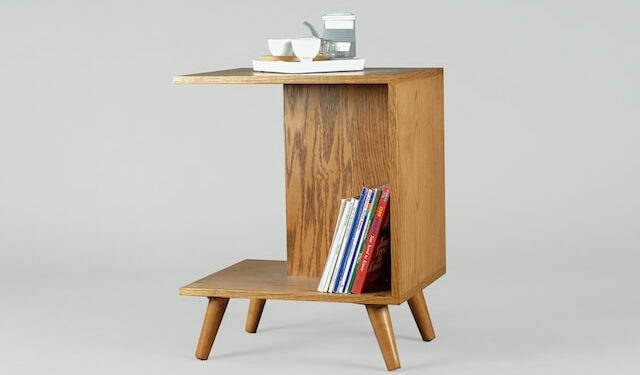
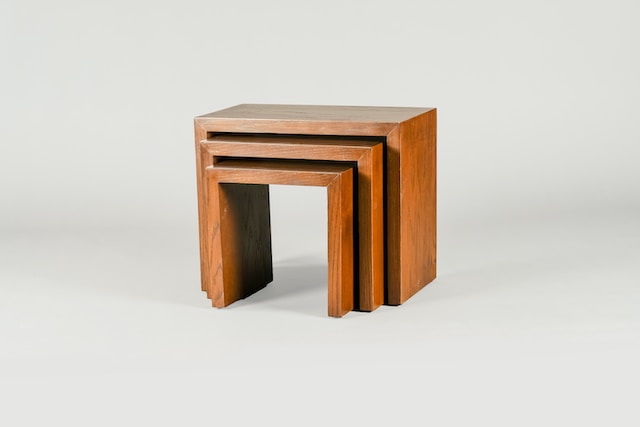
How To Make A Perfect Splined Miter Joint For Your Woodworking Project
G’day, woodworking fans! Poppa is back teaching you all the tricks of the trade! In this lesson, we’ll be learning how to make a perfect splined miter joint for your woodworking project. This is a perfect joint for any project, and once you’ve got the technique down you’ll never have to worry about weak joints again.
To make your perfect splined miter joint you’ll need to gather a few supplies. You’ll need a miter saw, a jigsaw, sandpaper, a piece of wood to use as your spline, wood glue, and clamps. Pro tip: you want to get wood glue that is waterproof. That way, you can be sure that your joint won’t fail even in the wettest conditions.
The next step is to mark the pieces. You’ll need to mark out exactly where you’ll be making the joint. It’s important to be precise here, since an imprecise cut can make the whole joint look sloppy. Use a ruler, a pencil, and a T-square to make sure each line you draw is straight and accurate.
Once everything is marked out, it’s time to get out the saw. Grab your miter saw and start cutting. Make sure the angle is perfect, otherwise the joint won’t fit together correctly. Line up the blade with the lines you drew and start sawing. It’s always better to go slow in the beginning and make sure you’re making accurate cuts.
Now you have to fit the joint together. Place the pieces in the correct position, and slide the spline in to fill the gap. You’ll have to use some pressure, so this is where your muscles come in handy. If the fit is snug, but not too snug, then you’ve done the job right.
When all the pieces fit together, it’s time to clean up the joint. Grab the sandpaper and start smoothing the edges. This way, you won’t have any sharp edges sticking out.
Once all the pieces fit together tightly and all the edges are smooth, you can glue and clamp the joint. Apply a generous amount of wood glue to each surface, making sure to get into all the nooks and crannies, and then use your clamps to firmly hold the joint together.
The last step is the finishing touches. Clean up any excess glue, then finish the wood however you like. You can choose to simply leave the natural beauty or give it a protective coat. You could also opt for a paint job if you prefer the look.
And there you have it, woodworking fans! You now know how to make a perfect splined miter joint for your next woodworking project. Now go out and create something beautiful!
Gather the Necessary Supplies

Ahhh, the splined miter joint… the quintessential woodworking joint. It has been used to join two pieces of wood together since the dawn of time, or at least, since the invention of tools that can cut angles.
So, you want to make a perfect splined miter joint for your woodworking project? Let’s get started! The first thing you will need to do is gather the necessary supplies.
When I say supplies, I’m not talking about the usual suspects like saws, sandpaper and clamps – those are a given. Instead, let’s focus on the supplies that are specific to creating a splined miter joint.
First of all, you will need a miter saw (or a handsaw and a miter box) to create the angles. This saw is the most important tool for the job. Apart from the saw, you will need some thin plywood or thin hardwood to make your splines, some wood glue and a variety of clamps to hold the joint in place while the glue dries. You may also want to use a chisel or router to clean up the joint after it has dried.
And that’s it! You should now have everything you need to create a perfect splined miter joint. Now all you need is a bit of skill, patience and luck and you should be able to create a joint that will stand the test of time.
Mark the Pieces
Hey everybody! Time to get ready to mark up our woodworking project with a splined miter joint!
Before we can mark, let’s make sure we have everything we need. We’ll need a square, a ruler, and some kind of marking device. I like a mechanical pencil for this part because it’s accurate and I won’t have to sharpen my pencil every time.
Now, marking our miter joints is easier if we start by making some reference measurements. Place the square against your miter joint piece, and use the pencil’s ruler to measure the distance from the end of the board to the corner. Be sure to adjust the ruler each time until it’s parallel with the end of the board. Make a note of this measurement for reference.
Now we’ll use that reference measurement to mark our miter joints. Start by placing the ruler at the corner of the board, and mark it at the same distance you measured off with the square. You should end up with a line running exactly parallel to the end of the board. Do this for both pieces.
Now, measure the distance from the end of the board to the miter joint’s farthest corner. Now use that to mark the miter joint’s far corner. But, this time start at the corner and measure up to the original reference mark, rather than down. This will ensure that all the corners align up with each other. Measure and mark both pieces, being sure to measure on the same surface for both pieces.
That’s all for our marking! Make sure your markings are neat and accurate, that’s the most important thing. Now it’s time to actually move on and start cutting our miter joints, so let’s get to it!
Cut the Pieces
Ha ha ha! In order to make a perfect splined miter joint, you’ll need to start by cutting the pieces. Alright, alright, this is where the real skill comes in.
Now, you’ll need some power tools to cut perfect angles. Your first step is to set the miter saw blade to the desired angle. A good tip to remember here is to always measure twice and cut once! That way you won’t end up having to try redo your work.
Once you have the miter saw set up (make sure you double check your angles!) all you have to do is create your miter joint pieces. It’s as easy as, well, slicing a live pizza pie! You’ll want to use a steady hand, and try to do all your cuts in the same angle and in a consistent direction. If a mistake is made, that’s ok – there’s plenty of wood out there you can use to start again. Just remember to be patient and keep a steady angle.
After the miter joint pieces have been cut and they’re all in the right angle and size, you can move on to the next stage. Now this is where having the right tools and supplies makes all the difference. And don’t worry, even if you make a mistake, you can always redo this step. It takes a little bit of practice, but it’s worth it if you want perfect splines in the end.
Once the pieces are all cut, it’s time to move on to the next step. It’s time to fit the joint – but that’s another story for another day! So until then, start cutting those pieces and keep a steady hand for the perfect angle!
Fit the Joint
Hello ya’ll fellow woodworkers! Let’s move on to the next step of making the perfect splined miter joint for our woodworking project. The fourth step is called what now… oh yeah, FITTING THE JOINT!
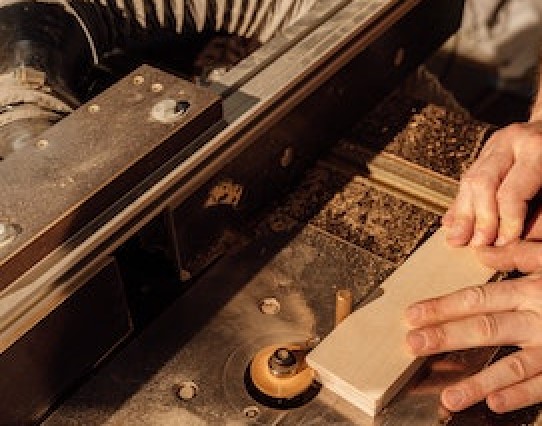
Firstly, we have to cut the splines. Grab the special router we have been using for this project and stick it onto the router table. We can then set the correct size of the spline. Once the settings are taken care of, the next step is to tilt the fence of the router table at a sixty degree angle. Now, we can be confident that each of the splined slots is perfectly aligned with the rest.
Now that the splines are all cut to perfection, we have to fit the spline into the piece of wood we’re dealing with. We’ve done a lot of work to make sure our miter joint is perfect, so why not take the task one step further? Wet the miter joint and check if the pieces fits in properly. If it does, great! But if there is still a gap, then we need to get to work. First, slightly sand down the edges until it fits perfectly. If that doesn’t work, then we need to tweak the angle of the miter joint.
Once the fitting is done, remove the excess spline wood with a saw. Be careful not to cut too deep, or else we won’t be able to make a perfect wood joint anymore! Finally, dry fit the pieces once again to make sure all the edges fit in properly.
And there you have it – the fourth step, Fitting the Joint, has been completed! In the next and final step, we will be doing the minor tidying up, gluing and clamping before our miter joint can be viewed as a finished product.
Clean Up the Joint
Well well, here we are- the final stretch, my friends! We’re just about done getting that perfect splined miter joint into place. I hope everyone’s been taking some well-deserved rests in between steps because, wow, that’s a lot of precision and skill needed to accomplish this project.
Now when it comes to cleaning up the joint, it’s important that no corners are cut (which, yes, is a pun). This is super important because it’s one of the most important steps in ensuring a beautifully-fitting finished project. So here’s what you’ll need:
– Sandpaper
– Sanding block
– Chisel
– Mallet
– Wood glue
– Clamps
Nice and simple, right?! Now to get started, you’ll want to grit up the sandpaper to your desired approach. Generally, you should choose something between 80 and 120-grit, but you know, this project is all about customizing it to each individual’s needs and taste, so do what works for you!
Once you’ve selected the perfect grit for your sandpaper, use the sanding block to even out the surfaces of your miter joint. Sand away any imperfections and grooves until you’ve achieved the smoothness you desire to get that perfect fit.
The next step is where things get a bit more delicate. Use the chisel and mallet combo to carefully scrape away any excess material you want to get rid of. This is the best way to ensure that the two sides of the miter joint fit perfectly. Just make sure to avoid applying too much force because that could end in disaster (none of us want to start over from the beginning, do we?).
When you’re done chiseling, it’s time to glue and clamp the joint! It’s easy- take some wood glue and apply to both sides of the joint, making sure to cover the interior with precision and accuracy. Then, clamp the joint into place- this is your time to shine and make sure that the edges are up to your standards.
And that’s it- you’ve officially completed the final step! You’ve created a perfect miter joint that is going to look amazing and be admired by woodworkers far and wide.
So as they say, ‘all’s well that end’s well’, my friends. Congratulations! You’ve successfully and skillfully created a beautiful miter joint for your project! Hard work pays off, I always say. Now go ahead and (gently) admire your work- you deserve it!
Glue and Clamp the Joint
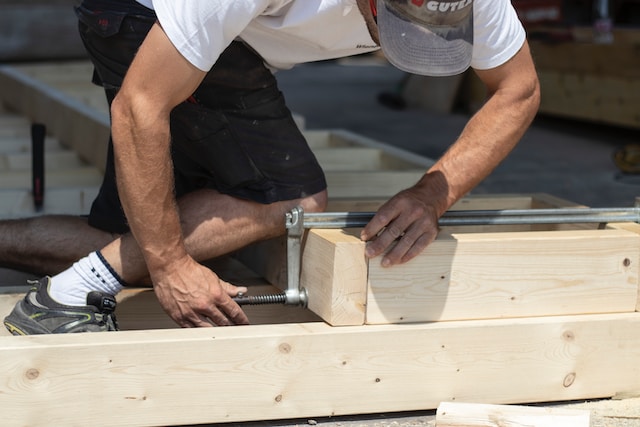
Just when you thought you’d made it! None of this matters if your splined miter joint pops apart, so it’s time to glue and clamp. Start off by spreading an even layer of wood glue over the mitered surface and then push the pieces together — don’t forget the spline!
Once in place, if you want that super chunky look with maximum strength, then consider getting some clamps out. Yeah, you’re gonna need ’em. If you didn’t already have some, then maybe try asking your neighbor for theirs.
Once clamped up, it’s time for a few jokes. I mean, after all, this is woodworking, so in my book it’s gotta be fun. So make sure to crack a few while that joint sets. You can start off with something like, “This glue takes longer to dry than Eddie Murphy takes to finish a project.” That’ll get the laughs going.
When your joint is dry, it’s time to check the fit. If it’s tight, then you know you done good. Now it’s time to give it a liberal dose of sandpaper to make that joint as smooth as Uncle Eddie’s shaved head. Now it’s ready for varnish or paint or whatever finish you want. Just don’t look at it funny, because that splined miter joint will stay tight until the end of time.
Finishing Touches
The last step of making a perfect splined miter joint, is the finish touches. It’s all in the details, folks! Have you ever heard that before? Well it’s true and this step is no exception!
Start by sanding around the joint to make sure it’s nice and smooth, with no rough edges. Pay close attention to the joint itself and make sure it’s nice and clean-looking. This is all about making a finished product that looks good, so it’s important to not skip this step.
Then, you’ll want to apply some finish of your choice, either a wax, a polyurethane or paint, whatever works best for your project. Applying the finish step may help to protect and secure the joint, especially if you are making furniture.
Finally, you can install any hardware that the project requires, like screws, fasteners, or handles. This step can take just a few minutes depending on what and how much hardware you need to install. Make sure to use the right size and type of fasteners to prevent any issues down the road.
And just like that, you have made a perfect splined miter joint! Now, put it in your project, sit back, and admire your masterpiece. You’ve earned it! Good luck and happy woodworking!