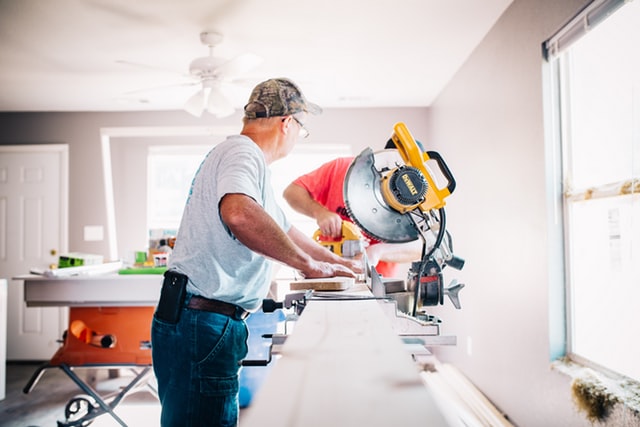
How To Create A Beautiful Wood Inlay Design For A Cutting Board

Wood inlay designs on a cutting board can make the piece stand out and add a touch of elegance to your kitchen. It’s a great way to personalize a gift or create a one-of-a-kind item for your home. In this article, we’ll explore the step-by-step process of creating a beautiful wood inlay design for a cutting board.
From selecting the right wood and tools to creating the perfect design, we’ll guide you through each stage of the process. Whether you’re a beginner or an experienced woodworker, this guide will provide you with the knowledge and skills to create a stunning wood inlay design for your cutting board.
Gather Materials
Hey, hey, hey! Ready to get crafty and make something badass? Let’s make a wood inlay design for a cutting board! Before we get started, we need to make sure we’ve got all the materials so we don’t get halfway through this project and get stuck with no way forward! We’ll need some wood, a template, wood glue, a wood-burning tool, and some protective equipment like safety glasses and right gloves. Let’s get ready to discuss how to create a beautiful wood inlay design for a cutting board.
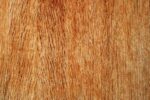
Let’s start with the wood. Your board will look way better if you make sure the wood is nice and smooth. You can find sheets of wood at your local craft store or do-it-yourself store. Make sure to get a piece of wood that is thick enough so that you can carve out your inlay and cut out your template.
Now, onto the template. The template adds that extra oomph to the finished product. Think about the shape you want for your design and draw it out on graph paper. Then, transfer the shape onto a material like tracing paper. The tracing paper makes it easier to transfer the shape to the wood.
Don’t forget the wood glue! We’ll use it to stick the pieces of wood together. This type of glue dries clear and waterproof so it won’t rust or destroy the wood it’s applied to. And a wood burning tool is a must for carving out your inlay. You can find these at most serious craft stores.
Finally, it’s important to remember safety! When you’re working with a wood burning tool, you want to make sure you’re wearing safety glasses to protect your eyes, and gloves to protect your hands. Now that we’ve got all the materials, let’s put them to use and make some art!
Wood
Hey there DIY-er! Time to gather your materials, and wood is the star of the show. You’ll want to find a wood with a light, natural color that will hold up to the wear and tear of cutting food. Depending on the size of your cutting board, you can opt for mahogany, oak, cherry, or walnut. These woods have varying characteristics, providing a unique final product.
Mahogany stands out due to its reddish-brown tones and dark grain pattern. Oak has yellowish tones and a bold grain pattern. Cherry has a smooth texture, light red tone, and lightweight feel. Walnut has a darker texture, with darker brown tones and a bold grain pattern. All these woods are great choices, so make sure you choose the one that is right for you.
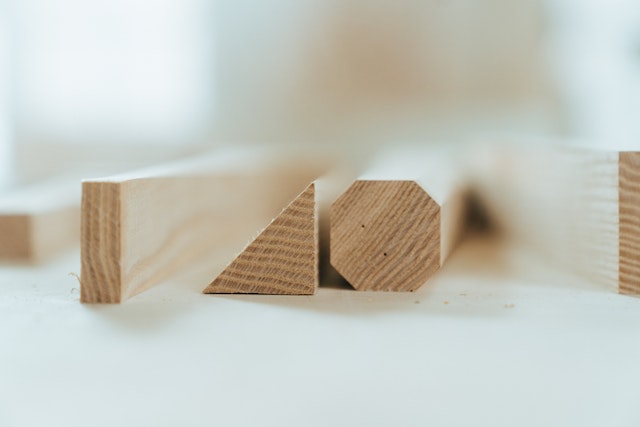
Once you’ve selected your wood, collect some smaller pieces to create the inlay. When choosing these pieces, look for some variety in color, grain pattern, and type of wood. Consider collecting pieces of pine, ash, or other light woods alongside the hardwoods you chose. This variety will give your board depth, since the inlay will stand out more against the different colors.
When selecting the pieces, keep your design in mind. Make sure the pieces are cut to size, as this will make assembling your project easier. Gather enough pieces to fill the inlay’s shape completely so it’s ready to install when you’re done. Now that you’ve gathered all the materials, let’s get to work!
Template
It’s time to get crafty, friends! You’re gonna be a real life wood wizard when you complete this awesome wood inlay design project. In this step, we’ll need to create a template to guide our design.
First things first, start by getting your wood on the table. You can use any hardwood, but I recommend walnut or birch to get this party started. Next, you’ll need a template. This will be the foundation of your inlay design, so make sure it’s something special. You can find printable designs online or make your own custom one with a scrap piece of paper.
Once you have your template, it’s time to trace it onto the wood. It’s best to use a pencil for this step, so you don’t accidentally ruin your design. Trace the template onto the wood in light, even strokes and then move on to the next step.
In the third step, you’ll be cutting out the template. You can use a saw or a drill to get the job done. Start by drilling holes along the design line and then cut the shapes with your saw. Make sure you wear protective equipment during this step, so you don’t make a mess of your work space. And there you have it! Now you have your template ready to use.
You’re one step closer to creating a beautiful wood inlay design for a cutting board! Now that you have your template, you can move on to gluing your slats together. In the next step, you’ll learn how to make the inlay fit inside your board. So stick around and let’s make some magic!
Wood Glue
Ahhh wood glue. It’s one of life’s simple pleasures, and one of the things we definitely need when creating a beautiful wood inlay design for a cutting board.
Wood glue is one of the most important parts of the inlay process, as it’s what helps holds our slats together. Without it, the slats would slip and and the design would end up looking wonky. Not a pretty sight.
When selecting wood glue, it’s important to choose a strong adhesive that’s specially designed for wood. Unlike regular glue, regular wood glue is waterproof once it dries and can even be sanded. It’s also more flexible, which helps keep the joints stable and avoid any possible cracking.
When applying the glue to the slats, make sure to spread it evenly and apply it over the entire surface. If you have any extra glue residue, try to clean it off with a damp cloth or rag. Gently insert the slats together and press to secure them.
It’s best to let the slats sit before moving on to the next step of the process. This will give the glue adequate time to dry and bond the materials. Make sure to keep an eye on it and make sure it doesn’t dry out before you can finish the project.
And there you have it, wood glue. An essential part of any woodworking project, especially when creating a beautiful wood inlay design for a cutting board. Go forth and glue away!
Wood Burning Tool
If you’re looking to artfully add some character to your cutting board, then a wood burning tool is an essential item you need to add to your arsenal of woodworking tools. With a wood burning tool, you’ll be able to create intricate designs and details with ease. Plus, you get to use the power of fire to shape wood – how cool is that?!
Wood burning tools can range from cheap and essential, to expensive and high tech. You can choose from pens, styluses, soldering irons, professional pyrography machines, and much more. If you’re a beginner, you’ll be able to find an affordable tool that is perfect for your needs.
The higher end tools will give you more freedom and power when using them. They offer more temperature settings, control over the shapes of your lines, more powerful heat, and often a variety of tips to change the details of your designs.
When using a wood burning tool, be sure to wear protective gloves and possibly a mask to protect yourself from the heat and potential errant smoke. If you’re working with your hands, be sure to also wear safety tack gloves to protect from splintering wood.
And that’s it. With your wood burning tool and some tips and tricks, you’re ready to go and make a beautiful wood inlay design for your cutting board. Keep it safe and happy wood burning!
Protective Equipment
Protective equipment is an essential part of any woodworking project, and creating a beautiful wood inlay design in a cutting board is no exception! It is essential to protect yourself while working with wood, wood glue and wood burning tools. You never know when a splinter might fly up and poke you in the eye!
First, protective eyewear is an absolute must. Everyone needs to wear protective glasses when handling wood, especially when you are cutting into it with a saw and a drill. Make sure to get that special shatterproof kind and keep them firmly on your head during the entire process.
Second, consider getting some gloves and a heavy-duty apron. Gloves are great for keeping your hands from getting too dry, and the apron will protect your clothing from getting dirty and shredded during the different stages of the process.
Finally, it is a good idea to wear a dust mask or respirator as you are cutting into and working with the wood. Doing so can help you avoid any potential problems like inhaling small pieces of sawdust or wood residue.
Making sure you have safety in mind can help you make the most out of your wood inlay experience, and avoid any small injuries that might occur while you are working. You don’t want to put yourself or the wood inlay design in any sort of danger, now, do you? So, be sure to stay safe!
Create Template
Hey everyone! It’s me, here to help you create a beautiful wood inlay design for your cutting board. The first step is to gather materials. You’ll need some wood, a template, some wood glue, a wood burning tool and some protective equipment.
Now it’s time to create the template. Trace your template onto your wood and then cut it out. Be sure to use the right protective equipment when cutting out your template. You don’t want any accidents!
Now that you have your template, let’s get started. Place the wood slats out so that you can easily glue them together. Once the slats are laid out, apply the glue to the slats and join them together. Make sure to spread it evenly so that everything will stick together.
Once the slats are joined together, you can start working on the inlay design. You’ll need a wood burning tool to burn out the small V-shaped grooves along the design line. Be sure to keep the tool in motion when you’re carving and to wear protective gear. You don’t want to get hurt!
Once you’ve finished your design, you can fit your inlay into the board. Place the inlay onto the board and then trim it to size. Now that the inlay is in place, you can secure it to the board. Just apply some glue and then press the inlay onto the board. Make sure to wipe off any excess glue afterwards.
And that’s it! Now you have your own beautiful wood inlay design for your cutting board. Thanks for listening, everyone!
Trace Template onto Wood
Well, it’s time to get started on this project by create the template! Now, you’ll need to trace it onto the pieces of wood you have. This can be done with a pencil or a pen – whatever works best for you. Just make sure to go slowly so that the lines are accurate, and always double check your work!
Once the template has been traced onto the wood, you’ll need to cut it out. This can be done with a hand saw, router, jig saw, or even a power drill. Whichever tool you decide to use, make sure to use the proper protective equipment – a face mask, work gloves, safety goggles, and a hard hat if you’re feeling extra safe.
After the template has been traced and cut out, we can move on to the next step in the process. But before you do, take a break and admire the wood – you know it’ll make a beautiful inlay design for your cutting board.
Cut Out Template
Hey, y’all it’s me and here I am to walk you through creating your very own beautiful wood inlay design for a cutting board. So let’s get to it!
Once you’ve gathered your materials, the next step is to create the template. You’ll need something that is small and flat, like a stencil or a piece of cardboard, and you’ll also want to make sure it’s the size you want your design to be. Trace the template onto the wood and make sure it’s centered properly then get ready to get cutting!
You can use a jigsaw for this bit, which will give you a clean cut and make sure you’re really precise. Easy does it, as this design will make all the difference to the final effect of your cutting board. When it comes to the smaller pieces you can use either a jigsaw or a utility knife. Just make sure to have a steady hand and focus on getting those cuts straight!
Once you’ve cut them all out, shape the pieces so they fit together nicely – you can use a file or sandpaper to do this. Ta-da! One step closer to creating your beautiful wood inlay design.
Glue Slats Together
Welcome aspiring woodworkers! You’ve made it to the third step of creating your beautiful wood inlay design for your cutting board; let’s get gluing. This part of the process is relatively straight-forward, but an important one to get right – you don’t want your inlay to come apart at the seams! So grab your wood glue and let’s get to work.
First off, lay out the slats that you’ll be using for the inlay. This will help give you an idea of the size of the inlay and help you decide how much glue you need to apply. Once you’ve laid everything out, it’s time to move onto the next step.
Now that you have the layout figured out, it’s time to apply the glue. Go ahead and squeeze out a nice bead of glue onto the first slat. Then take the next slat and carefully line it up with the first one, making sure they’re even. As you work your way down, be sure to spread the glue evenly on both sides of each slat. This part is especially important as we don’t want our inlay to come undone!
Once you’ve finished gluing the slats together, take a few moments to inspect your work. Make sure that the glue is evenly distributed across all of the slats. There should be no gaps or excess glue anywhere. Once you’ve thoroughly inspected your work, you can move onto the next step. And just like that, you’re done with gluing! Congratulations! With the slats now glued together, you’re ready to move onto the next step in creating your beautiful wood inlay design.
Lay Slats Out
We got our materials, so now it’s time to get to crafting! First, let’s get our slats laid out. Now, I’m sure you don’t wanna just lay them out all higgledy-piggledy and all that, so let’s take some time and figure out which way we want them. Do you want your inlay to look cool and symmetrical? Then lay them out nice and straight! Do you want a wild and unpredictable design? Scrumble ’em up, like me when I’m eating fried chicken!
Once you’ve laid out your slats, take a quick break and take in the craft you’re about to make. This is a beautiful piece you’re making, and it deserves your full attention and care. So, take a few deep breaths, maybe a sip of tea, and prepare to get your craft on!
You’ll be able to lay out your slats quickly and effectively if you remember one key thing: Stay organized! Put the similar slats together, and arrange them so that you know exactly where everything is. This will save you from confusion, and let’s you get to the glue-ing with ease.
You’re almost done with this part of the project! Take one last look at the design you’ve laid out, and make any adjustments as necessary. When you’re ready, it’s time to move on to the next part of the project: gluing those slats together.
Apply Glue to Slats

When it comes to applying glue to slats, put those images of your 8th grade science project out of your mind. This application of glue isn’t nearly as vexing as the process of creating an erupting volcano or a self-powered boat. In fact, this part of the process can be downright enjoyable.
Put on some of your favorite tunes, and start laying out the slats. Make sure they’re all facing the same direction and that they fit tightly together. Place the template on your desk or the table you’ll be working on and line up the slats around it.
When it comes to applying the glue, make sure you don’t go too heavy handed with it. A thin, even layer of glue should do the trick just fine. Don’t be afraid to experiment with different types of glue and methods to get a stronger bond between the slats. Once that has set, you’re ready to move on to the next step in the process.
Everything should still be lined up, so when it’s time to join the slats together you should be able to simply press them together without any problems. You may need to use a clamp or other tool to make sure they stay together, so it’s important to be vigilant here.
And just like that, you have applied glue to your slats! Now, time to move on and start Carving Out your Inlay Design.
Join Slats Together
Hey, y’all! So, it’s time to join those slats together, and I’m here to show you how it’s done. Grab your wood glue, and let’s get to it!
First thing you’re gonna do is lay out your slats. Make sure you’ve got your inlay design in mind as you figure out which slat goes where – this is your chance to get creative and make your little work of art come alive.
Now, cover each slat evenly with your wood glue, like you’re the icing on a cake. Or the whipped cream on a delicious ice cream sundae. Yeah, like that. But here’s the key – be sure you don’t glob that wood glue on there; too much glue can make a real mess, and too little means your slats won’t stick as well as they should. Find a happy medium so your slats come together nice and clean.
Once you’ve applied the glue, it’s time to fit the pieces together. Now, don’t rush this part; move slowly and deliberately for the best results. You’ve got to make sure each piece is sitting where it’s meant to be, and that each joint is locked together tight. Which should be easy if you’ve got the glue on there just right.
And once you’ve got everything in place, use a clamp to secure your slats together. That’s it! Now, let your newly assembled slats sit for a few hours to make sure all that glue bonds together good and tight.
All right y’all, we’ve done it! Now, it’s time to move onto the next step – carving out our inlay design. So, grab that wood burning tool and let’s get to it!
Carve Out Inlay Design
Hey there woodworking enthusiasts, now that you’ve gathered all your materials and created a stunning template, it’s time to start carving out that beautiful design! The first thing you’re going to need is a wood-burning tool. It’ll give you the precision necessary to really get your inlay looking perfect. Don’t forget to wear your safety gear before you start, you don’t want to ruin this project by burning off your fingers!
Now, when you burn the grooves onto your wood, you want to make sure you use a V-shaped tip because that leaves nice deep grooves for your inlay to sit in. Make sure not to go too deep or you might be stuck having to buy all new materials. No fun! Make sure to keep your V-shaped tip perfectly in line with your design to ensure a symmetrically perfect pattern.
When you’ve finished the burning process, the next step is to trim off the excess wood. This can be done with either a hand saw or a drill. Make sure to be careful here. If you go too deep, you might end up with a section of the design that doesn’t line up properly. As they say, measure twice, cut once!
Now you’re ready to move on to the next step. Have fun and try to be creative. After all, this is your cutting board and it should be as special and unique as you are.
Burn Out Small V-Shaped Grooves Along Design Line

All right, everyone – we’ve made it to the fun part! Let’s get ourselves ready to burn out some v-shaped grooves along our design line. Before we get started, let me remind everyone to be safe and take all the necessary safety precautions.
I’m talking about wearing protective goggles, gloves and masks. We don’t want eye infections, lost fingers and… well, that’s not a problem you want to have. So when that’s all taken care of, let’s get started with burning!
Grab your wood-burning tool and give it a test run. Make sure the temperature is set to an ideal level, and that everything is running smoothly. It’s best to practice on a scrap piece of wood before attempting your design; find the best speed and pressure for getting that nice v-shape. Alright, now you’re good to go!
Burning the design on the wood is actually quite soothing. Focusing on creating the v-shaped grooves at an even rate, running along your design line, is like being in a trance of sorts. It may take you a couple of hours depending on the size of your board and the intricacy of the pattern you’ve chosen, but it’ll be worth it in the end. And although it’s tedious and a little mundane, you’ll take pride in knowing that you created your very own inlay design.
Now, if the practice session you did beforehand was enough to convince yourself that you have this under control, you can get started! Trace the design you’ve chosen onto the board, then use the burning tool to create v-shaped grooves along the design line. Go slow and steady and concentrate on the results; you may find yourself lost in the process and getting mesmerized. Once you’ve finished burning, the shape of the design will begin to emerge and you can start to see the finished product.
So there you go – that’s how to create a beautiful wood inlay design for a cutting board. Now, don’t forget to release the smoke from your nostrils and put on some Bob Marley to get in the groove – it won’t be long until your cutting board is looking as good as new. Have fun!”
Trim Excess Wood Away With Hand Saw or Drill
If you thought carving out your inlay design was a piece of cake, well then guess what – you thought wrong! To really get that intricate design, you need to go the extra mile and cut away any excess wood that’s leftover from your burnout process.
But don’t you worry, it’s not as intimidating as it sounds. See, all you need is either a trusty hand saw or a drill, and you’re good to go!
First, start by laying your piece of wood onto a flat surface, so that you can have a good foundation to work with. Make sure it’s held firmly in place – you don’t want to slip and slice off the wrong part of your piece!
Now, take your trusty saw and slowly start to trim away any excess wood. This is where you can really take some time and let your eye do the job of perfecting that inlay design. Go around and carefully cut away any pieces that don’t fit perfectly into your design.
Be sure to always go slow and steady and keep your saw or drill in a comfortable position. If you have any protective equipment like a pair of gloves or glasses, feel free to put it on. We don’t want any accidents!
Once you’re finished cutting away the excess wood, you can start to see your final inlay design come to life! You can give yourself a pat on the back for a job well done, as trimming away that excess wood can be difficult and time-consuming. But after all, isn’t that inlay design worth it?
Fit Inlay into Board
Ah yes, you’ve come a long way! You’ve designed your template, you’ve glued your slats together and carved out your inlay design. Now, it’s time to fit the inlay into the board and the final touch to a beautiful wood inlay.
First, you need to place your inlay onto the board and make sure it fits correctly. This is the key step and one that could make or break your project. Once the inlay is placed, you should start to trim off any excess wood that may be peaking out of the board. This part requires a lot of patience, because you don’t want to miss a single shard of wood that is standing out.
If you want to ensure that you have trimmed it perfectly, you should use a marker along the edges of the board, while making sure to trace the outline of the inlay. Once the trimming is finished, you can put down the marker and proceed to the next step.
At this point, you need to apply a good amount of wood glue to the inlay, before you place it securely onto the board. Now this is where the fun starts! Wipe away any excess glue and make sure everything is in its place.
And now, you have successfully fit your inlay into the board! Don’t forget to stand back and admire your work. You have achieved something truly incredible and something that you can proudly show off to your friends and family.
Place Inlay onto Board
Ok, so we made it this far! You got all the wood cut, glued together and now it’s time to fit the inlay into the board. Sounds easy, right? Well, here are a few steps you’ll need to do just that.
First off, you’ve got the inlay sitting there complete and looking beautiful. Now it’s time to place it onto the cutting board; like a beautiful jigsaw puzzle piece. What you’ll need to do is place the inlay onto the cutting board and make a few adjustments.
You may have to trim the inlay a bit to make it fit properly on the board; just take a hand saw or an electric drill to do this. Make sure to be really careful every time you make a cut or trim, as that can really mess up the design in the inlay.
Once you’ve got the inlay into the right place, you’ll want to take a look at it again with a critical eye. Make sure that it fits properly, that the lines align where they were cut out, and it looks great. Now, it’s time to move on to the next step and secure it in place.
Trim Inlay to Size
Well, here we are folks: the moment we’ve all been waiting for- it’s time to trim our inlay to size!
As you know, the inlay is the crowning glory of our beautiful wood cutting board, so it’s time to make sure it fits perfectly in place. There’s a few things we need to do to get our inlay in the perfect position.
First of all, let’s get our protective gear on! An inlay should always be trimmed with protective eye and ear wear, because there’s a chance for wood shavings to fly and you don’t want them in your eyes! So put on those glasses, pop in some ear plugs, and secure your hood. That’s the safety party look!
Now, it’s time to fit the inlay into our board. For this, we’ll need a ruler and marker. We need to measure the exact space we want to fill and mark it with our marker. Then, we can put our inlay into the area and make sure it fits. If it doesn’t, it’s time to start trimming it.
Now, here comes the tricky part. We need to use our wood burning tool, but with caution. If we go too deep, we can ruin our work. So, measure twice, cut once! We will use our wood burning tool to create a v-shaped groove that is the exact width of the inlay. The groove should just barely be deep enough to fit the inlay- this way it won’t wobble due to a lack of surface area.
If the v-shaped groove doesn’t seem to be deep enough, we can use a hand saw or a drill to trim the excess wood away. This can give us a precise fit.
And there you have it, the inlay should now fit snugly into the board. Time to move onto the next step: securing it!
Secure Inlay to Board
Well now that you’ve made the effort to get this beautiful piece of art assembled, it’s time to make sure it sticks! This can be a little tedious, but we’re almost done.
First, get some wood glue and apply it to the unit. You want to make sure to have a thin layer all along the surface where it will be adhering to the cutting board. Wipe away any glue that spills over onto other areas of the unit, you don’t want that nasty stuff ruining the look of your masterpiece!
Next, carefully put the inlay onto the board, making sure all of the edges are properly lined up. If everything looks good, you can start to gently press the inlay down onto the board. Do this slowly to make sure the pieces fit snugly together and the glue spreads evenly.
With your fingers pressing the unit to the board, use a small soft cloth to wipe away any more excess glue. Once the surface is all cleaned off, you can then place a heavy object on top to ensure a strong bond is formed. Leave it for 24 hours and then you can move on.
Congratulations, you’ve completed the process and now have a beautiful wood inlay design for your cutting board! You went through a lot and now you should be proud of the outcome. Go ahead and take some pictures to remember it, or better yet, show it off on social media!
Apply Glue
Ahhh, at last we are to the sticky part of the project… applying glue! Applying the glue is the fun part of the project so make sure you have the right protective gear on, kids. You definitely don’t want to get any of that icky glue on your nice clothes. You will be handling some potentially hazardous materials, so don’t forget those safety goggles either!
Now that we’re comfy and safe, let’s get gluey! As you prepare to make your beautiful wood inlay design, lay each of the slats out on your work area and start slathering them like a delicious panini sandwich. That’s right, use your gluestick and don’t skimp on the coats either. You want each of these slices of wood pie to be properly lubricated and ready for stacking. Make sure to get glue between each piece and don’t forget the edges.
Once you have stuck your slats together its time to take them for a test drive. Flip them over so you can see how it looks and make sure everything is in its proper place. If you see any mess ups, break them apart and re-apply the glue until you are satisfied with your sandwich masterpiece.
And with that it’s time to start buttoning these bad boys up. There is no going back now so take your time and make sure each piece is securely fastened. I recommend using a pair of clamps to help secure the slats in place. And when you are all finished keep them taped together until the glue dries.
And there you have it! You are now ready to start fitting your inlay into the board. Until then keep your fingers crossed, be safe, and enjoy the gluetastic process!
Secure Inlay Onto Board
Ah, you made it here, do you? You’ve completed the arduous task of creating a gorgeous wood inlay design for your cutting board, and now it’s time to secure that inlay.
First things first, you’ll want to make sure you have the proper materials you need. In this case, you’ll need wood glue, the inlay design you’ve made, and the cutting board itself. Depending on the glue you’re using, you may also need protective equipment. That way, you won’t have to worry about getting any sticky glue on yourself later on.
Once you have all the materials, you can begin the process of securing the inlay. Start by applying the wood glue to the board, then place the inlay design on top. Make sure to press firmly so it sticks. You’ll also want to trim the inlay to size. A hand saw or drill could come in handy here.
Now, the inlay design should be securely fastened to the board. Give it a few minutes to set and make sure everything’s in place. You won’t want any of it coming apart later on. Once you’re confident that it’s secured properly, you’re ready to move on to the next step.
Finally, if you have any extra glue that needs to be wiped away, do that now. A damp rag should do the trick. And just like that, you’ve secured your beautiful wood inlay design onto your cutting board. Now you can show off that masterpiece in the kitchen with pride.
Wipe Excess Glue Away
Gone are the days when the only projects you could do with wood involved nailing a few boards together. No, sir, with a couple of tools, some protective equipment, and maybe a bit of elbow grease, even you can create something extraordinary! And the last step in that extraordinary process involves something so simple – wiping away that excess glue.
That’s right, you heard me right. All of your hard work, all of those long hours spent toiling over your wood inlay design, they all come down to this one single step: Wiping away the excess glue.
Now, you might be tempted to skip this important step and just leave that glue there. That’s a rookie move you’ll regret, because that sticky stuff will dry up and leave behind a gummy mess that doesn’t provide much structural support and looks terrible.
Instead, be sure to wipe away all of the excess glue with a damp cloth. And make sure to use the cloth damp – not wet. Too much moisture and the wood can warp and ruin all of your hard work.
And that’s all there is to it. Now you’ve taken your beautiful wood inlay design from dream to reality. All it took was a bit of hard work, some patience, and a lot of wiping away of excess glue. Congratulations, you’ve just successfully completed one of your first woodworking projects!”