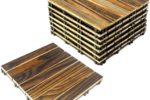
How to Create a Beautiful Wood Jewelry Box for Your Accessories
Are you looking for a special and unique way to store your jewelry and accessories? Look no further than creating your own beautiful wood jewelry box! Whether you’re a beginner or an experienced woodworker, this project is a great way to showcase your skills and create a stunning piece for your bedroom or vanity.
In this article, we will guide you through the steps of how to create a beautiful wood jewelry box for your accessories, from selecting the perfect wood to adding finishing touches. Get ready to impress yourself and your friends with your woodworking skills and make a statement with your own handmade jewelry box!
Well, if you’re a lover of the environment as well as of woodworking, then you will be pleased to know that by creating projects from recycled materials you can help reduce the amount of waste that is dumped in our landfills every day. Not only are you helping save the planet, but you’re also able to create functional, beautiful and even one-of-a-kind pieces of furniture or home décor. So, let’s dive right in and get started with this project!
In this tutorial, we’re going to show you how to build a beautiful wood jewelry box, using only a few tools and recycled materials. You’ll need wood, screws, nails, glue, and paint. You can find all of these materials in your local home improvement store or in a second-hand shop. We’ll also cover some of the most popular types of recycled materials, including pine, cedar, and even cardboard!
We’re also going to talk about the importance of safety when it comes to working with any kind of power tool or recycled materials. We’ll give you a few simple safety tips to ensure that you are creating the most beautiful jewelry box possible – and in the safest manner possible.
If you’ve ever wanted to create a stunning, one-of-a-kind jewelry box out of recycled materials, then this is the article for you! By the end of it, you’ll have all the tips and tricks necessary to make your project a success. So let’s get started – it’s time to show everyone that recycling doesn’t have to mean boring, it just means smart – and beautiful!
The Benefits of Recycled Materials
Do you know what is the best part about using recycled materials? It’s not just eco-friendly but budget-friendly too! You get a quality product without having to pay an arm and a leg. Plus, you have the satisfaction of knowing you saved some materials from going to the landfill!
Recycled materials, such as wood, can be used for projects like jewelry and small furniture. It also provides unique textures and colors for something special. For example, if you want to make a jewelry box with a vintage look, you can use old wood from a kitchen table from your grandmother’s house.
Moreover, recycled materials can be customized to fit your own style. For example, you may want to use pretty fabric for the drawers for a soft, feminine feel. Or you can use pieces of an old leather belt for an edgy look. The possibilities are endless!
Plus, when you use reclaimed materials, you can get creative with the construction process. Instead of using nails, you could use twine or rope to hold the pieces together. Or you could join wood pieces together with a tool like a chisel and hammer.
So, if you’re looking for an enjoyable, budget-friendly project that has a rustic or vintage look, recycled materials are the way to go. With the right tools and a little bit of creativity, you can make something beautiful out of something old! Get started today and make something you can cherish forever!
Types of Materials
If you’re gonna craft yourself a gorgeous wood jewelry box from recycled materials, you gotta choose the right materials! Now, it’s totally up to you what materials you decide to use, but there are a few things you should consider before making your decision.
When it comes to woodworking with recycled materials woodwork, you pretty much have the pick of the litter when it comes to materials. You can find wood just about anywhere if you know where to look – think scrap yards, your garage, your neighbor’s shed, even the municipal dump! There’s all kinds of amazing stuff you can find there; from old furniture, broken toys, and even appliances! The possibilities are almost endless.
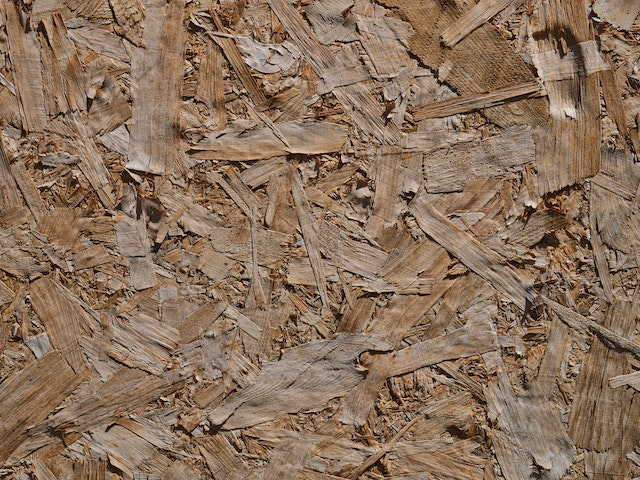
So what kinds of materials should you be looking for? Well, for starters, hardwoods are always a great choice. They are strong and durable, and will hold up to years of wear and tear. Softwoods, like cedar, pine, and fir are also great options, but make sure to coat them with a finish to protect them from the elements. You can also find reclaimed lumber from old barns and buildings. The great thing about reclaimed lumber is that it’s already seasoned, so it’s easier to work with than fresh wood.
If you’re feeling a bit more adventurous, there are some other awesome options too. You can find plastic and metal in construction sites and demolition sites, and these make great work pieces. You can also check out yard sales or thrift stores to find all kinds of weird and wonderful materials, like old pots and pans, discarded books and magazines, and even glass bottles!
No matter what kind of material you decide to use, just remember that the possibilities are almost endless when it comes to woodworking with recycled materials. Be sure to think outside the box and have fun exploring all the materials available!
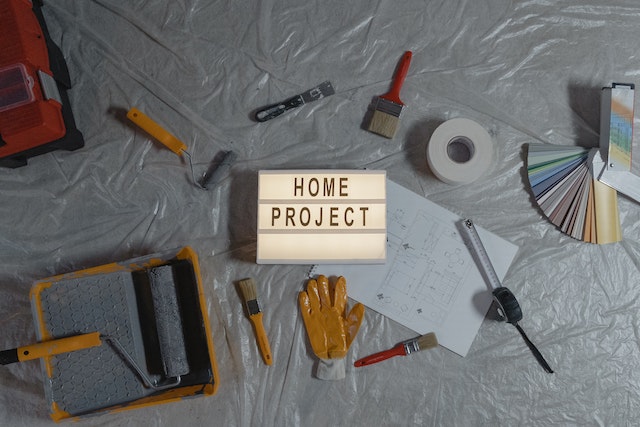
Tools Needed

Good morning, folks! I’m gonna talk to you today about the tools you’ll need to make a beautiful wood jewelry box.
First up, you’re gonna need a saw. Now, while I know that most of you are probably thinking of a circular saw when ya hear that, it’s important to remember that there are a lot of different types of saws out there. So depending upon what you’re working with and what you’re trying to accomplish with your wood jewelry box, you’re gonna want to pick the right type of saw for the job.
A miter saw can be great for making fine, precise cuts, while a jigsaw can be great for making curved cuts. You’re also gonna want a band saw for some of the thicker pieces, and a scroll saw for cutting out some of the smaller, delicate details.
You’ll also want to have a load of different drill bits. You’re gonna want a few different sizes of brad point bits, a couple of Forstner bits, some spade bits, and some countersink bits. And don’t forget the drill itself – you’ll want to make sure that you get one that is powerful enough to handle the job.
And last but not least, you’ll need a lot of different clamps. Believe it or not, those little guys can be a life-saver in the woodworking world. That’s because clamps will hold your pieces in place while you work on them, so you can make sure that everything is standing up straight and in its proper place.
So there you have it, folks. Those are some of the tools you’ll need to make a beautiful jewelry box with recycled materials. So get out there and get to work! You won’t regret it.
Step-by-Step Instructions
Welcome y’all! Are you ready to create your own beautiful jewelry box made with recycled materials?? Good, good! Let’s get started.
Step 1: Prepare Materials
The first step is to prep your materials. You’ll need a few pieces of wood that are all the same size. The type of wood you use doesn’t matter too much – it could be oak, maple, pine, or really whatever recycled wood you can find. If you want to get fancy, you can use different types of wood for each side so the box has a cool two-tone look.
Step 2: Cut Materials
Now that you have your wood pieces, it’s time to cut ’em up! You can use a jigsaw, table saw, or bandsaw. It’s important to make sure that all your pieces are the same size so your box will fit together properly.
Step 3: Build the Box
Now it’s time to start putting everything together! Start with the sides, and work your way around. Use wood glue and small nails to secure the joints. Once everything is in place, you may need to use a sander or chisel to even out any rough edges.
Step 4: Add Finishing Touches
After building the box, your last step is to add some finishing touches. You can add decorative patterns with carving tools, stain or paint the wood with a brush, or use tiny nails to secure the lid. You can also use woodburners to add intricate designs or personalized monograms.
And that’s it! Once the glue dries, your handmade jewelry box is ready to store your precious possessions. If you need some more ideas, check out the next section for some alternate designs and safety tips. Happy building!
Alternatives
Be sure to look at your alternatives when it comes to creating your own wood jewelry box with recycled materials. For example, you can change the design of your box by adding different types of materials or even changing the size of the box. This way, you can customize the box to fit your needs and make a statement.
And when it comes to safety, you need to keep in mind that the use of recycled materials may bring with it some potential hazards. Be sure to wear protective gear when handling the tools involved in the process, as well as the materials. Also, use caution when sanding or sawing, as these actions may produce harmful dust particles.
Now, it may sound dull, but with a little creativity, you can create a very unique and beautiful piece of wood jewelry that will surely be admired by your friends and family. And, who knows, maybe you can even turn your woodworking hobby into a profitable venture. All you need is a little imagination, some elbow grease and a few tools!
Finally, if you’re feeling extra creative, you could even try combining different types of materials, such as metal or plastic, to create a multi-dimensional look. Or, you could even carve intricate patterns into the wood surface. The possibilities are truly endless. So, go ahead, have some fun and get crafting! With a little bit of perseverance, your wood jewelry box will be the envy of all your friends.
Alternate Designs
Hey there! If you’re feeling adventurous and want to make something a bit unusual, there are plenty of alternatives available. Here are some fun ideas if you’re feeling creative and want to try something different.
If you want to really stand out, why not make your box using multiple materials? Try combining wood with metal or stone to create an eye-catching piece. Scraps of fabric, leather, and even plastic can be used as inserts to create interesting color and texture contrasts.
Try out different geometrical shapes, such as octagons or hexagons, for a truly unique look. Turn an oblong box into a cylinder, a circle, or an oval depending on your design. How about triangle-shaped drawers? Or circles on either side with a half-moon lid?
Are you a fan of the traditional? Experiment with different inlay techniques to bring an old-school look to your jewelry box. Use pieces of contrasting woods to create patterns, or even carvings if you’re feeling particularly ambitious.
Something a bit more modern? Give your box an industrial look by adding in metallic accents. Try different hues of gold, silver, or copper for a shimmery effect. Or if you’d prefer, plastic can provide a bright, glossy look.
Let your imagination run wild! Have fun with it and be creative. Adding recycled materials to your woodworking projects can create new, innovative designs! Got an idea that you’re passionate about? Get out your tools and start building.
At the end of the day, the best design is whatever speaks to you. Go ahead, explore different options and see what else you can come up with. Good luck!
Safety Tips
Safety is of utmost importance when it comes to woodworking with recycled materials. Whether you’re just starting out or a long-time practitioner, there are a few safety tips you should always keep in mind.
First, always wear safety goggles. Wood dust, metal shavings, screws, and other debris can do some serious damage to your eyes if not properly protected. In addition, try to work in a well-ventilated area, preferably outdoors. Not only will the fresh air help keep you cool and comfortable, but it will also help keep sawdust and particles from accumulating in your ducts or on furniture.
Whenever possible, clamp your materials to a flat surface before starting a project. This is especially important when sawing or drilling. You don’t want to find yourself off-balanced and in danger of cutting or drilling into something you didn’t intend.
Finally, and probably most important, make sure the tools you’re using are unplugged before you begin. While you may save a little time on your project, it’s simply not worth risking injury.
In conclusion, woodworking with recycled materials can be a great experience and a wonderful way to express your creativity. However, as with any type of hobby or project, safety should always be at the forefront of your mind. Take the time to review these safety tips and ensure that you are always taking the necessary precautions. Good luck and happy crafting!