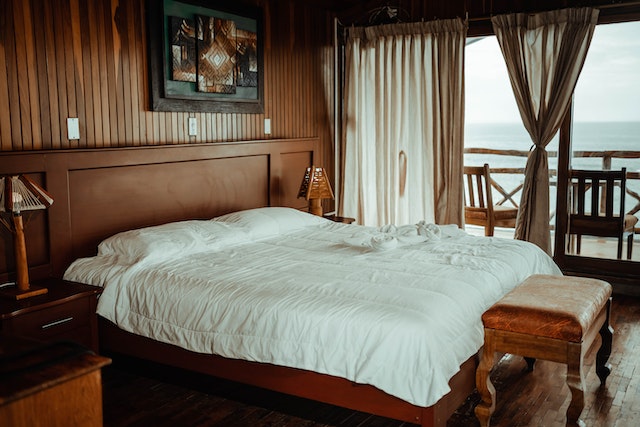
How To Create A Beautiful Wood Headboard For Your Bedroom

If you’ve ever wanted to know how to create a beautiful wood headboard for your bedroom, you’re in luck. It’s time to show off your woodworking skills and create a stunning wood headboard of your own.
Now before you get started, you’ll need to grab a few supplies. Most likely, you’ll need to visit your local DIY store or lumber yard for supplies. Grab a level, drill, circular saw, and hardware. Once you’ve got all your supplies, you’re ready to begin.
The first step in creating a beautiful wood headboard is to measure your bed frame. Measure both the length and height of the frame, then write these measurements down so that you don’t forget. This is an important step, because you want to be sure that the headboard you make fits perfectly over your bed.
Once your measurement is done, it’s time to get your wood supplies. This depends on the style of headboard that you’d like to make. Look around at lots of different kinds of wood to get a better idea of which style would look best in your bedroom. After purchasing your wood, take it home, and let it acclimate to your room temperature.
The next step is to cut out the outline of the headboard with your saw. Start by making sure the wood is lying down on a flat surface. Make sure you mark where the corners will be, and draw out the shape of the headboard. Once you have that done, cut along the lines you’ve just drawn. Keep in mind that you may need a helper to ensure that the saw is straight as you cut.
Once you’ve got all the pieces cut out, it’s time to assemble the headboard frame. Use your drill to screw the pieces of wood together. Base your assembly on the measurements you took of your bed frame. This is the most important step, because you want to make sure that your headboard will fit.
Once the frame is together, it’s time to finish the wood headboard. Sand down the edges and use a finish that is appropriate for the wood you’ve chosen. Once the finish is dry, you’re ready to move onto the next step.
Attach the headboard to the bed frame. This is usually done by using screws that you can attach from the back of the headboard and into the bed frame. This will ensure a secure fit for your headboard.
The final step is to add the finishing touches. This could include upholstery, fabric, or other decorations. Have fun with it and make it your own.
Creating a beautiful wood headboard doesn’t have to be difficult. With the right supplies, measurements, and a lot of patience, you’ll be the proud owner of a beautiful wood headboard. Now, all that’s left to do is to enjoy the finished product.
Supplies You Will Need

Alright, if you want to get this headboard project done right, don’t skimp on the supplies. You gotta be prepared! Here’s what you will need to create your gorgeous wood headboard:
wood boards or plywood – the size will depend on the size of your bed. If you’re unsure about measurements, grab someone to help you measure up. It’s a two person job!
wood glue – this will help hold the pieces together
nails and screws – you’ll need these to secure the headboard to your bed frame
saw – for cutting out the pieces of wood
wood filler – this stuff is great for filling any imperfections like nicks and gouges in the wood
sandpaper – you don’t want any splinters feeling you when you touch your beautiful new headboard, do ya?
varnish or sealant of your choice – you’ll want to use this to protect and enhance the finish of your headboard
paint – if you want to paint your headboard. Go wild and choose whatever color you like!
There you have it—all the supplies you’ll need to make your very own beautiful custom wood headboard! Now go get it!
Measure Your Bed Frame
Ah, so you’ve decided to take a crack at creating a beautiful wood headboard for the bed in your bedroom. You are of the ambitious type, I see. One that likes to tackle projects head on. That’s great! But before you start building, best be sure you measure your bed frame correctly.
You’ll want to measure your bed frame from side to side, from beginning to end, from corner to corner, and from the floor to the top of the frame. This is key information that you’ll need in order to create the headboard of your dreams.
If you haven’t been in the habit of taking measurements, now would be a good time to start. Grab yourself a measuring tape and work quickly, but accurately. It’s okay to measure twice and cut once, my friend.
If you don’t have a tape measure, you can make do with your trusty ruler. Measure in increments of one inch, because you’ll need to be as precise as possible! Just be sure to note your measurements down somewhere safe so that you don’t forget them later on.
Avoid rounding up or down when measuring the bed frame. It’s important that you measure the exact measurements so that the headboard fits perfectly. If the headboard is too small, your bed might look a bit lopsided. If it’s too large, it will stick out and make your bedframe look like it’s about to topple over.
And don’t forget to measure from the outside to the inside of the frame! Be sure to take note of the exact width and length of the space you’ll be filling with your dream headboard. With these two measurements, you’ll be able to start gathering the supplies you need to make a beautiful wood headboard.
So there you have it, step one in creating your beautiful wood headboard. Now grab your measuring tools and let’s get started!
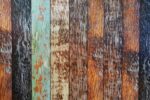
Get Your Wood Supplies

I’m ready to help you create a beautiful wood headboard for your bedroom. The first step is to get your supplies and let me tell you, you will need a ton! Now you may be able to find all your supplies in one store, but I like to compare prices at different stores, so you can get the best deal.
You will need wood for the headboard so make sure you know what kind you want. You’ll need to know how thick the wood is, how wide it is, and how long it is. You don’t want to end up with wood that won’t fit your bed frame. Then you should pick a type of wood. You could use pine, cherry, maple, or oak. It’s your choice so pick something that appeals to you.
You’ll also need screws, nails, glue, sandpaper, paint, and sealer. Make sure you get screws and nails that are suitable for your wood and buy plenty of wood glue. Now let’s talk about sandpaper. You’ll need coarse, medium, and fine-grit sandpaper for smoothing the wood and making it ready for painting. As for the color you choose for your headboard, pick something that will go with the colors of your bedroom. A good sealer will keep the headboard looking good for years to come.
Good luck! You’re almost on your way to making a beautiful wood headboard for your bedroom. Now go get your supplies and make sure you have everything you need before you start. Happy building!
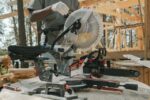
Cut Out the Outline of Your Headboard
We’ve come to arguably the most exciting step: cutting out the headboard. You see, cutting out the headboard outline is where the dream comes to life! Now, you’re going to use your jigsaw to do the cutting. It’s a lot of fun, just imagine being a kid with scissors and cutting a picture out for the first time. Yup, same exact feeling!
Now, if you’ve got your wood supplies and your measurements, it’s time to get to work. The first thing you want to do is lay out the pieces onto the backboard of the headboard so you can get a good fit. Once you’ve got your desired shape and fit, then you can use the jigsaw to cut out the outline.
Now, if you’re not familiar with using a jigsaw, don’t worry. It’s actually quite simple and easy. All you need to do is hold the jigsaw against the wood, press the trigger and make sure the blades are cutting into the wood as you move the jigsaw along the outline. The most important thing here is to make sure you’re holding the jigsaw steady and in control. Also, make sure you make a steady and smooth cut, don’t do any crazy sawing or you’ll end up ruining the piece of wood.
Once you’ve gone along the entire outline, you’ll have the headboard outline cut out. Congratulations, now your headboard is really beginning to take shape! You can give yourself a pat on the back or even a little dance – hey, I ain’t judging.
Now that you’re done cutting out the headboard, let’s move on to the next step which is assembling the frame.
Assemble the Headboard Frame
Boy, do I love woodwork! Assembling this headboard is gonna be like a walk in the park! So let’s get to it.
Before you start anything, make sure you have all the supplies you need for this job gathered up and ready. This includes the wood pieces you cut out in step 3, wood glue, and a drill. You don’t want to be running around and trying to gather stuff after you’ve started!
Once you’ve got everything ready, you can start putting it all together. Begin by measuring each piece of wood and making sure they fit together properly. Then, grab the wood glue and start laying it out and layering it on. Make sure to be generous, because it’s best to have a bit extra so you don’t run short of glue.
Now that you have the pieces of wood all glued together, it’s time to start drilling. You’ll need to use the drill to connect all the pieces of wood together. Take your time and be patient. When it comes to drilling, it’s better to have a slow and steady progress, rather than rush and make mistakes.
Once you have all the pieces of wood connected, it’s time to attach the back and the sides. Take your time here as well. You don’t want to rush and end up with a headboard that looks like it was put together by an amateur.
When you’ve finished attaching the pieces, assess how sturdy it is. You don’t want it to just fall apart right when you’ve completed it. If it’s stable enough, it’s all good!
Ay, caramba! You’ve finished assembling your headboard! I’m sure you’re so proud of yourself! Now all you need to do is glue the pieces of wood together and start putting the finishing touches. Congrats, amigo! You’re doing great!
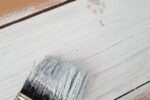
Finish the Wood Headboard

Alright, y’all, let’s finish this thing off! It’s time to finish your wood headboard. We’re gonna go from zero to lazy Sunday bed-in-city good looking.
The best part about making your own headboard is you get to customize it with any type of wood finish that you want. Whether it’s distressed, stained, or varnished, there are plenty of ways to make the most out of your wooden masterpiece.
We’re gonna start by sanding down the whole headboard until it’s smooth to the touch. This will help make sure that any finish you decide to put on will look its best. Next, you’ll want to use some sandpaper to remove any splinters and make sure all the edges are nice and smooth, so nobody gets scratched in their sleep.
Now, it’s time to get to the real finishing touches. If you’re looking for the best finish for a wood headboard, you probably want to go with polyurethane or lacquer. These are the most long lasting and durable finishes, plus they look pretty spiffy. If you’re looking for something simpler and much less messy, you can go with a wood stain. This will add some color but it won’t last as long.
It’s also important to make sure that you’re keeping your headboard away from any heat sources. The heat will cause any finish to blister or crack.
Once your headboard is finished and looking its best, you can start to put it together. Use some screws or nails to attach it to your bed frame. Make sure everything is level so it won’t be lopsided.
And that’s it, congratulations! Now you have a beautiful wooden headboard that looks like it just stepped out of a design magazine. Whether you go with light stains or dark, varnished or smooth, you just created yourself a real one-of-a-kind bed.
Attach the Headboard to the Bed Frame
Being able to attach the headboard to the bed frame is one of the most important steps! After all, what good is a beautiful headboard if you can’t even get it to stay put? But don’t worry, as long as you have the right tools, it’s a breeze.
First, you’ll want to take your bed frame and place it against the wall. Make sure you find a spot that makes it easy for you to attach the headboard. This will vary depending on your bed, but you should be able to easily fit the headboard and frame together.
Next, you’ll need to grab your drill and screws. The screws should be slightly longer than the thickness of the headboard. You’ll want to carefully place the screws on the headboard, making sure they’re evenly spaced throughout the frame. Once you have your screws in place, take your drill and carefully drill them into the bed frame. Be sure to have someone help you with this process so that the headboard is lined up correctly.
Once you’ve securely attached the headboard to the bed frame, it’s time to admire your work! All of the hard work has paid off and you now have a beautiful wooden headboard for your bedroom. Enjoy!
Add the Finishing Touches
Finally, it’s time to really pimp out your wooden headboard. Step 7: Add the Finishing Touches. To really make the headboard look snazzy, why not add some finishing touches?
The first thing to consider is upholstery. If you have some leftover fabric lying around, you can use that to cover your headboard. Simply cut out the fabric in the same shape and size as the frame and attach it with spray adhesive or staples. Then, to give it that extra bit of flair, why not attach a few buttons to the fabric?
Once the upholstery is sorted, it’s time to move onto the details. You can use some small nails to attach decorative trims and rope around the frame to create a unique look. Another great idea is to use a jigsaw to carve shapes and patterns into the wood. Use your imagination – you can create anything from stars, moons and hearts to more intricate designs like word art or a family crest.
Lastly, to really make your bedroom look luxurious, wood staining is a great idea. There are lots of colors to choose from, so you should be able to find something that complements your interior design. Just apply the stain according to the instructions and let it set for a few hours before you enjoy your beautiful, handcrafted masterpiece.
There you have it – your very own beautiful wood headboard for the bedroom. As you can see, it’s a relatively simple and enjoyable DIY project – and the results will truly add to the coziness of the atmosphere in your room. Now all that’s left is to crawl into bed and admire your work – you deserve it!