How To Create A Beautiful Wood Intarsia For Your Project

Wood intarsia is a beautiful woodworking technique that creates a stunning 3D effect on your project. If you’re looking to add some depth and dimension to your woodworking project, then intarsia may be the perfect technique for you.
In this article, we will discuss the step-by-step process of how to create a beautiful wood intarsia for your project. Whether you’re a beginner or an experienced woodworker, this guide will give you the knowledge and inspiration to create something truly unique and eye-catching. So let’s get started!
Introduction to Wood Intarsia
Hey there! Do you want to learn how to create a beautiful and unique wood intarsia? Well, you’re in luck! With this article, you will soon have a fantastic masterpiece to hang on your wall or to give as a gift.
So, what is intarsia? Intarsia is a form of woodworking that requires the assembly of different pieces of wood to create a picture or design. It’s been around since ancient times, although the methods and tools have changed over the centuries. The pieces of wood are cut, shaped and glued together so that when viewed from a distance, the wood design appears as one piece of wood. It’s a fun and creative way to add a unique touch to any project.
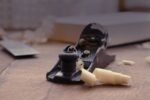
What are the essential tools for creating an intarsia? These include a jigsaw, sandpaper, wood glue, clamps, a chisel, a pencil, and a wood burner. Depending on the complexity of the design, you may also need a scroll saw and a band saw. Plus, for the finishing touches, you’ll need some carnauba wax and a few other supplies.
So, that’s a brief introduction to intarsia. Now, let’s look at the step-by-step guide on how to create a beautiful wood intarsia for your project.
What is Intarsia?

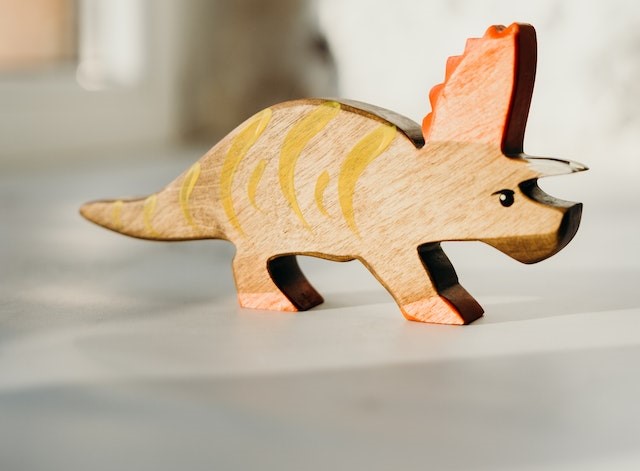
Ahhh intarsia, intarsia… What is intarsia you ask? Well, let me school ya real fast. Intarsia is a woodcraft technique where you assemble colorful pieces of wood (called intarsia) to create a beautiful piece of art. The intarsia pieces are usually cut from different kinds of wood and often feature intricate shapes and patterns. What makes intarsia so cool is that the wood pieces fit together like a big puzzle, and the end result is something spectacular!
Intarsia has been around for centuries, and it originated in Italy. The term intarsia comes from the Italian “intarsiare”, which means to cut in or to inlay. In the 1500s, intarsia artwork was popular in cabinets and furniture made by Italian artists. Intarsia also became popular in other European countries; you can see examples of this type of artwork in many churches in England.
Intarsia isn’t just used to make furniture and artwork, though. It’s also used to make all sorts of decorative items, like frames, boxes, plaques, and more. What’s great about intarsia is that anything you can imagine can be created using this technique. That’s why it’s a great way to show off your creative side and make some truly unique pieces of artwork.
So now you know what intarsia is, but what kinds of tools do you need to get started? Well, the basic tools you’ll need are a scroll saw and a sander, but you’ll also need some other tools, such as wood glue, clamps, files, and a variety of sandpapers. Once you have all your tools, you’ll be ready to start creating your own intarsia pieces from scratch.
The Essential Tools
Hey,yo, if you’re a beginner intarsia artist, you should know the essential tools you need.
First off, you’re gonna need a good scroll saw. It is used to cut intricate curves and details in your design. With the right blade, you should be able to cut wood up to two inches thick. Wooden dowels are also necessary because they are used to move pieces within the design.
You’re also gonna need sanding tools because they are best to shape your pieces with. A sanders is good to use because they can take down wood quickly. But wood often needs to be shaped with detail and sandpaper is good for that. Sandpaper in different grits will also work best to sand for a smooth finish. A thick foam pad is also needed to help shape and contour your piece.
To glue up your design, you’ll need adhesive. A strong and slow-drying hide glue is the best choice. Lastly, you’ll need clamps to hold your piece together while drying. Make sure you use properly sized clamps.
That’s all the tools you need, dude. Now you’re ready for the next step of intarsia.
Step by Step Guide
Hey there, your intarsia project isn’t gonna make itself, so you better get to it! Intarsia is all about creativity, so pick up your tools and get to work. When it comes to wood intarsia, there’s plenty to consider before you get started.
Let’s start by choosing the right wood. You want to use woods that are easy to work with but also have a nice grain like pine, cedar, or poplar. Pick some nice contrasting colors to really make your intarsia stand out.
As far as designs go, take a look around your home and see what inspires you. You can even search online for some cool intarsia designs. Once you have the design, it’s time to cut the pieces. For this, you’ll need a band saw. This type of saw will make it much easier to cut out the shape of the pieces.
After you’ve cut out the pieces, you’ll want to shape them to get the desired look. Use sandpaper to sand down any rough edges and to give the wood a smooth finish. You can also use a wood burner or router to create unique shapes.
Once the pieces are ready, it’s time to start gluing and assembling. Use wood glue or wood adhesive to attach the pieces together. Be sure to wear gloves and a mask to keep all the dust off your skin!
And finally, you want to finish the intarsia and highlight its intricate design. Waxes and oils work best, and you can also use a sealer to protect the wood. Now that you’ve finished your intarsia, you can proudly display it in your home.
How easy was that? See, it’s not that hard to create a beautiful intarsia project. With enough practice and patience, anyone can create a stunning intarsia. So what are you waiting for? Get to work!
Choice of Wood
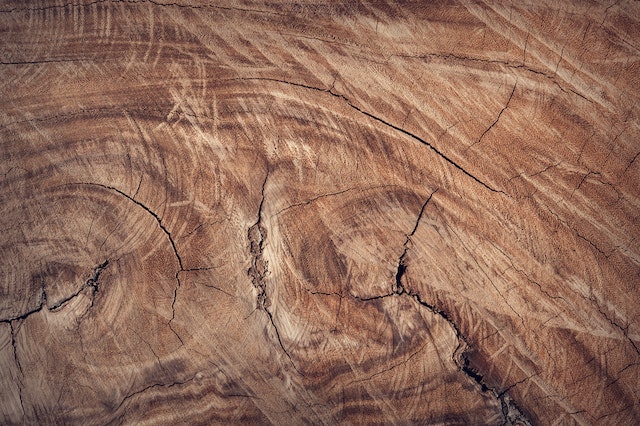
Ahh, yes. Choosing the wood for your wood intarsia project. Now that’s the fun part! Where to begin?
For beginners, I recommend starting with softer woods. They’re easier to work with and don’t require lots of tools. I’m a big fan of pine, aspen, and alder. They cut and shape easily, and can make all sorts of interesting designs.
If you’re more experienced, you might want to try mahogany, cherry, or teak. They can be a pain to work with, but the end result is worth it. The natural grain in these heavier woods gives the design a uniqueness and depth you won’t find in softer woods.
No matter what kind of wood you choose, take a minute and feel the texture of each piece. Sight alone can’t tell you which wood is right for your project. Touch is the best way to learn how each wood will work.
Have fun with it! Experiment with different kinds of wood to figure out what works best for your design.
When you start cutting, make sure all the pieces are between 1/4 and 1/2 inch thick. That makes them easier to shape and assemble.
Now that you know your wood and measurements, it’s time to start creating your masterpiece!
Choosing the Design
Choosing the design of your intarsia can be the fun part! It really is the opportunity to create something great from a humble chunk of wood. And we suggest making the most of it by choosing something that’s unique, bold, and eye-catching.
You can go for a traditional look like a flower, a unicorn, or a sun. Or you can be more daring and choose something totally left-field like a flying ice-cream cone, a robot, or a llama wearing a dress. It’s completely up to you and what you think will look amazing once it’s all put together.
But remember, the design you choose will be filling the pieces you cut out of the intarsia, so keep in mind the same guidelines as picking out your wood. Find something that works with the grain and that will really pop.
Another great tip is to draw out the design onto squared paper. That way you can accurately plan the size of your intarsia and make sure it will fit the area you want it to.
It sounds like a lot of work, but this is really the best way to make sure you get the perfect design. You can also look online for inspiration or even consider having a professional artist do the artwork for you if you’re not feeling creative!
Really, the sky’s the limit when it comes to designing an intarsia – so take this opportunity to be daring, bold and have fun.
Cutting the Pieces
Well, well, well, it’s time to cut the pieces of wood for your beautiful wood intarsia. Now, it’s important to know that cuts need to be precise, so you need to know how to precisely measure and handle the wood. We recommend having a protractor, a ruler, and a saw of your choice on hand. Whether you choose a handsaw, hacksaw, or a jigsaw, make sure you have the proper protective gear like gloves, masks, and googles.
Now, let’s get to work. It’s best to start by measuring and drawing the outlines of the pieces onto the wood itself. This will ensure accuracy. Keep in mind that any mistakes you make in this step will carry over and show up in the final product. Once you have the outline drawn, grab your saw and make the cut. Make sure it’s even and straight, paying close attention to the protractor.
Depending on the size of your project, you can choose to make piece by piece or assemble all the pieces and make the big cuts at once. We recommend the latter for large projects as it save time, since you won’t have to do detailed work for every single piece.
After you’ve made the cuts, don’t forget to smooth the edges. This will prevent any potential splinters and it’ll help with achieving that perfect look. Grab your sandpaper and take your time while you sand away any irregularities.
When you’re satisfied with the piece, set it aside and keep on cutting until your design is complete. And, don’t forget to take a break and grab a snack every once in a while, you need your energy to finish this masterpiece.
Welp, there you have it. This is the cutting part of your intarsia project. Just remember, be precise and take your time. Don’t make any careless cuts, because once it’s done, it’s done. Permanently. That’s why patience and paying attention are key here. In the end, you’ll be left with the beautiful intarsia of your dreams.
Shaping the Pieces

Shaping the pieces is a fun and creative part of the wood intarsia project. You can make use of various tools to shape your pieces as you see fit. For starters, you can use a band saw to make straight or curved cuts. After that, you can use a disc or drum sander to make the edges of the wood smooth and even. You can also use a router to contour or carve intricate shapes into the wood.
If you want to add texture to the wood, you can make use of chisels or gouges. Chisels are ideal for making shallow cuts on the surface of the wood. On the other hand, gouges are useful for making deeper and more intricate carvings. You can also use a rasp tool to create deeper carvings and curves.
Using sandpaper is an important step for achieving the desired shape and texture for your intarsia project. It’s important to start with the grain of the wood and work your way up from there. Start with the coarser grits and move up to finer grits until you achieve the desired texture.
It’s best to practice your woodworking craft on smaller pieces first before attempting to shape the pieces of the wood intarsia project. Doing this will help ensure that you have a good understanding of how to use the various tools effectively and safely.
So there you have it – shaping the pieces of a wood intarsia project is surprisingly fun and creative. Even if you’re the type of person who gets intimidated by messy projects, you can still find a way to make the most out of your wood intarsia project! With a little bit of time and patience, you’ll be able to create something that you can be proud of.
Glue and Assembly
It’s time to put your intarsia project together! It’s nearing completion but first, things need to be glued together.
Let’s start with some iron-on glues or resins. These come in sheets or tubes and are recommended for beginner intarsia projects. It’s easy to apply the glue to your pieces, but the thing you want to keep in mind is to not overuse the glue! The rule is generally: the more glue, the more mess. The more mess, the more sanding it takes to make the intarsia look neat and clean.
Now, let’s discuss some liquid adhesives like epoxy, poly poly, and superglue. This is great for attaching small details together. But don’t be too hasty! You need to follow the same no-overuse-glue rule for this too!
Once your glue is applied, it’s time to slide the pieces together. You can use small clamps for bigger pieces or small clothespins for the smaller ones. This will help keep the pieces in place until the glue has time to fully dry.
Once you have everything glued together, don’t be in too much of a rush to take it out of the clamps. Let it sit overnight and take options in the morning. This will give the glue time to fully harden and achieve maximum bond.
And that’s all there is to it! With the right tools and a bit of patience, you can now assemble your gorgeous intarsia project and bring to life your creative vision!
Finishing the Wood Intarsia
Congratulations! You have successfully created a stunning wood intarsia masterpiece and now, it’s time to finish your project like a professional. But don’t worry, finishing an intarsia is much easier than getting a good finish with a wood saw or wood planed. So let’s get to it!
First, you should sand all of the surfaces that you can reach, ever so lightly. Remember, you’re not trying to remove a lot of material – just make it smooth to the touch. This will give your intarsia a professional-looking finish and make it look great when you’re done.
Next, you’ll need to apply a finish. Now, this is where you get to be creative. You can use whatever finish you want – varnish, shellac, lacquer, even clear paint – the choice is entirely up to you. Just make sure that whatever finish you use, it’s going to protect your beautiful intarsia from the elements and give it a beautiful shine.
Once you’ve chosen your finish, you’ll need to prepare it. This means sanding off any excess glue, dust, or dirt from the intarsia. You’ll also want to make sure that all of the nooks and crannies are dust-free, too. If you’re working with wood dust, use a dust brush or a vacuum to make sure it’s all gone.
Now that the intarsia is ready for the finishing touches, use a clean soft bristle brush to apply the finish evenly. Make sure that you don’t leave any streaks behind, as this will ruin the look of your intarsia. And don’t forget to be consistent with your strokes – make sure all of the surfaces are covered.
When the first layer of finish is dry, use a fine grit paper (around 400 grit is perfect) to buff the surface. This will help the finish to adhere better to the wood, creating an even and uniform look. Once you’ve finished buffing, you’ll need to apply a second layer of finish.
Finally, you’re ready to put the finishing touches on your intarsia. If you want to accentuate certain elements, like the different colors of wood or the intricate details in the design, you can use a brush to apply a thin layer of clear or tinted lacquer over the areas you’d like to stand out.
So there you have it! You’ve finished your wood intarsia and you should be proud of yourself. Your masterpiece will be something to enjoy for years to come – and a great conversation starter when you have friends over!