How To Create A Beautiful Wood Picture Frame For Your Artwork

A beautiful picture frame can enhance the appearance of any artwork, adding a touch of elegance and sophistication to your home decor. While there are many frames available for purchase, creating your own custom frame can be a rewarding and cost-effective way to showcase your artwork.
In this article, we’ll guide you through the process of creating a beautiful wood picture frame for your artwork. From choosing the right type of wood and tools, to step-by-step instructions and design tips, we’ll cover everything you need to know to create a stunning and functional frame.
Whether you’re a beginner or an experienced woodworker, this guide will help you create a beautiful piece of art that you’ll be proud to showcase in your home. So, let’s get started on how to create a beautiful wood picture frame for your artwork!
Learning How to Create a Beautiful Wood Picture Frame
Hi there and welcome to my tutorial on how to create a beautiful wood picture frame for your artwork! You might be asking yourself, why oh why would I go through the trouble of creating a wood picture frame when it’s so much easier to just buy one?
Well…just because I said so, but also it’s because learning how to make something with your own hands is a great feeling! Not to mention you might take it a step further and personalize it to make it unique, so let’s get to it already!
Let me first start by telling you the materials you’ll need. Any basic wood-working tool set should do, but make sure you have some measuring tape, screws, a jigsaw, hammers, sandpaper, glue and both gloss and satin finish varnish.
Alright, now comes the fun part!
Step 1: Measure and Cut the Wood- before you start nailing and hammering, you’ll want to make sure that your frame is the right size for your artwork. Here’s where the measuring tape comes in handy. Use it to measure the artwork and cut wood accordingly using the jigsaw.
Step 2: Sand the Wood- once all the pieces have been cut, you’ll want to sand them down to smooth out any rough edges.
Step 3: Glue the Wood Together- you’ll want to glue the sides of the frame to ensure a strong hold, so apply some good quality wood glue and fit the frame together.
Step 4: Hammer and Nail the Pieces- use the hammer and screws to nail the frame together and voila! You’re almost done, but you’ll want to ensure that the frame is nice and secure and won’t come apart anytime soon.
Step 5: Varnish the Picture Frame- once you’ve nailed the frame together and it’s dried, varnish it up! Applying a good layer of both gloss and satin finish varnish will make it look extra beautiful and perfect for your artwork.
Step 6: Hang the Picture Frame- and lastly, hang the picture frame in your desired location. I like to add some vintage charm by using some recycled wooden hooks, but if you’d like you can use leave the hanging to a professional.
And there you have it – a beautiful wood picture frame for your artwork! I hope you’re happy with your end result, and don’t forget that you can always get creative and customize your frame.
Required Materials
So, you want to make a beautiful wood picture frame for your artwork, eh? That’s a great idea! But before you get started, you’ll need to make sure you have all the necessary materials.
Let’s start with the wood. You’ll need enough wood to make the frame, plus a little extra for some mistakes along the way. Ideally, you’ll want to use a hardwood, like maple, oak, or walnut. That way, your frame will last longer and look nicer. And while you’re at it, you might as well pick out some nice varnish or paint to make your frame look even better.
You’ll also need to get some tools. You’ll definitely need a saw to cut the wood. A good jigsaw is perfect for that. You’ll also need a hammer, nails, some sandpaper, and a sanding block. And don’t forget the glue and the clamps!
That’s about it for what you’ll need for materials. Make sure you check that you have everything, and get to work on that frame!
Step by Step Instructions
So now you know all the supplies you need to create a fantastic wood picture frame, including wood, glue, nails, and varnish. Now let me give you the step-by-step process so you can be sure you’re creating your wood frame the right way.
Step one: Measure and cut the wood. Now don’t be afraid by how daunting this part seems, you got this. Measure accurately and double check your measurements before cutting the wood. Remember, measure twice, and cut once (as my grandmother used to say) so you don’t waste any wood. And please, please use a saw and vise for this part.
Step two: Sand the wood. If you don’t have a sander or sandpaper, now might be a good time to grab it. The sanding process is important to get the wood smooth and free of grains. Don’t forget to wear safety goggles and respirator to keep yourself and your environment clean.
Next, step three: Glue the wood together. Use short and sturdy clamps to secure the pieces together, and use a strong wood glue for best results. Don’t just settle for any type of glue– make sure it’s a wood-specific glue.
Step four: Hammer and nail those pieces together. Once the glue is dry, take a hammer and a fistful of nails and get to work. No, not literally a fistful of nails (although if you were so inclined….), but enough nails to hold the pieces firmly.
Ok, now for step five: Varnish the picture frame. Brush, spray or wipe your favorite type of varnish all over your wood frame for a smooth finish. Make sure to cover all surfaces for maximum protection, and don’t forget to apply varnish in several layers– one layer isn’t enough.
And the big finish: Step six: Hang the picture frame. Now that your wood frame is shiny and ready to go, pick a place in your home where you want it to be. Then use proper screws (or you can use nails if that’s more your thing) to hang the frame. And voila! You now have a stunning and beautiful picture frame to put your favorite artwork in.
Measure and Cut the Wood

Creating a beautiful wood picture frame is like making a beautiful piece of art – precision is key! That’s why it’s important to get the measurements of your artwork just right, so you’ll need a ruler, tape measure, and a carpenter’s square.
Once you have all your measurements, you’ll need to cut the wood for the frame. Make sure you have a saw suitable for the job, either a hand saw or a power saw will do the trick. I prefer to use a power saw, mostly because it’s faster, but also because if you’re experienced, you can make more precise cuts.
When cutting the wood, make sure to wear the proper clothing and safety equipment. You’d be surprised at how many people forget their safety glasses or a face mask! My advice is to invest in a pair of thick, clear safety glasses, a face mask and good pair of sturdy gloves. Once you have everything on, you’re ready to start cutting your frame.
Start by lining up the wood with the edge of the table saw, making sure the cut line is flush with the edge of the table or the cutting guide you will be using. Then it’s time to power up the table saw and measure the depth of the cut to make sure that you don’t saw through your frame.
Once you have made your cuts, be sure to double-check them for accuracy. Measure both inside and outside corners with a carpenter’s square to make sure that each side of the frame is perfectly square. Once inspected and approved, get ready for the next step of the process – sanding the wood!
Sand the Wood
Lemme tell ya sumpin, sanding a wood picture frame is the key to having the perfect frame finish! Now, first thing’s first – you definitely want to use sandpaper. It’s gonna be your best friend!
Now, sometimes people want to rush the sanding process and just kinda go over the wood once, but don’t do it! You gonna end up with a rough finish and ain’t no one wants that.
Take your time. Go over the wood at least two to three times with different grades of sandpaper. That way you’ll smooth out any rough patches and make the wood grain more prominent.
Also, be sure to sand the edges of the wood too. It’ll help make the edges more even and give you a cleaner finish. Don’t worry if things don’t look up to par. Just keep sanding until ya get the surface ya wanna see.
And don’t forget to wear safety glasses – this is prime time for dust and splinters to fly!
Now lastly, when ya feel like a world champion sandman, it’s time to take a look at the frame and make sure you get all the pieces in the right place. Give it one last look for a nice, smooth finish!
Sanding a wood picture frame takes practice, but when ya do it, ya gonna have the best-looking frame in town! So just put some music on, relax and get sanding! Ya can’t go wrong if ya just take it slow and steady. With a little bit of patience and your sandpaper in hand, soon you’ll have a beautiful wood picture frame showcasing your artwork.
Glue the Wood Together
Ah okay, now we’re getting somewhere! Now that it’s time to glue the wood together, don’t get confused. Here’s what you gotta do: grab yourself some wood glue and that’s it.
Get two pieces of wood that you’ll be using to make the frame, turn them over so the face that will show when the frame is assembled is facing down, and spread some wood glue on them. Now, you want to remember to be careful and make sure you spread the glue evenly.
Make sure the glue is spread to all the edges of one of the pieces, and then put the two pieces together. Make sure to line up the sides the best you can so when the glue dries, it looks like you have a perfect frame!
Once that’s done, don’t be in a rush to jump in and mess around with it. You must remember that the glue needs time to set. After about 20 minutes, you may start to mess around with the frame, but still make sure you’re easy with it, since there’s still a bit of a way to go.
But rejoice and smile the widest, cos you know what? You’ve just figured out how to glue the wood together. Ha! Doesn’t that feel good? Sure does! Now, let’s move onto hammer and nail the pieces, shall we? It’s about to get real interesting, trust me.
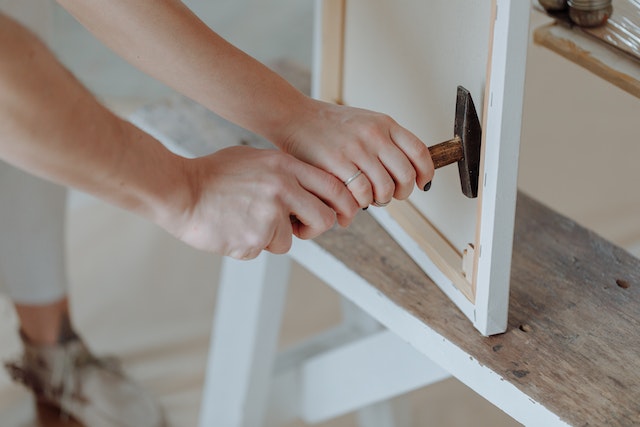
Hammer and Nail the Pieces
Ahhh the good old hammer and nails! This is by far the most exciting part of creating a beautiful wood picture frame for your artwork. After all that measuring, cutting, gluing, and sanding it’s finally time to get down to the business of hammering and nailing those gorgeous pieces of wood together.
But before you start hammering, you need to make sure that everything is perfect. That means measuring the center of your pieces and finding the right length of nails. If you do this right, it will look like professional craftsmanship!
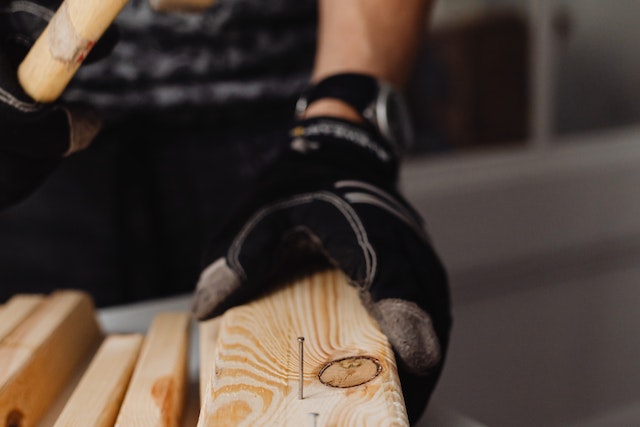
Once you have everything ready, get your hammer and nails. Start by nailing the corners of the pieces together. As you hammer, make sure the nails go in straight, otherwise the picture frame won’t look very symmetrical! Make sure to keep your hand steady as you hammer—you don’t want to hit your fingers with the hammer.
Once the corners are all nailed together, start hammering the nails into the sides. Again, make sure the nails are going straight and everything looks even. If you have a saw, use it to cut excess pieces off the frame so everything is perfectly aligned.
After all the nails are in, use a nail setter to make sure the nails are all flush and even with the wood. If you’re feeling creative, you can also use a pattern to arrange the nails in different shapes or designs for a unique and artistic look.
Once everything is nailed and secured together, don’t forget to test the strength and stability of your picture frame. Make sure everything is solid enough that it won’t fall apart when you hang it up. If you feel it needs more stability, you can always go back and add more nails.
And that’s it! You’ve successfully created a beautiful wood picture frame. All that’s left to do is admire your craftsmanship and marvel at the fact that you are now a master woodworker. Good job, my friend!
Varnish the Picture Frame
So you’ve just about finished making your beautiful wood picture frame for your artwork. All that’s left to do is to put the cherry on the cake—the varnish!
There are a few different types of varnish out there, so it’s best to decide which one to use based on the type of project you’re working on. Here are the main types of varnish you can choose from:
– Polyurethane varnish is probably the most common type of finish. It’s great for outdoor projects, as it’s moisture-resistant, and it provides a greyish color.
– lacquer is best for glass, wood, and metal surfaces, as it provides a hard, glossy finish.
– Shellac is a natural finish made from the crushed shells of lac bugs. It’s great for sealing wood, but not recommended for outdoor use.
Once you’ve chosen the varnish you’d like to use, you can start applying it to your wood picture frame. When varnishing wood, there are a few tips to keep in mind:
– Start by using a clean, lint-free cloth to remove all the dust from the frame.
– Apply the varnish with a brush in a steady, even motion.
– Let the varnish dry for at least 24 hours before applying a second coat.
– Once the second coat is dry, use steel wool to buff the varnish to a high shine.
– Finally, touch up any spots that need a bit of extra varnish, and let the frame dry.
And there you have it—you’ve just varnished your wood picture frame to perfection! Congratulations on a job well done—you can now proudly showcase your artwork in your stylish and unique wood picture frame.
Hang the Picture Frame
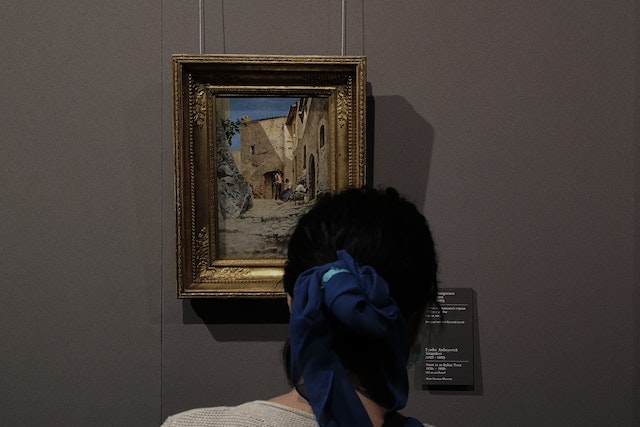
Alright everyone, we made it to the last step! Once you’ve finished your beautiful wooden picture frame and hung it up, all that’s left is to admire your work! First thing’s first, you want to make sure the frame goes in the right spot. Measure the wall space you have, and make sure your frame will fit.
Now, it’s time to actually hang your frame. There are a few ways of going about this. You can buy small nails, or you can use a wire. Personally, I prefer using a wire to hang my frames because I feel it gives them a bit of a weightless look. But hey, to each their own!
Using small nails is a bit more straightforward—just make sure to hammer them in securely while being careful not to go too deep. On the other hand, putting on a wire can be tricky, so make sure to double check with a level when you’re done!
Now, whether you used nails or wire, the last step is to make sure your frame is tightly and securely in place. This is important so that it doesn’t wobble or jostle around when you go to dust it off or reposition your work.
Finally, comes the part I love best—standing back admiring my work! Your frame’s a statement of your creativity, and you no doubt put a lot of hard work into making it a reality. Take the time to enjoy how your piece turned out and bask in your skill.
And that’s it! After taking the time to make such a beautiful wooden frame, you should have no problem showcasing your art in style. All that’s left is to hang it up and enjoy. Congratulations! You’re now a master craftsman.