How To Sharpen A Dull Saw Blade
Always wanted to know how to sharpen a dull saw blade? Well, here’s your chance to figure it out! It’s easier than you think and you don’t even have to shell out the big bucks for a professional to do it. With the right tools and knowledge, you can keep your saw blade nice and sharp.
So why should you take the time to sharpen a dull saw blade? Simple: having a sharp saw blade will make cutting easy and precise, saving you time and effort. And with a clean blade it will also last longer, as it won’t be subjected to as much wear and tear.
Now, let’s get to it. Before we get into the nitty-gritty of how to sharpen a dull saw blade, let’s take a look at what tools you will need, a few tips and tricks, and best practices during the sharpening process.
First off, it’s best to use a sharpening stone or honing tool for the actual sharpening part. A sharpening stone is a great choice for creating a very precise and precise edge. The honing tool is great for creating a sharper edge on the blade, but won’t be as precise as a sharpening stone. You’ll also need a file and clean brush and cloth, which we’ll cover in more detail later.
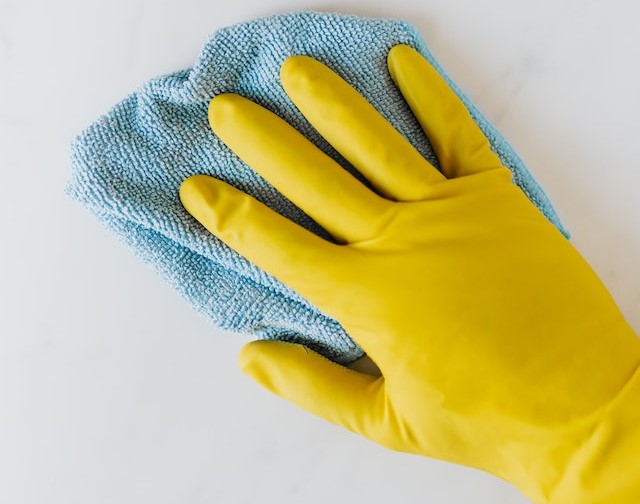
It’s also important to make sure you wear safety glasses when sharpening a saw blade. Make sure you have the blade secured to the saw so it doesn’t move when you apply pressure, and don’t forget your gloves!
Lastly, remember that you’ll need some patience when sharpening a dull saw blade. It’s important to follow the steps closely and take your time, plus be careful not to rush through it. A sharp saw blade requires precision and care – take your time to make sure you get it right.
And with that, you’re now ready to learn how to sharpen a dull saw blade! So, let’s get to it.
Assess the Blade
As any DIY-er knows, a sharp saw blade makes quick work of even the toughest of projects. A dull saw blade, on the other hand, is a detriment to progress and can make any project tedious and arduous. If you’ve found yourself with a dull saw blade and want to get back to work, the first task is to assess the blade.
Obviously, the first thing any wise handyman or woman will do is be sure the saw is unplugged from any electrical source before attempting anything. I mean, let’s not get crazy here! No one wants to feel the full impact of electricity going through their body when dealing with sharp objects, right? Let’s stay safe!
The next step is to take off the saw blade. Most saw blades can easily be removed by hand. Depending on the type of saw, there may be a few bolts that need to be taken off, but nothing complicated. Once the blade is off, check for any obvious damage like deep knee slappers, chips, or dents. If the blade is bent, it’s probably a good idea to replace it rather than try to sharpen it. If you notice any signs of wear or damage, the blade may need to be replaced with a new one.
Once you’ve assessed the blade, it’s time to take the next step and get it in tip-top shape.
Remove the Saw Blade
You’ve decided that the saw blade in your toolbox needs sharpening and you’re ready to dive into the process. But first things first, you have to remove the blade from whatever it is you’re trying to saw.
If you have a circular saw blade, it’s usually pretty easy. Just disconnect the saw from any power sources, then look for a locking plate or bolt that holds the blade in place. Give it a turn, and the blade should come off without much trouble. If you’re dealing with a reciprocating saw, you’ll want to find the direction of the blade’s rotation and move it accordingly. Again, the blade should come off pretty simply, but use caution as these blades move around a lot more and can be harder to control.
Although it’s a bit more complicated, if you’re working on a jigsaw blade the process is the same. Again, disconnect the power, locate the moving part that holds the blade in place, then turn it away from the blade until it releases. There may be a clip or screw in the way so make sure to check for that, as well.
Once the blade is free, have a look at it. If it’s been a while since you last visited this blade, it may have collected dirt and rust that can race up the sharpening process. Using a brush or cloth, clean any debris and dirt away. Now you can move onto the next step and start sharpening those blades! Good luck!
Check for Obvious Damage
Well, hello again everyone and welcome to another tutorial about sharpening your saw blades. Before you take any action, you want to make sure your blade is not overly damaged, so let’s talk about checking for obvious damage.
Okay, so the first step is to remove the saw blade. This step can be easy if you have experience with power tools, but if you don’t, you may want to get some help from a professional or a more experienced friend. Once you have the blade removed, set it on a clean piece of cloth, so that you can more easily inspect it.
Now, there are several signs of obvious damage that you should be looking for. Firstly, keep an eye out for chips and dents in the blade. If the saw blade is overly chipped and dented it may not be worth trying to sharpen and may need to be replaced. Secondly, make sure to check for any rust that may have formed on the blade. If too much rust has formed, the saw blade may again need to be replaced. Finally, check for any bends or cracks. Again, if the blade is bent or cracked, it won’t be able to be sharpened and should instead be replaced.
Fortunately, if you don’t see any signs damage, that’s really good news! You can comfortably move on to the next step, which is cleaning the saw blade.
So that’s how easy it is to check for obvious damage on your saw blade. As long as the blade is intact and without chipping, dents, rust, cracks or bends, the rest of the steps should be pretty easy for you. Alrighty then, I’ll see you in the next tutorial when we start cleaning up the blade!
Clean the Blade
Ah, so you’ve made it to Step 2 of this little how-to, Clean the Blade. I’m here to help you out in your quest to get that old saw blade looking and feeling sharp as a Mack Truck. Don’t worry, I’m a pro, and if you follow my lead, you’ll be slicing through lumber in no time.
First off, we need to get the blade some serious cleaning power. You can use a brush and a little elbow grease to scrub away any pesky dirt, but don’t press too hard or you may scratch the metal. Then you’ll want to get a soft cloth and carefully wipe away the grime. Make sure you clean every nook and cranny of that saw blade- you don’t want anything hanging around that could dull the blade even more.
Speaking of dull, you can also use a mild solution of detergent and water to really get that blade squeaky clean. Pour a little bit onto your cloth, then wipe down the blade. You don’t have to use a whole lot- just enough to do the job.
After you’re done cleaning, dry off the blade with another dry cloth. And if you’re feeling really ambitious, you can even polish it with a metal polish. Now your saw blade should be spic and span, and ready to be resharpened.
Use a Clean Brush
If you’re like me, the most daunting thing when it comes to sharpening a dull saw blade is getting the blade clean! But don’t worry, it’s not as hard as it may seem. All you need is a good brush and a bit of elbow grease and you can get that nasty saw blade cleaned up in no time!
First, take off the saw blade and set it aside. The next step is to grab a brush. Now, when I say “brush,” the one you want to use is something stiff, with stiff bristles. This will help you get into all the nooks and crannies that are caked with sawdust, sap, and resin.
Once you have your brush, take it to the saw blade. Start by sweeping the bristles in a back and forth motion, using as much pressure as you can. In between brushing, you may have to use some sort of solvent to help loosen up the more stubborn residues.
Make sure to focus on the fringes of the saw, as this is where the grinding process creates the most dust. Also, if your saw is old, there could be a ring of rust that has accumulated around the blade. A stiff brush can help to break up this rust and get the blade nice and clean.
Once you’re done scrubbing, make sure to look carefully at the blade and make sure all dirt, dust, sap, and rust is gone. If everything looks good, you can move on to the next step – sharpening!
So remember, the first key to getting that blade sharp again is getting it super clean. So don’t be afraid to get the brush out and give that saw blade a good scrub! You and your saw will thank me later.
Use a Clean Cloth
When it comes to keeping your saw blade in sharp and clean condition, one of the most important tools in your arsenal is the clean cloth. The cloth won’t actually sharpen your saw blade, but it will keep the blade clean and free of debris, which will help maintain its sharp edge.
First and foremost, you always want to use a non-abrasive cloth like cotton or microfiber. Paper towels are also handy, but they can be abrasive and they just won’t do the same level of cleaning that a good cloth will.
When you’re using the cloth, take it slow and really scrub the saw blade, focusing on the teeth of the saw blade. If you hit the right amount of force, you should be able to hear a sweet, metal on metal scratching sound, which is music to the ears of saw blade sharpeners everywhere. But don’t go too hard, or else you risk damaging the blade and having it get dull even quicker.
After you’ve scrubbed the blade to your heart’s content, rinse it off and then dry it off with the cloth. This is especially important if you’ve been using any kind of cleaning solution or lubricant, as it should be wiped off to avoid any unwanted residue on the blade.
Finally, when you’re done, store the cloth someplace where it won’t get dirty or damaged. That could be in a drawer or in a closed tool box, as long as it’s clean and out of harm’s way.
When it comes to sharpening a dull saw blade, having a good clean cloth handy is key. Don’t forget, a clean blade is a sharp blade! It may take a bit of extra elbow grease, but your saw blade will thank you in the end.
Sharpen the Blade
Alright folks, here comes the fun part! Now is your chance to show off you’re tool bench skills and act like a real handy-man with your saw blade.
We’ll start off with the easy one first, the file. A file is a great tool if you’re looking to even the surface of your saw blade. Take the file in whichever direction your saw blade needs to be worked on. With each stroke, drag the file till it’s a more even surface across your blade.
No file? No problem! You can also use a sharpening stone or honing tool as an alternative. Basically, you’ll do the same motion as with the file, except you’re not dealing with the surface texture, but the cutting edge of the blade. With careful strokes and a good eye, you should see the blade getting skillfully sharper with each slide.
For the real pro-busy bee types out there, you can get yourself an electric sharpener. This will be perfect for anyone looking to get the job done quickly and precisely. All you have to do is chuck in your blade, turn the machine on and do your thing! Easy peazy, right?
Now that you’ve got your blade nice and sharp, it’s time to find out how well it works. Time to move onto Step 4 and evaluate the sharpness. Unless you’re exceptional with a file like Hercules with a sword, go have your blade checked by a professional to make sure you’re good to go!
Use a File
Ahhh, using a file, the time-old method for sharpening any dull saw blade! To be honest, I have always been skeptical regarding using a file as a sharpening tool. But I have to admit, it actually works quite well! Besides, once you learn the proper technique, it’s just so easy!
So, let’s get started! First you will need the right file for the job, one that is designed specifically to sharpen saw blades. You can find these in any decent hardware store – just ask the clerk, they will point you in the right direction. Once you have the right file, it’s time to get started!
Begin by attaching the saw blade firmly in a vice, so that it’s held secure and isn’t likely to move. Now you can start to move the file back and forth across the blade. Aim for smooth, consistent strokes and make sure to move the file in the same direction and in the same area for the entire motion. Repeat for 5-10 strokes on the same area.
After a few strokes, shift over to the next area and begin to do the same thing. Continue shifting from area to area, making sure that you are getting the same amount of strokes on each area. As you work, remember that the goal is to shave off the dull part of the blade while keeping the cutting edge sharp.
Keep an eye on your progress as you go. You will know when the saw blade is sharp enough when it has a clean, even surface. It’s important to be patient and take your time – if you rush it, you won’t get a good result.
Once your saw blade is sharp as can be, it’s time to test it out! Carefully remove it from the vice and try it out on some wood – if it’s just as sharp as you expected, you are ready to go!
So, there you have it – the proper technique for sharpening a saw blade with a file. I have to say, it really works! So if you ever find yourself with a dull saw blade, grab your file, get to work and you’ll be cutting like a boss in no time.
Use a Stone or Honing Tool

Hey dudes and dudettes, are you feeling fed up because your saw blade is dull? Well, have no fear, I’m here to help! In this section of the article, I’m gonna tell you step-by-step how to sharpen a dull saw blade using a stone or honing tool.
The first thing you need to do is locate the stone or honing tool. If you don’t already have one, you can easily find one at most hardware stores for a fairly reasonable price. Just make sure to get one specifically made for sharpening saw blades.
Once you have your stone or honing tool, use it to gently rub the saw blade in a circular motion. As you do this, make sure to evenly sharpen the entire surface. You may want to double check that you don’t miss any areas. Note that the stone will likely do most of the work for you so you don’t need to put in a lot of pressure.
After you have sharpened the blade with the stone or honing tool, make sure to clean off the saw blade using a small brush and a clean cloth. Once you have done this, you can evaluate the blade for sharpness. If it still needs a bit more help, you can try using a file to achieve the desired result.
And voilà, there you have it! With a bit of patience and attention to detail, you should have yourself a nice, sharp saw blade. Just remember to clean the blade after each use and store it in a dry, safe space.
Now go ahead and get sharpening, my sharpening-savvy friends. I wish you the best of luck!
Evaluate the Blade
Now that your saw blade is nice and sharp, it’s time to take a look at how it’s performing. Step four in the process of sharpening a dull saw blade is evaluating the blade. This evaluation process allows you to ensure that the edge of your blade is indeed sharp, and that it is not experiencing any abnormal wear.
To begin evaluating the blade, the first thing you want to look at is the cutting-edge sharpness. With the saw blade still secured in place, use a magnifying glass to take a close look at the edge. You should be able to make out an almost microscopically thin line along the edge which signifies a sharp blade. If the cutting-edge looks good, then it’s time to look for any signs of wear.
For this portion of the evaluation process, use your index finger to run along the cutting-edge of the blade. As you do this, you should feel a crisp edge along the outer layer of the blade. If you find any areas where the blade feels smooth, then this indicates normal wear and can likely be attributed to the age of the blade. If the blade has already been stressed and warped due to heavy use, then this could be due to the blade being improperly sharpened.
Once you have conducted a full evaluation of the blade, you can go ahead and get to work with your newly sharpened saw blade. Be sure to keep in mind that your saw blade will require regular sharpening and maintenance as over time the cutting-edge will naturally become dull, so be sure to maintain your saw blade accordingly.
By taking the time to sharpen and evaluate your saw blade, you can save yourself from unnecessary frustration and expense. Keep up with the maintenance on your saw blade and it will keep you sharpening for years.
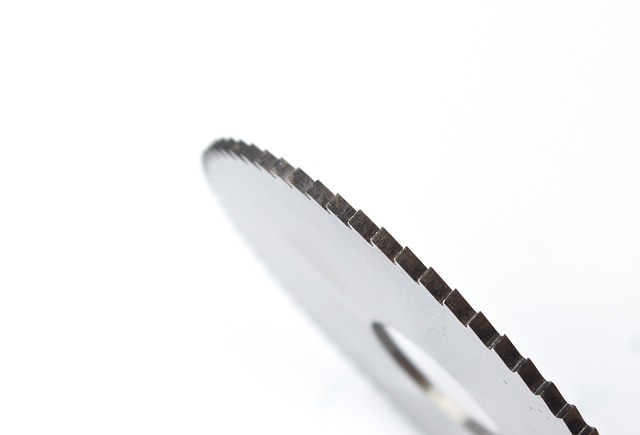
Check for Cutting-Edge Sharpness
Oh sure, you’re about to sharpen a saw blade and make it go from dull as a doorknob to sharp as a dentist’s drill. But don’t be fooled into thinking you’re done from here. After all the effort of assessing the blade, cleaning it, and sharpening it, you’ve got to make sure you’ve got the edge you want. Time for a check-in, yes?
To get the most out of your saw blade sharpening effort, you need to check for cutting-edge sharpness. That means inspecting the sharpened edge to make sure it’s nice and honed. No worries – in this step you’re just taking a look, so there’s no need to disassemble the blade again.
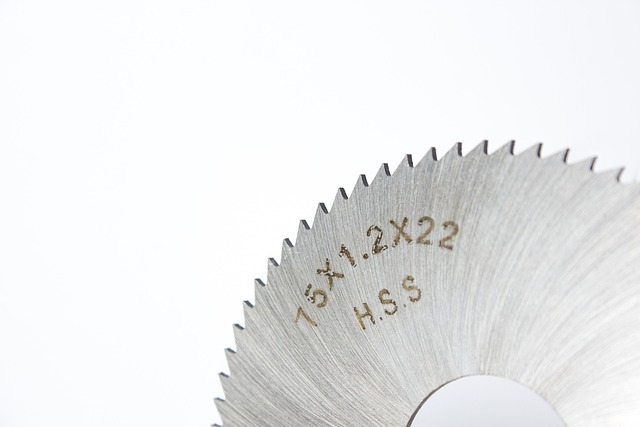
To check the blade, start by holding it up in the light and examine the edge. You’ll be looking for the flat portion of the blade, the grind marks, and a micro-bevel right at the edge. It should be shiny and reflective, showing that it’s been properly sharpened. If everything looks good, you’re in luck – you’ve got a sharp blade! But if there are any burrs, nicks, or dull areas, you’ll need to do some additional work with the file or stone.
In some cases, you can also do a quick test on a piece of scrap wood. Place the board against the blade and give it a gentle pull. If the blade bites into the wood quickly and easily, you’ve got the edge you wanted! If it takes some effort, you may need to do a bit more honing (or.cringing, depending on how yourefeeling) to get that sharpness you want.
There you have it – a quick and easy way to check for cutting-edge sharpness. With just a few minutes of work, you can make sure your saw blade is sharp and razor-ready. Sure, it might take some practice until you reach master-level sharpening skills, but at least you can be sure you’ve got the edge you’re looking for. Now get out there and finish that project you’ve been working on – it’s time to put your newly sharpened blade to good use!
Evaluate for Wear
When it comes to evaluating your saw blade for wear, there is no room for mistakes. If you want to keep sharpening your blade over the years, then you need to assess its condition carefully.
First, take a look at the teeth of the blade. Are they all evenly spaced? If not, that might be a sign that the blade has been used for too long and needs to be replaced. If any of the teeth are broken or chipped, that means the blade is definitely due for a replacement.
Next, check for signs of wear and tear on the body of the blade. As blades become dull, they often become pitted or corroded. This is a good indicator that the blade has done its time and needs to be replaced.
Finally, run your fingers over the entire blade. Do they come up dirty or covered in metal filings? If the blade is covered in metal filings, then it has definitely seen a lot of work and should be replaced soon.
If your blade passes all these tests, then congratulations! You have a sharp saw blade that is good to go. Just remember to take good care of it and keep it clean and well-oiled to help ensure its longevity.
Cleaning and Maintenance
As we all know, a sharp saw blade is a critical tool for any project you might have. But not everyone knows that a dull saw blade is no fun whatsoever, and can lead to dangerous and/or disappointing results. That’s why it’s so important to take the time to clean and maintain your saw blade, regardless of whether or not it’s brand new or have seen better days.
It’s important to clean the saw blade after you use it. This way, your blade won’t collect any dust, debris, or dirt and will be ready to use next time you need it. Use a brush designed for saw blades to carefully sweep the blade clean, then follow up with a clean cloth lightly dampened with a small amount of vegetable or mineral oil. This will help protect and preserve your blade.
In addition to cleaning the saw blade after use, you should also always store it somewhere safe and secure. Make sure that the saw blade is placed in a space away from other potentially hazardous materials, like solvents and solids. Also, don’t forget to cover it, so no moisture or dust can get in and dull your blade again!
Now that you know how to keep your saw blade in top shape, you’ll be ready to cut clean and fast whenever you need to. And if all else fails, at least you can say you tried! But that doesn’t mean you have to settle for a saw blade that’s not sharp. Put the five simple steps above into action and you’ll be cutting through wood like a knife through butter in no time at all!
Clean the Saw Blade After Use
You know what’s bad? A dull saw blade. Even worse is a dirty saw blade. That doesn’t cut quickly, efficiently, or effectively. So, one of the most important steps to keeping your saw blade sharp is making sure it’s clean after every use!
Here’s what you should do. After every use, gently brush off your saw blade with a clean brush. Use a brush with soft bristles to minimize potential damage to the blade. Don’t press too hard, as you don’t want to scratch the blade.
Next, follow up with a soft cloth. Make sure it’s damp, not completely wet. Wipe the blade down and then check it for any dirt or dust. If there’s any residue left on the blade, use a damp cloth and a bit of mild soap or detergent to clean it off.
You’re almost done! Once you’ve finished cleaning the blade, make sure it’s completely dry. You can even go the extra mile and use a hair dryer, too! If you need to remove any rust or oxidation, you can use a rust remover (avoid using steel wool). This will help keep your saw blade in tip-top shape.
By this point, you should have a clean saw blade. Now, it’s time for the important part: storing it properly. You want to make sure your saw blade is stored in a cool, dry, and safe place. After all, a clean saw blade won’t be of any use if it’s ruined by the elements!
And there you have it, folks! Cleaning your saw blade after every use might seem a bit tedious, but it’s an essential part of caring for your saw blade and sharpening it. With a little bit of effort, you can keep your saw blade sharp and in great condition for years to come!
Store the Blade in a Safe Space
Well, while the saw blade is not actually in the saw, it is still essential to store it safely. After all, even a dull saw blade is not something to be taken lightly. The easiest way to make sure your saw blade isn’t an eyesore or an accident waiting to happen is to store it somewhere safe.
For starters, it’s best to store the saw blade in a designated area either inside or outside the home. Avoid placing it just anywhere; put it somewhere that is out of the way, away from children’s reach, where it is out of harm’s way. If there is room, you might consider investing in a durable container such as a toolbox or a plastic storage bin specifically designated for saw blades.
If you’re planning to store the blade indoors, make sure that it is stored away from moisture, dust, and other elements that can cause damage to the blade. On the other hand, if you’re intending to store the blade outdoors, cover it with a tarp or plastic sheeting and make sure that the covering is securely attached. To prevent rust and erosion, lubricate the saw blade before storing it.
Lastly, keep the saw blade away from any magnetic field that may be generated by speakers, TVs, etc., as this may cause the blade to corrode or tarnish. Additionally, always store the blade with the saw blade teeth pointing up. This will prevent you from accidentally injuring yourself the next time you reach for it.
Clearly, it is a great idea to store your blade in a safe, secure spot. This small effort can save a lot of time, energy, and safety concerns down the line and ensure that your saw blade is in its best shape for years to come.