How To Choose The Right Saw For Your DIY Project

Are you planning a DIY project and wondering which saw to use? With so many types of saws available, it can be overwhelming to choose the right one for your project.
But don’t worry, we’re here to help! In this article, we’ll guide you through the different types of saws and their uses so that you can choose the best one for your DIY project.
Whether you’re cutting wood, metal, or plastic, we’ve got you covered. So let’s dive in and learn how to choose the right saw for your DIY project!
What is a Saw?
Ahoy mateys! So, you’ve decided to take on a fun and exciting DIY project, and now it’s time to determine what type of saw is the right saw for the job! But before we start discussing the different types of saws available, let’s get down to the nitty-gritty and talk about what a saw actually is.
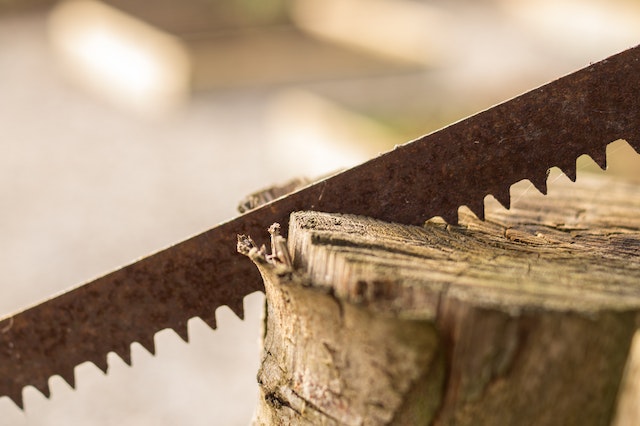
A saw is a tool that has been used since the Middle Ages to cut through materials like wood, metal, and plastic. Over the centuries, saws have evolved from large hand-held blades with handles to power tools that come in different shapes and sizes.
In its simplest form, a saw is a sharp blade with a handle on one end, which is used to make precise cuts. The blade can be straight, curved, or jagged for different cutting applications. The main purpose of the blade is to cut quickly and accurately through the material that is being cut.
Saws come in all shapes and sizes. There are manual saws such as handsaws, coping saws, and keyhole saws, which are great for light-duty cutting jobs. There are also power saws such as circular saws, miter saws, reciprocating saws, and jigsaws. If you need to make large or complicated cuts, these saws are a great choice.
When it comes to safety, it’s important to remember that saws can be dangerous — they come with blades that can cause serious injury, so it’s important to be careful when operating one. Always wear safety glasses and protective gloves when using a saw, and don’t try to use one without reading the instructions first.
So, there you have it — now you know a little more about saws! Let’s move on to the next step and disc
Definition
Hey, have you ever seen a saw before? If so, you might think you know what a saw is, and you’re kinda sorta half-right. Sure, you know that it’s a tool used for cutting things, but really, it’s so much more than that.
A saw is a tool that usually has a blade of metal, diamond, or some other material, which is used for cutting through workpieces. The blade itself usually has serrations that are made to the shape of your intended cut. Saws come in many shapes and sizes to suit almost any job.
Some saw blades are designed for use by hand, while others require specialized machines, such as circular and table saws, to use. Hand saws are the most common and are used in everyday life – such as when trimming branches or sawing in wood. Electric saws are powered by electricity, as the name implies, and are used to cut through hard materials. Even saws that are powered by fuel can be used to make cuts in difficult-to-reach areas, such as the insides of pipes.
The type of saw you choose is important, as it can make the difference between an easy job and a dirty one. It’s important to pick the right saw for the job, as every saw has its own strengths and weaknesses.
Types of saws include hand saws, electric saws, circular saws, table saws, hacksaws, reciprocating saws, miter saws, jigsaws, and saws designed for special uses, such as those for cutting metal, plastic, and tile. With so many different types of saws, selecting the right one can be overwhelming. If you’re like me, though, you don’t really know what you’re looking for most of the time. Just remember to read the instructions before using any saw and always follow safety protocols. Trust me, you don’t need an accident to ruin your day.
Types of Saws
Hey y’all, let’s talk about saws! When it comes to do-it-yourself (DIY) projects, having the right saw is essential. Saws come in all shapes and sizes and they can be used for a wide variety of jobs. It can be confusing to know which one is perfect for your project.
Well, let’s start with the basics. What is a saw? A saw is a tool that used to cut through materials like wood, stone, metal, plastic, and more. There are many different types of saws – some are manual and some are powered.
Now, let’s look at the types of saws out there. These are the main ones you should know about if you’re planning to embark on a DIY project.
The first type is a hand saw. These are the most commonly used saws for DIY projects. They usually have a handle and a blade which is pulled back and forth in order to cut. They can also have a serrated edge which can help when needing to make odd shapes.
Next, you have circular saws. These are powered tools and they’re used to make straight and curved cuts in materials like plywood, sheet metal and more. They are great for larger jobs and can be used to make precise cuts.
Then you have jigsaws. These are hand-held and powered tools which use small blades with fast, up and down motions to cut. They are great for making curved, intricate designs and can be used to cut various materials.
Finally, you have reciprocating saws. These are power tools that move back and forth rapidly and they are best used for cutting through materials like metal, plastic, and even brick or stone.
There are many other types of saws out there, but these are the main ones you need to know about when it comes to DIY projects. Now that you have a basic understanding of the types of saws you may need for your project, you can make a decision on which one is best for the job.
Selecting the Right Saw for Your DIY Project
Ooh, selecting the right saw, now that can be a tricky business so you best be bringing yo’ A-game or else you’ll have some projects around yo’ house that you won’t like! Now all jokes aside, choosing the right saw for your next DIY project is an important element as it can literally make or break a project.
As Einstein said, “Everything should be made as simple as possible, but not simpler.” The same can be said for selecting a saw. So, let’s break it down. What do you need to consider?
First, it’s important to measure the job. What type of saw you need depends on what you’d like to do. If you’re cutting a lot of long boards, you’ll need a different type of saw than if you’re cutting curved pieces of wood. So, measure the job and know what you’ll use the saw for.
Second, you need to know what the different types of saws actually are. This means you’ll have to do some research, but trust me, it’s not rocket science. Just a simple google search or asking around can help you to determine which saw you will need for the job.
Third, you’ll need to decide on how much you’d like to budget for the saw itself. Here’s the thing, sometimes, it’s better to invest in a quality saw right away; it will last you much longer in the long run, and you’ll have less frustration in the short term.
Fourth, once you’ve measured the job, done your research, and determined your budget, then you’re ready to select the right saw for the job. Just make sure it fits all the criteria that you need!
Finally, don’t forget to use a few additional tips when you use your saw. Always think safety first. There’s nothing worse than an injury that could have been prevented with proper care. As they say, “it’s better to be safe than sorry.” Additionally, don’t forget to practice makes perfect. The more you practice and get used to how the saw works, the better your projects will look. Finally, make sure you’re storing and maintaining your saw to keep it in top working condition.
All in all, there’s no one size fits all solution for choosing the right saw for your next DIY project. But with the tips above, you should be able to go into it well-armed with the knowledge you need to choose the perfect saw!
Measure the Job
Hey fellas, so once you start looking for the saw to suit your DIY project you first have to understand and measure the job that you are about to undertake in order to find the suitable saw for you.
It doesn’t matter if you have to cut through a piece of wood, metal, or soft stone, it’s critical to measure the job and see what you need. Firstly, locate the area or piece of material that you want to cut and take a look at the size, the thickness and the angle that you are dealing with and match those with the right saw.
You want to measure the length, width and thickness of the material. For example if you are looking to cut through 2 by 4 studs then you want a saw that will make a straight cut while if you want to cut trim pieces then you need a saw that will make angled or curved cuts. Also be aware of how thick the material is, any material that is more than an inch thick will require a different saw.
Think about the material too, do you need a saw that can cut both metal and wood? A portable saw that can be used for on-site work may be better than a large stationary saw for a small job. Do you need a saw that is powerful enough to make through thick metal or plastic? Make sure you know exactly what you’re looking for before you pick your saw.
Hey check it out, picking the right saw isn’t as hard as you think it is. Just make sure you measure the job and get familiar with the types of saws so you know what you need. Hit me back with the right saw and you’re golden!
Research Types of Saws
Ahhh research, everybody hates it, you know what I’m saying?
But when it comes to the world of saws, research is a must! Understanding the different types of saws and what they offer will help you decide which is the best saw for your DIY project. Otherwise, you may just be sawing in the dark!
Let’s start with handheld and stationary saws. Handheld saws are super easy to use because they are run by battery power or electricity. They are also ready to go right out of the box, no assembly required. On the downside, they may not have the power or accuracy of some stationary saws. But hey, if you have a small or quick job, handheld saws are the way to go.
Stationary saws on the other hand, may require some assembly and will require a bigger investment in terms of purchasing. But these bad boys are super powerful and deliver precision cuts. They are great for larger projects, but you’ve got to be a master at sawing for these babies.
The size of the blade you will need will be determined by what material and size of project you’re tackling. If you’re sawing lumber, such as plywood, a general-purpose 7 1/4-inch blade should do the job.
Circular saw blades are great because they cut clean and straight lines, but they’re not so great if you’re doing detailed work. Jigsaws are great for those intricate details and are available with blades of different thickness and tooth configurations.
A reciprocating saw is a powerful, handheld saw that’s great for demolition work. It has a blade that moves back and forth, so the possibilities for projects are almost endless. A table saw is also a powerful choice for many projects. It uses a rotating blade and is great for making straight, accurate cuts.
My point of all this is that when it comes to saws, it pays to do your research. Shop around, compare prices, and read reviews to see which saw is best for your project before jumping in head first. Trust me, your DIY project will thank you.
Determine Your Budget
Ah, yes, the moment of truth. So if you want to get the perfect saw for your DIY project, you gotta determine your budget. Now, when it comes to budgeting, don’t buy a saw that costs more than you’re willing to pay — that’s the surest way to waste your hard earned money. So, here’s what I recommend:
First off, decide how much you can actually afford to spend on a saw. Don’t be too ambitious, because it’s easy to get caught up in the excitement and overspend. Once you have a ballpark figure in mind, figure out how much you’re willing to spend on accessories, such as additional blades and special blades for more precise cuts.
If you’re looking for a top-notch saw that won’t break the bank, be sure to comparison shop online. This will give you a wide range of prices, so you can compare and find the perfect saw for your budget. Don’t forget to factor in the cost of accessories, as these can quickly add up.
It’s also a good idea to ask other DIYers what saws they recommend. Chances are, someone you know has already purchased a saw, so ask them about the price and features before you buy. And when in doubt, always read reviews and customer feedback. It’s a great way to decide if a particular saw is worth your money or not.
Choose the Right Saw for the Job
Now that you’ve studied the types of saws and measured your project, it’s time to choose the right one for the job. Hey buddy, let me also provide few tips that can help you make the best decision.
A handsaw is great for basic cuts in soft or hard woods, but that might not be the case for plastics and metals. For those materials, you’re going to need something with a little more power.
Your budget is important here. You might want the most expensive saw you can find, with all the bells and whistles, but if you’re working on a tight budget then you’ll have to really weigh the price against the quality of the saw.
A good rule to follow: When selecting the right saw for the job, you should ask yourself, “Can I get the job done with a cheaper saw and will the quality of the job be satisfactory?” If the answer is yes then you should go with the less expensive saw.
If you’re ready to make a purchase then try to find a saw that has adjustable blades for more intricate cuts. If you’re cutting shapes like circles and arcs, then look for something that can rotate at different angles. Handheld saws are great for small projects and if you’re looking into a bigger saw then make sure that it has portability in mind.
No matter the kind of project you’re undertaking, there’s sure to be a saw that fits the job. With a little bit of research and patience, you can find the best saw that meets your needs and budget. Now it’s time to get out there and start DIY-ing!.
Additional Tips for Using a Saw
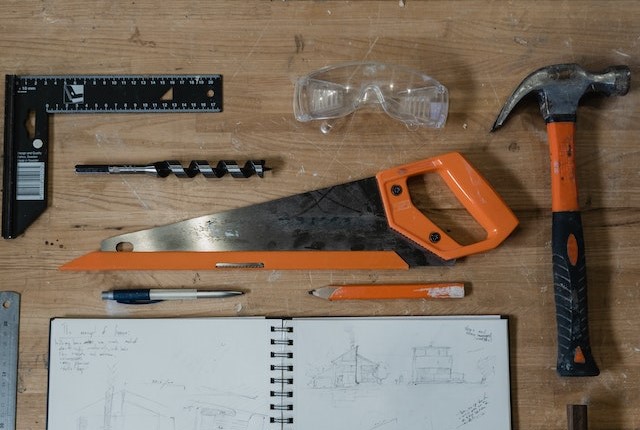
Hey there DIYers, if you’ve made it this far and still reading, you’re clearly taking this project seriously. Let’s talk about that – safety first! Wearing the right gear is essential – a hard hat, gloves and those cool safety goggles, you know the ones that make you look like a mad scientist – they’re key. Also, remember to plan out your sawing action, don’t just go in with a flying saw and hope for the best.
Now let’s talk about practice. You know what that old saying’s about, right? Practice makes perfect! That applies to sawing as well. When using a saw, it’s important to understand the different sawing techniques, so practice your technique on a smaller piece of wood before working on the project you’re actually going to use it for. Before you know it, you’ll be sawing like you were born with a circular saw in your hands!
Last but not least, make sure you keep up with maintenance and storage. Cleaning the blade after sawing is essential to make sure you don’t rust or corrode your tool. Also, make sure to store saws properly – that means ensuring that they’re not near any potential heat sources to avoid accidental ignition.
And that wraps up the extra tips for using saws! Now you’ve got the knowledge, so don’t be afraid to show off your sawing skills and build something awesome. Just remember – safety first! Best of luck on your project.
Safety First
Oh, safety is always first! That’s the most important rule for any DIY project and it’s definitely true with saws too. If you want to stay safe, you need to stay focused on the job at hand and take all the necessary safety precautions.
Before you start any sawing projects, you should make sure to wear the right safety gear: safety glasses, safety goggles, or a face shield, gloves, and a work apron or overalls. You should also wear long-sleeved shirts and long pants that cover your skin properly, and a pair of sturdy work boots.
To avoid accidents, you’ll also need to read and understand all instructions that come with the saw. Pay attention to the safety cautions written in the manual and take note of the important safety features, such as the blade guard or other safety mechanisms.
Once you have the saw set up and ready to go, there are some basic safety routines you should follow. For example, make sure the blade is sharp and properly aligned before using the saw. Also, always stand to the side when you are sawing, since the wood can suddenly bind against the blade, sending shards of wood flying in any direction.
If you are using a power saw, keep your fingers well away from the blade, use the handle for guidance and make sure the area around the saw is clear. Inspect the saw before and after you are done for signs of wear, tear or damage. Finally, when you’re finished with your sawing project, make sure to unplug the saw and clean up any sawdust or wood chips left behind.
Safety is always vital, so remember to take your time when operating saws and to follow all safety instructions. Stay focused on the job at hand, follow all the safety procedures, and you’ll be cutting like a pro in no time.
Practice Makes Perfect
As they say, practice makes perfect. When it comes to using a saw, this sentiment certainly holds true. Coming from an infamous comedian, I should know. Like any skill, the more you utilize it, the more comfortable you will become.
When starting out, find some scrap lumber and start cutting. Granted, these materials will not be used for your end project, but you will become acquainted with the saw. Get a feel for how it runs and how the blade moves.
It is also important to understand how the different types of saws operate. Table saws generally run on the same format, but jigsaws and circular saws will provide you with different results. Take note of the set up and settings you are using when performing different cuts with each saw. This way, you will know the best way to make cuts with each type when you begin your actual project.
Also, if you are new to using a saw, consider enrolling in a class so you can get some hands-on instruction on the basics of saw technique. This will ensure that you are appropriately utilizing the saw when you begin some of your own projects.
Finally, take your safety precautions seriously. Pay attention to the guard on the saw and make sure to wear protective eyewear and clothing. As the famous comedian Murphy’s Law says: Always apply safety first! It’s much better to take the extra time and safety measures before operating the saw, than to rush and get injured.
Maintenance and Storage
When it comes to proper maintenance and storage of your saw, half the battle is knowing what you’re doing. Much like with any other power tool, proper storage and handling of your saw will ensure its longevity and performance – and can even help you avoid injuries.
So, what do you need to do when it comes to proper maintenance and storage of your saw? Well, first of all, you must make sure that the saw is clean. This means removing dust, dirt, and any material that may accumulate on the tool and in the dust collection system. Wipe any oil residue from the saw from time to time, and use a grease solvant and a rag to keep it clean.
Next, store your saw in a safe and dry place. Do not allow your saw to get wet or exposed to elements, as this can lead to rusting and other maintenance issues. Also, inspect your saw regularly to make sure all moving parts are functioning and that no pieces are loose or worn out.
Finally, make sure you protect yourself whenever using your saw. Wear safety glasses, hearing protection, and gloves, and keep your hands and hair away from the saw. Also, be aware of kickback, which can occur when the blade tries to move in the wrong direction, and do not allow children to use the saw.
If you follow all the above mentioned steps for proper maintenance and storage of your saw, you’ll not only be safe, but may extend the life of your saw for many projects to come. So, next time you feel like getting ready for your next DIY project, don’t forget to keep your saw clean, dry, and ready to go – it will help you save time and avoid potential accidents!