How To Cut A Perfect Square With A Jigsaw

Heya! Ever been frustrated when trying how to cut a perfect square with a jigsaw? Yeah me too. But don’t worry, I’m here to help.
Let’s get started! First you need to select the material you want to cut – it can be any type of wood or plastic. Go for something that has a smooth surface.
Next, you’ll need to gather your tools. You need a jigsaw, a measuring tape, a pencil, and a straight edge.
Now, before continuing further you need to prepare the material by lightly sanding the surface. Smooth out the surface so your cut will be straight.
Now, it’s time to secure the material. If you don’t hold it down, you’ll end up with a wobbly mess. Use clamps, tape, or anything else that will help keep it in place while you cut.
Finally, you’re ready to make the cut. Start at the edge and make sure it’s perfectly straight. Take your time, and make sure you keep the blade from moving too fast. If it moves too fast, you won’t get a nice, clean cut. The handle of the jigsaw should be firmly grasped and make sure you don’t force the cut. Moving the blade a bit slower will help perfect the square shape.
Once you’re done, you’ll have a nice, neat, and perfect square! But don’t forget, safety first. Make sure to wear safety goggles and gloves when using a jigsaw.
So, what are you waiting for? Get to work and let’s make some perfect squares!
Select the Material

If you are looking to cut a perfect square from a material of your choice but you don’t have the finesse to do it with a hacksaw, maybe you should consider investing in a jigsaw. The jigsaw is such a versatile tool and can allow you to cut almost any shape and material.
Now, before you can start cutting with a jigsaw, you need to select the appropriate material to cut. Depending on which material you want to utilize, you should select the blades to match. Characters like blade material, blade length, cutter shape, and the number of teeth per inch of the blade are some things to be considered.
Let’s say, for example, you want to cut a perfect square out of a piece of hardwood, such as oak. You should choose a blade with more teeth, like a blade with twelve teeth per inch of blade length. The more teeth per inch, the smoother your cut will be and the easier it will be to cut a perfect square.
Now, let’s say you want to cut a perfect square from a piece of plywood. A jigsaw with fewer teeth, like a three-tooth-per-inch blade, should do the trick. However, if the goal is to be able to cut a perfect square, the blade should still be able to cut through the material of your choice cleanly. The blade should also be long enough to provide good control for assured and accurate results.
Now that you’ve selected the material, it’s time to gather the tools you’ll need and prepare the material for cutting. In order to get the best results, it’s always best to mark and measure where you want to cut the square so that you can make the cut in one fell swoop. This will ensure you get a perfect square with very little effort on your part.
Finally, you’re ready to make the most important part of cutting a perfect square with a jigsaw: securing the material. It’s always best to secure the material to a work table with a clamp so that you don’t have to worry about the material slipping and moving while you’re cutting it, leading to imperfect cutting results. With material secured, all that’s left to do is pick up the jigsaw, make sure it’s set to the appropriate speed, and start the cut!
Now, I know starting that jigsaw may be a bit intimidating for some of you, don’t worry, I’m gonna keep talkin’ ya through it and make sure ya get that perfect square. Just take a deep breath, and let’s grab that jigsaw and get cutting!
Gather the Tools
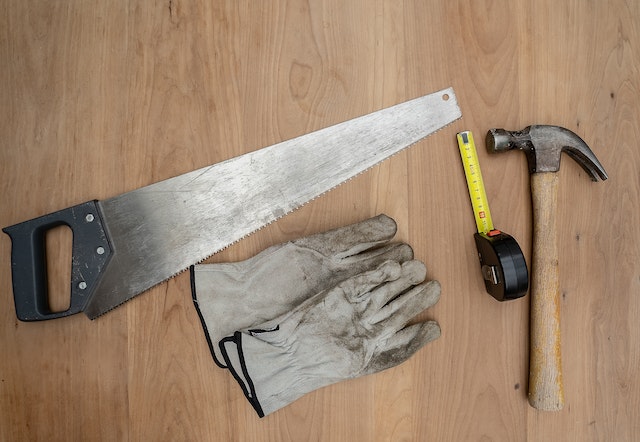
Ah yeah, so here you are thinking about cutting a perfect square with a jigsaw! First things first- you need to gather the tools. As my grandma always said, “you can’t do it without them”, and she was sooo right!
So, here’s what you’ll need:
– Jigsaw – Make sure you pick the right blade for the job!
– Measuring tape or ruler – This will help you keep those square sides perfectly straight!
– Pencil – Use this to mark the square onto the material you are using.
– Safety goggles – Get yourself some goggles that protect your eyes, you don’t want to be messing around with flying pieces of material!
– Clamps – Clamps hold the material steady while you cut, so pick yourself up some nice strong clamps.
– Dust mask – This will come in handy so that you don’t inhale any dust!
Once you have gathered all the tools, you are ready to get started! But wait… did you get a really really really really really really really REALLY long measuring tape? Did you get enough clamps to hold down a border wall between two countries? Did you make sure to get an ultra-durable blade? Don’t forget these things, or you might end up with a wonky-shaped square that resembles a squished banana!
Now with all these tools in hand, you are ready to move on to the next step- preparing the material for your perfect square. Ready steady go!
Prepare the Material
Well hello there! You’ve made it to the subsection, “Prepare the Material”. Let me tell you, you are in for a real treat!
The best part about this step is that it’s all about being creative! Now, don’t worry, I’m here to tell you what exactly you should do, but how you do it is up to you!
First thing’s first, find a place to work and make sure you spread out your materials so you can measure and start cutting! Next, you’ll need to measure correctly. If the material you are using is thinner than a quarter of an inch, you’ll want to use a standard ruler to measure and mark. If the material is thicker, you’ll need to use a tape measure.
Now, that you’ve got your tools and are confident in your measurements, you’ll need to mark the material! Here is where you can get creative. Unless you are working with a particularly hard material, you won’t need to try any special tooling or jigs. A simple pencil or permanent marker should do the trick.
Once the material is marked, you’ll need to make sure it’s cut correctly. For this, you can either use a straight-edge and a handsaw or a jigsaw. I highly recommend using a jigsaw, as it’s much more accurate and safer than a handsaw. If you’re using a jigsaw, you’ll want to make sure you’ve got the proper blades for the job and you understand how to use your jigsaw.
So there you have it! All the prep you need to do to ensure that you cut a perfect square with your jigsaw. Good luck and have fun!
Secure the Material

Now it’s time to secure the material so you get a perfect cut. I remember the time I tried to cut a piece of siding for my house and it slid across the saw bench like I was a figure skater. Have you ever tried chasing a piece of wood around the shop? Man, it ain’t easy!
That’s why it’s important to secure the material. If you don’t have clamps, you can use double-sided tape, painter’s tape, or C-clamps. I prefer the painter’s tape because it doesn’t leave a residue and it usually gives me a pretty solid hold on the piece.
Once you get the material secure, it’s important to make sure you hold the saw firmly. Since a jigsaw uses vibration to cut, it’s easy to lose your grip and the blade can wander, which can be dangerous.hold it firmly and steady, while keeping fingers and other body parts away from the blade path.
It’s also a good idea to make sure the saw table is secure. If it has any wobble to it, that can also lead to a wobbly and imprecise cut. The best way to do this is to use a few clamps underneath the table and make sure it’s bolted directly to your workbench.
Once all that is done, you should have a secure and stable work area, ready to make the perfect square cut. Remember, safety first, and always keep your fingers away from the blade. Have fun!
Start the Cut
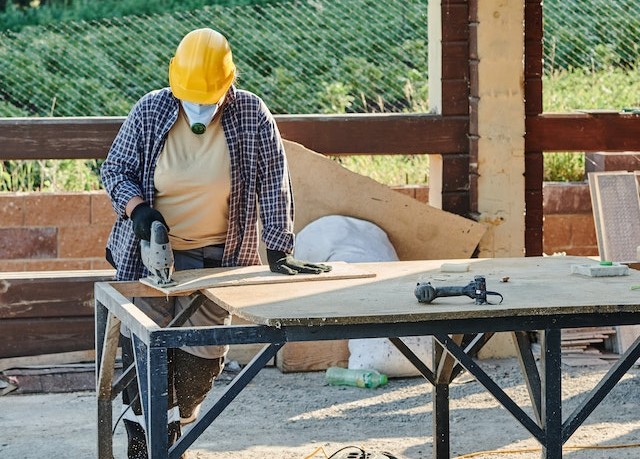
Hey Hey Hey! So, you’re ready to make that perfect square you’ve been dreaming of! Now it’s time to start cutting.
First, make sure your jigsaw is plugged in and the blade guard is on. Once you’ve checked these two items, you’ll want to check the jigsaw foot. This small, metal lever secures the saw to the material, which will prevent any slipping.
Now that the jigsaw is prepped, you’ll want to adjust the blade speed. Your jigsaw will likely have a few speed settings. Depending on the material you’re cutting, you’ll want to set the speed accordingly. You’ll want to set the speed to slower settings for thicker and denser materials, like plywood. Conversely, if you’re cutting thin, soft material, like foam, you’ll want a faster speed setting.
For this particular project, it’s a good idea to have a straight edge. This guide will keep the blade on the desired cut-line and reduce the chance for any inconsistencies in your cut. If you don’t have a straight edge, use any hard, flat object you have on hand. A ruler or a level could work as well. Lastly, make sure to mark your starting and stopping the points. A pen should work for marking.
With your jigsaw ready and straight edge in place, position the jigsaw foot so that it’s securely clamped onto the material. Take a deep breath and press the trigger. Keep a steady hand and you’ll be on your way to making a perfect square.