The Beginner’s Guide To Woodworking: Tips And Tricks For Getting Started
Well, Aren’t ya looking for some real wild advice about getting started with woodworking! Then huddle up close friends, as I pass on my hard-learned wisdom from years of hard work and building experience with wood.
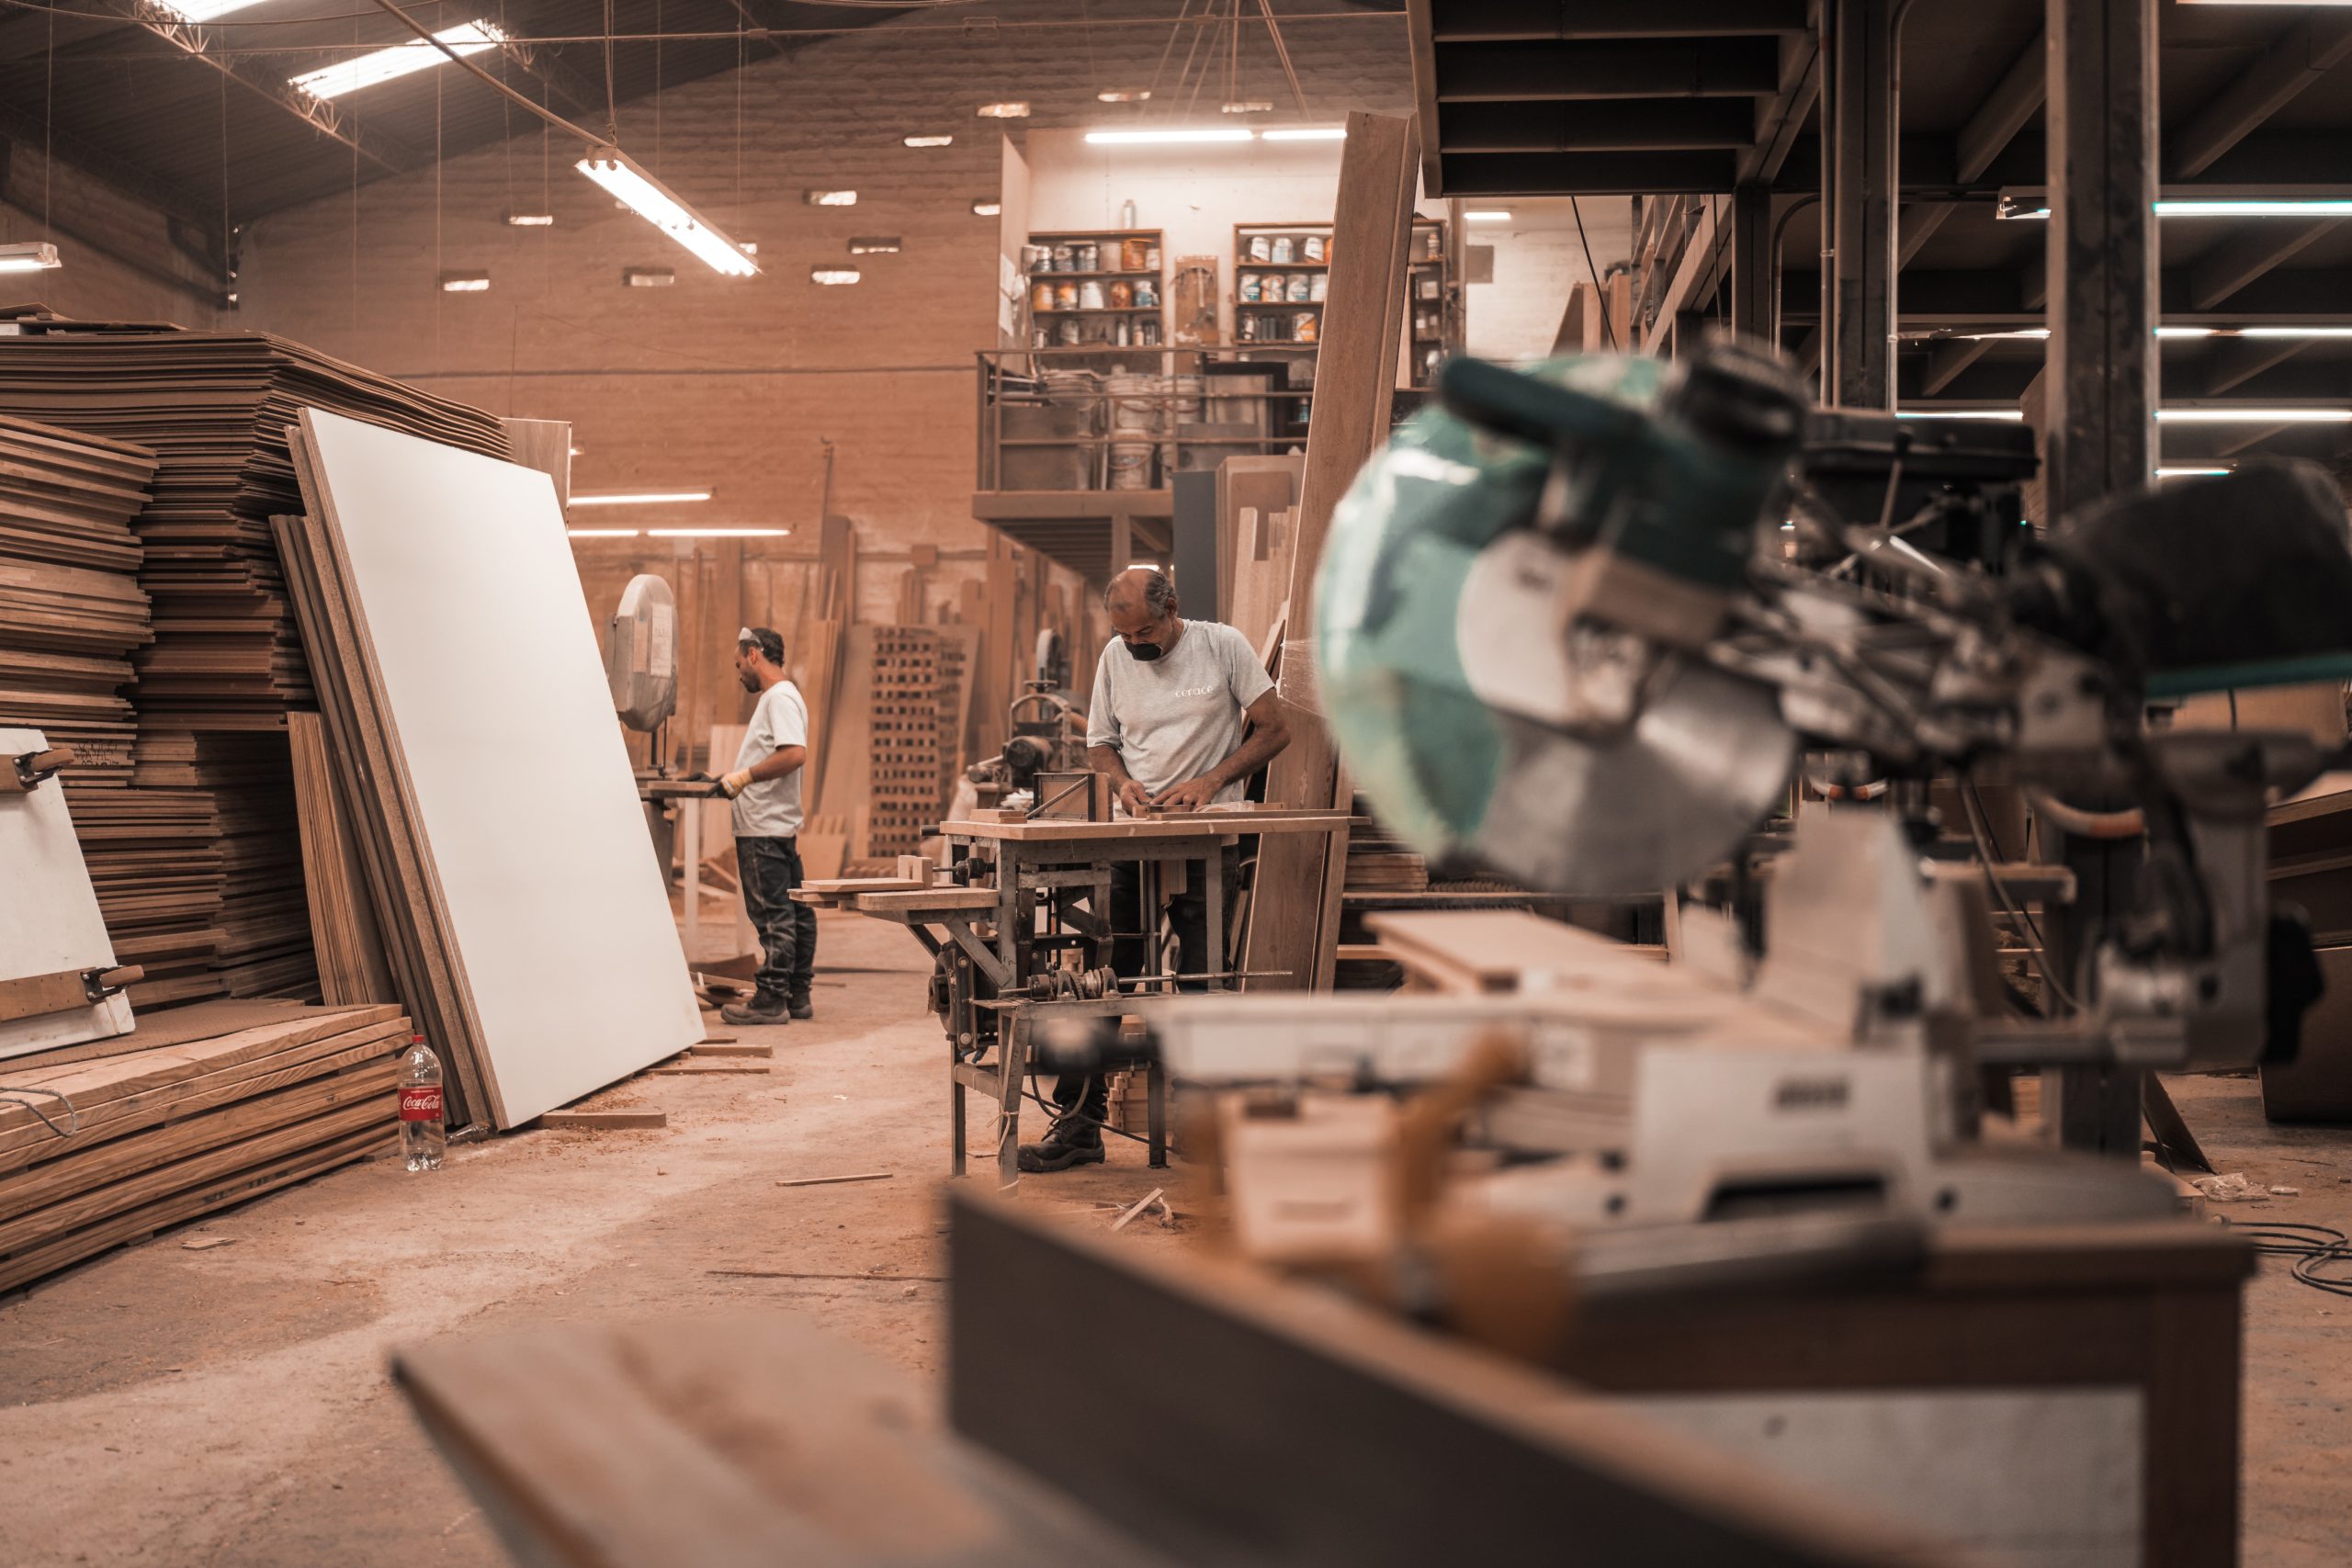
First, you need the right tools. You should set up your workshop with the basics such as rulers, squares, saws and drills. You’ll also need to add clamps, files, and other materials like a table saw and sandpaper. It’s best to start out with basic tools and then build up your kit according to the projects you aspire to do. Just remember, the right tools vary depending on the job and the woodwork is only as good as the tools employed.
Once you have your tools, you’re ready to prepare the wood. With woodworking, as with anything else, it’s crucial to get off to a good start by first preparing the wood. Start by measuring your wood and cutting it to the length, width and thickness you require. Measure twice and cut once. Then, use a ruler and square to check for straightness of your board. Next, trim off any rough edges so that the pieces are smooth and even. With the wood prepared and measured, you’re ready to start the project.
Next up, you’ll want to learn basic woodworking techniques. This includes accurate measuring, sawing, drilling and other methods such as routing, carving, and joining. You don’t necessarily have to become an expert on all these methods, but picking up a few tricks of the trade will give you the edge. Once you’re comfortable with the basics, start using more advanced techniques like lamination and veneering.
Now onto the exciting bit – making basic cuts. For starters, cutting straight lines with a miter saw, circular saw or jigsaw will be necessary for 90% of the projects you do. Then, with more practice, you can try making cross cuts, curved cuts and more complicated ones. When it comes to joining, you’ll want to get a handle on basic joints such as the mortise and tenon joint. This one is versatile and offers a strong, tight bond when used correctly.
Most woodworking projects require some type of glue or adhesive. The types of glues used can range from PVA glue to epoxy, and each has its own benefits and drawbacks. Figure out what glues best fit the projects and components you’ll be working with and make sure you use the right amount.
Sanding is a key tool when putting finishing touches on a project. You should have a selection of fine to coarse grit sandpaper at your disposal when finishing off a project. Be sure to use the appropriate sandpaper for each job. Start out with a rough grit and then move down a few grades until the wood is smooth. Additionally, the finer the finish, the finer the grit you’ll want to use.
Finally, you’ll want to apply a coat of clear finish to protect your work and make it shine. This can range from lacquer, varnish, shellac, and oil finishes, just to name a few. Test out a few different options to find the one that best fits the project and ensure you seal the wooden surface for the best longevity.
Well, ain’t that all ya need to get ya started with woodworking. Just remember these few tips: Wear safety glasses, use sharp blades and cutters, clean up dust, apply the right glue, sand down the finish, and apply a final coat. Now get out there and make some beautiful woodworking projects!
Get the Right Tools
Aww yeah, I’m gonna get you started on woodworking the expert way. First off, let’s talk about tools!
No one’s gonna be makin’ no fancy furniture without the right tools for the job. You’re gonna need some basic tools to get started woodworking, like saws, drills, and chisels. You may also want some kind of hammer, a measuring tape, and some hand clamps.
Saws are obviously one of the most important tools for woodworking. There are different types of saws like a hand saw, circular saw, and miter saw, but if you’re just starting out, a hand saw will do. When you buy a hand saw, make sure it’s sharp and sturdy enough to cut through the wood.
Drills are also great for woodworking. You can use them to make pilot holes, countersinks, and dowel holes. A good drill should have variable speeds and good battery life.
Chisels are essential for any woodworking job. They come in a variety of sizes and styles, but the most common type is a set of three chisels with a different angle on the cutting edge. Keep your chisels sharp and don’t use them on metals or ceramics.
You’re also gonna need some kind of hammer for striking chisels or nails into wood. Get one with a rubber handle to minimize shock.
You’ll need a good measuring tape for accurate measurements of your project’s dimensions. A laser measuring device is also helpful if you ever find yourself needing to make long measurements.
Finally, you’ll want to get yourself some hand clamps. There are a wide variety of clamps, like bar clamps, F-clamps, and spring clamps. Hand clamps come in all sorts of sizes so you can find one that suit your current project.
So there you have it – the basic tools you need to get started woodworking. Remember to use the right tool for the right job and take good care of your tools to keep them in good working order!
Preparing the Wood
Alright folks, time to talk about preparing the wood. Now this is an important step if you want your project to look professional. First up – know your wood. Not all wood is the same. Each type of wood comes with its own unique characteristics and requires different techniques to work with them.
The next step – shape your wood. Sand and plane the wood until you get the desired shape. When handling raw wood, wear protective gear like a face mask, safety glasses and gloves. Accidents are common and residue from sawdust and wood chips can be quite dangerous.
Now let’s get to the drill – literally. Before you can screw anything together, pre-drill any holes. If you don’t pre-drill, you could split the wood as you’re driving in screws. It’s also important to match the screw head correctly with the type of wood. This is one of those details that can make or break the success of your project.
Another important thing to keep in mind – moisture content. Make sure that the wood you work with is properly dried out. You don’t want to have your project swell after it’s completed. Having the right moisture content helps keep your project stable when it’s finished and also helps ensure that your project will last.
Finally, is safety. Make sure that all your power tools are properly grounded and that you use all appropriate safety guards while using them. Also, use good cutting techniques when cutting the wood. And a reminder to use appropriate protective gear like masks and goggles when dealing with sawdust and woodchips.
And that’s all folks. Prepping the wood involves more than just picking up the tools and getting to work. It’s important to take the time to understand the wood you’re working with, shape it, pre-drill and monitor moisture content. And above all – be safe.
Learn Basic Woodworking Techniques
Let’s talk about the basics when it comes to woodworking. It’s important to learn the basics first, so you can start practicing your skills and advancing your woodworking knowledge. First up, you’ll want to make sure you know the different types of woodworking tools and the different uses for each of them. You’ll need saws, chisels, hammers, planes, a drill, clamps, and so much more.
Once you’ve got all the tools in your woodworking arsenal, it’s time to get familiar with the basics of woodworking techniques. Start with planing, which is basically smoothing the wood with a plane. This will make the wood easier to work with, preparing it for gluing and machining. You’ll also want to make sure you understand chiseling, which is when you use a chisel to create deeper and detailed cuts in the wood.
You’ll also want to learn about joinery, which is joining pieces of wood together. The most common ones are butt joints, dowels, and mortise & tenon. With a little practice and patience, you’ll develop your skills in joinery and be able to create projects like shelves, garden furniture, and other intricate designs.
Don’t forget about sawing, where you’ll use saws to make accurate cuts for joints, to shape the wood, and even to create angled cuts. You’ll want to master each technique and get familiar with saw blades to ensure accuracy. Plus, the right saw will depend on the type of project you’re working on since there are a variety of saws that you can use.
Lastly, you’ll want to get comfortable with routing, which is an important technique used to shape the wood. You’ll use a router to add detail to furniture and other wooden projects.
As you begin practicing your woodworking skills, take your time and focus on developing each of the techniques properly. Eventually, with a little bit of practice, you can create beautiful and intricate designs that you’ll be proud to show off!
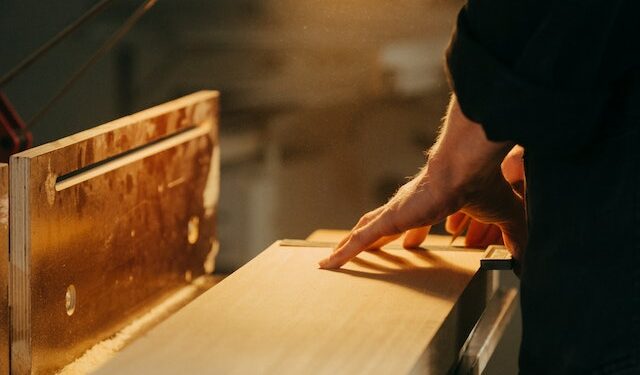
Basic Cuts

Hey there, fellow beginner woodworkers! Does the thought of making basic cuts send you into a cold sweat? Well, fear not; for I am here to walk you through it.
To make basic cuts, safety should be your number one priority. Wear protective gloves and safety glasses to protect yourself from the saw blade. When pushing the saw, be sure to keep your arms straight and use the blade guard.
There are several types of saws available, but the most common ones are the circular saw, table saw, and miter saw. For simple cuts, the circular saw and miter saw will do the trick.
The circular saw is great for making straight cuts in wood. To make a cut, set the blade depth and make sure the saw is unplugged. Now measure and mark the wood. With the blade set at the right depth, you can guide the saw along the mark. Remember to use the blade guard, and when the cut is complete, disconnect the saw.
Using a miter saw is another easy way to make straight cuts in wood. Set the saw to the desired angle and measure and mark the wood. Place the wood on the saw table and be sure to keep your hands clear of the blade. Now you can use the blade guard and gradually push the blade through the wood. Don’t forget to switch off the saw when the cut is complete.
Ripping wood is another basic cutting technique. To make a rip cut, use a table saw. Make sure the blade has teeth pointing forward and tighten the blade to the correct height. Place the wood on the table and turn on the saw. Align the blade with the mark, use the blade guard, and push the blade through. When the rip is complete, switch off the saw.
Making crosscuts is another essential woodworking skill. To do this, make sure the saw blade is pointing in the right direction and the blade height corresponds with the size of the wood. Mark the line and before you cut, make sure the blade guard is in place. Push the blade into the wood at a 45-degree angle and cut along the line. Keep your hands away from the moving blade and switch off the saw when done.
Well, that was easy, wasn’t it? Well, perhaps not easy, but hopefully now you feel a little more confident when it comes to making basic cuts in wood. If you practice these techniques, you will be a woodworking whiz in no time. Good luck!
Glues and Adhesives
Good morning and welcome to the beginner’s guide to woodworking—where you’ll learn the tips and tricks for getting started! Today we’ll be talking about glues and adhesives, two of the most important components in any woodworking project.
Now, before you glue any pieces together, you’ve got to make sure the wood is properly prepared. Make sure all surfaces are clean, and then lightly sand them to help create a stronger bond. That way, when you apply the adhesive, it will get a good grip.
Speaking of adhesive, it comes in many forms, so you’ll need to be familiar with each one before starting a project. White glue, for instance, is great for woodworking projects because it’s very strong and creates a long-lasting bond. Yellow glue is another popular option and is perfect for bonding small pieces. If you need a really strong bond, you can use the old-fashioned hide glue which is made from animal by-products like sinew and hide. Then there’s epoxy, which is the strongest adhesive of them all and is ideal for repairing small pieces.
Different glues and adhesives all have their pros and cons, so it’s important to do your research before selecting which one to use. And don’t forget to use enough glue to get the job done. A little bit can’t hurt, but not enough and you’ve undone all your hard work.
Now, the next step I suggest taking is to remind yourself to use clamps when gluing anything together. Clamps will help apply pressure to the parts and make sure they don’t slip while the glue is drying. And while they can be a bit of a hassle when using huge pieces, they’re absolutely essential for small pieces.
And lastly, I want to make sure you remember the goof off rule. If you make a mistake, the best way to get it off the wood is with a product like Goo Gone or paint remover. This will dissolve the glue and make your projects turn out perfectly.
So that’s it for today! I hope you have a better understanding of glues and adhesives. Now take what you’ve learned and apply it to your woodworking projects. You’ll be glad you did.
Sanding and Finishing

It’s time to put your woodworking skills to the test with sanding and finishing. This is a crucial step in woodworking and can make or break your project, so it’s important to do it right!
First, lets talk about sanding. Sanding is the process of smoothing out your wood and can be done in a variety of ways. You may want to use a sander to smooth out the surface, but for finer details, you’ll want to use sandpaper. Sandpaper comes in a variety of grits, from extra-fine to coarse. The lower the grit, the finer the paper, so start with the coarsest and work your way up to the finer grits as needed.
Next, you’ll want to clean any debris from the piece of wood with a brush or vacuum. This helps ensure that you get a smooth finish. Next, you’ll need to apply the finish. This could be anything from a clear finish like polyurethane to a stain. Before applying the finish, it’s important to test the finish on a scrap piece of wood to ensure you get the look you’re hoping for.
Finally, you’ll want to lightly sand the wood after applying the finish. Make sure you do this using very fine sandpaper to preserve the finish. This will help ensure that the finish isn’t scratched or altered during your sanding.
That’s it! With these tips, you should have no problem sanding and finishing for your woodworking projects. Just remember: start with the coarsest sandpaper, move up to finer grits as needed, make sure to finish sand gently, and always test the finish on a scrap piece first! Good luck!
Applying Finishes
So you worked hard, selected the right tools, prepared the wood, learned the basic woodworking techniques and the basic cuts. You even tried using some glues and adhesives. And finally, it’s time to apply the finish coat to your masterpiece.
Well, here’s some advice on applying finishes that you don’t need a woodworking degree to understand.
First and foremost, you’ve gotta make sure you don’t glob on this stuff. Brush it on in even, repeating strokes. Once it’s on, rub it in whichever direction makes you feel all warm and fuzzy inside, but whatever you do, just make sure you don’t go back and forth.
It’s also a good idea to make sure the area you’re working on is adequately ventilated, or else you may find yourself a little lightheaded.
Once you’ve applied the coat, rub it down with a rag to make sure it’s extra smooth and then wait a few minutes to let it dry. You can repeat this process as many times as desired, but make sure you flip the rag in between applications so you don’t end up rubbing the dirt and dust back onto the wood.
Now some of you may be thinking it’s best to apply a finish with a spray. Well, that works fine, too. But if you do this, keep the can a few inches away from your work, and work it around in a circular motion rather than just gunning it on in one shot. This will help to create an even and attractive finish.
Of course, before you start applying any sort of finish, you should always sand the wood first. This will remove any harsh edges or splinters and make the surface nice and smooth. And you should also make sure all the dust is cleared away before you start applying the finish.
It’s also important to note that some finishes are oil based and some are water based. And, although it seems like a no brainer, make sure you use the right finish for your project.
Well, that’s all you need to know to apply the perfect finish to your woodworking project. Of course, practice makes perfect, so if you make a mistake, just start again and you’ll get the hang of it.
So go ahead, grab your tools and supplies and get to work. It’s amazing what you can create when you put your mind to it.
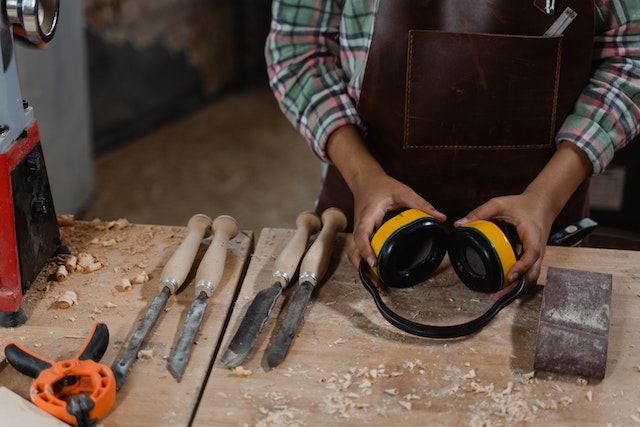
Tips to Remember when Woodworking

Hey there, newbies to woodworking! As you know, woodworking can be tricky but it can also be great fun if you know what you’re doing. Here are some tips to help you stay safe and get the most out of your woodworking experience.
First and foremost, it is important to WEAR YOUR EYE PROTECTION! Even when you think nothing is going to go wrong, when you’re sawing, sanding, carving, or shaping wood, there’s always the possibility of splinters or other flying materials, so make sure you always have your safety glasses on!
Before you start to use power tools, make sure you understand their safety procedures. Knowing the basics about these tools and understanding what all their controls do is essential for ensuring your safety and getting the job done right. Read the manual, and don’t be afraid to ask questions if you’re unsure about anything.
A lot of power tools require an outlet, so use a GFCI device if you’re using one. These devices significantly reduce the risk of electric shock, and they should be used in all areas that can get wet.
When you’re not using power tools, you should still be mindful of how you handle the wood, as there’s always the potential for cuts, scrapes, and splinters. Make sure your work area is clean, and keep all tools, nails, and screws neatly put away when you’re done with them.
Always measure and mark your wood twice before starting any cuts. This ensures that you’ll get the exact length, width, and shape of the piece of wood you need, and it will help you save time and money.
Finally, don’t be afraid to experiment! Woodworking is all about trying new things and learning as you go. If a project turns out differently than you hoped, that’s okay! Think of it as a learning experience, and go back to basics until you get the hang of it.
With a little practice, safety precautions, and patience, you’ll be a woodworking expert in no time! Say goodbye to that unshaped chunk of wood, and hello to the masterpiece you’ll be creating in your very own workshop!