How To Make Straight Cuts With A Handsaw
Are you tired of crooked cuts ruining your DIY projects? Do you cringe at the thought of having to use a handsaw because you can never seem to get a straight line? Fear not, dear reader, for I have the solution to your sawing woes!
In this article, I will be sharing with you some tips and tricks on how to make straight cuts with a handsaw like a pro. So put down that wonky saw and let’s get to work!
Gather Materials
If you wanna make straight cuts with a handsaw, you’re gonna need some material to get the job done right. The first thing to do is get your hands on a handsaw. You can find one of these at most hardware stores. Once you’ve got it, you’ll want to pick up a tape measure so you can make sure your cuts are accurate. You’ll also need a straight edge so you can make sure your cuts are perfectly straight. And of course, a pencil and marking tool to mark the cut you’ll make.
Now, you may be thinking, “Man, why can’t I just use a ruler for a straight edge?” Sure, that would work if you’re only dealing with two-dimensional objects, but with something three-dimensional like wood, what you really need is a straight edge. A ruler isn’t gonna cut it (pun intended).
Once you have all your materials, it’s time to start measuring and marking your straight cuts. But remember, if you don’t measure right, your cut won’t be right either. So get that tape measure out and make sure it’s accurate. Then, lay down your straight edge and make sure that it’s straight and secure. Then, you can use that marking tool to get exact measurements of where you want to cut. That way, you won’t cut too much or too little.
All right, you’re all set. Now it’s time to make that straight cut with your handsaw. Place it directly against the marked line, and slowly pull it back and forth. Make sure to keep it level, and go slowly and steady. When you’re done, the cut should be completely straight. If it’s not, just sand it down a bit until it is. And that’s it, you’re good to go with your straight cut.
Obtain a Handsaw
Now we’re talking about straight cuts! We need to gather the right materials to make them happen. Let’s start with the handsaw. That’s right, a handsaw! I know, everything is digital and automatic nowadays, but coming from the old school, I trust the good old handsaw. You should too
So where do you get a handsaw? Don’t worry, they are surprisingly easy to find. A simple search will bring up multiple stores that sell them. If you want the good old traditional wooden handle saw, you can even find them in antique shops and flea markets. Your grandma must have kept one in the attic. Nowadays, plastic handles are more common and you can buy one from any hardware store.
Now that you have the handsaw, you will need to make sure it’s in top shape. If it’s from an old family heirloom, make sure you are cleaning it and sharpening it. And you’d be smart to inspect the saw’s teeth, to make sure they aren’t rusty or broken. Fortunately, if you find any issues, they can be easily fixed and with a good sharpening, your saw will be good as new.
A handsaw may be not so fancy, but it is a reliable tool that can make good straight cuts. Now you’re ready to measure and make the cut! Who’s ready for some more saw action? I am!
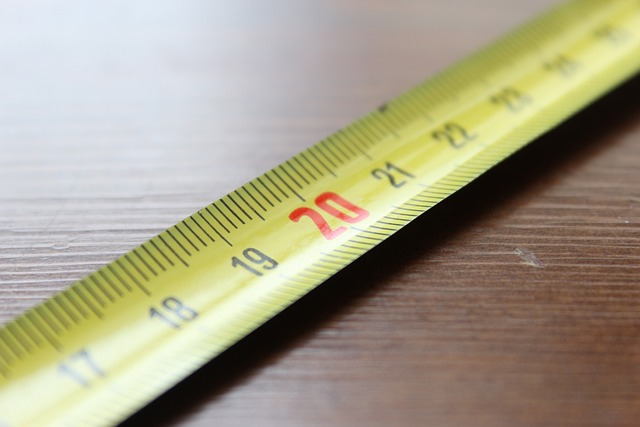
Gather a Tape Measure
Tape measure? Man, who needs one of those? I’m telling you, even if you do get one, it’s gonna take forever and waste most of your day. You’d be better off using your own ruler. I mean, we all know how rulers work, right? Plus, it’ll help cut down on the confusion.
Even if you do go ahead and get a tape measure, be sure to get a decent one. You don’t want one of them cheap ones you find at the dollar store. You need something that’s gonna help measure your cut right. Don’t trust the little metal ones. Not only are they hard to read, they’re inaccurate! The kind that have the numbers on them in graduated sizes are the way to go. Plus, they come in all sorts of colors.
When using a tape measure, you want to make sure to measure twice and cut once. Once you’ve measured your cut, make sure you put the tape measure down and don’t move it until you’re done cutting. That way, the measurements will match up and be in the right spot. Also, don’t forget to mark the cut. You don’t want to be guessing where to cut.
And since tape measures are a bit long, you might have to find an alternative way to store it. I recommend a clip-on that you can attach to your belt. That way, when you’re ready to make the cut, you don’t have to lug the whole thing around and can just carry the part of the tape you’ll be using. Easy to store and easy to use, just the way I like it.
So go forth and make those cuts, my friend. But first, make sure you get the right tape measure and follow the instructions to use it. That way, you’ll make sure that you get the perfect cut each time!
Find a Straight Edge
They say practice makes perfect. And since you want the straightest of straight cuts, you’ll want to get yourself the perfect straight edge.
If you’re a DIY home renovation enthusiast like me, chances are you already have the perfect straight edge setup. But if you don’t, have no fear – there are ways to find a straight edge before you use that handsaw.
First, you’ll want to find something sturdy and rigid like a long board or metal straight edge. A long board is the easiest, tried-and-true way to make straight cuts. You just need to make sure that it’s longer than the cut you want to make. The longer the better; that way, you have enough leverage as you pull it against the cut.
If you don’t have access to a long board, you can always use a metal straight edge. This will come in handy if you have to make curved or jagged cut – it has a flexible body so it’s easy to adjust the shape. However, there’s more of a learning curve to using a metal straight edge, so it’s best to practice on some scrapwood before you tackle a project.
Once you have your straight edge of choice, take it and your measuring tape and place it against the material that’s gonna be cut. Make sure to firmly press down so that the straight edge can guide your cut as precisely as possible. And then, once you have it set, mark the cut with a pencil. That way you’ll always have a reference for when you start making the cut.
So, there you have it. Get it. Measure it. Mark it. You’re a pro now. Perhaps you don’t need that Perfect Straight Cuts badge after all.
Collect Pencil and Marker
Ahhhhhh! pencils and markers! Y’all don’t forget those. You know how I feel about pencils and markers! I mean…you don’t have one without the other! Before you can really make any kind of cut in the wood, you gotta mark it first. Otherwise, it’s like tryin’ to find your way out of a dark cave without a flashlight.
And pencils are the best. I don’t know about you, but I’m still a fan of pencils. They have a way of just making things easier, don’t they. And markers…they’re great too. I mean you gotta use the markers after you make the cut so you can make sure it’s smooth and crisp.
And to make a perfect cut, you need the best tools. So when it comes down to it, a good set of pencils and markers is all you need. Get the right ones that have a nice sharp tip and you can mark the measurements exactly where you want them. After that, you’ll be ready to make a picture-perfect straight cut.
But you can’t just stop there, you know. You gotta make sure that you sharpen the pencils and keep the markers filled with a nice, rich creamy color. That way, you can clearly see the lines and check your measurements properly so that you get the cut you want.
And you don’t have to skimp on the pencils and markers either. Get the best ones you can find. Believe me, it’ll be worth it in the end when you have the perfect straight cut.
So don’t forget those pencils and markers. They’re just as important as the saw when it comes to making straight cuts! Get the best ones you can, sharpen your pencils, and fill your markers with a nice, rich color. Then you’ll be ready to make picture-perfect cuts in no time.
Measure the Cut
Measuring the cut for a handsaw can be easy as long as you have the right supplies. To get started, you first need to gather the materials. You’ll need a handsaw, a tape measure, a straightedge, and a pencil and marker. Once you have the necessary supplies, you’re ready to measure and mark the cut.
Now, it’s time to measure the width of the cut you’ll need. Get out your trusty tape measure and measure the distance of the cut. Once you’ve taken the right measurement, you can transfer this on to your material using a straightedge as a guide. Using your pencil, gently mark the cut.
Now that you’ve measured and marked the cut, it’s time to cut. Get out your handsaw and focus your “game face.” Place the saw on the wood and make sure it’s lined up with the pencil mark you’ve made. Make sure your cutting line is straight and steady, and cut away.
When you’re done, you’ll have a wooden cut, ready for your next project. Take a moment to admire your work, then clean it up by sanding the cut smooth. Congratulations, you’ve successfully measured and cut a straight line with your handsaw.
Measure the Width of Cut
Welcome family, I’m here to teach you how to cut straight lines with a handsaw. Before you can take on the challenge, you’ll need to measure the width of your cut first and make sure it’s exact.
Here is what you’ll need to make sure you get the measurements correct: first, you’ll need to get yourself a tape measure – not a ruler or any similar tool, but an actual tape measure, something that will tell you the exact number of inches in the cut that you are about to make.
Once you have the tape measure, you’ll also need to find a straight edge. It doesn’t have to be anything fancy, just something that you trust will give you a true mark along the piece of wood that you are planning to cut. Your trusty old ruler or yardstick will work just fine!
And last but certainly not least, you’ll need some writing implements. For this step, grab yourself a pencil and a marker – each with a fine-pointed tip. That way, you can make sure that you have a perfectly straight line to start your cut.
With that material in hand, it’s time to start prepping for the cut. Start by using the tape measure to measure the width of the cut that you need. Make sure that you write down these measurements – whether you jot them down on paper or save them in your trusty smartphone – so that you remember them later on.
Once you have the measurements, it’s time to get the perfect line. Place your straight edge on the side of the wood you are planning to cut, and make sure that it lines up perfectly with the measurements that you just took. Now, take your pencil and draw a perfectly straight line along the straight edge, making sure to follow it all the way to the end of the wooden piece.
Now, take your marker and outline this line in bold – something that is easy to see and will not disappear after you start sawing away. This marking will ensure that you know exactly where to place the blade of your saw so that you end up with a perfectly straight cut.
So there you have it family, that’s all there is to measuring a cut for a handsaw. Make sure to take your time and double-check the measurements and the line that you are about to make – this is the first step to making a perfect cut, and if done right, the rest should be a breeze! Thanks for listening!
Place the Straight Edge
Hey, before you reach for the Saw and start cutting you gotta make sure you got a straight edge to mark that cutting line! And no, I’m not talking about the lotto.
Now straight edges can come in many shapes and sizes. You can use a metal ruler, a wooden yardstick, a 4-foot level or a just a simple piece of 2×4 you left lying around in your basement. Whatever you decide to use, it needs to be long enough for the length of the cut you need to make and level enough so that the cut will look perfect.
So, my advice is to be picky about which straight edge you use, and if it ain’t straight, you don’t use it! Once you’ve got it, just lay it down along the line you need to cut. Make sure it’s long, flat and sits firmly along the line. And one more thing: don’t use a curved object, only straight edges.
Now that you’ve got your straight edge lay down on the line of the cut, grab your pencil (or sharpie if you feel fancy) and get ready to mark the cut. You definitely don’t want to miss your mark. But if you do, don’t worry…we’ll get to that in just a minute! Until then, it’s off to the 3rd step… cutting that wood!
Mark the Cut

If you’ve completed steps 1 and 2 and you’ve finally found yourself ready to mark the cut, congrats. Marking the cut is one of the most fun steps in the process (if you’re into that kinda thing). Be sure to get your pencil and marker ready to go.
First things first: straighten the line you need to cut using the straight edge you gathered in step 1.3. This is important, otherwise you’ll be left with a curve or two instead of a straight line! Once you’re satisfied with the straightness of the line, go ahead and mark the cut with the pencil. Make sure the mark is clear and visible so you don’t make any mistakes during the actual cut.
You can also use the marker if you want to really make sure the line is obvious during the cut. That’s totally optional, but recommended. By now you should be pretty proud of yourself if you’re following along, you little genius you. Step 3 is all that’s left before you can show off your freshly-cut straight line.
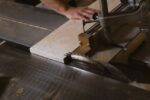
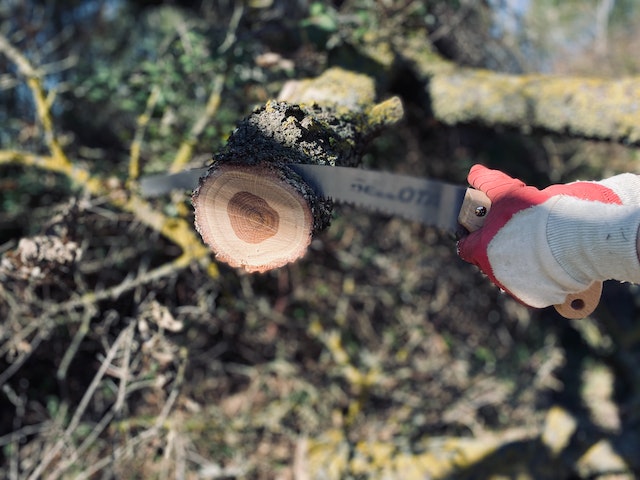
Make the Cut
Ah, so now that you got all the necessary materials out of the way, it’s time to make the cut! Hold onto your hats, people, ’cause this is the part where all the magic happens.
First, you gotta make sure you place the saw correctly. Line the handsaw up with the mark you made on the wood and hold the handle firmly in your hands. Don’t forget to make sure your straight edge is in place to guide the saw – it’s gonna be your best friend in making straight cuts.
With the handsaw in place, it’s time to break out your inner lumberjack. Get a good grip and start sawing with a smooth, back and forth motion. Don’t press too hard and don’t rush it – take your time and keep it steady. Keep your focus on the tip of the blade and steer it towards the mark you made. Remember, it’s better to saw a few more times than to rush it and make a nasty uneven cut.
Good job! You did it! Now, all that’s left to do is to sand down any rough patches using some sandpaper. The outcome should be a nice, clean cut.
And there you have it! Just remember, the key to making a straight cut with a handsaw is to stay focused and be patient. If you ever get stuck just remember – one cut at a time. And in no time at all, you’ll be a pro at sawing wood like me!
Place the Handsaw
Ah yes, now that you’ve got all the materials together, it’s time to put them all to use. Step one is to get that handsaw ready for the cut.
Pick up the handsaw, and make sure it’s exactly where you want the cut to be. Place the blade of the handsaw on the cut line. Rotate the handle so that the teeth of the saw are facing away from you. This will keep the saw from slipping once you start the cut.
To make sure the saw is firmly set, tap the other end of the saw handle onto the surface. This will help secure the saw in place and make sure that your cut is straight. If you’re still feeling unsure, use a clamp to hold the saw in place. This will ensure that your handsaw won’t slip and your cut will be on point.
When everything’s in place, make sure one last time that everything is where it should be and you’re ready to go. That’s how to place the handsaw for a straight cut! With the saw in the right place, it’s time to actually make the cut.
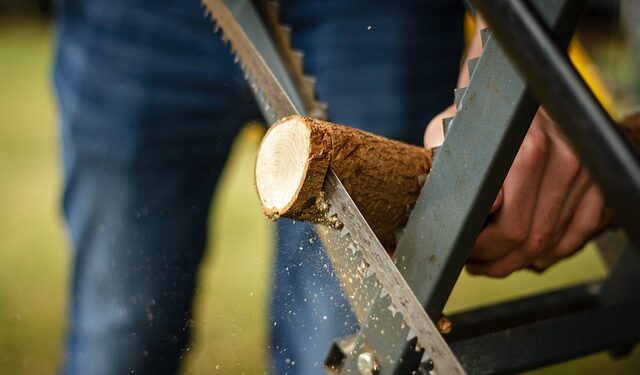
Make the Cut
It’s time for the fun part; cutting your piece! If you’ve prepped the handsaw, you can take the plunge and make your straight cut. Let me tell you, it’s like riding a bike! Once you’ve got the hang of it, you’ll be cutting wood like a pro.
You’ll want to make sure that you tilt the saw forward and make sure that you keep a consistent angle. This is important if you want to maintain a straight cut. Start slowly, and use a smooth motion to cut down into the wood. Be careful not to jam up the saw; otherwise, you might cause it to break or get stuck in the wood.
When the saw is about halfway through the wood, you can start to pick up the pace to finish the cut. Always remember to remain focused on the cut and treat the saw with care. When the saw is about three quarters of the way through, you can be a little more aggressive with the push and pull motions to finish the cut.
When you’re done, you’ll have a perfect straight cut that looks like it was done by a pro. Go ahead and admire your work and pat yourself on the back. From now on, you can make straight cuts with the best of them.
Sand the Cut Smooth
Ahh yes, the final step! Sanding the cut to make it extra smooth. Now is a good time to get those dusty goggles, gloves, masks and aprons on if you haven’t already. Because sanding can definitely be a bit messy and a little bit of a dusty job.
Most people don’t actually enjoy sanding and it’s not the most glamourous part of woodworking, but it’s an essential step to make sure your hard work results in a beautiful final product. After all, you definitely don’t want to cut all that wood just to have a bad final result because of some jagged edges or rough patches.
First, you’re going to need some good quality sandpaper. You want something that’s going to be able to tackle relatively tough material, but still able to create a smooth finish. Most people prefer the palm sander for jobs like these, as its smaller size allows for easier maneuvering and a more controlled sanding.
With the sander in hand, you’re going to start working your way around the cut. Begin on the outside and work your way inwards. Make sure you pay attention to the details, no corner should be left untouched by the sandpaper.
Also, make sure you’re sanding in the same direction as the grain of the wood. Going against it could cause some serious damage to the overall look of the cut. When using the sander, make sure the pressure isn’t too high. Too much pressure can cause deep gouges in the wood or even worse, break off certain parts.
Once you’re done sanding, wipe away all the leftover dust with a soft cloth and you’re pretty much done! The last thing to do is to step back and admire your work. Making a straight cut with a handsaw is no easy task, so you should be proud of the end result.