How to Create a Beautiful Wood Carving for Your Project

Wood carving is a popular and satisfying craft that can add a unique and personalized touch to any woodworking project. Whether you’re a beginner or an experienced woodworker, carving allows you to create intricate and detailed designs that can bring your projects to life.
In this article, we’ll guide you through the process of creating a beautiful wood carving for your project. From choosing the right type of wood and tools, to step-by-step instructions and design tips, we’ll cover everything you need to know to create a stunning and functional carving.
Whether you’re looking to create a custom piece of furniture, a decorative item, or a gift for a loved one, this guide will help you to know how to create a beautiful wood carving for your project that you’ll be proud to showcase. So, let’s get started on creating the perfect wood carving for your project!
Creating the Perfect Wood Carving
Man, have you ever seen something just absolutely amazing crafted out of wood? It’s such a beautiful thing to see how people take a plain piece of wood and transform it into a piece of art. You know, I’m determined to try something like that for my next project and I want to create the perfect wood carving! In this article, I’m going to tell you all about my journey on how to create a beautiful wood carving for your project.
First, I’m gonna need the right tools. I’m talking about chisels, gouges, saws and files, cause those are essential in making a good piece of work. Honestly, it’s a lot different from the wooden spoon that I made with my great aunt when I was a kid, but I’m trying to make a real piece of art here! So, I’ve got my tools, now I need to find the right wood.
Wood comes in all different shapes, sizes and colors; so it’s important to find the right one for your project. My dad is always talking about what kind of wood he should use and I’m taking a page out of his book and doing the same. Once I figure out what the best wood is, I’m gonna prepare it and get it ready to carve.
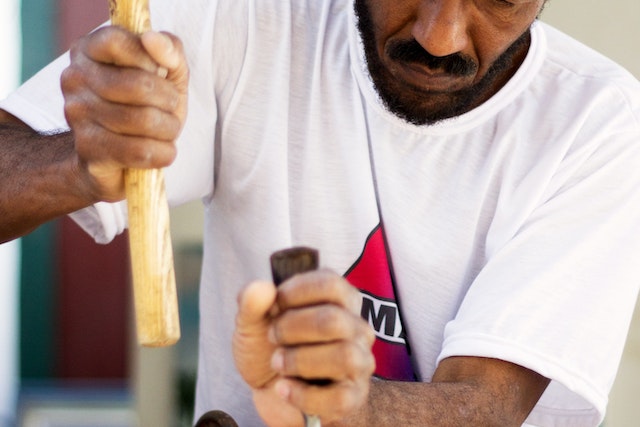
This is where we get to the good stuff, carving the wood. I need to remove all the excesses with the tools, and then start forming and shaping it into the carving that I want. This is something that takes time, cause you want to make sure you take your time to get every detail just right. You also want to be careful about how you hold your knife and chisel, cause if you carve too quickly, you could ruin your wood.
Okay, now that the wood is all carved, it’s time to finish it off. I’m gonna need a couple more tools like sandpaper, burning tools and some oil. All these things will help bring out the beauty of my carving and make it look even better. After I cover the whole carving in oil, I’m going to let it dry, and voila – the perfect wood carving!
That’s it guys, that’s how I’m gonna make the perfect wood carving for my project. Keep it coming if you want to learn how to make your own beautiful wood carving. Good luck and see you next time!
Tools

Hey y’all. Betcha here to learn how to make yourself a beautiful wooden carving, right? Well I’m yer friendly neighborhood and I’m here to help you out. So you need to get the right goodies, or tools, to create the perfect masterpiece. You don’t need a lot of whiz-bang contraptions or anything, but make sure you get what you need to do the job right.
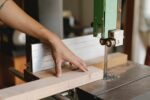
First of all, you need something to saw the wood. If you got a jigsaw then you’re good to go. But if you don’t, don’t worry, there are other options too. Hand saws work great, just be sure you get the right saw for the job. Cross cut saws and rips saws do best for different wood carving needs.
For the detailed carving you’ll need something smaller. Chisels like V-chisel, gouges, and knives are a great starting point. Just be sure to get the right one for the right job at hand. You may also need a mallet to hammer the chisel into the wood.
Sandpaper is another must have. Grits in 80, 120, and 220 are probably the best bet, but you can go wilder if you’re feeling adventurous. When it comes to the finer details chisels are a great way to go, but you may also need a hand power tool like a rotary tool with specific attachments to get the smaller details right.
One last handy tool is a wood router. It’s not essential, but if you’re looking for a certain look it may help. It’s great for final designs, too. Just make sure you don’t get too carried away and make sure there is enough wood left for you to keep your carving as its intended shape.
So there you have it. Tools are an essential part of any wood carving project and make sure you get the right ones. Happy carving folks!
Selecting the Right Wood

Now that you’ve gathered the supplies you need to get started on your project, it’s time to select the right wood. Hey, this isn’t just any old material we’re working with here—this is a beautiful piece of craftsmanship we’re talking about. So let’s take a look at some of the options out there for your wood carving project.
When you’re looking for wood, keep in mind that the type you choose will have a huge impact on the finished product. You have options like pine, cherry, walnut, and oak. But if you don’t have any of these on hand, you can always go with something else, like maple, birch, mahogany, and teak. No matter what you go with, just make sure it’s a hardwood that’s been properly kiln dried.
You also want to make sure that you account for the size and weight of the wood. If you’re working on something small and thin, like a figurine, you can probably get away with using a smaller chunk of wood. But if you’re carving a larger scale piece, you’ll need something heavier and thicker to ensure it doesn’t crack or break.
Don’t forget about the grain of the wood either. Grains are essentially the patterns the wood makes when cut. If you’re looking for a more angular or abstract look, you can go with a wood that has a tighter or more meandering grain. But if you’re looking for a smoother, more consistent look, you can opt for a wood with a straighter grain.
When it comes to selecting the right wood for your carving project, there’s no getting around it: you’ve gotta do your research. There are so many different types and varieties of wood out there, that you want to make sure you’re picking the one that will give you the look you’re after. But with a little bit of effort, you’ll be able to find the perfect wood chunk to carve your masterpiece. Then, it’s all downhill from there.
Preparing the Wood
Preparing the wood is an important step in creating a beautiful wood carving. It’s sometimes overlooked, but it’s necessary in order to ensure that the wood is ready for carving. Here are a few tips that you can follow to make sure your wood carving looks great.
First, you’ll need to select and clean the wood. Make sure that the wood you select is dry, as wet wood will not carve well. If you’re using a log or branch, use a saw to cut off any rough branches or dead bark. You can then remove any dirt from the wood by scrubbing it with a brush or sandpaper.
Once the wood is clean and dry, you’ll want to sand it down to even out the surface. A good rule of thumb is to start with a rougher grade of sandpaper and then slowly work your way up to a finer grade. You want the surface of your wood carving to be as smooth as possible.
When you’re done sanding, you can begin to carve into the wood. If you’re using a carving knife, it’s important to sharpen it frequently. A dull blade can make it harder to carve. You can also choose to use a wood chisel, which makes more delicate and intricate carvings.
Don’t forget to practice caution while you work with the wood. Carving wood can be dangerous, so be sure to wear gloves. If you’re using a chisel, make sure that you wear protective eyewear. Finally, be sure to use sharp tools, and never force a blade through the wood.
Once you’re done carving, you can always use a sealant on the wood. This will help protect the carving from the elements and from any dust and dirt particles that may accumulate.
Creating a beautiful wood carving takes time and skill, but the reward of a finished project is worth it. By taking the time to properly prepare the wood first, you can ensure success when it comes to your carving. Good luck and happy carving!
Carving the Wood
Ah, now we’ve gotten to the good part – carving the wood! Depending on the project, the carving can range from really simple (like carving a shape) to really detailed (like carving a person’s face).
The most important thing is to make sure you have the right tools and that you use them correctly. You’ll probably need a mallet and chisels, which come in lots of different sizes and shapes. Depending on the project, you might also need different grits of sandpaper.
When you start carving, you have to be prepared for imperfections. That’s just part of the wood carving process. It might take a few attempts to get the angle, size, shape, and depth of the carving just right. That’s why it’s important to go slowly and be patient.
If you’re stumped on how to start carving, you can use a mallet or chisel to make a series of small “test cuts.” See how that looks before you start making bigger and deeper cuts.
As you carve, make sure that you’re taking regular breaks to check how the design is turning out. In the end, the goal is to be able to stand back and appreciate all your hard work.
Of course, don’t forget to show off your artistic talent on social media! Wood carving may be a niche hobby, but don’t be surprised if your work gets lots of likes and shares – it’s always fun to show off your masterpiece!
Finishing the Wood
Finishing your wood carving is the last step before you can really proudly display it and it’s the last step before your sculpture can show off your awesome talent for all the world to see. To give your wood creation that perfect glossy finish, start by sanding the project lightly with a fine-grit sandpaper. Then wipe off the wood with a clean cloth. Depending on the type of wood, you may want to apply a wood treatment such as oil or varnish.
Some carvers chose to apply a thin layer of white wax on their projects with a cloth to give their projects a more pronounced finish. Of course, this is completely optional and you don’t necessarily have to do it if you don’t have the right tools.
When you’re done polishing your sculpture, examine it to make sure you’re completely satisfied with it. It’s important to look for any blemishes or areas that need some extra work. If you notice anything, make the necessary fixes and adjust the finish as needed.
By the time you’ve finished sanding, polishing, and waxing your wood carving, it should look amazing. You can show it off to friends or donate it to a charity fundraiser. After you’ve experienced the happiness and satisfaction of creating something beautiful, you’ll be encouraged to keep on carving, forming, and creating more beautiful sculptures. Plus, as an added bonus, you won’t just get a beautiful wood sculpture as a result of your efforts; you’ll acquire many new skills that can be used in other wood working projects.
So remember, the key to finishing off a wood carving is to be patient, pay attention to detail, and use the right materials. With a bit of practice, you can be a master carver and the results you get will make everyone around you quite impressed. Now go off and unleash your inner Eddie Murphy!