How To Make A Perfect Lock Miter Joint For Your Woodworking Project

Ah, woodworking projects. A favorite pastime of all DIYers out there, and also, my favorite. Nothing beats the feeling of satisfaction from seeing your project finally complete and looking so good. Let me walk you through all the steps on how to make a perfect lock miter joint for your woodworking project to make sure you get that same satisfaction at the end of your woodworking project.
First, let me tell you what a lock miter joint is. This joint is a type of mitre joint that joins two pieces of wood at an angle, typically 90°. The two pieces slide together, with the joint taking the shape of an interlocking box or shell. It works great for making chests and drawers.
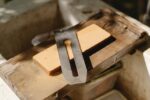
The materials you’ll need really depend on the type of Lock Miter Joint you’re wanting to create. You’ll need two pieces of wood, a saw, clamps, wood glue, and a sanding block. If you’re looking to get fancy, you can also get specialty tools, such as a miter saw.
Once you have all the materials, the next step is to cut and measure the wood pieces. Measure each piece carefully and make sure the cuts are precise. It’s easy to just cut the wood in one direction, but make sure the cuts are at 90° and the pieces are exactly the same size.
Next up is assembling the miter joint. To do this, place one of the pieces on top of the other, with the edges lined up. Slide them together until they interlock, and then use clamps to hold them together.
Once in place, it’s time to glue it all up. Use wood glue to get a strong bond, and make sure to spread it evenly over the joint. Once the glue is dry, you can remove the clamps and you’re ready to sand and finish the joint.
Finally, don’t forget the final touches. Use sandpaper to remove any rough edges and make sure that the joint is even and smooth. This is important for the joint to form a tight lock and look great.
And, finally, a few tips and tricks from me. When creating a miter, don’t be afraid to use a specialty saw. It can give you more precision and accuracy, and help you get the perfect joint. Also, don’t be in a hurry; it’s important to take your time and measure everything precisely.
That’s all there is to creating a perfect lock miter joint. Give it a try, and you’ll see that anyone can do it.
What is a Lock Miter Joint?

Welcome to my workshop special friends! Today I’m going to tell you all about make a perfect lock miter joint. First up, let’s talk about what a lock miter joint is.
A lock miter joint is an essential tool for any woodworking project. It’s a type of miter joint that uses two pieces of wood or material that are fitted together with a lock miter bit. This is so a strong and permanent join is created. But don’t just take my word for it, lets discuss the details.
To begin, the two pieces of wood or material are typically fitted with a miter saw, and then the lock miter bit is used to cut the two pieces to create a 45-degree angle on each end. This creates a joint that is super strong and won’t budge! It’s almost like a locked door when you use a lock miter joint. Plus, the look of the joint looks nice and adds a unique twist to your woodworking project.
Another benefit to the lock miter joint is that it is often less time consuming to build compared to other miter joints. And because it’s strong, you can be sure your project will last a lifetime!
So there you have it folks! Now that you know what a lock miter joint is, you’re ready to go tackle your next woodworking project. It’s really a great asset to any woodworker looking to make their project look great and last forever.
Me, I prefer to stand back and admire my handy work once I’m done, but all that hard work is so worth it when you look at the finished product.
So get out there and start locking and miter-ing your way to success! Believe me, your projects will thank you for it!
Materials Needed
First you’ll need your materials. Make sure you have a good quality saw and these other materials: at least two pieces of wood of the same thickness, clamps, power drill, drill bits, sandpaper, glue, and a chisel.
For the saw, depending on how accurate you need the cuts to be, it is wise to invest in a higher quality saw for optimal results. When it comes to the wood, make sure the pieces you have chosen are of the same width and thickness. You don’t want your joint to look wonky!
For the clamps, at least two will do the job, but I strongly suggest getting more, just to be safe. Power drill and drill bit: the size will depend on your joint size, so make sure you buy the bits that fit the joint size you will make.
Sandpaper will be used to smooth the surface of the wood, so make sure you choose the correct grade for your project. Glue and a chisel will be used to make sure all of your pieces fit together snugly and accurately.
And there you have it! With these materials you should have all the tools you need to make the perfect lock miter joint. Now go get to work!
Cut and Measure
Ah, the most important step in learning how to make the perfect lock miter joint: Cut and measure. All your hard work will be wasted if you get this step wrong, so pay attention to the details.
First thing’s first: you’ll need to decide the size of the joint. Unless you’re a professional woodworker, it’s best to go with the standard size: 1/4 inch. That way, your cut will be uniform and easy to read in the future.
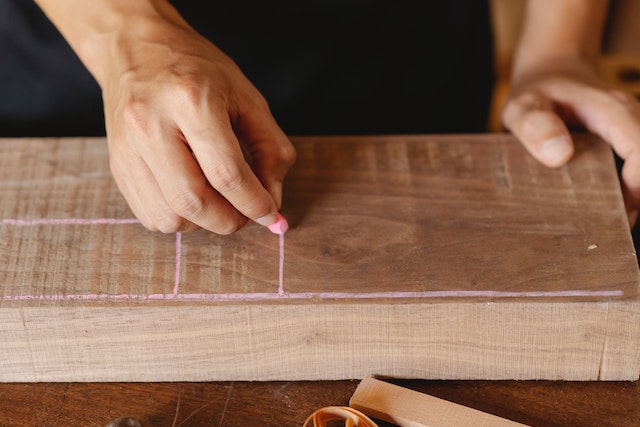
Once that’s out of the way, you’ll need to measure the stock for the miter joint. Make sure to use a square and a standard tape measure for accuracy. It’s best to measure multiple times, especially if you’re dealing with smaller pieces.
When you’re ready to cut, use a hand or table saw to get the job done. Remember to be safe and use the right blade and blade guard. The teeth on the blade should have a negative hook to ensure it will cut with minimal chipping.
You’ll also need to use the fence to get a perfect angle. To get the best results, use hold-down clamps to keep the stock in place while you saw.
Finally, take a moment to look over your cuts. If everything is accurate and smooth, move on to the next step!
There you have it – the basics of how to make a perfect lock miter joint. As with any woodworking project, accuracy is key, so take your time and double check your work. And don’t forget to check out my tips and tricks at the end of this piece – I’ve got a few tricks up my sleeve that I want to share!
Assemble the Miter Joint
Hey, y’all! I’m gonna tell you ’bout assemblin’ yer Lock Miter Joint! You see, it’s probably the most important step. If you don’t do this right, your project won’t turn out perfect.
The first step of assemblin’ is pretty simple – you’ll want to make sure to get both the sides of the joint cut and measured first. And then ya gotta line ’em both up just right. Ya can use a few clamps ta hold ’em tight while ya screw ’em together. Now, you’ll likely have to make sure one side is slightly longer than the other. This creates an ‘interlocking’. Well, that’s what I call it anyway.
The following step depends on whether ya used a regular saw to cut up yer board or whether ya used a router. If ya used a saw, then you’ll want to use glue on both sides of the joint to make sure them sticks together. However, you’re in luck if you used a router cuz that means you don’t need no more glue!
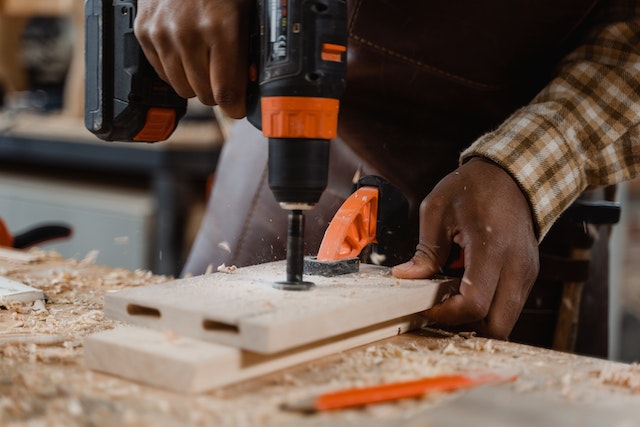
Once you’ve got the glue on and the sticks together – it’s time to start putting the screws in. Make sure to always use the correct size screws, and try to not over-tighten them. It’s better to put several screws in than just one cuz that makes your joint stronger and it won’t break apart as easily.
Those are the basics when it comes to assemblin’ a Lock Miter Joint! Now ya just gotta do the same to make your other joints, and then ya have a perfectly assem-blowed joint. Later on I’ll share some tips and tricks on how to make your joints even better.
Glue and Clamp
Now you’re getting to the crucial step of making that oh-so-nice lock miter joint. You’ve got all your pieces cut and ready to go, so now it’s time to glue it all together and make sure it stays put with some good ‘ol fashioned clamps.
To start with, go ahead and lay out one of your pieces face side up, and then take the second piece you cut and lay it against the first one as desired. Line up the miter with the other piece, so that the angles all appear to fit together nicely.
It’s at this point where you may want to take your wooden ruler, the one I know you got from the thrift shop a few weeks back, and give it a good check to make sure the angles of the joint all meet up how you want them to.
Once you got that checkmark complete, it’s glue time! Get yourself a tube of wood glue, squeeze some out on the miter joint, and spread it around with a tiny artist brush that you got from the craft store. Try to get it along the full length of the joint. Once you’re confident you got it in good, lick your fingers and smooth it out so it goes evenly around and then press both pieces together so the glue spreads into the miter joint.
Once it’s all glued up, get yourself some of those wonderful spring clamps that will keep your masterpiece in place as the wood glue dries. Don’t be stingy with it, get enough clamps to cover the whole joint and secure it in place. Leave it alone for a few hours and let the clamps and the glue do their job.
So there you have it, that’s how you glue and clamp the lock miter joint for your woodworking project. I wish you success and I want to see what you come up with! So Happy Crafting!
Final Touches
Now that your lock miter joint is fit together it’s time for the final touches. If you did it correctly, your joint should fit together tightly and look professional. If there are any gaps, use some wood filler and a putty knife to smooth them out. Make sure the joint is stable and secure. If it needs reinforcing, add some wood screws or dowels to the joint.
Once the joint is ready, it’s time to sand and finish it. Use a palm sander and 120-grit sandpaper to sand the surface and smooth out any rough edges. Then use a higher-grit sandpaper such as 180 or 220 to make the joint even smoother. Once the sanding is complete, use a wood sealer or polyurethane to protect the wood and seal the joint.
Now, here’s the best part—adding the perfect touch. Feel free to add your own unique touches to the joint, like painting the wood or using some special details like inlays or carvings. Get creative and use some of your signature style to make the joint truly yours.
It all comes down to the details—the details make or break the perfect lock miter joint. And while the tips and tricks I’ve shared will help you create the perfect miter, don’t forget the last and most important step—checking over everything one last time. A second set of eyes can help pick up on any imperfections that may have slipped through.
So go ahead, show off that perfect miter joint you created—you earned it! Have fun, be creative, and don’t forget to share your results with me. I’m always looking for unique creations!
Tips and Tricks

When it comes to woodworking projects, no one knows it better than me. From cabinets and furniture, to home improvements projects and more, if you wanna do it right, you gotta listen to me. Here are some of my top tips and tricks for achieving the perfect lock miter joint for your project.
First off, choose the correct saw blade for your type of wood. Whether you’re cutting a hardwood or a softwood, or even a synthetic, choosing the wrong blade can ruin the whole project. A miter saw with an appropriate carbide tipped blade will ensure the perfect cut.
Next, make sure you measure twice and cut once. No truer words have been said. Before you start cutting, take the time to make sure you’re measuring right. This will prevent any costly mistakes once you start sawing.
When you’re assembling the lock miter joint, be sure to double check the accuracy of each piece with a ruler. Center your nail and give it a few extra taps with a hammer to really ensure security. If it’s a project you’re waiting to show off afterwards, make sure to use clamps to keep everything tightly bound together.
When the time comes to glue, don’t skimp on it. A good quality wood glue will make all the difference in the world when it comes to your end result. I swear by the D3 type glue for the superior bonding qualities.
Finally, once your project is finished, don’t forget to step back and admire all your hard work. You put in a lot of effort and you deserve to feel proud and accomplished. Invite someone over to see your incredible masterpiece and show it off.
So in conclusion, if you want your lock miter joint to come out perfectly, take heed to my words of wisdom and you can’t go wrong. Measure twice, cut once, and use top quality glue and lumber.