How to Make a Perfect Edge-to-Edge Joint for Your Woodworking Project
Ha ha, check me out, woodworking guru at your service! Today, I’m gonna teach y’all just how to make a perfect edge-to-edge joint for your woodworking project. Without further delay, let’s get started!
First off, if you wanna get this project off the ground, you’ll need the right tools. Don’t go for whatever you can find. You need a saw, a couple of clamps, and glue gun – Alright, now, you’re ready to go. Resist the temptation to dive head first into the project, you gotta do some preparation first.
Now, take that sawing thing you got a minute ago and make sure you’re using the appropriate cutting angle. You wanna create a perfect joint so you want the angle just right. Test it out with some practice cuts in wood scrap before you start, that way you’ll get a feel for the right speed and, boom, there you have it, a perfect angle. See, this part ain’t that hard, right?
Once you’ve found the perfect angle, it’s time to move on to the actual cutting. Cut your boards in the exact length, that way you can easily put them in the correct position. So, in order to make a perfect edge-to-edge joint, the boards must pay perfectly one on top of the other. No half-undone stuff here, no sir.
Next thing on the list – gluing. Take that glue gun and add some glue to the edges, then press them together and distribute the glue evenly. Gotta make sure every single edge is firmly glued, that way it will better hold the board together. Don’t forget to use enough glue to cover the entire surface.
Once you’ve finished the gluing process, it’s time to clamp the boards together. Make sure you put enough pressure, that way you’ll be sure that everything holds in place. Try not to leave them clamped up for too long, take them out in a couple of hours and unclamp them one by one, checking the joint to make sure it’s perfect.
And there you have it, that’s all you have to do to create a perfect joint for your project. Finishing up, give everything a nice sandinng, just to take off those rough edges, and you’re ready to move on to the next step of your project.
So, that’s it, folks. Hope you enjoyed reading this tutorial, and remember, don’t let anything stop you from achieving the perfect edge-to-edge joint for your project. Now, get out there and make something awesome!
Finding the Right Tools
When it comes to making a perfect edge-to-edge joint for your woodworking project, you need the right tools for the job. Don’t be like Pops…you know. He loves to tell jokes but not deal with the technicalities of woodworking. Thankfully, there are some pretty easy-to-use tools that make it easier to create a great edge joint every time.
Start off with a tablesaw, as it is your friend. This sharp electronic tool takes a lot of the hard work out of making an edge joint. Before you make any cuts, make sure to adjust the blade height to make a flat cut. It may take some time to get everything adjusted right, but the payoff is worth it.
One of the most important tools in your arsenal of woodworking tools is a jointer. This will make sure that the two pieces of wood line up perfectly. It can also be used to shape the two pieces if you need to make a perfect edge joint.
You’ll also want to make sure that you have a few clamps on hand. These will come in handy when glueing the two pieces together. You don’t want any gaps or movements when clamping, so make sure the clamps are tight and evenly distributed.
Finally, you’ll need a good quality wood glue. This glue is essential for creating a strong bond between the two pieces of wood. Make sure to read the instructions on the bottle as different glues require different application methods.
So, there you have it – the key tools needed to make a perfect edge joint every time. I know you can handle the technical side of woodworking and make a professional-looking edge joint. You just have to have the right tools and the right attitude!
Preparation

Ahoy woodworkers! Preparations are a key step in achieving edge-to-edge perfection! Without a good plan and all the right tools, edge-to-edge woodworking won’t go your way. Now, don’t be too alarmed! Get ready to prepare because the job can be done and done right.
Before getting started, gather all the tools that you’ll need. A tablesaw and a good sharp chisel come to mind. If you don’t have those two items, head over to your local hardware store – don’t forget to flaunt your new skills and give the cashier an example of what you’ll be creating!
Then make sure that the surface of your workbench is clean and clear. Have everything laid out for you to easily access during the process. After you’ve got all that ready, double check that the edges of your material are straight. If not, take corrective action with sandpaper. Absolute precision is essential for a perfect joint.
Next, lubricate the blade of the tablesaw with a light spray of household oil. Not only is it cool and fun to do, it will also protect the blade from rust and corrosion! And don’t forget to use the correct blade on your saw; a crosscutting blade with a high number of teeth is needed.
Now that you have the right tools and the gleaming set up, it’s time to get down to business. Carry on woodworking warrior, you’re almost ready to make magic. But first, chisel off any rough edges that have crept in somehow, this will help keep them clean and uniform.
There you have it! You’re now ready to proceed and make that perfect edge-to-edge joint for your project like a total pro. So, go ahead and exude pride with your amazing edge-to-edge joint-making abilities – after all, you know you’ve earned it.
Positioning

Ah yes, positioning. Now this is an important step in achieving that perfect edge-to-edge joint in your woodworking project. This is the step that separates an amateur woodworker from a professional one.
Positioning your joint right is the key to making sure that your project looks the way you want. So it’s important to get this step right!
First thing you need to do is make sure that the pieces of wood you’re using are flush and have the same thickness. This will ensure that the joint is as strong as possible.
Then align the pieces of wood side-by-side. It might be helpful to use a square or ruler to make sure that everything is perfectly lined up. Once all of your pieces are aligned, it’s time to move on to the next step.
Now you’ll need to mark the spot where the joint will be made. Make sure to make your mark as close to the edge of the wood as possible. You’ll want the joint to be as close to the edge as possible for a seamless finish.
Once you’ve marked the spot, use a chisel to create a small indentation in the wood. This will help you to achieve a snug fit when you put the joint together.
And that’s it! You’ve done it! You’re officially ready to start cutting and assembling your edge-to-edge joint. Now you can sit back, relax, and know that your woodworking project is going to look as perfect as you imagined.
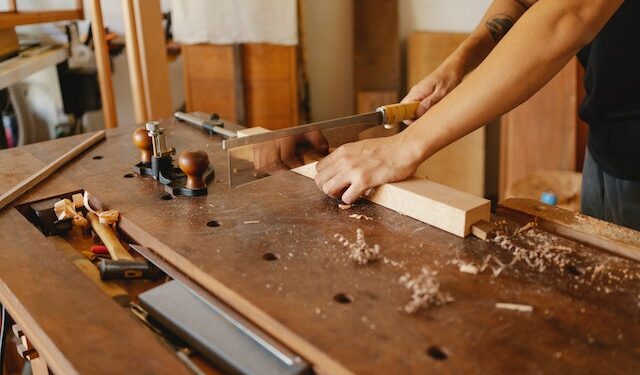
Cutting
Uh oh yeah boy, now we’re talkin’! It’s time to start cutting, and you must use the right tools and the right technique. To make a perfect edge-to-edge joint, you’ll need the perfect saw. Depending on the size of the joint, you might want to use either a handheld circular saw or a jigsaw for the job.
No matter which type of saw you use, make sure to wear safety goggles and a dust mask as sawdust will be flying everywhere. Now that your makeshift sawdust-catcher is in place, it’s time to begin. On a flat surface, preferably a workbench that’s at waist level, place the wood together to form the joint. Now you’re ready to cut.
Using the jigsaw or circular saw, begin the cut using a slow and steady motion. When using a jigsaw, always cut on the outside of the line, to ensure a smooth finish. If using a circular saw, make sure to hold down the workpiece firmly and keep your body a safe distance away from the saw.
When cutting a joint, pay attention to the angle of the saw. If you’re making a right-angle joint, cut at a 90-degree angle. For an angled edge-to-edge joint, cut at the desired angle. When making a curved edge-to-edge joint, make sure to hold the saw steadily and take small, steady strokes.
And always remember to choose the right drill bit for the job. A drill bit that’s too large won’t give you the precision you need. A drill bit that’s too small can make the joint weak. So choose wisely.
Once you’re done cutting, inspect the joints, checking for any burrs or sharp edges. If you find any, use a file or sandpaper to smooth them out. And that’s it! Not too tough, right? Now you know how to make a perfect edge-to-edge joint for your woodworking project. Good luck!
Gluing

Gluing is the adhesive of choice for a strong, resilient edge-to-edge joint. Whether you’re using wood glue, construction adhesive, hot glue, or epoxy, it’s essential to adhere the pieces together properly. This can be tricky, though – after all, you don’t want any glue splotches all over the place.
My number one advice for applying glue is to take your time and make sure to apply it evenly. A light touch is best, since too much pressure can squeeze off too much glue and create a mess. If you’re not confident doing it freehand, you can always use a small, clean paintbrush to spread the adhesive. This will also help you to focus on making sure everything is lined up properly and that there are no gaps or overlaps.
For extra-strong joints, you may want to use a combination of glues. You can use wood glue and construction adhesive together on a joint, but make sure they’re compatible first, or you could end up with some serious problems down the road. You can also utilize all three types (wood, construction adhesive, and hot glue) by using wood glue along the edges and then using hot glue to lock the pieces into place and adding construction adhesive as a finisher.
No matter what kind of adhesive you decide to use for your edge-to-edge joint, you have to make sure that the pieces are thoroughly clamped together to remove any air bubbles or gaps. Time and pressure are your friends here, so don’t be afraid to spend extra time making sure the pieces are glued together perfectly.
That’s all there is to it! With the right tools, preparation, and attention to detail, you’ll be crafting perfect edge-to-edge joints in no time. So break out your best glue gun, grab the duct tape and get glue-ing!
Clamping
When you get to the clamping part of your edge-to-edge joint project, you better get ready for a wild ride! Clamping is one of the most important pieces of the puzzle; without it, your joint won’t hold together. Clamps come in all shapes and sizes, so keep in mind the size of your project when choosing.
Once you have the right clamping device, you’re ready to get clamping. Make sure your clamps fit snugly inside the joint, pulling it together firmly. If you don’t have enough clamps, that’s no problem — just get more!
In the rare event that your clamps are too big for the joint, don’t panic. Break out your trusty power drill and craft some cleats that fit the joint and add extra strength to the connection.
Noooooo! So here’s what you do: slowly and carefully, back off just a little bit. That’s right, relax the pressure. Take a deep breath, a sip of coffee, and give the clamps a little break. Once your joint looks good, lock it down with a few extra twists of the clamps and let your project chillax for a bit.
Finally, before you take off the clamps, do one last test fit. Make sure everything looks ok and the tightness is just right. When you’re sure it’s perfect, you can remove the clamps and marvel at the beautiful joint that you’ve made!
Clamping is an important step in making any edge-to-edge joint, so don’t skip it! Detracting from your work because of lack of or improper clamping is far more embarrassing than taking the time to do it right. Now, get clamping!
Finishing Up
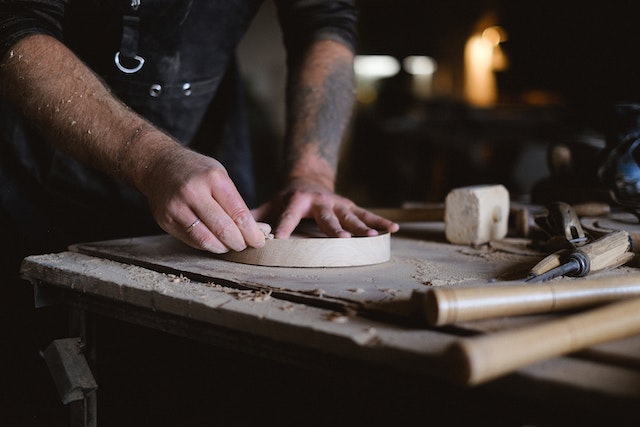
Well, all the hard work is done! Now it’s time to finish up, my friends. Of course, you’ve already done all of the hard stuff – the finding, the preparing, the positioning, the cutting, and the gluing, but you can’t just stop now. After all, your project won’t be complete until the joint is perfectly finished and ready to use. So, how do you do that?
First, you’ll need to make sure that the joint has been clamped and left to dry properly. If you want, you can use a damp cloth to wipe down the joint to make sure that all of the excess glue and other residue has been removed. Once that’s all taken care of, you’re ready to start sanding and shaping.
Take a few moments to lightly sand the edges of the joint to make sure that they have a nice smooth finish. You can also use a chisel or other small hand tool to add some decorative detailing to the joint, if you’d like. Once the sanding is complete, grab the wood finish of your choice and brush it onto the joint. If you want a nice glossy finish, you’ll want to opt for a varnish or lacquer. If you’d rather keep the natural look of the wood, a stain or sealant would do just the trick.
Finally, once the finish is dry, you’re finished! All that’s left to do is admire your handiwork. You’ve just created a perfect edge-to-edge joint! Now get out there and show off your impressive new creation!