How To Make Bevel Cuts With A Miter Saw
Okay diddily-doo! Today we’re gonna learn how to make bevel cuts with a miter saw- one of the must-have tools for woodworkers! As always, safety is the #1 priority. Read the instructions of your miter saw carefully and make sure the saw isn’t plugged in when not in use. Let’s get started!
There are a few steps you’ll have to do to be ready to cut. First of all, set up a large, flat workspace for the project you’ll be doing. Make sure the workspace is well lit so you can accurately measure and align wood pieces. Place your miter saw on a solid, flat surface- make sure it is adjusted properly to the blade length. Add a feather board to keep stock against the cutting blade to prevent kick-back.
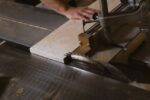
You can start by making a cross-cutting; this allows you to make clean cuts across the width of the wood. Make sure the saw blade’s teeth are properly aligned with the wood before switching the saw on. Once the wood is in place and aligned correctly, you can switch on the saw. The miter saw should be in the right position and angle so that the cut is even and accurate. When the cut is complete, switch off the saw and take out the wood piece you have just cut.
Next is the bevel cutting. Starting from the middle of the blade, tilt it forward until it is completely parallel to the surface. Adjust the bevel cut angle to the measurement required for your project. Finally, bring the blade down slowly and carefully to start the cutting. When the cut is complete, switch off the saw and take the wood piece out.
And that’s all there is to it! Now, you are now bevel cut pro! Don’t forget, safety is always the #1 priority when using power tools, so never forget to unplug your miter saw when not in use. Have fun!
Preparation
Alright, funniest part is first – the preparation. Planning is essential, because you don’t want to make any mistakes when you’re dealing with a sharp saw blade like that.
First of all, you have to make sure you got the right saw. A miter saw is the only way you should be attempting to make a bevel cut – anything else is too dangerous and could lead to disaster.
Next, you gotta make sure you got the right blades. Most miter saws come with blades that can handle just about any kind of material, from wood to steel, but if you want to make a perfect bevel cut, you gotta use the right blade for the job.
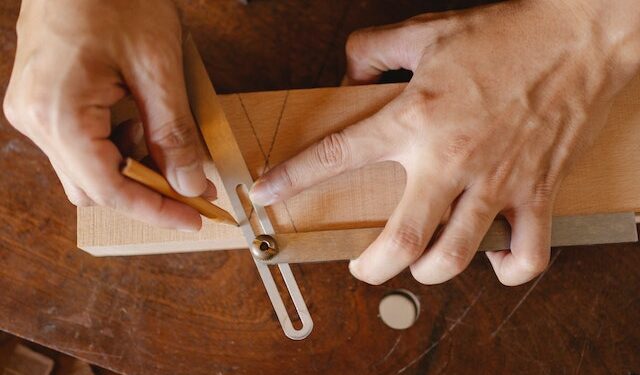
Now, you need to adjust the blade’s angle. This is pretty easy, especially on newer miter saws. Most models have a scale that indicates the angle of the cut you want to make. All you have to do is adjust the saw accordingly.
Think about the fence too – that can help you determine just how far down the blade will go into the material and is one of those safety features you can’t do without.
Finally, think about making the cut. When you start cutting, it’s best to take it slowly at first so that you can get an idea of how deep the blade is going and how fast it is rotating. That way, you can get a feel for the material and make sure you’re not rushing it and risking an accident.
Good, now that we got all the preparation done, let’s move onto the actual cutting!
Executing the Cut
Well, here it goes – time to make some bevel cuts! Y’all ready?
First off, check the machine to make sure it is properly set up and that the blade guard is in place. Safety first, right fellas? You never want to start a project without the right safety gear, so get your safety glasses on before we start cutting.
Now, let’s see what angle we’re going to be cutting at. You should have already figured out your angle before setting up your saw, but just in case, check it now to be sure. There should be a scale or guide with which you can use to set up your saw for the particular angle you need.
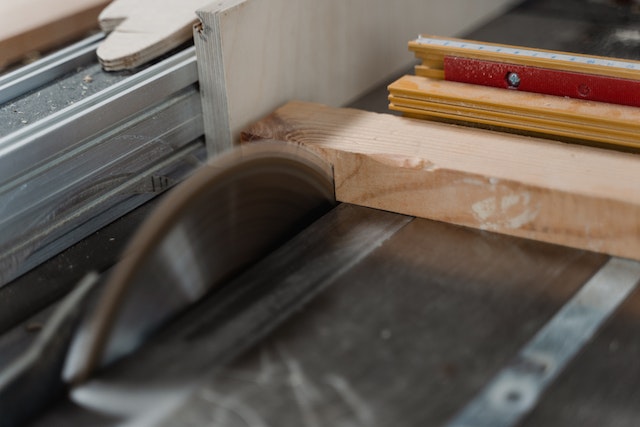
Once the saw is set, start it up and let it spin up to speed. It is important to let it reach full speed before you make a cut, otherwise you might make a very sloppy cut.
Now, place the wood on to the saw’s table, making sure that the exact area of the wood you want to bevel cut is lined up with the fence. This ensures that the cut is going to be straight.
Clamp the wood in place so that it doesn’t move while cutting. Now, tilt the saw blade to make the bevel cut. Make sure the blade is tilted away from you while making the cut.
Now the fun part – Turn on the saw and start cutting! The blade should move cleanly through the wood, and if your angle is right you should be able to see the bevel you are creating.
Just keep cutting until you have reached the end, and then turn off the saw. Don’t forget to shut off the power once you have finished!
OK, now it’s time to take a look at your bevel cut. Make sure that it’s nice and smooth – no rough edges, no splinters, etc. If it looks good then you’ve successfully completed the cut and you can move on to the next step.
So that’s it, you’ve officially made a bevel cut with a miter saw! It may have taken some trial and error to get it right, but now you know how to do it and you can confidently bevel cut again and again.
Finishing Up

Finishing up with making bevel cuts with a miter saw is so easy it can be done in your sleep! Well, you don’t have to actually fall asleep at the saw, but you get the point.
First and foremost, turn off the tool and unplug it. We don’t want any accidents, do we? After you do that, check the cut with a square on both axes. That’ll tell you whether the cut was as good as you wanted it to be. If it weren’t, well, you can always start over and make minor adjustments as you go or get a different saw!
Now, it’s time to clean up! Upon wiping off the sawdust, you should inspect the blade to see if everything went as planned. Make sure there are no burrs or any other form of imperfections. Also, check if the blade is still sharp. This is essential for future use and for ensuring the best quality results. If it isn’t, sharpen it or simply get a new one.
Finally, assemble the miter saw back together. Make sure all the screws and bolts are tight and secure. Once you do this, the job is done!
Making bevel cuts with a miter saw is a breeze! With just a few simple steps, you can make precise and accurate cuts in a matter of minutes. So go ahead and give it a go! Who knows, you may even find it fun!