How To Properly Maintain Your Saw For Longevity

When it comes to woodworking, having the right tools is crucial to creating high-quality projects. And one of the most important tools in any woodworker’s arsenal is the saw. But simply having a saw isn’t enough – it’s also important to know how to properly maintain your saw for longevity and continued performance.
In this article, we’ll go over some tips and tricks for maintaining your saw, so you can get the most out of this essential tool for years to come.
Maintenance Tips
And if you’re anything like me when it comes to tools, you always forget to properly maintain them. But without proper maintenance, your saw won’t last as long as it should and you’ll be buying a new one sooner than necessary. So, I’m gonna give you some tips on how to maintain your saw and keep it running smooth and strong.
First up is keeping it clean. I’m talking about more than just wiping down the blade and the housing. You’ll want to clean up all the sawdust and debris every time you use it. If you let that build up, it can make it harder for the blade and gears to move and cause more wear and tear. Plus, it just looks better when its all shiny and free of dust and dirt! Secondly, you’ll want to make sure you’re regularly replacing the oil and grease on your saw. This will help keep the gears and the blade moving smoothly – and actually in one piece – and make sure the saw continues to work properly.
It’s also important to pay attention to the gear. Make sure there aren’t any stones, nails, or other debris trapped inside that could cause major damage to the saw. And every couple of months, check the internal parts for any signs of wear or tear. If you notice any odd-looking patches or anything, it’s best to get it checked out by a professional – that could save you a big headache in the end.
Also, don’t forget to ensure you have proper handling and mixing of fuel when fueling up your saw. If you don’t, you could end up with a nasty explosion on your hands. It’s also essential that you properly sharpen your saw blades. A dull blade will make cutting harder and could even damage the saw – not to mention the piece of material you’re trying to cut!
So, if you’d like your saw to last for years and years, just remember these maintenance tips and your saw will be running like a champ! Well, I reckon that’s all any sawin’ folk need to know. Catch ya later and have a good one!
Keep it Clean
If you think saw maintenance is as simple as, well, sawing stuff, you must not have me as a saw engineer! Keeping your saw in top condition requires regular cleaning. I’m talking about keeping it clean enough for a date with Miss Universe!
First, give your saw a once-over with a relative hassle-free item – a shop towel. My grand-pappy taught me to always keep a towel handy, it’s the best way to remove dust and dirt without nudging any of the sensitive parts of your saw.
Next, it’s time to into the nitty-gritty. I’m talking about actual cleaning with a degreaser, preferably a mild one if you can find it. Work the degreaser over all the parts that really need it, like the piston and cylinder. Sometimes a tiny bit of elbow grease can go a long way!
If your saw has an air filter, make sure you clean it (preferably with a vacuum). Sad to say, myself included, sometimes we tend to forget about this vital part of proper saw maintenance. It’s essential to keep it clean since running a saw with a clogged filter is a recipe for disaster.
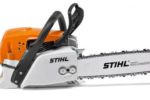
Finally, don’t forget about the chainsaw bar. Keep it cleaned up and free of build-up, as well as sharpened. Besides just looking better, a clean-cut with a sharpened bar will also prove more cost-effective in the long run.
You may not be in the running for Miss Universe, but at least you’ll be looking good enough to take your saw to the club! Keep your saw fresh, my friends, and she’ll keep the cuts fresh too!
Regular Oil and Grease Replacement
Today, I’m here to talk to you about the proper upkeep of your saw. Specifically, I’m gonna be discussing regular oil and grease replacement. Now, before I get into the nitty gritty, let me tell you all why this is so important.
When you use your saw a lot, the parts that drive the blade, such as gears and pulleys, will wear down quickly. Without oil and grease, the metal on metal contact from these parts can overheat or cause the metal to wear down. Over time, this will lead to broken parts and may even cause the saw to have to be replaced.
Keepin’ it lubricated is the key for a saw that’ll last you for years to come. So how do you do it?
Well, the first step is to check the manufacturer’s instructions. Most saws come with a guide that will tell you how often to replace the oil and grease, as well as what parts need lubrication. It’s important to follow these instructions; while it may seem like a hassle, it’s essential for the longevity of your saw.
Once you know what to do, it’s time to actually do it. To properly oil and grease your saw, you’ll want to use good quality lubricants like saw grease and bar oil. Make sure to spray small amounts of each in all the appropriate places, including the blade, the blade bearings, guide roller bearings, and links. Remember to keep the area clean; this will help the lubricant last longer and create less mess down the road.
You’ll also want to wipe off any excess lubricant after you’re done. This will ensure that it doesn’t collect dirt or debris and clog up any of the parts.
So that’s the basics of it. If you properly maintain your saw with regular oil and grease replacements, you can protect your investment and make sure it lasts as long as possible. It’s not exactly the most exciting way to spend your Saturday afternoon, but it’s worth the effort in the end.
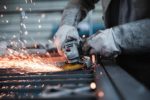
Pay Attention to the Gear
Alright, listen up, now it’s time to pay attention to the gear of that saw. If you don’t pay attention to the gear, it won’t be cutting or grinding nearly as quickly or effectively.
First thing’s first – check the gear housing and make sure it is free from any debris or dust. In some cases, a good cleaning may be necessary to clear any blockages.
Next, inspect the gears themselves. Make sure that they are turning freely and are not being blocked or hindered in any way.
Don’t forget to check the grinding wheels as well. Make sure they are securely attached and that they are free from any potential hazards. Make sure they are sharpened periodically, as well.
It is also important to make sure the gears are lubricated properly. All the gears should have a clear layer of grease and oil, which protects them from wear and tear. When you apply oil, make sure you don’t over-grease it, as this can lead to wear and tear on the gears.
Finally, if you ever notice any wear or tear on the gears, take the time to replace them. Don’t wait until the damage rings true – this can be costly.
So, as you can see, it is important to pay attention to the gear whenever you are maintaining your saw. Don’t underestimate how important it is to keeping your saw running smoothly and efficiently. Make sure to check the gear housing, grinding wheels, and gears regularly, and make sure to apply oil and grease whenever necessary.
And there you have it – all the tips and tricks you need to properly maintain your saw’s gears. Keep these points in mind and you’ll be sure to get a long life out of your saw.
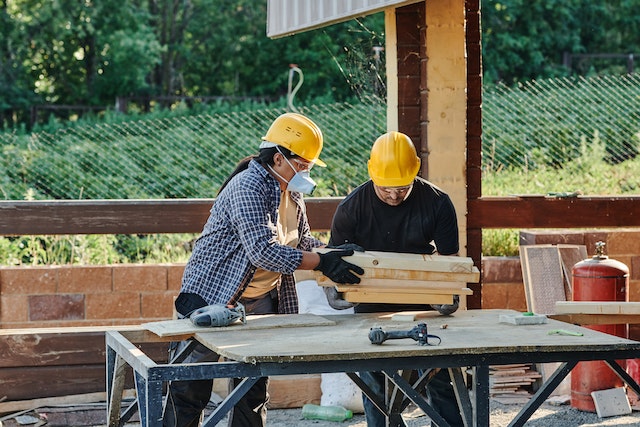
Regularly Check Parts for Wear
Regularly checking parts for wear is one of the most important parts of saw maintenance! It’s easy to forget, it seems like too much of a hassle, or you just don’t know how to do it, but it’s critical for saw longevity.
Let’s start with chainsaw and string trimmer maintenance. With chainsaws, it’s important to check the sprocket and each tooth for missing bits or chips. Watch for any rough edges. If it looks like the sprocket is worn down, it’s time for a replacement.
Another thing to check for is tension on the chain. There should be enough tension so that it doesn’t easily fall off, but not so tight that it’s difficult to move. If you’re not sure, consult your owner’s manual.
As for string trimmers, check the string line itself. Is it frays, rips or hints of damage? You might have to swap out the trimmer head to get a fresh line. You should also look for any signs of corrosion in the chrome or the plastic parts of the trimmer head. If it’s corroded, it’s time to replace.
When it comes to lawnmowers, the first area to check is the blades. Are they bent or worn down? If they’re really off-balance, you might be able to adjust them, but if they’re badly damaged, replace them.
Also, check for any bits of debris stuck in the blade holes. If there’s debris, that could mean buildup in the fan blade. Check for any sticky or rusty components.
Moving on to blowers and vacuums. Check the fan blades for any signs of damage. Also, look for clogs in the vents or nozzle. If you see dirt or leaves, then a quick clean out could do the trick.
Finally, with leaf blowers, check the air filter. If it looks dirty or clogged, then it’s probably time to replace it.
By regularly checking parts for wear, you can ensure that your saw stays in top shape and keeps serving you well. It can be a bit tedious, but it’s worth it in the long run. So remember to just take the time and make sure your saw parts are running right.
Ensure Proper Handling and Mixing of Fuel
Lemme tell ya, proper handling and mixing of fuel is important when it comes to maintaining your saw. You know, saws run on gasoline, so if you don’t have the proper fuel-to-oil ratio, you can end up with a lot of problems with your saw. I mean, it could start smoking and smoking isn’t good for your machine.
First off, if you’re going for gasoline, make sure you get yourself some fresh fuel. Don’t even think about using the stuff you find in your shed or basement, you know the stuff you’ve been using to fill your lawn mower. That’s a no-no. You want to buy the highest quality fuel you can find with an octane rating of at least 89.
Once you’ve got the fuel, make sure you are careful to mix it properly. You should read the instructions provided by your saw’s manufacturer before you do anything else. I recommend, however, that you always use 40:1 2-stroke oil with the best quality unleaded you can find. That’s gonna give you the best results.
Don’t forget, that if you don’t mix the fuel correctly, you could end up damaging your saw’s engine, leading to a lot of headaches and expense. So, it’s important that you keep the fuel-to-oil ratio in check.
Once you have the fuel and oil mixed, you should also make sure that entire mixture is stored safely away from any source of heat. I’m sure you know not to keep it next to the fire, but you should make sure to keep it away from your shed, in case it gets too hot out.
The last step, when it comes to proper handling and mixing of fuel, is to make sure the whole thing stays airtight. If air gets into your fuel, it’ll make your saw start smoking and that’s something you want to do your best to avoid.
So, there you go. That’s how you properly handle and mix your fuel to make sure your saw is up to the task and ready to mow. If you take care of it and make sure it gets the right mix of gas and oil, it’ll thank you by being ready to go any time you need it.
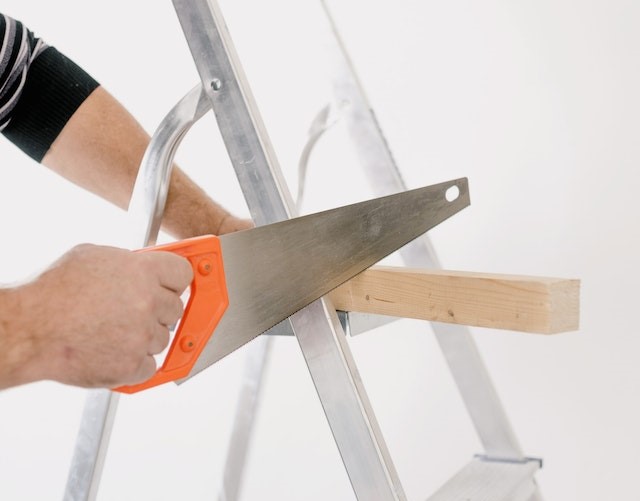
Properly Sharpen Your Blades

When it comes to sharpening our blades, it’s important to remember that it’s not a task that should be taken lightly. If you don’t do a proper job, it can be a real pain in the butt!
If the blade on your saw is starting to look a bit dull, the first thing to do is to figure out the correct angle that the blade should be sharpened at. This will depend on the type of saw you are using and the type of material you are cutting.
Once you know the correct angle, it’s time to break out the sharpening whetstone, or grinder. If you’re using a whetstone, make sure to wet it before you place it against the blade. This helps protect and lubricate the blade, enabling it to stay sharp for longer.
Keep a steady and consistent pressure as you pass the blade over the stone. This is important to ensure an even sharpness. Also, focus on one side of the blade and make sure to do an equal number of strokes on each side. This will result in an evenly sharpened blade.
If you have a grinder, mark the blade with a marker, so that you can stop once you reach the line. Make sure to move the blade quickly, in a uniform motion, so that you don’t overheat it.
When you’re done sharpening, use a cloth to wipe off any excess grit, and feel free to give the blade one final polish with oil.
Finally, if you’re ever feeling uncertain about how to sharpen a blade, it’s best to take it to a professional. At the end of the day, safety should be your number one priority. And while sharpening a blade seems like a simple task, it’s always best to err on the side of caution and get someone who knows exactly what they’re doing to help.