The Top 10 Most Beautiful Woodworking Projects of All Time
Woodworking is an age-old craft that has been passed down from generation to generation. From creating functional pieces like furniture and cabinetry to artistic masterpieces that showcase the beauty of wood, woodworking has always been an integral part of human culture. In this article, we will take a look at the top 10 most beautiful woodworking projects of all time.
These projects have stood the test of time and continue to inspire woodworkers today with their intricacy, elegance, and craftsmanship. Whether you’re a seasoned woodworker or just starting out, you’re sure to find inspiration in these stunning works of art. So let’s dive in and explore the world of woodworking at its finest!
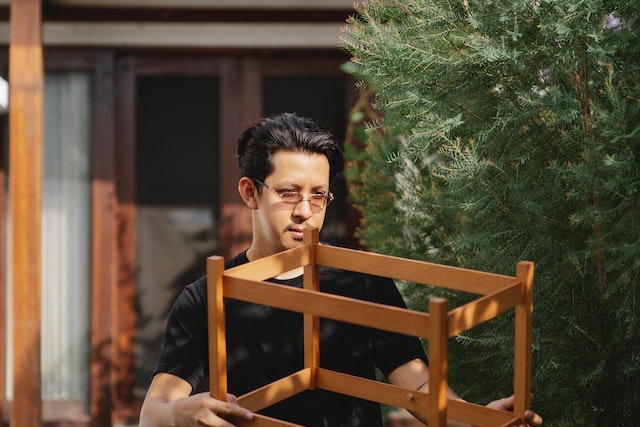
Bird Feeder
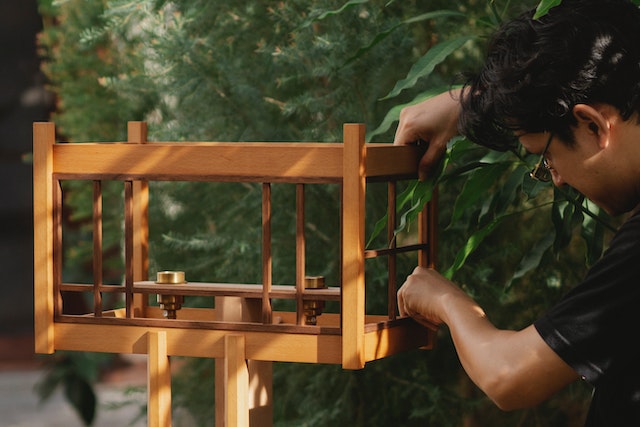
What’s up, y’all? I’m here today to talk to you about the top 10 most beautiful woodworking projects of all time. Starting at number one, we have a bird feeder! Now, before the work begins, let’s make sure you have all the materials you need. You’ll need some wood, something to provide food for the birds (like bird seed), and some tools – like a drill, saw and screws. Got it? Alright, let’s do this!
Start by cutting your wood into the shape of the bird feeder. You can get creative here and add a little flair, like a fun edge pattern or a cool top finial. Have some fun with it! Once you’ve got the shape cut out, use a drill to add about four screw holes in the wood. This will help your bird feeder stay together.
Now, add the bird seed or whatever you’re using for food inside. Make sure you leave enough space so the birds can feed comfortably.
Finally, screw the two pieces of wood together so your bird feeder is totally secure. And you’re done! You now have your very own bird feeder for you and your beautiful feathered friends to enjoy. Now, ain’t that something?! Come on, I dare you to try and make this bird feeder even prettier!
That’s it, folks! Don’t forget to come back for number two on our list of the top 10 most beautiful woodworking projects of all time. Later!
Materials Needed
Hey ya’ll! If you’re looking to make the top 10 most beautiful woodworking projects of all time, then you’re in the right spot. We got everything ya need to get started. Let’s get into it!
The first project on our list is a Bird Feeder. Now, you got to get some basic materials to get started building this. You can get these materials from any of your local home and garden stores.
First off, you’re going to need some wood. You want to use a good quality wood so your bird feeder is strong and durable. The type of wood depends on what you like the look of and the climate you’re in. Local stores should have the right wood for you.
You’ll also need some nails or screws and glue. The type of nails or screws depends on the wood you have chosen. You don’t want to use screws or nails that are too big or small for the wood.
You’ll also need some paint and sealant for the bird feeder. Since birds like bright colors, make sure you get a bright color for your bird feeder. You’ll also need a sealant to provide added protection against the weather.
You’ll also need some basic tools like a saw, drill, sandpaper and clamps. These will help you create the right shape and size for your bird feeder.
Now that you have all the materials, tools, and supplies you need, you can begin your project. So what are you waiting for? Let’s get started building the most beautiful bird feeder of all time!
Steps
It’s time to get crackin’ on that sweet woodworking project of yours! You’ve got all the materials the project calls for, you’ve got all the tools and you’ve got the ambition and energy. Now let’s get to it!
Firstly with the bird feeder, you’ll want to start by measuring and cutting out the dimensions for the sides. This is best done with a saw, as it will give you the most precise cuts. Once the sides are ready, you’ll want to attach them together by drilling in screws. Make sure that the screws that you use are long enough to hold the sides firmly in place.
After all the sides are attached, you’ll want to measure the height of the sides depending on where you want to hang the bird feeder. Cut the appropriate lengths of wood, and then attach these to the sides with screws. This will form the roof of the bird feeder.
Now, you’ll want to cut a small hole in the roof, as this will be where the food will be accessed by the birds. You’ll then want to measure the appropriate size of the tray, which will be placed under the hole to receive food. Cut that out of wood, and attach it to the bottom of the bird feeder with screws, in the same way that you previously attached pieces of wood.
Finally, you’ll want to decorate the bird feeder! Paint and stain the sides, add cute little designs and embellishments to make the bird feeder look even more attractive. Once this is completed, you’re ready to hang it up and watch the birds come and dine in your creation!
And that’s how you make a sweet bird feeder from woodworking. Now you can impress your friends and family with your stunning craftsmanship and show off your beautiful project. Good luck and have fun!
Bed Frame
With a beautiful bed frame, you can truly elevate the look of your bedroom to a whole new level. Whether it’s a platform bed with a stylish headboard or a classic four poster bed for a more traditional look, a good bed frame can do a lot for the aesthetics of your room. And best of all, the most beautiful woodworking projects of all time all boil down to knowing the basics and taking your time, so no matter your skill level, you can make a masterpiece, turn your bedroom or living area into something you truly love, and have tons of fun in the process, of course. Now, let me tell you about a bed frame.
At the end of the day, the foundation of any bed frame is the bed frame itself. You can get fancy with the headboard and foot board, but the foundation will determine the strength and stability of your frame. As such, you’re going to want a sturdy piece of wood such as oak, maple, mahogany, walnut, etc for the bed frame. You can also buy pre-made pieces or, if you have the tools, you can fabricate your own.
Materials needed for a good bed frame:
– A good piece of wood
– An Allen key set
– A drill
– Wood screws
– Wood glue
– Sandpaper
Steps:
- Cut the pieces of wood to the appropriate size and shape (or buy pre-fabricated pieces).
- Assemble the bed frame pieces together and attach them with the Allen key set. Make sure the pieces fit and are secure.
- Apply the wood glue to the surfaces that will be in contact with the bed frame.
- Secure the pieces in place with the wood screws and drill.
- Sand down any edges that need it and clean off any excess sawdust or other debris.
- Add the headboard and footboard if desired and attach them to the bed frame with wood screws and drill.
- Once the bed is complete, add a mattress, a nice set of sheets, and maybe a comforter, and you’ve created a beautiful bed that you can enjoy for years to come.
Creating a beautiful woodworking project doesn’t have to be intimidating. You can create something that you and your family can enjoy for years. Just take your time, use the right materials, and make sure your measurements are exact. You’ll be able to turn a masterful bed frame and be proud of your accomplishment.
Materials Needed
Ah, the infamous woodworking projects. Everyone attempts to take on ambitious woodworking tasks and I’m here to tell you all about them.
Let’s start with the materials needed to build the top 10 most beautiful woodworking projects of all time.
First, let’s take a look at the materials you need to build that bird feeder that’s been on your to-do list. You’ll need wood, birdseed, and some nails and screws to put it all together. It’s not complicated – let’s move on to the bed frame.
For the bed frame, you’ll need to do some heavier lifting – but it’s still doable! You’ll need a saw, screws and nails, wooden slats, metal poles, and some fabric for the mattress. You’ll have a comfy bed in no time, although it may take some manual labor.
Next you’ll need materials for the storage cabinet. The only thing you’ll be missing here is a drill. Other than that you’re golden – you’ll need nails and screws, wood, metal poles and varnish, plywood and glue, and hinges and handles. Easy peasy.
Now on to the coffee table. You won’t need much here – some Veneer, wood, varnish, nails, staples, screws, and glue (depending on the coffee table design). Voila – coffee table is done!
For the fifth installment, a hallway bench is up next. You’ll need wood, paint, nails and screws, metal legs, and some padding. Add a few pillows and you’re set!
The dining table is next in line – you’ll need some saws and screws, nails, and varnish (or paint or stain depending on the situation). You’ll also need wood and metal legs, and padding for the chairs.
Building a barstool is pretty straightforward – you’ll need wood, some screws and nails, and metal legs. Nothing too complicated here.
Blanket boxes come with a few extra steps – you’ll need wood and stain or paint, hinges and screws, glue, fabric and varnish. And if you want to get fancy, you can add some leather or suede.
Outdoor chairs are up next – you’ll need wood, screws and nails, some fabric and padding, metal legs and a drill. Make sure you choose good outdoor-friendly fabric and you’re good to go.
Finally, you’ll need a drill, wood, fabric and padding, screws, nails, and some varnish for the media cabinet. Depending on the design, you can also add some hinges and handles.
So there you have it – the top 10 most beautiful woodworking projects of all time and the materials you’ll need for each. Now, what are you waiting for? Get to work!
Steps
When it comes to woodworking projects, it’s time to get up and make that Bed Frame you’ve been dreaming about! Building a bed frame is easier than it sounds, and you’ll have a great piece of new furniture for your home in no time.
First you are going to need to decide on a method of construction. If you are looking for a rustic look, reclaimed wood would be a great option. You’ll need to measure the length and width of your bed to determine the size of the materials that you need.
Once you’ve got your materials, it’s time to get to work! Start off by constructing two side rails. Then, build four posts that will make up the headboard and footboard. Use screws or nails to attach the posts to the side rails.
Next, you’ll need to build a platform to hold the mattress. To do this, you’ll need to cut four pieces of plywood that match the size of your bed and attach them together with screws. Make sure to use screws long enough to penetrate the side rails.
For some extra stability and support, you can add corner brackets to each corner. Simply cut pieces of wood that fit the size of the corner and secure it to the side rails with screws.
To finish the job, you’ll need to stain the wood and seal it. If desired, you can also paint the frame. Allow it to dry before you move on to the next step.
Finally, all that is left is to attach the mattress to the frame and do a bit of styling. Place a few cushions and a blanket or two to make your perfect cozy bed. You’ll be proud of the modern look you’ve achieved!
So there you have it! With a bit of skill and patience, you’ll be able to build your own bed frame and show it off to friends and family. Get those creative juices flowing, and you’ll be able to make some amazing pieces!
Storage Cabinet

Welcome to the world of woodworking, folks. Today, we’re looking at storage cabinets, the ultimate solution to your storage quandary. Whether you have a lot of stuff to organize and store or just need help keeping it all tidy, a storage cabinet is just what you need.
Let’s talk about the materials and steps needed to make a storage cabinet.
To make a storage cabinet, you’ll need some wood sheet, wood glue, wood screes, wood sealant, wood preservative and some wood finish (or paint). When it comes to tools, you’ll need a saw, drill, screwdriver and sandpaper.
Now comes the fun part, the steps. First, you’ve got to measure and cut the wood pieces to the size you need. You may need to use a power saw to get the job done. After that, you’ll need to drill in the desired places and screw the wood pieces together.
Next, you’ll need to give those pieces a good sanding job to make them smooth and attractive. Once you’re done, you’ll need to seal the wood pieces with a wood sealant or preservative, to keep them from rotting away.
Finally, it’s time to apply your wood finish or paint. Most people go for a clear finish, but you can use any color and paint combination you’d like. That’s it! Now, you’ve got a gorgeous storage cabinet, the envy of all your woodworking-savvy neighbors.
After you’ve put together your storage cabinet, you’ll never have to worry about where to put stuff ever again! Just make sure to check on the wood sealant and finish from time to time, to ensure your storage cabinet stands the test of time.
Now, that’s some serious woodworking knowledge. That’s the end of this week’s feature. Until next time, keep crafting your way to success!
Materials Needed
Let’s start with the materials we need for building a storage cabinet. All woodworking projects begin with a journey to the lumber store, and this one should be no different. If you’re feeling particularly adventurous, feel free to try some more unusual materials. For example, if you want to create a more rustic look, then use reclaimed wood from an old barn.
You will need to pick up some wood of your desired thickness, length, and width. This should be a minimum of ¾” thick for greater stability. Depending on the size of the cabinet you’ll want to get some ¼” plywood for the backing. You might also benefit from some thicker lumber if you want to create shelves that can bear heavier weights. It could be thicker boards or even wooden dowels.
For the doors, you’ll need some aluminum or steel sheet, Plexiglas, or small wooden panels. Whatever type you choose should be 1-2 mm thick and the same diameter as the storage cabinet. For the handles, you can use either aluminum pulls or wooden knobs.
Next, you’ll need the hardware: screws and nails, hinges, and latches. If the cabinetry will be exposed to moisture, it’s a good idea to pick up some waterproof glue such as polyurethane.
Finally, you’ll need a few tools for the job: a saw, drill, clamps, and a sanding machine. The saw will be necessary for cutting the wood, the drill for precision work, and the clamps for keeping pieces together in place for gluing and nailing. Lastly, the sanding machine is crucial for making sure the whole project looks professional.
There you have it: all the materials needed for crafting a beautiful storage cabinet. Now that’s out of the way, we can focus on the next step: the construction itself.
Steps
Yup, now we’re getting into some intense stuff. You’ve got this Storage Cabinet project prepared and all the materials ready to go. Let’s get into it.
First things first – prepare the panels. Cut each panel to the correct size according to the plans. Then grab your dowel jig, drill pilot holes into the panels, and join them together with dowels. Give it a good sanding to round out the edges.
Next, you’re going to prepare the cabinet base. Drill pocket holes into each side panel, then assemble the panels with pocket screws. Time to move on to the next step – assemble the side panels with the back panel and the bottom panel. Attach these with pocket screws.
Time to prepare the top of the cabinet. Cut each top panel the correct size and drill pocket holes into each piece before joining them together with pocket screws. When joining the top with the cabinet base, use glue and finish nails.
Now it’s time to build the doors. Measure the opening in the cabinet and cut the door to the correct size. Then assemble the door frames. Drill pocket holes on each joint, then join the frames together with pocket screws. Sandwich the panels between one frame and attach them to the other frame with pocket screws.
Finally, you’re going to install the doors onto the cabinet. Cut four mortises in the sides of the cabinet. Attach the hinges onto the back of the doors, place the doors into the mortises, and secure the hinges to the side of the cabinet. And voila, you have your Storage Cabinet complete!
Whew, that was quite the project! Storage Cabinets can be pretty tricky, but with a little know-how and the right tools, you’ll be able to build the perfect one. Good luck!
Coffee Table
As you can imagine, a coffee table is an absolute must-have piece of furniture in your living room or den. With that being said, what better way to spice up your home than with a beautiful wooden coffee table. And, when it comes to the most beautiful woodworking projects of all time, you can’t go wrong with a coffee table.
The materials you’ll need for your coffee table are fairly straightforward. You’ll need a circular saw or jigsaw to cut the pieces of wood to the size and shape you desire. In addition, you’ll need a drill, a hammer, a measuring tape, and of course, the wood pieces of your choosing. Finally, you’ll need wood glue, screws and nails to put it all together.
When it comes to the actual steps of making a coffee table, first measure and mark off exactly what size and shape you’d like your table to be. Once that’s done, use the jigsaw or circular saw to cut the pieces of wood to your desired shape. Once that is complete, you can begin the assembly process
Using the wood glue, attach the wood pieces together. Be sure to glue on opposite sides, with added support in the middle. Also, make sure the surface of the wood pieces is flat. After the glue is dry, use the screws and nails to add additional stability. Now you have the basic frame of your coffee table.
To finish it off, you’ll need to sand the entire frame and then stain. Choose the color you believe will best suit the décor of your living room and apply the (natural or oil-based) stain. Once that’s done and the stain is dry, you’re ready to show off your beautiful new woodworking project to everyone. Your friends and family will be impressed, and you’ll be proud of the breathtaking piece of furniture you’ve created.
Materials Needed
Ah, the coffee table. One of the most beautiful, classic, and highly sought-after woodworking projects of all time. A coffee table has graced many a home over the years, whether it’s as an elegant centerpiece for conversation, for holding a prized plant, or for simply shoving your feet on after a long day. Crafting your own is an great way to make a statement, not to mention you get to choose the materials, shape and size to your personal tastes.
To make your own coffee table, you can gather up a few simple materials. Of course, wood is the main choice here, but you could choose any sort of sturdy material you’d like. Plywood is a great option, but you could opt for something unusual like metal or even glass if you prefer. You’ll also need some screws, nails, drill, saw, and sandpaper, as well as some glue and sealant to make your table look pristine. And lastly, you’ll need something to give your table that personalised touch. A personalised engraving or carving, some interesting paintwork, or something extra special from the craft store is all you need to give your coffee table an extra special touch.
Now that you’ve got the materials you need for your coffee table, you’re ready to move on to the next steps! Keep reading to learn what you’ll need to do to create your very own beautiful, personalised coffee table.
Steps
One of the most beautiful woodworking projects of all time is a beautiful coffee table. This is an easy project that even the most novice of carpenters can handle. Here are the steps to get you started on this instant classic:
First, there’s the materials. You’ll need some wood, preferably 2″ thick and 4′ tall, cut into 4 equal pieces. Some screws and nails, a drill and an eye-opening sandpaper will also do you wonders.
Second, assemble the pieces. Take the two bottom pieces, attach them a foot away from each other, and then secure with screws. Do the same with the top pieces. Use the drill to pre-punch the nails.
Third, add the legs. These can be cut if need be, but each set of four should be the same height. Secure each one with screws and nails, lining them up at the corner of the frame.
Fourth, the fun part – sanding. Make sure the wood is completely smooth. After it’s all said and done, you should have an elegant, rustic looking coffee table that you can proudly display to all your friends and family. They won’t be able to get enough of it!
And there you have it, the fourth most beautiful woodworking project of all time. Now go out and show the world just how talented you are!
Hall Bench

We love the look of the Hall Bench, and of course, since it’s me speaking, we love the idea of having a special place to crash after a hard day of woodworking! The Hall Bench provides a functional yet aesthetically pleasing piece for any home decor.
To build the perfect Hall Bench, you’ll need the following materials: a saw, drill, jig, bolts, screws and nails, sandpaper, and an assortment of wood—depending on the size and desired style.
Once you’ve gathered all your materials, it’s time to start building! Begin by sawing the back legs and support braces for the bench. Afterwards, attach the legs to the back supports and create the seat. To finish off the bench, screw in or nail in the final support on the seat and shape the arm and leg rest of the bench if necessary.
Finally, sand down the bench to make it smooth and give it a final touch. Now you can enjoy the beauty of your newly constructed Hall Bench!
Don’t forget to finish it off with a coat of sealant or stain of your choice to bring out the best in it. You can even add some woodworking accents like paints, or patterns to make it unique! Whether it’s for lounging or just for additional seating, a Hall Bench is a great piece of furniture for any home. With a little bit of time, effort, and some patience, you’ll have your very own Hall Bench in no time!
Materials Needed
The materials needed for your hall bench project are gonna sound like something out of a silly story narrated by Pops himself. You’ll need a saw, hammer, drill and screws, all of which might as well have been made by pixies (but of course they weren’t). And if you are going to be doing this project on the weekend, you’ll also need a bit of motivation.
You need wood! A LOT of wood! Preferably hardwood of the good quality variety, because you will be using it for all kinds of practical reasons such as durability and comfort. You’ll need tools too, such as a measuring tape, a jigsaw, level, sandpaper, and extra miscellaneous items such as a saw blade, nuts and bolts.
Finally, you’ll need some wood finish. You’ll know when you’ve got all the materials together since your hands and workbench will be packed to the brim!
Steps
When it comes to making a hall bench, it certainly ain’t no small feat. You’re gonna need a whole lot of tools, a whole lot of skill, and a whole lot of patience! But don’t worry, once you’re finished, you’ll have the most beautiful hall bench the world has ever seen and you’ll have definitely earned a few bragging rights.
Step 1: Start off by cutting the lumber you’ve picked for your hall bench. This includes your back and seat frames as well as the decorative side accents. Make sure to take precise measurements before cutting, as any mistake here can be a disaster for the rest of the project.
Step 2: Now that you’ve got your wood ready, use wood glue to attach the side accents to the back of the bench. Once this is done, use the nails with a hammer to make everything nice and tight.
Step 3: Now it’s time to prepare the seat. If you’re going for comfort, you’ll want to use some thick, high-density foam to make the seat. You can also use some batting as well if you want a softer finish. After tracing and cutting your foam to size, attach it to the seat and cover it with a fabric of your choice. Secure it with staples from a stapler along the edges.
Step 4: Move onto the back of the bench. To add an extra layer of support and aesthetics, choose something like corbels for the top. If you want to add a nice, decorative touch, you can also use some decorative moulding here and there. To help the back look smoother and uniform, sand it all down.
Step 5: Add in the finishing touches. This can include a beautiful stain or paint, some hinges and handles if you want to make the bench look even fancier, and some nice cushions and a throw at the very least. And voilà, you’ve got yourself your very own beautiful, one-of-a-kind hall bench! That’s a job well done!
Dining Table
Woodworking isn’t just about building a chair or a bed; it’s more than that. It’s about creating a piece of furniture that is both beautiful and practical. This is why we are introducing the Dining Table and why it’s made it to the Top 10 Most Beautiful Woodworking Projects of All Time.
Creating a dining table isn’t for the faint of heart, but with the right materials and steps, you can create a stunning piece sure to be a conversation starter. To start, you’ll need a circular saw, hammer and nails, screws, wood glue, measuring tape, chisels, skills saw, drill and drills bits, table saw, and clamps. You’ll also need wood panels, wood veneers, adhesive, wood edging, wood spray polish, a damp cloth, and sandpaper for extra brightness!
Now let’s get constructing! Start by cutting and measuring the panels with a saw, hammer, and nails. Your panels will form the skeleton and structure of the table. From there, attach your panels using screws and wood glue as you did with the panels. Give them some time to set.
Next, trim your wood pieces with the chisels so it doesn’t have any sharp edges. Also use the sandpaper to give the table a glossy finish. Put the wood edging along the edges and finish it off with wood veneers for even more design details.
Now for the fun part: embellishments! Attach the legs of your table, then spray it down with the wood spray polish. Once done, use a damp cloth to wipe it off and you have yourself a beautiful and unique dining table!
So there you have it, the process of crafting a gorgeous dining table! With just a few steps and some patience and time, you can create stunning furniture that adds both beauty and warmth to any room. It’s no wonder why this craft is making it to the top of the list of most beautiful woodworking projects of all time.
Materials Needed
Ah, the materials you will need to construct the majestic dining table. Let’s start with the wood you need. You’ll need four pieces of pine, cut to the following dimensions: 2 at 48” by 24” and 2 at 24” by 24”. You’ll also need a couple of two-by-fours, cut to the following length: 2 at 48” and 2 at 24”.
But wait, there’s more! You’re gonna need an orbital sander and some sandpaper to smooth down the rough edges. Plus, you’ll need some clamps and a drill to really get those pieces secured. You’ll also need a pocket hole jig for some precision drilling, and some wood glue to really adhere the pieces.
Finally, you’ll need some finishing touches. You’ll need a miter saw to cut the corners of the table top and base with precision, as well as a box of screws to keep everything held together. Finally, you’ll need some wood stain and varnish to give the table its beautiful finish.
Now you got all the materials you need to construct the very beautiful wooden dining table! Here’s to many more dinners around the table!
Steps
Taking on a dining table as your next project can sure be a challenge. Here I’ll walk you through the steps to easily create a beautiful dining table that is sure to be the envy of everyone who steps foot in your home.
First, gather all of your materials and tools. A saw and a drill are going to be your best friends here. Along with these, you’ll need wood stain, wood glue, clamps, wood screws, a saw guide, and wood boards of various sizes. To get the best possible results, choose the wood boards that are straight and true.
Using the saw guide, cut the wood boards to the desired length. Once you’ve got all of the pieces ready, take the time to sand them down to the desired smoothness and finish. You’ll want to use a progressively higher grit of sandpaper, starting with a lower number until you reach the desired level of smoothness.
Once your boards are sanded and ready, it’s time to start assembling them. Using the drill, predrill and countersink your screws. Screw the four sides together and make sure all the boards are flush. Attach the top pieces to the sides, predrilling and countersinking the screws as before.
Once you have the table assembled, take some wood glue and place it inside each of the corners. Place a clamp on each corner to hold the table together while the glue dries. Add a couple extra clamps around the center of the table just in case.
Once the glue has dried, use your saw to trim any overhanging edges. Using the same “incremental” sandpaper technique, sand the edges until they are smooth.
Once everything is smooth and level, it’s time to stain and finish your beautiful dining table. Choose a stain and finish that suits your needs. Using a brush or rag, apply a generous coat of the stain. Then, once the stain is dry, finish it off with a protective sealant.
And there you have it, your very own beautiful and functional dining table! It has been said that the best projects are crafted with care, and your dining table is a testament to that saying. Enjoy the compliments that your new dining table is sure to get!
Bar Stool
When it comes to woodworking and beautiful projects, nothing is as classic as a bar stool. A bar stool is a staple in any home’s seating arrangement, and a sturdy, stylish, and comfortable one can be perfect for both a kitchen counter setting or a bar area.
When you’re designing your Bar Stool, you’ll need the right building materials. You’ll need some sturdy wood, some quality nails and screws, and some comfortable upholstery if you want it to be comfortable.
As for the steps for creating a Bar Stool, once you’ve got your materials you’ll want to start by constructing the seating frame. Measure out a pair of legs for your stool, and attach the legs to the seat. You can either connect them with strong wood screws or with specialized finish nails.
Next, attach the backrest if your barstool is going to have one. Secure the backrest by attaching the wooden frame to the legs with wood screws. Finish the job by upholstering the seat, stapling and gluing it down with an interior fabric glue. Measure twice and make sure the upholstery fits tightly, and your bar stool is ready use!
You can make your Bar Stool even more special by adding ornamental scrollwork or some delicate carving to the legs. These elements add a special touch and can help your barstool stand out from the crowd.
And, voila! Those are the easy steps to creating a great looking and comfortable barstool, the perfect addition to any home and bar area. Enjoy the comfort and beauty you’ve created, and don’t forget to top it off with some signature drinks for the perfect beverage experience. Now that’s a great evening!
Materials Needed
Okay folks, so when it comes to making a stylish bar stool you’re gonna need some pretty easy to get materials. You’ll want to grab a big saw, some paint, and then a jigsaw or some kind of saw depending on whatever design you come up with.
Some of the materials you’ll need include 1/2” and ¾” plywood in various sizes, wood glue, wood screws, wood dowels, and a drill. Additionally, you may need some sandpaper, wood filler, and a cardboard template.
To be sure, this isn’t a project about buying stuff, it’s about making your own beautiful, creative piece of furniture that you can show off to your friends. The satisfaction of building something with your own two hands is hard to beat.
You probably already have some of these items around the house, but if you don’t, these materials are all easy to find in hardware and craft stores. A few trips to your local stores, some measuring, and likely a few experiments should have you good to go in no time. Just remember that the better the quality of materials, the better the outcome of your finished work will be.
So that’s it! An easy to follow list of materials needed to make your own beautiful bar stool and get a project that you can be proud of – which, after all, is what woodworking is all about! Go get to work, and be proud of your accomplishments.
Steps
If you’re looking to make a bar stool with a bit of flavor, then this one is for you. Building a bar stool begins by cutting the wood of your choice into the desired shape. Depending on the design, this may require a good deal of precision.
Next, it’s all about putting the pieces together. Chisels, glue, dowels, screws and nails are all common tools you’ll be needing to put together this piece.
Finally, sand it until all your pieces are smooth, and finish it off with stain and a polyurethane. Now your bar stool is ready to be placed in the kitchen, or wherever you need it most! And you know what that means. Happy woodworking!
Blanket Box
Ah, the Blanket Box. Don’t let this deceptively easy-looking project fool you – it requires a bit of patience and careful planning. That being said, it’s not a difficult project, and with a bit of instruction, it’ll be the perfect edition to any home.
The Materials Needed for this project include a chisel, saw, a drill, wood glue, wood pins, wood screws, wood clamps, wood blades, sandpaper and a piece of wood (preferably pine) that is an inch thick.
Now, let’s get started. First, you’ll need to cut the wood using the saw to the desired size of the box you’d like to create. Once you’ve got the wood cut down, drill small holes in each corner. This is where the wood screws will go to keep the box together.
Next, use the chisel to carve out handles on either side of the box. This will make it easier to move the box when it’s filled with blankets. Once the handles are carved out, use the glue to secure them in place.
Now, it’s time to shape the box. Start by making lines and angles that will create the sides of the box. Once you’ve done that, use the saw to cut the side panels. When you’ve finished, be sure to sand down any rough edges and use the wood pins to secure the panels in place.
Finally, it’s time to add the lid to the box. Measure the top of the box and cut a piece of wood that is slightly larger than the opening. Once you’ve cut the wood, use the wood clamps to secure it in place and finish the project off with a bit of sandpaper.
And there you have it – a Blanket Box. This project may take some time and a good set of instructions, but the end result is a beautiful piece of woodworking art.
Materials Needed
Ahhh, the infamous Blanket Box! For this woodworking project, you’ll need a couple of things if you plan on crafting it successfully.
First off, you’ll need a good saw. I’m talking a saw with a 120-volt motor and at least a 10-inch blade. This should do the trick when it comes to cutting through that hardwood.
You’ll also need a drill, some clamps and a chisel, because you can’t make a clean cut without them. Plus, some glue and screws to hold that thing together too! Oh, and also don’t forget a protective eye mask and some ear protection. Without them, woodworking is gonna be a lot less fun.
Lastly, if you plan on staining the wood or making any special design, then it would be wise to grab some sandpaper, stain and finish. It’s all these little details that bring that Blanket Box to life. So, don’t skimp out!
Alrighty, now that you got the tools and materials, you can finally start making that Blanket Box. Good luck!
Steps
Making your blanket box is easy! All you need is the right materials, some patience, and we guarantee you’ll be rushing to make all the boxes you can get your hands on, just like yours truly here.
First off, you’ll need to gather your materials. You’ll need screws, nails, wood glue, a saw to cut the wood, and pieces of wood that are the same thickness and length.
Once you’ve gathered your materials and set up your work area, start cutting the pieces of wood to the exact sizes that you need. Make sure your measurements are accurate and double check them if needed!
Now, break out those nails, grab your hammer and start nailing the sides of the box together. Make sure each nail goes in as straight as possible – or it won’t hold up!
Once the sides are joined up, its time to glue the bottom of the box in place. Apply the wood glue, press the bottom in place and let it dry, then voila – beautiful!
Congratulations! You’ve now made your very own blanket box. Now you can fill it up with blankets, toys, whatever you want – the possibilities are limitless!
And of course, don’t forget to show off your work. We’re sure your friends and family would love to see it, so don’t be shy. Let them know how talented you are and share your project with the world.
So there you have it – the simple steps of creating a beautiful blanket box. Now don’t waste another minute – get out there and start building!
Outdoor Chair
Ah, the great outdoors! Nothing beats good old nature, the fresh air, feeling the sun on your skin, and of course the amazing woodworking projects that come with it! And what better way to spruce up your patio or deck this summer than a fabulous outdoor chair? Believe it or not, the design of this project is simpler than it looks and with the right materials, tools and steps you’ll be able to master it like a woodworking pro!
Let’s start by gathering the materials needed to build your own fabulous outdoor chair. Depending on the type of wood and style of finishes you decide to go with, the materials may vary, but here’s the basic list:
- WOOD: You can find a wide variety of outdoor-friendly boards with different grains, widths, and colors at any local home improvement store.
- SIZE: Cut the boards for the back, seat, and legs according to the plans you will use for the chair.
- FASTENERS: You’ll need duct tape, bolts and screws suitable for outdoor use, to join the components of the chair.
- WIRE BRUSH: To give the wood an aged and rustic look, you can use a wire brush.
- SAND PAPER: A few sheets of medium-grit sandpaper will help you achieve a smoother finish.
- ALTERNATE FINISHES: If desired, you can also apply wood stains, sealants and other type of finishes to the wood.
Once you have all the materials ready, the next step is to start assembling the chair. For this project, the tools you’ll need are:
- POWER DRILL: To make holes and secure the different components of the chair.
- SAWS: To make sure all the pieces are cut to size.
- HAMMER: To drive the nails.
- CLAMPS: To make sure the pieces stay in place while you’re putting them together.
Start by carefully measuring and cutting the boards that will make up the back and legs of the chair. Attach the seat to the top of the legs with the screws and bolts and leave the back to attach last. Lastly, once all the pieces are in place, you can use a wire brush to give it an aged and rustic look, and apply any other type of finishes if desired.
That’s it! Your own outdoor chair is now ready to enjoy a sunny summer afternoon with friends, family and your favorite beverage. So, what are you waiting for? Get your tools and materials ready and start building!
Materials Needed
If you’re looking to create something really lovely out of wood, you might want to check out this awesome outdoor chair project. Before you get started, you’ll need to assemble the following materials: wood, sandpaper, wood glue, wood screws, wood filler, paint, and sealer.
Now, for the wood, you can go with whatever you like, but I prefer oak or walnut. Of course, if you want to go ahead and step up your game a bit, you can use exotic wood like mahogany or maple. It’s all up to you.
You’ll also need some sandpaper for smoothing the surfaces and edges of your wood. The stack of sandpapers should range from extra-fine to coarse, to get the best results.
The wood glue will come in handy when you start gluing pieces of the chair together. I recommend a good quality waterproof glue, as it will make sure your chair is water resistant.
The wood screws and the wood filler are both needed to make sure you have the strongest bond between pieces of wood. These two items will help make sure there are no gaps and that the chair is secure.
After you have all your pieces put together, it’s time to paint it! Choose some colors that will match the outside of your home, or, go wild and choose whatever colors you want.
After the paint is dry, use a sealer to make your chair-building project water and scratch resistant.
And there you have it, all the materials you need to create the perfectly stunning outdoor chair. Now that you know what you need, all you have to do is get started! So what are you waiting for? Let’s get to work!
Steps
Okay, so you have your materials and you’re ready to get to work on your Outdoor Chair! It’s going to be a thing of beauty when you’re done, I can just tell already. Now let’s get started.
Step 1: Start by cutting the pieces of wood to size. You’ll be building an A-frame structure, so you’ll need five pieces of wood to make the A-frame, as well as four pieces of wood for the seat.
Step 2: Now you’ll need to assemble the A-frame. Measure, mark, and drill pilot holes in the wood before screwing them together. This will make sure your chair is nice and sturdy.
Step 3: Once your A-frame is done, you’ll need to build the seat. Take four pieces of your chosen wood and screw them together at the corners. Make sure you use screws that are long enough to go through both pieces of wood!
Step 4: Attach the seat to the A-frame. You can either use screws or nails to hold the seat in place. Make sure you place the screws with the appropriate amount of space between them.
Step 5: Now it’s time to finish off your outdoor chair! Sand the wood and give it a few coats of primer. If you want, you can even paint your outdoor chair in any color you like.
Step 6: Now that you’ve finished building your outdoor chair, it’s time to put it to use! Grab a few cushions and your outdoor chair will be good to go.
Voila! And just like that you’ve created a beautiful outdoor chair. It may have taken you a bit of time and effort, but now you have a piece of art you can take pride in every time you look at it.
Media Cabinet
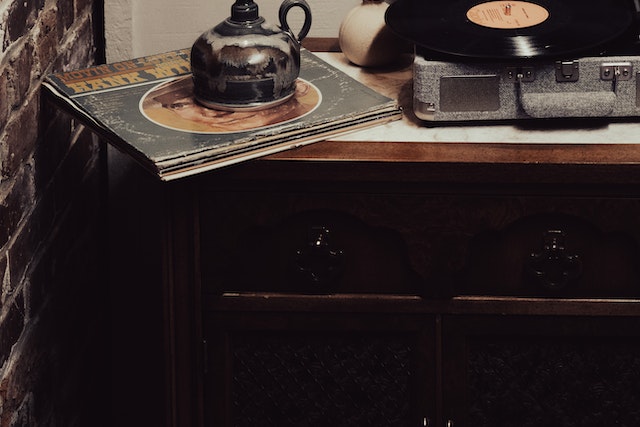
Ah, the media cabinet! This woodworking project has been around for ages and it remains one of the most beloved around. There are so many styles and designs you can choose from, each with their own unique set of qualities.
So if you’re looking for a piece of furniture that will turn heads, then a media cabinet would be your best bet. And it’s not that hard to make, plus you can customize it to fit any room of your home.
So what do you need to make a media cabinet? Well, the materials you require depends on the type of cabinet you decide to make. Typically, you’ll need an assortment of woods such as oak, mahogany, cherry and walnut. You might also need screws, glue, hinges, and drawer pulls.
Now onto the steps. Building the frame of the cabinet is the most important part of the project. Start by measuring the width and length of the wall space in your living room and decide how big you want the media cabinet to be. Use this measurement to cut the plywood to size, keeping in mind that the sides should be longer than the center.
Next, you’ll sand down the wood and fit together the pieces. To assemble the cabinet, drill pilot holes for the screws and screw them together. After that, you can attach the doors, drawers and handles.
Finally, you’ll want to finish the cabinet. You can either paint it or use wood stain for a classic look. You could also add some shelves inside the cabinet or utilize thin, space-saving wire storage baskets.
And that’s it! Media cabinets can add a functional touch to any room and they’re a great way to store DVDs, video games, remotes, and more. So why not try your hand at making your own and create a one-of-a-kind project that you and your family can enjoy for years to come?
Materials Needed
Here it is folks, your chance to create the most beautiful woodworking project out there and join the famed ranks of the ‘Top 10 Most Beautiful Woodworking Projects of All Time’. But before you get too excited, you’ll need the right materials or things could get ugly quick! So here’s what you need to get your own masterpiece off the ground:
For the epic tenth project of the list, the media cabinet, you won’t be able to put it together with just a stapler and some Elmer’s glue. Grab yourself some wood glue, wood screws, jigsaw, drill, orbital sander, hammer, finished nails, tape measure, sandpaper, finishing oil, clamps, and some wood of your choice.
If you’re not already aware, wood is incredibly versatile and can come in all sorts of colors, densities, and textures. So if you want to make a statement, you’ll want to make sure you pick something dramatic and your inner wood expert will thank you. Once you have a good idea of the type of wood you’re using, you’ll want to include enough to give your media cabinet some substantial weight and height so that it can support the other parts that come later.
For the drawers, some paints and finishes may be necessary depending on the type of wood you’ve chosen. Choose wisely and have fun! Also, don’t forget to factor in if you’ll be using any hardware such as hinges and pulls, in order to make the cabinet more attractive.
With the right expertise, tools, and materials, you’ll be well on your way to etching your name into woodworking history. Good luck!
Steps
If you thought gathering the materials was difficult, wait until you dive into all the steps to build this fancy media cabinet. First, you’ll need to decide on the measurements and cut the wood accordingly. While you measure, make sure the cushions fit in the cabinet with ease. Then set the stiles and rails with the drill. Next, attach the two rails and the two stiles together for the framework of the sides. Keep the back flush with the stiles and the rails to keep it smooth and level.
To ensure the cabinet stays standing, insert dowels into the front and back of every joint and glue them together. You also need to glue, pin and screw the panels of the shelves. Now setting up the drawers is important. Make sure to use the right type of wood so they can hold the weight of all your gadgets, DVDs, and whatever else you choose to fill it with. As an extra precaution, you may also have to add an extra locking mechanism.
From there, you can begin working on the actual cabinet itself by attaching all the four sides together. Once everything is flush, add the top piece, to finish off the whole media cabinet. Be sure the top is properly aligned so it can handle whatever switches, remotes and other items you might need easy access to.
Next comes the fun part. You can finish off the media cabinet in any way you want. You can drill in some furniture locks, or carve out some cool designs. You also have the option to stain, paint or just varnish the woodwork. Whatever you choose, walk away with pride knowing you have created one of the top 10 most beautiful woodworking projects of all time!