How To Create A Beautiful Wood Bent Lamination For Your Furniture
Bent laminations are a beautiful and unique way to add curved elements to your furniture and woodworking projects. By layering thin strips of wood and bending them into shape, you can create elegant curves and shapes that would be difficult or impossible to achieve with traditional woodworking techniques.
In this article, we’ll share step-by-step instructions on how to create a beautiful wood bent lamination for your furniture. We’ll cover everything you need to know, from selecting the right wood species and thickness, to preparing the wood strips, bending them into shape, and gluing them together. Whether you’re a beginner or an experienced woodworker, this guide will help you add a stunning and unique touch to your furniture and woodworking projects.
So, let’s dive into the world of wood bent laminations and discover how to create a beautiful curved masterpiece for your next project!
What is a Wood Bent Lamination?
Ahoy mateys, you’ve stumbled upon quite a conundrum. That’s why you’re here, to learn all about wood bent laminations. Now, what is a wood bent lamination? Great question!
It’s like getting a bunch of pieces of wood, some thin, some thick and some of different shapes. Maybe you’ve got a few sticks that resemble an animal bone, and some pieces that look like they could be the skeleton of an old tree! Then, you cut and glue them together to make a beautiful, curved shape.
A wood bent lamination is a traditional method of creating wooden shapes, furniture or sculptures that can be made with fewer pieces than if you were to build each piece separately. You get the best of both worlds with this technique: a beautiful, intricate shape with fewer parts.
The history of this technique goes way back. Several techniques have been developed over the centuries, from the ancient Chinese technique of lamination to the more modern practice of applying thin layers of veneer to a core material.
Today, the most common type of wood bent lamination is veneered, which consists of small, thin sheets of wood that have been glued together and bent around a core to create a strong and durable shape.
The beauty of a wood bent lamination is that you can play with the colors, shapes and textures of the wood. Using different types of wood allows you to create something truly unique. You could use the same piece of wood over and over again, or combine different types of wood to get something completely different.
The end result of a wood bent lamination is something that is both functional and aesthetically pleasing. You can use it to create all kinds of furniture, sculptures and artistic works.
So there you have it, that’s a brief overview of what a wood bent lamination is. Now that you know about the technique, why not try it yourself and make something beautiful?
History and Origin of Wood Bent Laminations
If you’re itching to make a beautiful wood bent lamination for your furniture, you’ve got to understand the origins of this craft to really appreciate it. Believe it or not, wood bending is not something new, it’s been around since ancient times.
Did you know that wood bending was used by the ancient Egyptians? Yes, they used it to make chariots, chairs and tables. But since then, wood bending has evolved. It was used by the Chinese to build furniture in the Han Dynasty. They also used to shape wood boat hulls during that time period.
In medieval times, wood bending was used to make a wide variety of items, such as chairs, bed frames, and carriages. It was also the preferred technique for making curved arches for roofs and other architectural features. During the 19th century, steam-bending became a popular method of bending wood, which allowed for more intricate shapes to be created.
Wood-bending has also been used in the manufacturing of musical instruments, such as violins, mandolins, and guitars. Without the accurate gluing and clamping of the bent pieces, these instruments would not be able to produce their wide variety of sounds. That same principle applies to making furniture as well.
In the 20th century, wood-bending gained more popularity due to the resurgence of the Arts & Crafts movement. This revived interest in creating beautiful objects with the natural properties of wood gave rise to the example of wood bent laminations we see in furniture today.
The process of making a wood bent lamination is truly amazing. It’s no wonder it’s been around since ancient times. From the Egyptians to the Chinese, the medieval times to the Arts & Crafts movement, wood bent lamination has been around and is still being used today. Now, let’s get to making that beautiful wood bent lamination for your furniture!
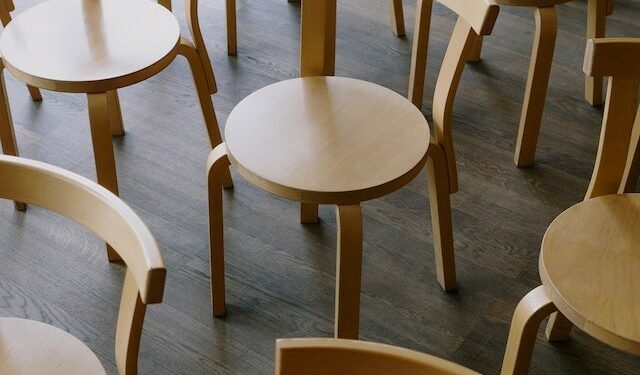
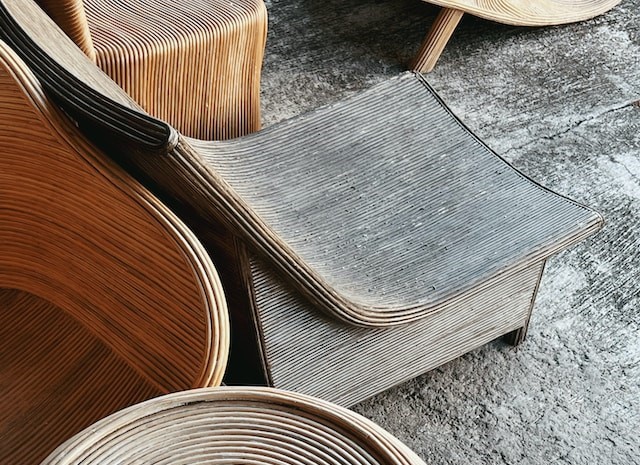
What Does a Wood Bent Lamination Look Like?
Do you know why wooden bent laminations have been around so long? It’s because they look like something out of a fairytale! I mean, just picture it – a curved wooden panel with a glossy sheen and texture like a magical dream.
This is exactly what a wood bent laminate is – a gorgeous curved wooden panel that’s created by glueing thin layers of wood pieces together. It’s like a beautiful mosaic puzzle with each thin strip of wood fitted together like a magical jigsaw. The wood you choose for the project is entirely up to you for its color, texture, and look. That’s why you always end up with a unique and mesmerizing aesthetics.
If you love smooth curves or large curled up features, wood bent lamination is your best bet. It can add a unique appeal to your furniture while making sure it looks modern and stylish. And the best thing is, you don’t have to settle for one type of wood. You can mix and match different thin layers of wood to create a subtle spectrum of beautiful colors. Or you can combine different types of wood for a bold statement.
Wood bent lamination doesn’t just look amazing but also has great strength. The thin layers of wood are incredibly durable and can withstand pressure or wear and tear. So it’s perfect for tables, chairs, or anything that your family might use. Its robustness makes it ideal for a lifetime of durable use without fail.
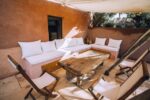
Just imagine looking at a beautiful bent laminate on a piece of furniture in your living room. Everyone in your house will be mesmerized by its beauty and practicality. They won’t be able to resist the temptation of getting their hands on something so beautiful.
If you’re looking for something unique and beautiful, wood bent lamination is the way to go. Whether you want a subtle look or an eye-catching feature, this bent laminate will help you make it happen. Just make sure you follow the right steps and you’ll end up with a masterpiece worthy of any fairytale!
What do You Need for a Wood Bent Lamination?

Hey y’all! Making a beautiful wood bent lamination starts with the right stuff! So before you get started, you need to know the right tools and materials so you don’t waste your precious time.
Let’s start with the materials. Depending on the project, you might need 4-8 pieces of bent lamination wood such as cherry, poplar, or walnut. Generally, each piece should be about 3 centimeters thick and 20 centimeters wide. You’ll also need about 8 clamps – these be the heavy-duty alligator clamps – and some strong, waterproof wood glue.
Now, when it comes to tools, you gonna want a jigsaw, sander, rasp, and chisel. You’ll also need a rubber mallet, a drill and drill bits, and some sandpaper (make sure it’s 100 or 120 grit – anything higher won’t do!). Finally, you’re gonna need a few unusual tools like a forming press, scrapers, and a heat gun.
And that’s it! When it comes to making woodbent laminations, these are the essential tools and materials you’re gonna need to get the job done.
Materials
When talking about materials that you need to create a beautiful wood bent lamination, the only limit is your imagination. Any kind of wood can be used to achieve a unique and beautiful look. However, if you are looking for the most common type of wood used in wood bent laminations, then Poplar, Walnut, and Oak are probably the most typical choices.
Apart from wood, you will also need glue. Some people might choose a traditional wood glue, but there are also modern alternatives such as epoxy. Think about your project and select the glue that best suits what you are trying to accomplish.
Necessary tools for a wood bent lamination include a saw, drill, router bits, sander, clamps, chisel and a scraper. You will also need a way to steam the wood to help it from bending. If you plan to steam-bend the wood lamination, then you will need some sort of steamer, either a domestic one or a professional one.
Finally, you will need some kind of finish for the lamination. This can either be a polyurethane sealer or a stain. The choice really depends on what kind of look you are trying to achieve. If you are going for a classic look such as an oak finish, then a poly or a wax finish might be best. However, if you want a more modern look, then a stain might give your lamination the perfect look.
Overall, the materials you will need to do a wood bent lamination can vary based on your preferences and the type of look you are trying to achieve. However, with a bit of creativity and the right research, you will be able to create the perfect wood bent lamination to match the furniture you have in mind.
Tools
If you’re serious about creating a wood bent lamination for your furniture, you’ll need the right tools. Let me tell you, folks, it ain’t gonna done with your bare hands. Here’s the list of tools that you should have ready:
First, you’ll need a solid workbench. It doesn’t have to be a fancy one – just sturdy. You don’t want it wobbling as you’re sawing away.
Second, you’ll also need a good saw – preferably a miter saw. Sure, you could get by with a hand saw, but a miter saw will save you a huge amount of time and give you more precision. So, invest in one if you can.
Next up, you’ll need a hammer. Keep it handy for tight lamination joints. A rubber mallet is also good to have on hand for when you don’t want to damage the wood – when you’re hammering things together, but softly.
Last but not least, you’ll need a roller or rolling pin. Not the kind that you roll dough with, I’m talking about a special woodworking one. It’ll help you keep a nice even pressure as you roll the laminated piece together.
There you have it! Now you know the tools needed for wood bent lamination – and sure, you could do without most of ’em, but it’ll be much faster and smoother if you have them. So, invest in the right tools – you’ll thank yourself later! And the best part is, you can use them for future woodworking projects too.
How to Do a Wood Bent Lamination

Let’s get down to the nitty gritty of creating a beautiful wood bent lamination for your furniture! We all know it’s a daunting task, so don’t worry – I’m here to provide my expertise and help you out. Here are the steps you need to take to execute a successful wood bent lamination.
Step 1: Prepare the Work Area: The first step is setting up your work environment so you can build your wood bent lamination properly. Make sure there’s room to power your tools, a sturdy workbench to keep pieces from moving, and anywhere to store your supplies. Once your area is set up, you can begin your project.
Step 2: Cut the Pieces: The next step is to cut the pieces to your desired lengths and shapes. You can use a hand or a power saw and make sure you use a belt sander to smooth out any rough edges.
Step 3: Bend the Pieces: Now that you have the pieces cut to size, it’s time to start bending the pieces. Depending on the thickness of your materials, you can use a heat gun, hair usern, or heat form press to help the pieces bend efficiently.
Step 4: Glue the Pieces Together: After the pieces are cut and bent, you can now glue them together. You can use either a hot glue gun, epoxy, or wood glue for this step. Be sure to read the instructions for the particular glue you use as it varies from one to another.
Step 5: Cut Out the Final Laminations: After the pieces have been glued together, you have to cut out the final laminations. You can use a coping saw to cut out the shape of the lamination, or you can use a jigsaw to make cuts more precise.
Step 6: Attaching the Lamination to the Furniture: The last step is attaching your lamination to the furniture. You can use a variety of adhesives for this step, such as hot glue, epoxy, or wood glue. Make sure to read the instructions for the particular adhesive you use and apply it according to the manufacturer’s instructions.
And there you have it – a beautiful wood bent lamination for your furniture! Follow these six steps and you’ll be sure to have a stunning addition to your furniture. I hope this article was helpful, and I wish you the best of luck in your wood bent lamination project. Happy laminating!
Prepare the Work Area
Welcome! you are one step closer to creating a beautiful wood bent lamination for your furniture! Before you can start with this fun and creative process, you need to make sure that you have your work area prepared and ready to work in.
It’s time to open up your dad’s garage, or find your own working space. You will need a surface to work on and make sure it is free of any dirt or debris. You don’t want small objects getting in the way while you are crafting.
Once your workspace is set up, it’s time to gather your materials. Make sure you have all the supplies you need including your wooden materials, saw, clamps and any other tools you need to complete the job. It’s always a great idea to have some extra materials if you make a mistake.
Now it’s time for the next step, cutting your pieces. But before you get to cutting, you want to make sure the pieces line up just right and that you have enough materials for the job. Make sure you have the exact measurements you need, then start cutting the pieces.
Finally, it’s time to start the fun part. Now that your workspace is ready, your pieces are cut and your materials are gathered, get your wood bent lamination to a few friends and start the process of creating a beautiful wood bent lamination for your furniture.
Cut the Pieces
Alright, now that we have all the materials and tools, let’s get to the next step: cutting the pieces. Now, this part of the wood bent lamination process can take some time and won’t be very exciting, so I suggest you put on your favorite album while you work.
I usually use a band saw to cut the pieces, which is faster than a jigsaw. But if you don’t have a band saw, the jigsaw should do just fine. And if you don’t have either, you can always just use a handsaw.
For this step, you want to make sure you measure the pieces accurately, and make sure all the cuts are perfectly straight. Now, if you’re using a band saw to cut the pieces, you can eyeball it, but it’s still a good idea to double-check each piece with a ruler. If you’re using a jigsaw or a handsaw, you want to make sure you use a square to keep the cuts straight.
Once you’ve cut all the pieces to size, it’s time to move on to the next step: bending the pieces. This can be tricky, so be sure to take your time and measure twice before cutting once. If you make a mistake here, it could ruin all your hard work. Good luck!
Bend the Pieces
Hey, all you woodworking guru’s listen up! It’s time to get ready to get your bend on and make that furniture curvaceous and eye-catching. Step 3: Bending the pieces is a crucial step, you certainly don’t want any faux pas while constructing your dream lamination.
Now, depending on the type of wood you have, you should think about heating the wood before you bend it. You can use a blow dryer, or other type of hair dryer, or a steam generator. If you heat the wood up with one of those before you bend it, the wood will be a lot more pliable and you’ll have no issues.
Also, when you’re ready to bend the pieces, you may want to invest in some bending jigs. This is a great way to ensure that your curves are consistent and that your wood bent lamination looks nice and uniform. You can also make use of a pipe clamp, threaded rods, and straps from a mental hardware store to bend the wood in the way that you need it to be.
Once you get to the point where the wood is ready to go, you can put a block of wood underneath the bend and use a small clamp to hold it in place. If the wood isn’t totally flexible yet, you can use a rubber mallet to help get the curves in place.
And that’s it! With that, you should have your pieces bent in the right way and be ready to move on to Step 4: Glue the Pieces Together. No matter what, remember to be patient and as steady as you can, don’t rush the process, it’ll all come together soon! Godspeed!
Glue the Pieces Together
Now we come to the fun part! This part’s pretty simple, all you need to do is glue the pieces together. You’ll want to make sure the wood pieces fit snugly together, so you can get a strong hold when everything is set.
Once everything is set and positioned, grab your glue and get to gluing. Use a slow-setting epoxy to make sure the pieces are secure. Be sure to keep the glue away from the edges or joints of the bent lamination, as it will weaken the bond.
Start gluing the pieces together. Don’t put too much glue on it, just enough to ensure that the pieces stay in place. Try to apply even pressure as you press the pieces together. Wipe away any excess glue that might squeeze out as you go.
Allow the glue to dry completely before moving on to the next step. It’s very important to let the glue dry completely, otherwise your lamination won’t stay together.
And that’s it! You’ve successfully glued your pieces together, and you now have a beautiful bent lamination. Congratulations – you’ve come quite a long way. Now all that’s left to do is cut the lamination out and attach it to your furniture!
Cut Out the Final Laminations
Ah man, we’ve finally made it! We’ve done all the heavy lifting, the lamination is bent and glued together and looking real nice, right? Now it’s time to cut out the final laminations – the icing on the cake if you will.
Cutting out the final lamina takes a bit of skill and finesse, so practice and research on proper cutting technique is always a good idea. First, you’ll need to measure and mark out the lamination so that it fits your intended purpose. You can use a thick marker, a saw or a router, or even a combination of those tools.
If you’re using a saw, the wooden lamination will usually require a fine-toothed saw blade that cuts at a shallower angle than other types of blades. The idea is to follow the contour of the lamination as much as possible. Router or flush trimming bits should be used when adjusting the edges of the lamination. It’s also a good idea to practice a few cuts before you actually start cutting the final lamination.
Another important factor to consider when cutting out the final lamination is safety. Always wear safety glasses, gloves and a dust mask when cutting wood. Also, make sure the saw blade and router bit are sharp and that the tool you’re using is in good working order. Don’t forget to wear ear protection as well; sawing and routing can be very loud!
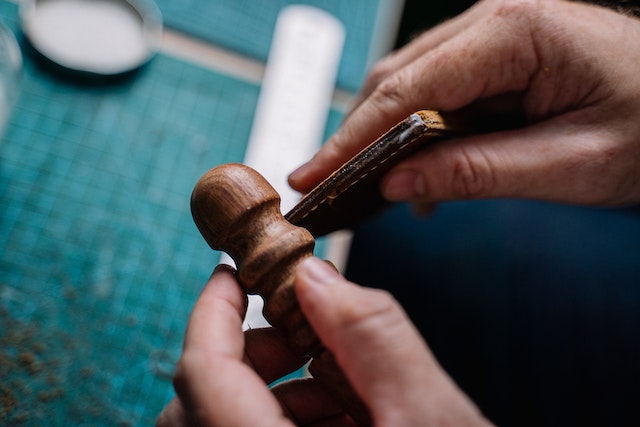
Once you’ve cut out the lamination, you’re almost done. It’s just a matter of sanding and finish the lamination to give it that beautiful and final look. Sanding is super important so don’t forget to do it. Happy sanding!
Attaching the Lamination to the Furniture
Well, if you’ve made it this far, you’ve done something right. Congratulations! Now comes the exciting part- attaching your beautiful lamination to furniture.
Before you dive in, there are a few things that can make this step easier. First, use a moisture meter before you start. This helps avoid problems down the road with warping.
Next, plan out exactly where the pieces of your lamination need to go. This will help you start in the right place, and avoid mistakes.
The lamination typically attaches to the frame, so you’ll need to measure the furniture frame pieces and cut the pieces of lamination to ensure a snug fit. Depending on the nature of the project, you’ll want to decide if you’ll use nails and/or screws to attach the lamination to the frame. For heavier furniture, you may want to use both for a secure fit.
If you’re using wood screws, you can pre-drill the holes and countersink them. If the project isn’t weight bearing, you can use small nails or finish nails. If you go this route, you’ll want to make sure the nails aren’t too long and breaking through the lamination.
Make sure to take your time when attaching the lamination. For example, if you’re using nails and a hammer, using some masking tape between the hammer and the lamination can help you avoid marks on the lamination that can be difficult to hide.
Once you have all the pieces attached, you can then add the finish of your choice. Whether it’s stain, paint, sealer, or something else- make sure to let the finish set before you begin to use the furniture piece.
That’s it, the lamination is attached and you can now enjoy the fruits of your labor!
That’s the power of wood bent lamination. A few easy steps and you can create something beautiful for your furniture that you will cherish for years to come.
What are you waiting for? Pick up your materials and get started now!