How To Create A Beautiful Wood Geometric Design For Your Wall
It’s time to get beautiful! Nothing classies up a wall like a custom geometric wood design. Whether you want to make it to match an existing decor or just because you think it looks cool, this project is a great way to bring something unique and stylish into your home.
But before you start creating, it’s important to gather the right materials so you can get your masterpiece finished quickly and have it look the best it can. Grab a measuring tape, some wood of your choice, sandpaper, a saw and sawhorse, and whatever stains or paints you might want to use. Today we’ll show you how to create a beautiful wood geometric design for your wall.
Now you can begin the construction on your geometric design. With your measuring tape, make sure you measure and mark the pieces accurately, depending on what dimensions you want your design to be. Using your saw and sawhorse, cut them to the desired size.
Once you have cut all your pieces, it’s time to sand and stain or paint them. Using your sandpaper, rough up the wood so that the stain can soak into the wood evenly. Start from the edges and smooth your way towards the center. When you’re satisfied with the results, start staining or painting depending on what you’re using. Make sure to keep things neat, so the end product looks nice and clean!
Now comes the exciting part—assembling the pieces! Start by connecting the pieces one at a time, following a pattern. You can even use some wood glue if needed. Once all the pieces have been attached, take a minute to make sure everything looks the way you want it to.
Finally, the last step is to hang your beautiful wood design on the wall. It’s important to use the correct hardware so you don’t damage your wall. After that, sit back and admire your handy work! That’s it – you’ve just created an amazing, stylish wood design for your wall.
Materials

What’re you gonna need to get this gorgeous wood geometric design on your wall? Well, I’m glad you asked! To start off, you’re going to need some wood. If you want to get fancy, get some plywood – it’ll give you the beautiful woodgrain pattern that you’re after. Get your measurements done first, then make the necessary cuts.
Next up – you’ll need to get some sandpaper. This part will require a bit of elbow grease, so don’t skimp out here. A higher grit works better for this project, but feel free to go as low as you’d like – it’ll just take longer.
Finally – you need a good quality wood stain in the color of your choice. Or better yet, mix your own! Of course, you’ll also need some cloths to apply the stain, as well as an oil-based polyurethane to get the perfect finish. Don’t skimp out on this one either, as it’ll make all the difference in the world when it comes to giving your design that perfect look.
And that’s it! Now you are ready to create your beautiful wood geometric design for your wall! So get out there and get to work! I’m really looking forward to seeing what kind of majestic masterpiece you come up with!
Measure & Cut the Wood
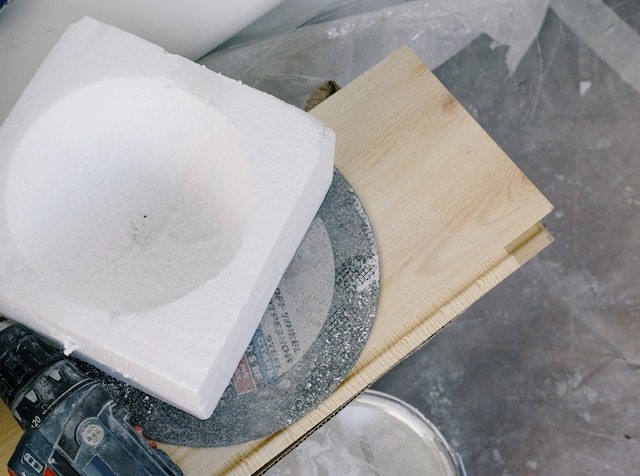
Let’s start off by gathering all the necessary supplies. We’ll need a flat surface, a long ruler, a marker, some wood, saw, and safety goggles and gloves. Make sure you have all these items because you don’t want to have to make a trip to the store in the middle of your project!
Now that you have all the required supplies, it’s time to start crafting! Let’s begin with Step 1: measuring and cutting the wood.
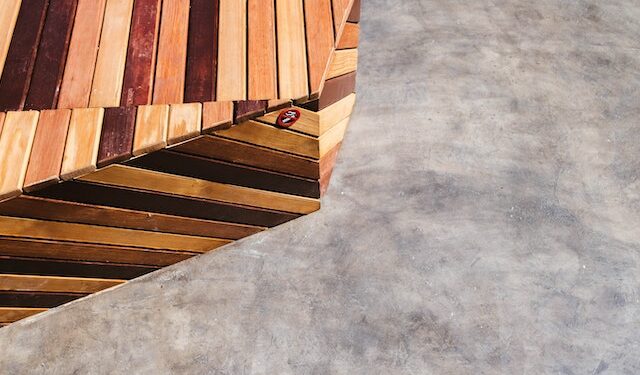
Start by placing the wood on the flat surface. Area rug, kitchen table, or concrete floor all work just fine. This step is important because you want to make sure that you cut the wood evenly. With the ruler, use the marker to draw the shape you are aiming for. Whether it’s an octagon, triangle or something else, find your inner geometry and get creative. Then, it’s time to grab the saw and begin cutting.
It’s important to wear the safety goggles and gloves when you’re cutting; you don’t want tiny pieces of wood flying at your eyes. Be extra careful when you’re sawing and make sure to cut in a straight line. Nobody wants an uneven design! Once you are done cutting, have a look at the shape and make sure it is the shape you intended and all edges are even. If everything looks good then you can move on to the next step.
Happy cutting! Now that you have your pieces all cut it’s time to move on to the next step. We’ll be sanding and staining the pieces in the following section, so it’s almost time to get creative and make this project look beautiful!
Sand & Stain the Pieces
Ugh, isn’t sanding just about the worst thing on the planet?! And if you’re like me, it’s not exactly one of your favorite hobbies. But! If you want to have a beautiful wood geometric design for your wall, you need to get to work!
So to sand your pieces, it’s best to use a piece of sandpaper with a lower grain level. I always go with around 100-grit. But if the pieces are really rough, you can go even coarser. Smoothing out the edges and corners will help the design fit and look right.
Once you’ve sanded your pieces, it’s time to stain them. I recommend using a natural oil like tung oil or even linseed oil. Make sure to apply the stain evenly and don’t forget to apply a coat to the edges and corners too. You may want to add a few more coats if you need to achieve a darker color. I usually just put on two coats, but the choice is yours!
And there you have it – you’ve sanded and stained your pieces for your beautiful wood geometric design! Now doesn’t that feel better? Don’t forget to take your time and try not to rush, the results will be worth it.
Assemble the Pieces Together
Alright, the moment you’ve all been waiting for: assembling the pieces together! This is the fun part, so grab your googly eyes and your measuring tape and let’s have some fun!
First, flip your pieces over so the unfinished side is face up. This will make it easier to get the pieces together. Now, depending on your level of confidence, I suggest either diving into the assembly with limited measuring or taking a few extra minutes to double-check your measurements.
Once you’ve done that, the fun begin? Line up your pieces so the edges match. Then grab your wood glue and start glueing the pieces together. As you glue, make sure to check for alignment. Don’t make it too complicated – leave the geometry to the design!
Be sure to also add a few pieces of tape in between the joints to securely hold the pieces in place. Now, it’s time to let the glue dry. This may take a few hours, so be patient!
Finally, once the glue is dry, it’s time to paint the design. Make sure to use a paint color that complements the wood color. Now your geometric wall art is ready to hang on the wall!
Whew! That was a lot of work, but I know you’ll be proud of your final product. This wall art will add beauty and character to your home – be sure to take a picture and share it with us!
Hang the Design on the Wall

Oh boy, finally – we’ve made it to the last step! This is the moment where you can stand back and admire your work of art. Now it’s time to proudly hang it up on the wall for all to see! This can be a tricky process but let me guide you through it and make it a breeze.
First, start by making sure that the tools you need are handy. Make sure that you have a hammer, nails, and scraps of wood or blocks to provide support. Next, position the design on the wall and lightly mark where the nails need to go. This will help make the nail holes have a uniform alignment.
Now, when you’re ready to begin the nailing process, start by positioning the nails between each of the pieces in the design. The first nail will be the trickiest since you’ll have to find the balance between keeping it sturdy and ensuring that it’s not protruding out too far. If you find that it’s too wide, you can try a smaller nail and add a few more.
After you’ve successfully nailed in the design and nailed down the individual pieces, the last step is to add the blocks between each of the pieces. You’ll want to do this by first making sure that the blocks fit snugly into each of the gaps and with the help of a hammer, nail them down into the wall as well.
And there you have it – you’ve officially completed your beautiful geometric wooden wall design. You should feel proud of the hard work you put into it, and the unique look that’s been accomplished. You’ve certainly outdone yourself and created something special that will be admired for years to come. So sit back, relax and enjoy your beautiful wall. You most certainly deserved it!