How to Make a Wet Room DIY | The Ultimate Guide | 2023
Adding a wet room to your home can send your property values soaring. They are also a practical alternative to conventional bathrooms. If your existing bathroom is prone to damp issues, a wet room provides you with an easy to maintain space that can be quickly cleaned without such problems occurring in the future. Essentially, a wet room is a waterproofed bathroom space. Shower drainage is incorporated into the flooring of the room, while full tiling throughout makes it easy to keep the space clean.
A quality wet room is often the preferred alternative to a standard bathroom in contemporary homes. They are also far more accessible than traditional bathrooms, making them a good option for people with mobility issues. Interested in adding a wet room to your property? Rather than spend a fortune on a contractor to handle the transformation, you can undertake the conversion as a DIY project. Our how-to guide explains everything you need to know about when tackling DIY wet room builds.
Preparing the Space
Flooring is the most important thing to think about when building a wet room. Before you commence work on a bathroom to wet room conversion, you will first need to remove any existing floor tiling or covering. You will also need to make sure any skirting is removed. If there are floorboards to remove, do this now. You should then find the lowest floor point in the room. You then need to ensure that there is sufficient fall around that low point. You may need to use additional timber strips to ensure sufficient fall around this low point.
You can then add new flooring to these joists. Thin plywood material is often the preferred option when installing new flooring in wet rooms. You should make sure plywood material is fixed firmly in place. In other words, once attached to the joists beneath, the plywood should not be able to move and flex. All screws should be sunk deeply into the material, with no screw ends protruding from the surface of the plywood.
Next you can turn your attentions to the walls. You need to ensure that the walls are able to take a new covering of tile at a later point, so any plaster needs to be in a good condition. If there are holes or uneven surfaces, fill them in with a good-quality filler or add additional plaster. If your bathroom is in a particularly poor state of disrepair, you may want to add plasterboards to make this process easier.
With all this taken care of you, you can think about the next steps of preparation. Priming your surfaces is crucial. Clean away any debris from your surfaces before adding a quality layer of primer in order to seal your walls and plywood flooring base. Primer needs to be completely dry before you can think about installing anything in your wet room.
Wet Room Installation
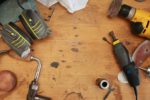
You will need some basic materials and items to install a wet room properly. A shower tanking kit is one such item, while a wet room shower tray is also essential. Many retailers and plumbing companies supply complete wet room kits, which make the task of getting together the raw materials easier. You will also need some essential tools in order to complete the work. A floor cutter is a must, as is a spirit measure. You will also need a selection of screwdrivers. A high-quality adhesive is also essential. You should also have paintbrushes, rollers and cleaning cloths and brushes to hand.
The first thing to do when carrying out wet room installation is to install the shower tray. You will need to cut the plywood flooring in order to fit this tray, so take the time to be precise when doing this. Any shower tray product will come with full instructions, so refer to these to ensure you are applying brackets and outlets correctly. You will also need to set the tray in place with a strong adhesive and additional screws.
You can now focus on levelling the wet room. To do this, use premium plywood of around 18mm thickness. Any plywood used for levelling should also be water-resistant. Marine plywood is the best material for this. Next, you can focus on sealing the joins. Use a quality polymer sealant to do this. Look for any gaps that might be present between the shower tray and train. You may also need to add sealant between the flooring and walls.
Be careful when applying sealant as you want a clean finish. It is more difficult to remove excess sealant once dry than it is to apply it evenly. When all joins are sealed, leave the sealant to dry. Most sealants should dry fully in around an hour, although you may want to leave a bit more time than this before adding anything else to your wet room.
You next to tank and waterproof the wet room. Your tanking kit should include tape that can be cut to varying lengths for waterproofing any joints between the walls, floor and shower tray. You should also take the time to apply tape to the area where your shower will be fitted. When applying tape, make sure you get a smooth finish, with no noticeable bubbles of air beneath the material. You then need to tackle the fitting of the membrane gasket.
You may need to carry out some trimming in order to ensure a good fit. Consult the instructions provided with your wet room kit and membrane gasket for best results. You will also need to paint over the shower tray, tape and membrane with a high-quality sealant before thinking about adding anything else to your wet room.
Finishing Touches
With all the hard work taken care of, you can think about applying the decorative touches to your wet room. Tiling is probably your chief concern at this stage. Make sure you are being particularly meticulous when applying tiles to a wet room, as any uneven edges or gaps will be more noticeable here than in a standard bathroom. You also want to prevent the chance of moisture finding its way into the gaps between tiles. With tiles applied, you should leave them to firmly adhere to the surface beneath. A wait of 24 hours will usually be more than enough.
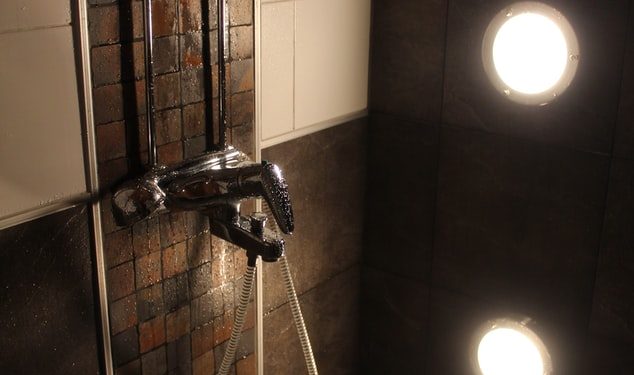
You can now add any shower fittings to your wet room. If you are adding a new sink basin and lavatory, now is the time to plumb them in. You will likely need to rework the areas around these items, so make sure you have kept spare tiles and sealant to hand to finish the job.