How To Make A Perfect Through Dovetail Joint For Your Woodworking Project
Dovetail joints are an essential component of woodworking, and are often considered the hallmark of quality craftsmanship. They are incredibly strong, durable, and visually appealing, making them ideal for a variety of projects.
But creating a through dovetail joint can seem like a daunting task, especially for those new to woodworking. That’s why we’ve put together this guide on how to make a perfect through dovetail joint for your woodworking project.
We’ll cover everything from the necessary tools and materials, to step-by-step instructions and helpful tips for achieving a precise and flawless joint.
Whether you’re a beginner or an experienced woodworker, this guide will help you master the art of creating beautiful and functional through dovetail joints. So, let’s get started on creating the perfect joint for your next woodworking project!
Gather the Materials
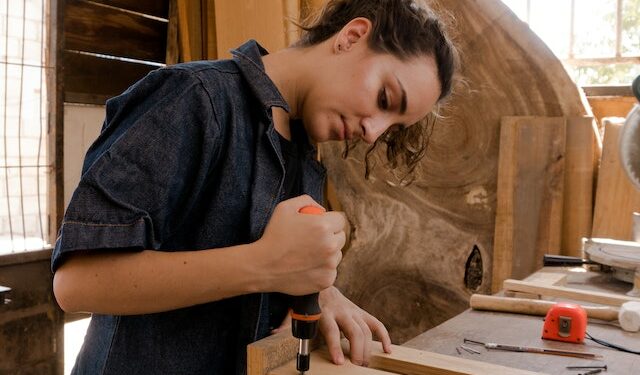
Ahhhh a woodworking project, so you want to make something perfect like a dovetail joint. This might be intimidating, but with the right materials and a pinch of patience, you can be on your way to crafting like a pro! First, you must gather the materials, which are simple and easy to find. Let’s go through the wood pieces and tools you need to get started.
Your wood pieces are everything. They will be the most important part of your joint, and for that reason, you have to make sure you use good quality wood. For dovetail joints, you’ll need two pieces of wood, a sliding dovetail piece and a pinboard piece. Both pieces should be of similar material, such as fir, oak, or cherry. You’ll also need to make sure they’re the same thickness, as this will make sure the pinboard piece fits snugly into the sliding dovetail piece when the joint is complete.
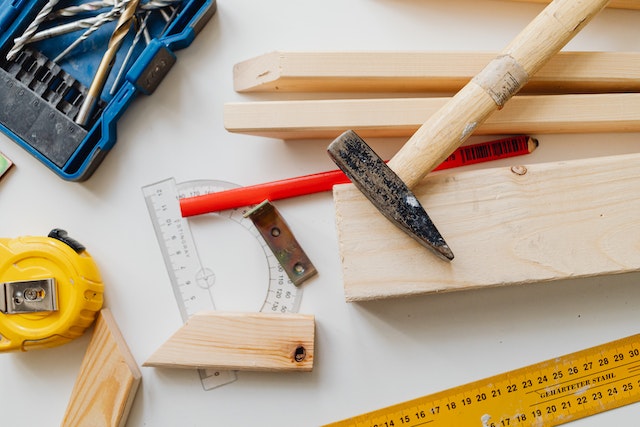
Now it’s time to find a few tools. This project is a heavy one, and you’ll need a saw, a chisel, a hammer, and wood glue to get started. For more complex joints, a router might also come in handy. Make sure all your tools are sharp and in good condition before you start your project, as this will make the process much easier.
Now that you’ve got your materials, you can start planning! In the next section, we’ll talk about the basics of cutting a dovetail joint, and how you can execute your plan once you’re ready. Until then, make sure you’ve got all the materials you need and are well-rested—you’re going to need your energy and focus! Good luck!
Wood Pieces
Hey everyone, today I’m talking about wood pieces.
When it comes to woodworking projects, you can’t do anything without wood pieces so it’s important to make sure you get the right pieces for your project.
To start, you need to pick the type of wood you’re going to be using and make sure to measure it twice and cut once! All the pieces should be cut to size and you should make sure to locate the pieces in such a way that the grain is consistent.
The pieces you use for a project should also be sturdy and high-quality. You don’t want to be wasting time and money having to buy new pieces after you’ve already cut them because they are too weak to hold the joints together.
Finally, make sure you have the right wood joints for your project. You don’t want to start a project on the wrong foot by having the wrong joint pieces.
So, there you go everyone. Get the right wood pieces and you’ll be well on your way to making a perfect through dovetail joint.
Tools
If there’s one thing that every woodworker knows, it’s that you can’t make a perfect dovetail joint without the right tools! Sure, you could try to cut through your wood with a butter knife, but believe me, that’s not going to end well (you might as well be trying to use a spoon to scoop out a lake).
The truth is, there’s no substitute for having the proper tools when executing a dovetail joint, so let’s make sure that you’re equipped with the best. You’ll need the following:
A dovetail saw. This saw is specially designed to make the perfect cuts for a dovetail joint, as it has a very thin kerf for precision cutting.
A chisel. While this does not have to be a fancy chisel, make sure you have a moderately-priced one for the best results. A chisel is especially useful for cleaning out the gaps between the tails and the pins.
A try square. This is an absolute must for anyone attempting a dovetail joint. Not only will it ensure that the angles of the board remain consistent, but it will also help you when temporarily clamping the pieces of wood while the glue dries.
A marking gauge. This is used to scribe a line across the end of the wood to create a certain depth for the dovetail joint.
So there you have it folks, the four tools that you need to make sure you have if you’re planning on creating a perfect through dovetail joint. Remember, these tools don’t have to be the most expensive ones on the market, but you should invest in at least moderately priced tools in order to guarantee a good result. Do yourself a favor and make sure you have what you need before you start your project – your results will thank you for it!
Understand the Basics

Hey there, fellow woodworkers! You know, making the perfect through dovetail joint for your woodworking project requires a bit of knowledge and planning, but theres nothing to it! Understanding the basics is the first thing you gotta do.
To begin with, you’ll have to set the shoulder cut. All that means is putting a groove at the two ends of the boards you’ll be using. This way, when the pins meet, they’ll attach in the groove. Now, how deep you make your cut depends on the size of your dovetail. The narrower your joint, the shallower your cut.
Next up is cutting the pins at the two ends of your boards. For your first joint, you’re most likely going to want to follow the standard ratio- a 1:8 ratio, which means the end board is 1 inch wide, and the other board is 8 inches wide.
And don’t worry- all this math is taken care of for you with the templates! However, some people do prefer to use the saw, so if you’d rather do it that way, here’s a helpful tip: for your pins, draw a diagonal line at 30 degrees, and also mark a saw line before getting in there with your saw.
And that’s it for the basics! Keep practicing and you’ll have your dovetail joint done in no time.
Set the Shoulder Cut
Nobody said making a perfect dovetail joint was going to be easy; after all, you’re trying to emulate something that comes naturally to some woodworking birds. That’s why before you get to the good stuff – the cutting and glueing the joint together – you’ve gotta understand the basics.
First up, you’ll need to set the shoulder cut. Sure, that sounds fancy but it ain’t no big thang.
Let me make this as simple as I can, so your neck begins to bob: take the parts that you be needin’, place into the jig you be heedin’. Now you’ve got to set the depth of the shoulder cut or your joint will be a flop. To set it up, use your router to make sure it will be to the right depth or hop.
Next, come back with a chisel and adjust the should so it fits the way you like, then mark out the tails and the pins so that they can be cut-out with your bike. See, it’s easy so far, just make sure you go slow and do it right, else your project will look like a mess and you’ll be cussin’ into the night.
Cut the Through Pins
Who wants to have steak when you have pins? Well, when it comes to woodworking, through pins are crucial, so if you want to achieve a perfect through dovetail joint, you have to love them.
Let me give you a complete overview of what cutting through pins involves. First, you need to measure the tail board accurately and mark the depth of the shoulder cuts. To set the shoulder cuts, use a marking gauge and set the blade for 1/4, according to the size of your wood piece. Now, measure the thickness of the board and mark out the tails on the board.
To cut the through pins, you need a handsaw, like a dovetail saw or back saw. If you’re a bit skeptical to use the handsaw, but hey, it’s easier than you think! Start off with the tail board and cut just above the line for each pin. Then, alternate between the pins and test the fit of the joint every two pins.
To ensure that the pins are perpendicular to the board, use a chisel, a marking gauge and an awl. With the help of these tools, you can easily adjust the slope of the pins and make sure they’re the right size. This will help the joint be snug and will look neat when completed.
Once you’ve cut the through pins, check your work by test fitting the joint. To do this, bring the two boards together and make sure each pin fits in its corresponding socket. If they fit, woohoo, you’re on the right path.
Are you still struggling? Well, help is only a few clicks away. There are plenty of helpful tutorials online that show how to cut through pins in woodworking projects. A few videos on YouTube will teach you how to get the job done in no time.
Now that you know the basics of cutting through pins, the rest is up to you. All you need is some dedication, patience, and the right tools to make a perfect through dovetail joint for your woodworking project!
Execute Your Plan

Executing your plan is where it all comes together. Once you’ve got the pieces cut, you’ll want to get started with assembly. I’m sure you’re wondering, how do I get the pieces to fit together?
Well, you’re in luck. It’s time to glue and clamp the joint. Here, you’ll find that using some wood glue is going to be your best bet. Make sure to apply the glue to all of the connecting surfaces. If you have a helper, have them hold the pieces in place as you apply the glue.
Once the glue is applied and the joint has been clamped, let it sit for a few minutes. Now is the time to think back on all the hard work you’ve put in and the plan you created. This is where you really show off your talent.
The next step is to final assemble the joint. You’ve done it before when you cut the pieces, so it should be familiar. Use a chisel or mallet to make sure the pins and tails fit together perfectly. Be sure to use slow, steady pressure so as not to ruin the joint.
Once the joint is assembled, you should take a step back and admire your handiwork. You’ve now successfully made a perfect through dovetail joint for your woodworking project. Congrats! You should take a moment to feel proud of yourself.
Now, you can move on to the finishing touches. Sand down any remaining glue, or use a bit of wood putty to clean up any cracks or chips in the joint. After that, you’re all finished!
Congratulations! You’ve now successfullymade a through dovetail joint. Your woodworking project is one step closer to completion!
Glue and Clamp the Joint
Hey everyone! So, you’ve got your wood pieces and you’re ready to assemble your through dovetail joint. Well, the first step is to glue and clamp the joint.
If you haven’t already, get yourself some wood glue and clamps to hold the joint together. If you haven’t done this before, be sure to read the instructions and safety precautions on the label to get it right.
Now it’s time to put the glue on. Pay special attention to the jointed surfaces, making sure that the glue covers everything. The key is to make sure that the glue coats evenly and fully. Once you’ve done that, it’s time to close up the joint and hold it all together.
Grab your clamps and get ready to assemble. Place the clamps close to the jointed surface, ensuring that the clamps snugly fit the joint and hold it securely. Put on all of the clamps that you need. Take your time and make sure the clamps are on securely and the joint doesn’t move.
Once it’s all clamped up, take a step back and admire your handiwork. You’ve now got the beginnings of a great through dovetail joint. There are a few things still to do, but right now, you’ve got the basics down.
And that’s it! You’re now ready to move on to the next step. As usual, take your time, make sure everything is secure, and you’ll have a great through dovetail joint in no time. Have fun with it!
Final assembly
Ah yes, the moment we’ve all been waiting for: Final assembly! After clamping your angled joint together, you’re armed with your dovetail joint ready for assembly.
Before you start, however, pat yourself on the back – you’ve done the hard part. While fitting the two pieces together is easier said than done, the final assembly is the easy part.
Start off by laying the joint down flat on a sturdy, even surface. Make sure you’re not balancing on a wobbly chair or table. That could be a real disaster.
Now take your tools and begin carefully tapping in the glue-covered joint parts into their slots on both wood pieces. Be gentle and take your time; haste makes waste! And I’d hate to see anything go so wrong with your beautiful joint.
When you’ve fit both pieces in snug and secure, you may want to twist the joint just slightly to make sure the pieces are even, one with the other. Then set the pieces aside to dry. If you have clamps, use them to hold it together and make sure it’s extra sturdy when it dries.
If done correctly, the glue should dry clear, leaving a perfectly fitted joint ready for whatever use you have planned.
Just remember, if you find yourself frustrated and ready to give up, don’t; mistakes are part of the process! Make sure to take your time and practice often, and you’ll be surprised by the beautiful joints you can make.
So there you have it! You’ve gone step-by-step through the process of creating a perfect dovetail joint: from gathering your materials to drying the glue. Now it’s time to reap the rewards of a job well done. Go tackle that woodworking project and reap the satisfaction of creating something beautiful with your own two hands.
Tips and Tricks
Hey now, if you want your joint to turn out to have some grade-A perfection, there are a few tips and tricks I can throw at ya.
Tip number one: try testing the fit of your joint with a piece of scrap wood before you tighten up the clamp. Don’t just go into it wildly, like a peacock plucking a purple people eater – imagine the terror! Take a deep breath, chill out and double check those measurements.
For tip number two, use some wood glue on the edges of the joint that don’t show, even if you ain’t gonna see them afterwards. Believe me – a little extra bond never hurt nobody.
Tip number three: use the same procedure for all joints, even the more tricky ones. Just like all types of show business, practice makes perfect.
And my last tip for tip-top wood working: give yourself plenty of time for it. Just like in a marathon, and just like an old dance move, don’t forget to pace yourself.
Good luck finding your inner wood-working- wizard at this joint-knee day! You’ve got the raw power, now get the knack of it.
Test the Fit of the Joint
Completing a perfect through dovetail joint doesn’t happen overnight, you gotta take your time and not rush it. One of the most important steps to achieving the perfect joint is testing the fit of the joint. When done correctly it will look like an intricate jigsaw puzzle, and testing the fit is the best way to check if you got it right!
First, lay out all your tools and wood pieces. Next measure and cut the two pieces of wood needed for the joint. Start by making the shoulder cut. Butt one end of the wood pieces together and then make the shoulder cut. This is the cut that will provide the mortise for the joint.
Once the shoulder cut has been made, the next step is to layout and cut the through pins. This requires precision to ensure that the joint has the right amount of space between the pins. You want there to be just enough space so that when the joint is assembled, the pins fit tightly together.
Now that the pieces are cut, it’s time to test the fit of the joint. Make sure all pieces fit together as they should, or you may have to start all over again. Fit each pin into its mortise, checking for proper fit and placement. The pins should fit tightly, but not be too tight or loose. Pay close attention to the angles of the joints and make sure all angles line up correctly.
Finally, you want to check for gaps between the pins, as well as any indications of unevenness. If all checks out, then you have a properly fitting joint and can move on to the next step!
For those looking to perfect their through dovetail joint, testing the fit is key. Make sure to measure and cut the pieces accurately, and then fit the pins carefully. Take your time, don’t rush it, and be patient – achieving a perfectly fitting joint takes time and precision!
Use Wood Glue for Non-visible Parts
Y’all, I’m here to teach y’all about the best way to use wood glue for your non-visible parts when it comes to a perfect through dovetail joint. Now, I know y’all probably askin’ yourself why usin’ wood glue for non-visible parts is so important – and the answer is simple but essential. Y’see, the wood glue helps keep everything snug and secure so that that joint ain’t goin’ nowhere.
So how in the heck do y’all use that wood glue? Well first off, before y’all start adding it, make sure you got the pieces fit at least loosely together. Then y’all can get started! I like to spread the glue on all the non-visible surfaces of the joint that won’t be seen, whether it’s jus’ one corner or both. Then move on to the other piece – same technique – spread that wood glue all over the nooks and crannies of the joints.
And then, this is the vital part, let that wood glue dry completely! Nothing worse than runnin’ around tryin’ to finish’ up a joint, only to find out the wood glue ain’t dry yet and the joint ain’t secure at all. So take it slow and give the wood glue enough time to do its’ thang and create the perfect joint.
Y’all, with these easy tips and tricks, y’all can be sure to get that perfect through dovetail joint for your next woodworking project! Now get out there and start putting these skills to use! Let me know how it works out for y’all, I’d love to hear your successes and takeaways! And Happy Crafting Y’all!
Replicate the Procedure for More Complex Joints
Hey everyone! So you got the basics for dovetailing joints with woodworking in the bag, huh? That’s great news! You might be feeling super confident and eager to move forward with making your masterpiece. Before you do, though, let me give you a little tip: replicate the procedure for more complex joints!
You heard me right! Replicate, replicate, repeat! The more complex the joint you want to make, the more replications of the procedure you’ll want to do. That’s because a more complex joint requires more parts that need to fit together. And the only way to make sure everything fits neatly is to practice the steps multiple times.
So, if you’re looking to make a beyond perfect dovetail joint, don’t just stick to the same steps. Break it down and practice the same steps multiple times, more and more complex each time. This might be tedious, I know, but it’s necessary to make sure that your joint is of the highest quality and aesthetic.
Plus, it gives you a chance to really get to know your tools and woodworking process. The more often you practice your steps, the easier it will be to replicate the same joint for a variety of projects. Not to mention, you’ll even feel more confident in your skills and ability to produce an excellent product.
And hey, if you really want to make sure that your joints are extra perfect, you got a couple more tricks for you as well. You can test out the fit of the joint before gluing it all together if that makes you feel better. Or you could even use wood glue for smaller, less visible pieces that you know won’t make a huge difference in the outcome.
But the most important thing is to give yourself plenty of time to perfect your joint-making skills! It’s not a project you can rush through – it requires patience and a good eye. Once you master the process, though, you’ll be ready to take on any complex joint you can dream of!
Give Yourself Plenty of Time for It

If you’ve made it through the first three steps in the process of perfecting your through dovetail joint, congratulations! You’re almost there. Now comes the most important part: giving yourself plenty of time for it.
Time is the secret sauce for any woodworking project. This does not mean rushing it and compromising on quality—it means setting a manageable timeline to accomplish a great result.
The temptation when starting any creative project at home is to bootstrap it and try to cut corners wherever possible—including your timeline. That usually backfires in the end. It can cause you to miss an important step, have to go back and rework certain parts, or even start from scratch if you’ve gone too far.
So take your time. When it comes to making a perfect through dovetail joint for your woodworking project, you need to consider three elements: the measurements, the angles, and the overall design.
Measure twice, cut once. It’s an old adage but it’s still important. When working with wood, it’s always best to take a few moments and check your measurements. If they’re not accurate enough, the joint won’t fit together properly.
It’s important to pay attention to the angle of the joint, too. Angle is an important factor when it comes to connecting two pieces together because if it’s not exact, the joint will be off balance, which makes it hard to make a seamless connection.
On top of the measurements and angles, you must also consider the overall design of the piece. Think about what would look best for this specific project. Pay attention to the detail in each part. Make sure the lines are crisp and the proportions are appealing. It takes time, but it’s worth it.
So don’t rush it, keep your eyes open and give yourself plenty of time to perfect your through dovetail joint. Take the time to measure, drill and plan thoroughly. Do it right the first time, and you’ll have a perfect joint that you can be proud of.