What You Need To Know Before Using A Table Saw
Using a table saw can be a real game-changer in the world of woodworking – but let’s face it, those whirring blades can be pretty intimidating. Don’t worry, we’ve got your back (and your fingers). Before you dive into your next project, here’s what you need to know to stay safe and get the most out of your table saw.
From choosing the right blade to mastering the right technique, we’ve got tips, tricks, and maybe even a dad joke or two to make sure your table saw experience is smooth, efficient, and (most importantly) all your digits intact. So grab your safety goggles, plug in your saw, and i’ll tell you all about what you need to know before using a table saw. So let’s get started – just don’t forget to keep your fingers to yourself!
Safety

Ah, table saws. One of the most intimidating power tools! When using a table saw, you need to be extra careful as it can be incredibly dangerous without the right precautions. But fear not, I’m here to guide you on the safety measures you need to know.
First up, let’s talk blades. Blades used on table saws come in different sizes, tooths and arbor sizes. Knowing which ones are right for the job will make your table saw experience a lot safer.
Next up is protection gears. Safety glasses, hearing protections and dust masks should always be worn when using a table saw, no exceptions! This isn’t just a safety precaution but also keeps you comfortable during your sawing sessions.
Now let’s talk about kickback prevention. If a piece of wood kicks back, it can cause serious injury. Make sure your wood is securely held in place when running it through the saw, and that the blade is in good condition. That is your best bet for kickback prevention.
Power cords should be properly inspected and maintained to avoid any kind of electrical shock. Make sure the cord is far from any moving parts and store it safely when you’re done with your saw.
Lastly, let’s talk dust. Table saws can produce a lot of it! Taking measures to control it such as ventilation and proper dust mask will help keep you safe while using a table saw.
Taking all these safety measures seriously not only help you stay safe while working on your table saw, but also make a lot of your projects a lot easier. So if you want to get started using a table saw, take a minute to check your precautions are up to date. Trust me, it’s worth it!
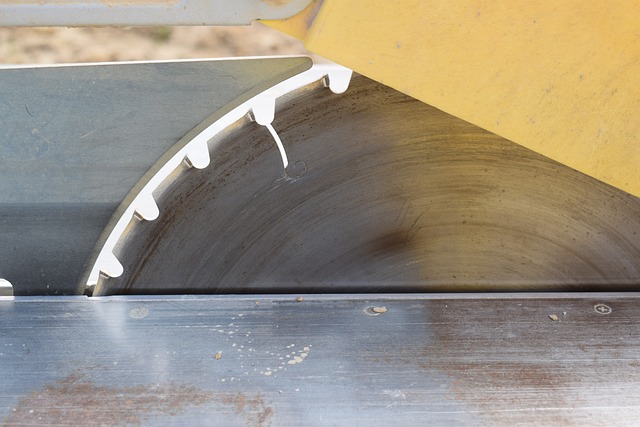
Blades
Now, let’s talk about blades when using a table saw, because blades can be very dangerous if you don’t take precautions. First of all, the blade size is important. It’s important to use the blades size recommended for the specific table saw that you are using. If you use a too big of a blade, it can be dangerous and cause injury.
It’s also important to make sure that the blades are sharp and in good condition. Dull blades can be more dangerous than sharp blades when using a table saw, because they can cause kickback and cause the material that you’re cutting to go flying. Another important thing to remember is to make sure that the blade covers are secure and in place when you’re using the saw. The blade covers are important because they protect you from the blades.
Also, it’s important to make sure that the blades are aligned with each other correctly, because misalignment can cause kickback and injure you. If you’re having trouble aligning the blades, then you should consult a professional or an expert for advice.
Lastly, it’s important to keep your blades clean and free from debris, because debris can hamper the blades from doing the job correctly.
So remember to use the right sizes of blades, make sure they are sharp and properly clean, ensure that the blade covers are secure, and make sure that the blades are aligned correctly. Taking these precautions can help you to use a table saw safely and also increase its longevity. In the end, safety should always be your first priority.
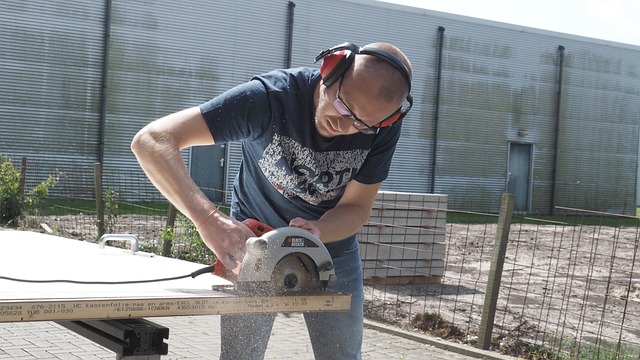
Protection Gears
Ha, so you think you’re ready to use a table saw, do you? Well, before you get anywhere near that power tool you’re going to have to do some serious shopping. We’re talking about safety gear! I know it doesn’t sound like much fun, but it’s very important that you invest in the right protective gear in order to make sure you stay safe while using your table saw.
Let’s start with a good pair of safety glasses. Not reading glasses, not your lucky pair of aviators. We’re talking shatter-resistant safety glasses that fit snugly and comfortably, and that has side shields or wrap-around protection. Generally, these will come with non-fogging lenses, and make sure they meet the ANSI Z87 safety rating.
Next up, hearing protection – maybe a pair of ear plugs or muffs. It’s really important that your ears are protected from the loud noises made by your table saw. You’ll definitely need to wear these whenever you’re using the table saw, so find the type that will be most comfortable for you.
Work gloves are another must-have item. Not only do they protect your hands from getting cut on the table saw, but they also provide extra grip and resistance to prevent your hands from slipping. Make sure to look for a pair of gloves that is for dust and puncture protection. You’ll also want them to be breathable and flexible enough that you can maintain your dexterity and handle the saw properly.
Last but not least, consider investing in a face shield. This helps protect your face from flying wood chips, sawdust, and all other kinds of debris that tends to fly around when you’re using a table saw. This is often an overlooked piece of protective gear, but you’ll be happy you have it when your face is being attacked by flying wood.
There you have it – the safety gear you need to protect you when using a table saw. Now that you’re all set, you can start prepping some wood and putting it through its paces. Just remember to be safe and use all the necessary protection – your body will thank you for it later!
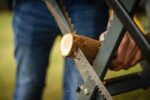
Kickback prevention

Oh boy! You wanna know about kickback prevention, do ya? Well, here’s a tip: it won’t prevent any kickback if you put your actual foot in the way of the blade! HAHAHAHAH. Just kidding!
Yeah, you don’t wanna do that. Sure, it seems cool on TV shows and movies, but it’s really not that much fun in real life. That’s why kickback prevention is so important.
See, when you’re using a table saw, the force of the blade can cause wood to get thrown back at you, causing a dangerous kickback. It’s something to be avoided, for sure.
So, let’s talk about how to do that. First, it’s important to use a push-guard on your saw. This will help reduce the chances of kickback. Not only will it keep your hands and fingers safe, but it’ll also keep the wood from sliding back towards you.
It’s also important to use the right type of wood for the job. Some types of wood have a tendency to snag and kick back, so make sure you know what type of wood you’re using before starting a cut.
Finally, make sure the blade is sharp. If it’s dull, it’s harder to push the material through, which can cause the material to be thrown back at you. So, make sure it’s always sharp.
And that’s what you need to know about kickback prevention. It’s not something to be taken lightly. If you follow these tips, you should be able to lower your risk of experiencing a kickback while using a table saw. Now, you can go out there and saw away safely — and with a lot less fear!
Power cords
Hey there! So, it’s me, and before we start using the table saw let’s talk about one important aspect – power cords! Now before plugging in the saw, inspect the power cord to make sure there are no tears or abrasions. If it looks like it is not in good shape then it is better to purchase new one.
Earthing the saw can diminish the chances of electric shock. Every table saw has an earth wire for the purpose of earthing. Before plugging the saw make sure that you have connected the earth wire to the mains. It is important that you also check if there is any leakage of current while connecting the saw to the electricity because leakage of current can be fatal.
Keep the wires away from the blades and dust emission. Always try to maintain a space of 3-meter around the saw to reduce the risk of electrocution due to excessive frictional force.
When multiple power tools are used, it is better to connect the saw to the appropriate extension cord. No cable should be overloaded, because it can result in an electric shock. Make sure that the cables are properly taped up so that cords dont come in contact with the blades.
Another important point to remember is to that never use any transformer or power regulator,’ as it can overheat and cause a fire. Also, make sure that the switch used to turn the saw on is of good quality and is not faulty.
Be aware of power cuts and switch off the table saw immediately in the case of a power cut.
Now that you know all the basic requirements for using a power cord safely with the table saw, let’s get started woodworking! Have fun!
Dust
When it comes to using a table saw, one of the most forgotten pieces of safety gear is dust protection. We all know that wood chips, sawdust, and splinters fly off in all directions when using a table saw. Inhaling these particles can cause serious respiratory tribulations, and result in undesirable health outcomes. Therefore, having the proper protection gear is of utmost importance.
When using a table saw, you can protect yourself by wearing a respirator to filter the particles out – this should be your number one priority. You should also be sure to wear safety glasses to protect your eyes, thick gloves to protect your fingers, and a cap or hood to protect your hair.
If you’re not wearing these pieces of gear, you could get a face full of wood shavings and sawdust, and that’s not a very fun experience, trust me on this one! Although it might seem a bit un-cool to wear all of this gear just to use a table saw, it is an important safety measure that should be taken.
Aside from protective gear, it is also beneficial to set up some sort of dust collection system when working with a table saw. Installing a dust collecting device to your table saw will help to keep the dust off of the ground and in a collector. These come in many forms and sizes, from small dust bags, to dust collection systems that vent directly to the outdoors.
To ensure that your dust collection system is working properly, it is important to clean it regularly – as dust will buildup over time and impede its performance. Cleaning your dust collection system on a regular basis will help it to remain effective in keeping dust off of the ground and away from your lungs.
So, don’t forget your dust protection gear and dust collection system the next time you go to fire up your table saw. Being mindful of dust particles during your woodworking projects will help to maintain a safe working environment. And don’t forget, with dust protection comes the ability to enjoy your projects with peace of mind and comfort.
Operating
Ah, you know, operating table saws can be a real tricky business! Now, speaking as someone who has been working with these things for years, I have plenty of insight and advice on the topic. So let’s get into it.
To start, table saws come in a few different varieties. There’s the standard table saw, the miter saw, the hybrid saw, and the circular saw. Each of these has its own advantages and disadvantages, so make sure to research the best saw for your needs before investing.
Miter saws are particularly useful for making angled cuts. They work by rotating the blade at an angle that is set by the operator. It’s important to know what angle you are using when using a miter saw, and to make sure the saw isn’t set too high or too low!
When it comes to cutting techniques, there are a few tricks to keep in mind. For example, some cuts require the blade to be tilted and others require it to remain straight. Make sure to use the correct angle when handling blades. In addition, be aware of the rip fence when making crosscuts. This fence will help to guide your saw and ensure accuracy while cutting.
Finally, it’s important to keep safety in mind when operating a table saw. Be sure to always wear protective gear such as glasses and gloves, unplug the saw when changing the blade, and never leave the saw unattended. You’ll also want to take steps to reduce dust in the area to avoid respiratory problems.
In conclusion, operating a table saw can be a tricky business, but understanding the different saw types, cutting techniques, and safety measures can help you make clean and accurate cuts. Good luck and have fun!
Table saws
Ah, table saws. What a wonder they are! If you’ve ever fancied yourself as a master woodworker, then you’ll know the importance of having the right tools for the job. Table saws are an absolute must-have when it comes to cutting boards into shape with accuracy and precision.
Table saws come in a variety of makes and models, so it’s important to figure out which one is right for you. You’ll want to consider both the size and the power of your saw. The larger the saw, the more power it has but this will also mean that it needs a bigger motor. Fortunately, most modern table saws come with adjustable power levels and a variety of blades, so you can tailor your saw to the kind of work you need it to do.
When it comes to the different types of saws, it’s best to know your way around a table saw before investing in one. Contractors typically use cabinet saws, while the average homeowner will most likely choose a benchtop saw. Regardless of your choice, it’s always a good idea to read the manual before using the table saw, because each model is different.
When using a miter saw, you’ll often be required to use the specialized jigs and fixtures that come with the saw. Miter saws are designed to make repetitive crosscuts, so always use the jig to get the best results. There are many different miter saw blades available and it’s important to select the best blade for the type of material you’re cutting.
Finally, don’t forget about adjusting the blade tilt before cutting, as this will ensure that you get the right angle for the job. In addition, it’s also important to make sure your rip fence and crosscut fence are correctly adjusted. This will ensure that your cuts are precise and accurate.
There you have it – all the basics of table saws. Once you understand the basics, you’ll be able to make precise and accurate cuts with ease, creating beautiful pieces of woodcraft in no time!
Types of Saws
Ah yeah, the ‘Types of Saws’ section. This is an important bit. You don’t want to be using a saw for the wrong job, now, do ya?
First off, let’s start with the most common type of saw – the table saw. This type of saw is what you’re used to seeing – a circular saw blade that’s attached to a machine. It’s used for cutting through straight lines and can handle a variety of materials.
Next up, we’ve got the miter saw. This type of saw is more precise than the table saw and you can use it to make cuts at angles. It’s best used for trimming and framing jobs, picture frames, and the like.
Finally, we have the reciprocating saw. This is a more powerful saw than the other two and it’s great for cutting through thicker materials like concrete.
Now that we’ve gone over the types of saws, it’s time to look at some specific features. For instance, when it comes to the table saws, some of them have blades that tilt so you can make angled cuts. Others have adjustable rip fences and cross-cut fences. You’ll want to make sure what you’re using is up to the job you intend it for.
Also, when looking at miter saws, you want to keep in mind what type of blade you need. Some blades are specialty blades that are designed for certain materials so you’ll want to make sure you’re getting the right one for what you’re doing.
And lastly, when dealing with reciprocating saws, you want to make sure you know what you’re doing before you start cutting. Of course, safety and protection in the form of face shields, gloves, and such are of utmost importance.
So that’s what you need to know about types of saws! Now go out there, get the right saw and make your masterpiece!
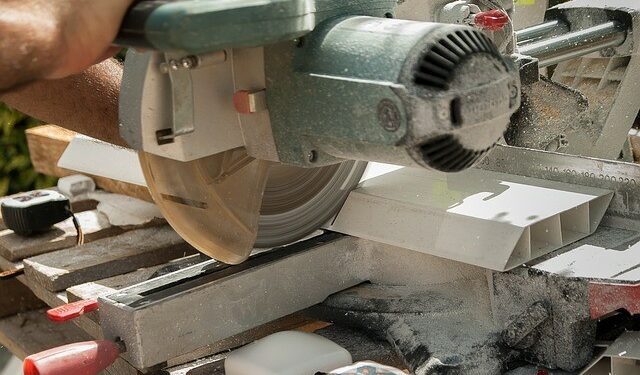
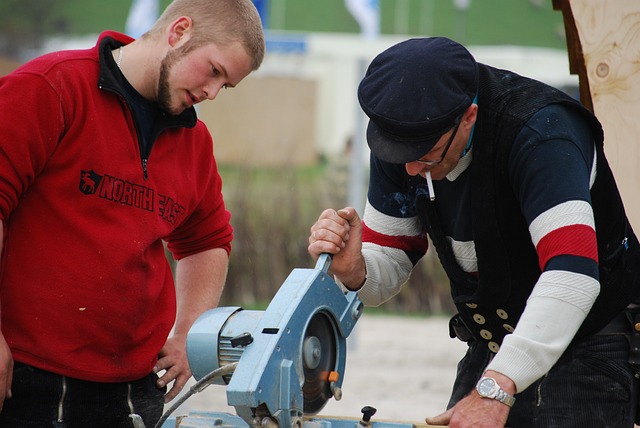
Miter Saws
Miter saws are saws that are designed to make accurate miter cuts in various kinds of materials like wood, PVC, and aluminum.
If you’re looking for a saw that can make precision cuts for all kinds of projects, a miter saw is your best bet! Before you go out and buy one though, I got some advice for ya.
First, consider the type of miter saw you’re gonna get. If you’re shopping around, you’ll find saws with chips, standard miter and compound miter saws. Chip saws are great for making straight cuts in wood while standard miter saws are great for making angled cuts. Now if you’re looking for the most accurate saws of all, you should get a compound miter saw. These saws are the top of the line and can handle more complex cuts. Make sure you got the power though, ‘cause these saws take a lot of energy to get the job done.
Another thing to consider when it comes to miter saws is the blade size. If you’re going to make clean and neat cuts, you’ll need at least a 24-tooth blade. In fact, if you’re doing any sort of detailed work, you should probably get a saw with even more teeth. This will give you the fine cuts you need for complex projects.
One more tip for using a miter saw – always make sure you use proper protection gear. Even though miter saws only make angled cuts, you still want to wear the appropriate safety gear before you get started. That includes safety glasses, safety gloves and ear protection.
If you keep all of this in mind, you’re sure to make the best use of your miter saw! I can tell you firsthand that it’s an awesome tool to have in your workshop. Just remember that safety comes first when you’re using a miter saw. For once you make awesome cuts, you can get fancy and show off your new skills to everyone! So get out there and start sawing away!
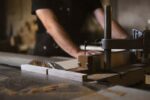
Cutting Techniques
If you thought it was just about pushing the wood through the saw blade, you thought wrong! It takes a lot of skill, knowledge and finesse to make a perfect cut.
First and foremost, you need to know the terms and the device you’ll be using. When cutting with a table saw, there are four types of cuts you can make. You have the traditional straight cut which is best done with a miter gauge and a push stick. You can also make rip cuts (used to cut pieces along the grain), joinery cuts (used to fit two pieces of wood together) and miter cuts, which are used when you need to cut pieces at an angle.
Now that you know the cuts you are likely to make, you need to know how to make them. When making a straight cut, push the wood toward the saw blade slowly, ensuring that the wood and the saw blade remain in contact as long as possible. When making a rip cut, try and keep the saw blade parallel to the grain of the wood. As for joinery cuts, use a miter gauge and a push stick when necessary to ensure a consistent and accurate cut. Finally, when making miter cuts, use the correct angle on the miter gauge to get the best result.
Of course, safety should always come first when using power tools. When making any type of cut, make sure you are wearing proper protection gear. That includes safety glasses and a dust mask. Keep your hands away from the blade, and do not forget to use the riving knife if provided.
Another important thing to remember is not to rush your cuts. Take your time, and be patient with your saw. The better and the more precise your cuts are, the better the result will be.
To sum it up – cutting technique is an important thing to master, when it comes to using a table saw. Know the different types of cuts you’ll be making and make sure you have the correct protectiongear and safety procedures in place. This way, you’ll have smooth, precise and safe cuts– every time!
Blades Tilting
Oh boy, talkin’ about blades tilting, huh? Blade tilting is probably the most important aspect of the table saw. When the saw blade is not properly aligned, your cuts can turn out to be less that satisfactory. It can also cause kickback and even worse scenarios. So, it’s time to get serious here.
The first step to check the blade alignment is to adjust the bevel angle. To do this, you need to loosen the bevel lock knob so that you can tilt the blade to your desired angle. It’s important to note that you should never tilt the blade past the manufacturer’s recommended angle. For example, most saws can handle an angle of no more than 45 degrees.
The next step is to adjust the blade height. This is where it gets tricky. You need to make sure that the blade is as high as possible, but not too high. If the blade height is too low, it won’t cut deep enough. But if the blade height is too high, you’ll risk kickback and other problems. To find the perfect height for your cuts, you’ll need to use a dial indicator and test the blade against a flat surface.
Once you’ve adjusted the blade height to the desired height, it’s time to adjust the blade tilt. This is where the handwheel comes in handy. To adjust the blade tilt, all you need to do is turn the handwheel and watch the blade tilt as you turn it. You should keep turning the wheel until the blade is at your desired angle.
Once you have your blade tilt set, it’s time to check the blade alignment. To do this, all you need to do is check the blade against a straightedge. If the blade is misaligned, you’ll need to repeat the previous steps until the blade is perfectly aligned.
And that’s all there is to adjusting the blade tilt on a table saw. Of course, safety comes first — so make sure to wear the proper safety gear and follow the safety protocols outlined by the manufacturer whenever you operate the table saw. Don’t take any chances with your safety and when in doubt, ask a professional for advice. That’s always a good idea before using a table saw.
Rip Fence & Crosscut Fences
Ahoy there to all the woodcutters out there! So you’ve heard of the dreaded “Rip Fence & Crosscut Fences”, have ya? Well you’re in luck, cause I’m here to give you the lowdown on what they are and how they work.
So first of all, let’s get the basics outta the way. A Rip Fence is a simple device that is used to make sure that the board being cut remains in the correct place. This fence has a handle that sticks out from the saw table, and it is used to hold the board against the fence, creating a straight line and perfect alignment. It is an essential tool for making accurate and precise cuts throughout the entire length of the board.
On the other hand, a Crosscut Fence is used to make sure that the board is kept in the correct orientation when cutting across it. The crosscut fence is usually made of metal, and it is typically a few inches longer than the rip fence. This extra length of the crosscut fence is to allow for any potential inaccuracies that might occur when setting the blade height.
Once the rip and crosscut fences are set up correctly, they can be used together to make extremely precise cuts. To do this, simply loosen the rip fence, move the board so it is just below the saw blade, and then clamp the rip fence down. Next, move the blade so that the board is between the rip and crosscut fences.
Finally, tighten the rip fence to make sure the board is secure and ready to be cut. The amazing thing about using this setup is that it allows you to make angle cuts – like a miter – with total accuracy.
So now that you know what a Rip Fence & Crosscut Fences are and how to use them, it’s time to get out there and cut like a pro! So get on those saws, because you know what they say: “nothing worth having comes easy.” Good Luck!