How to Bleach Wood | UK Guide | 2023

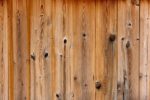
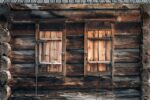
There’s many reasons why you may need to bleach wood. External wood, such as the materials used to produce outdoor furniture or decking, are particularly prone to weathering that can affect its colour and overall appearance. If moisture has gained a foothold, you may also need to remedy fungal growth.
Wood bleaching is a handy way of rectifying all of these issues. Internal wood, including flooring and furniture, will also often require bleaching if you plan on refurbishing particularly tired looking material. Although wood bleaching is a fairly simple technique, it takes some practice to deliver the best possible results.
Wood Bleaching Basics
All wood bleaching agents and techniques rely on the oxidation process. Regardless of what bleaching solution you are using, the agent will target the discoloured pigments within the wood, resulting in a whiter, more even appearance. Many chemical agents can be used to bleach wood, with products containing chlorine tending to be the most effective.
Chlorine dioxide and sodium hydrochlorite are particularly effective at tackling very discoloured wood, while even basic bleach products can yield impressive results. However, chlorine-free bleaching agents can also be used with success. In lieu of chlorine, this alternative solutions rely on active substances such as oxalic acid and ammonia to deliver whitening results.
Preparation
Before you think about applying a bleaching solution, you should first focus on preparing the wood by cleaning it. An off-the-shelf wood cleaning solution is always advisable here. When applying wood cleaner solution, make sure you are using a lint-free rags or cloths to prevent any unwanted fibres from lingering around on the surface of the material.
Once you have carried out a thorough clean of the surface, you can inspect the wood for any noticeable blemishes or unsightly marks. You may also need to remove a stubborn layer of stain or paint. A high-quality paint remover or stripper solution will be required if this is the case.
Once you have cleaned your wood and removed any colour or stain, you can turn your attentions to sanding your material. Sanding wood may take some time, especially if you want to restore the material to as natural an aesthetic as possible. No matter how long you spend sanding your wood, make sure you finish off the sanding process with a very light grit paper to ensure a smooth and even finish. Using a fine grit sandpaper at this point will also ensure bleach will be accepted more readily.
Bleaching the Wood
Now that your wood has been cleaned and sanded, you can finally apply the bleaching agent of your choice. Prior to applying bleach, give your wood a final wipe down to remove any dust particles and other small particles. There are several ways you can apply bleach to wood. Using a brush is always the best method if you want to reach the entire surface area of the material, but applying a fine mist of bleach solution via a spray bottle will make life easier.
Your aim here is to saturate the wood with bleach solution, so keep an eye on any drips or pooling excess as you go. One you have evenly saturated the wood, leave it to dry and do its work. You can repeat this bleaching process as many times as required to achieve the level of colourisation you’re looking for.
Once you’ve completed the bleaching process, leave the wood to dry thoroughly. Next, you can focus on sealing it for a first-rate finish. There are numerous options available foe sealing wood after it has been bleached, although wood wax tends to produce the best finish.