How To Create A Beautiful Wood Cutting Board For Your Kitchen
It’s time to show off your skills as a woodworker and create something spectacular as a way to upgrade your kitchen. And while a wood cutting board certainly isn’t the sexiest kitchen accessory, I’ll show you how to create a beautiful wood cutting board for your kitchen as it is a necessity.
So if we have to have it, let’s make it something special. And I’m here to teach you the basics of crafting a beautiful cutting board that will turn heads and become a conversation starter next time you have dinner guests over.
Let’s get started. The first step is to gather the materials you will need. Forget trying to be creative, just get the basics: wood, a saw, and sandpaper. You can also opt to use a router and other shaping tools to get more creative – if that is your jam.
OK, say you have all the materials. That doesn’t mean this is going to be easy. I’m warning you, it’s going to require a fair amount of work. But trust me, it will pay off. Now this is your chance to get creative, so take your time planning out the shape of your board and make sure it looks exactly the way you want it.
Once the basic shape is coming along, I would suggest thinking about putting your own personal touch on it. That could range from adding texture and color to really making it something to be proud of and enjoy.
Now, near the end of the project, don’t rush things. Take your time sanding it down, making sure the cuts are seamless and that each contour you have set into it looks right. And finally, put the finishing touches on it, like a beautiful clear finish that will protect it and make it shine.
And when you are finally done, sit back, admire your work and know that next time you use your board, you will feel a sense of pride – after all, it’s something that you created with your own hands! Plus, every time someone compliments your cutting board, you can tell them how you made it with your own two hands.
So there you have it – How to Create a Beautiful Wood Cutting Board for Your Kitchen. I hope you all enjoy your new project and have fun making it your own! Now what are you all waiting for? Get out there and get creative!
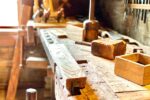
Gather The Needed Materials

Well, if you’re thinking about making yourself a nice wood cutting board for your kitchen, you’re gonna need some stuff. What kind of stuff, you ask? Uh, let’s see. You’re gonna need… some wood, of course. That’s the whole point, isn’t it? Yeah, I guess you’re gonna need to get some wood. So…you better get to goin’ and find the wood you want for your cutting board! How hard can it be?
And then, you’re gonna need some tools to go with that wood. Yeah, wood wouldn’t make a very nice cutting board if you don’t have some tools to shape it, right? So, you got to have tools to do that. Maybe something like a saw and a chisel, and maybe a sanding block if you want to get fancy. But don’t forget a drill, so you can put some cool handle or a little holder of some kind on the board. You know, make it a bit more functional, and easier to handle.
Maybe you can go overboard and get yourself a few extra tools to work with, if you’re feeling a bit adventurous. Something like a lathe, or some other stuff with an even more fancy name. These’ll all help you create some really nice patterns, curves and textures on your cutting board.
And don’t forget about the other materials, like glue and epoxy. Yeah, these’ll come in handy when you want to fix something, like a crack, or you want to hold two pieces together. Don’t forget about the wood stain, if you don’t want your board to just be wood-colored. You can add a bit more of an upgrade with a few other materials in order to really make it look nice.
That pretty much wraps it up. Got your wood, got your tools, got your extra materials. Now go out and start finding all that stuff! Oh, and while you’re at it, don’t forget to set a budget. That may come in handy. After all, no one likes going overboard, right?
Alright, so now that you know what you need, it’s time to get out there and start gathering it all together! So don’t waste any more time! Go get going and get all the items you need to make your new and beautiful kitchen cutting board.
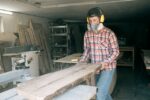
Get Over The Fact It Will Require Some Work
So, you want to build a beautiful wood cutting board for your kitchen? Well, I’ve got news for you, it’s gonna take some work. Don’t go getting antsy on me just yet though; I’m here to help.
It won’t be easy, but it will definitely be worth it. Sure, you could buy something pre-made and call it good. But c’mon, really? Where is the fun in that? Building something with your own two hands is the best way to get the satisfaction scores high.
You’ll need to make sure you got everything lined up before getting started. You’re going to need some materials in order to make it, and it’s not just going to build itself you know. That’s why I’m here, to make sure you got your ducks in a row and you’re ready to get going.
Think of all the compliments you’re going to get when you show off your masterpiece. Whether or not the other person knows the hard work that went into creating it, doesn’t change the fact that it will look beautiful. Strut your stuff and be proud of your work.
It’s going to take some effort, some elbow grease, and maybe a few breaks for rest. But at the end of the day, you’re going to have something tangible to show for it. That just sounds better than pointing to a bought cutting board on the counter and saying “I got this one.”
But you can’t start off looking too far ahead. Let’s get the basics in line first; the stuff you need and the tools at your disposal. I won’t sugarcoat it and say it’s gonna be easy; it’s not. But it is achievable. Pretend I’m your coach and you got this. Let’s do this!
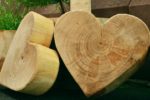
Create The Cutting Board Shape
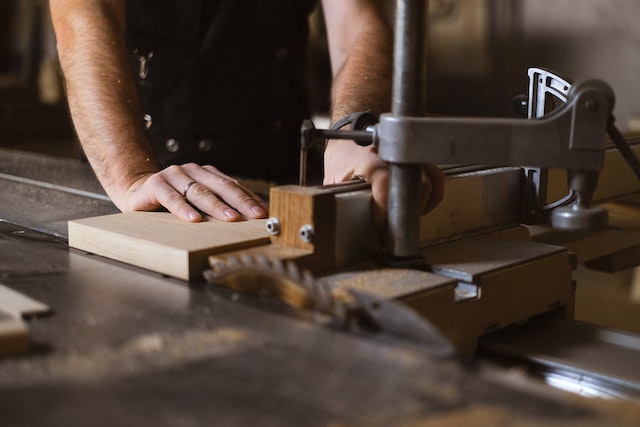
Ahh, creating the cutting board shape! This is a crucial step in the process, and the most fun, no doubt!
It’s always a good idea to plan ahead. Grab a piece of paper, and a pen, and sketch out the shape you envision for your cutting board. That way you can have an idea in mind of what you need to accomplish! Once you have a plan, it’s time to get to work.
You’ll need to use some tools – like a saw, measuring tape, and a hammer – to make our cutting board shape. It probably goes without saying, but you should always use caution when dealing with tools. Before you start, double check your measurements and make sure the wood you’re using is flat and secure on the work surface. It’ll save you a lot of trouble as you move through the process!
And now you can begin sawing. Even if you’re a little new to carpentry, it’s really not that hard. With patience, and a steady hand, it will come to you in no time. Carefully follow the shape you’ve sketched out, nailing the four corners in place – and voila, you’ve successfully created your cutting board shape!
Now it’s time to smooth out the edges and corners. Check for any splinters or nails sticking out, and use sandpaper to get the board looking smooth. And then use metal polish for any part of the board where metal has been used. This will give your cutting board a nice and professional finish.
We’ve just created the cutting board shape. It was a bit of work, but it looks amazing. We’re halfway there to having a beautiful and functional cutting board! Congratulations!
Begin Adding Texture And Design To Your Cutting Board
Ok, so now that you’ve got your shape for your cutting board all cut out we can start adding texture and design. Now you might be thinking, but how do I do that? Well lemme tell ya, there are a few different ways to add texture and design to your cutting board to make it look beautiful.
One of the most basic ways to add texture to your cutting board is with sandpaper. This can take a while and require some patience, but sanding your cutting board will give it a nice, smooth feel. All you have to do is take some sandpaper and begin lightly sanding along the surface of the cutting board. You don’t need to be too aggressive with the sanding otherwise you may end up ruining the shape of your cutting board, so be careful.
Another way to add texture and design to your cutting board is to etch it with a wood burning tool. This is a great way to add personal designs to your cutting board and make it look more unique. You can design a flower, lettering, or patterns. Make sure you be careful with the wood burning tool and don’t overdo it. Etching too much into the wood can cause irreversible damage, so go lightly and use a steady hand to get the design that you want.
We also can’t forget about wood stain. Wood stain is a great way to add hues to your cutting board, and there are a variety of colors to choose from. In order to stain your board, you first will have to sand it, so make sure you’re careful when sanding and you don’t create any impurities or damage the shape. Once you’ve sanded it, it’s time to apply the wood stain. Follow the directions of the particular stain you’ve chosen, as some may require you to use a brush and others may require you to use a cloth.
These are just a few ways you can add texture and design to your cutting board. Making it look beautiful is all up to you, so get creative and have fun with it. With a little bit of patience and some talent, you’ll be the proud owner of a beautiful, one-of-a-kind cutting board in no time.
Finish Off Your Cutting Board
If you’ve made it this far, congratulations! You’re almost done with telling your new cutting board how much you love it. Now all you have to do is make sure it looks just as shiny as you want it to look – it’s all in the details!
First things first – any sanding you may need to do in order to give your board the look you’re going for should be completed at this stage. To reach a smooth surface, use the highest grit sandpaper you can find, and make sure to move the paper in a circular motion.
Once you’re happy with the results of your sanding job, it’s time to apply a finish. This gives your board extra protection, so don’t skip this step! You may opt for a traditional oil finish, or go for something more contemporary, like a spray lacquer. Make sure to read the instructions for the finish you’ve chosen thoroughly before you begin and follow them accordingly.
Finally, your board is ready for the big reveal. So step back, admire your work, and take pride in the fact that you just finished creating your own cutting board, something that you can use and enjoy for years to come.
Now you don’t have to worry about struggling to chop or dice ingredients on a tiny cutting board or trying to find space on a large cutting board that takes up too much counter space. Instead, you can proudly display this work of art you yourself crafted – with style and convenience!
So that’s it – the complete amazing journey of creating your own wooden cutting board. This isn’t something you would expect to be easy or even possible, but with the right guidance – who knows what kind of kitchen or woodworking projects you could take on in the future? Now all that’s left is to enjoy cooking with your beautiful and functional new cutting board – time to get chopping!
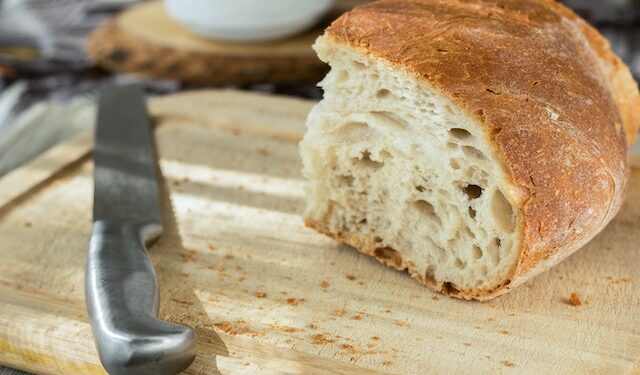
Enjoy Cooking With Your New Cutting Board

Well, congratulations! After all that work you’ve finally completed your own wood cutting board. Now it’s time to head on to the kitchen and get cooking!
Know that your hard work has paid off, and that you now have a unique cutting board that won’t be found in any store. Just think, someone will be going to be delighted with this custom piece of art in their kitchen!
So, you’ve put in all that effort and got a custom crafted cutting board. The funny thing about all of this is, you haven’t even used it yet. Sure, cutting boards are just boards, sure you’ve done a good job creating it and making it as good-looking as it is, but you’re still a bit scared to get it dirty, aren’t you? Cut a slice of bread with it, or dirty it up with some onion juice and watch your hard work vanish!? No way, not gonna happen!
Let go of those fears and get to work! There’s nothing better than the smell of a freshly chopped clove of garlic or a few slices of sweet tomatoes on a warm summer evening. Let that cutting board be the canvas of your cooking masterpiece!
Another thing that’s great about getting yourself a custom cutting board as opposed to a store-bought one is that you get to show it off to friends and family. That’s what it’s all about, sharing the food with them and, who knows, maybe even teach them a thing or two about woodworking!
No matter what you cook with it, enjoy the ride and have fun cooking with your new cutting board! That’s right, that sturdy piece of art is now your coveted tool in the kitchen! Keep it clean, and make sure to keep it dry after every use so it can look its best while working its magic in your kitchen!