How To Create A Beautiful Wood Marquetry For Your Project
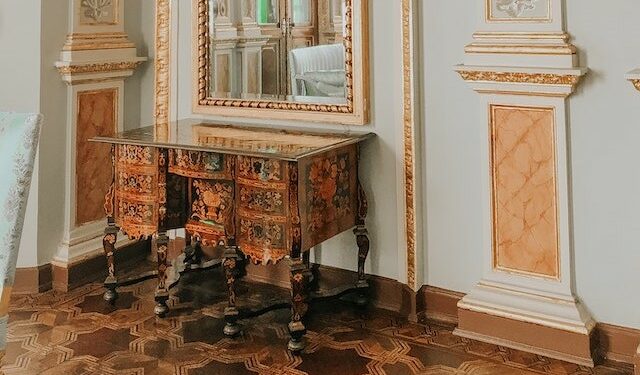
Wood marquetry is an intricate woodworking technique that involves creating a decorative pattern using small pieces of wood. This technique has been used for centuries to add beauty and elegance to furniture, cabinetry, and other woodworking projects.
If you’re interested in learning how to create a beautiful wood marquetry for your project, you’ve come to the right place! In this article, we’ll take you through the step-by-step process of creating a beautiful wood marquetry for your project.
Whether you’re a seasoned woodworker or just starting out, this guide will provide you with all the information you need to get started with this impressive woodworking technique. So, let’s get started!
The Basics of Making a Wood Marquetry
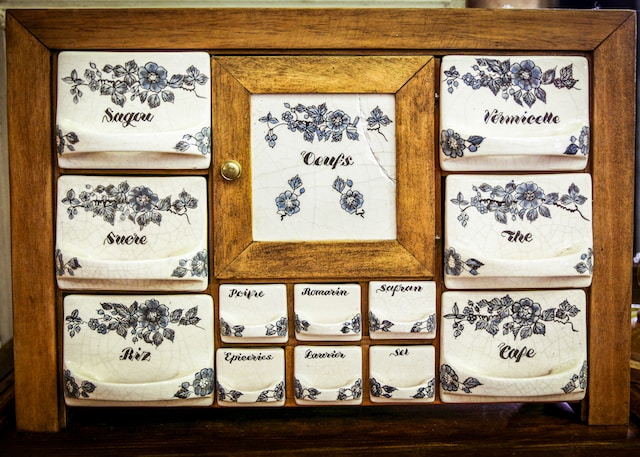
Woodworking has been around for centuries, and there’s no better way to make beautiful and intricate designs than with a marquetry. Whether you’re making a wooden bowl, desk, or cabinet a little extra work with marquetry can make a big difference. Here’s how to get started making your very own custom piece of marquetry:
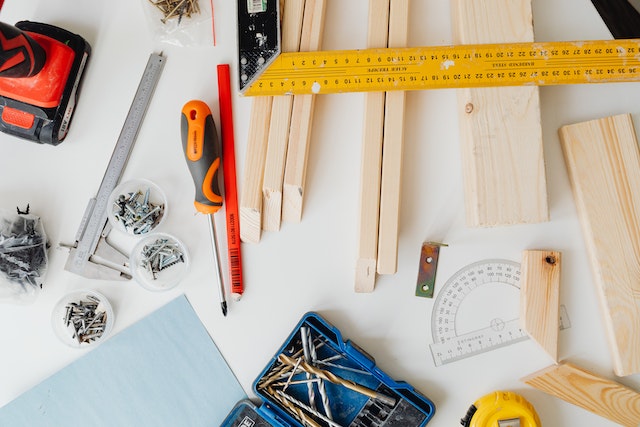
First, gather your materials. You’ll need a good quality wood with preferably some grain, an assortment of contrasting woods, a sharp knife, scissors, a ruler, glue, sandpaper, and some wood glue. If you’re feeling really ambitious, you can also use shellac or varnish for a truly impressive finish.
Once you have your materials, it’s time to start laying out your design. Take your time and be sure to lay out all of your pieces ahead so you understand how your design will fit together. When you’re satisfied, use a pencil or a knife to mark and cut your pieces to the required sizes. Take special care to ensure that all your pieces are the same size.
Now it’s time to apply your glue. You want to use a glue that won’t discolor or yellow the wood, so be sure to read the directions carefully. Spread your glue evenly with a brush and, when ready, assemble your pieces into the design you’ve created. Let it dry, and use a hammer to make sure everything is firmly in place.
After the glue has dried, use some sandpaper, an orbital sander, or a small power planer to give your design a smooth and even finish. You can use different grades of sandpaper for different projects; for example, a finer grain for the edges or a coarser grain for the surface. Lastly, you can polish your work with shellac or varnish for a glossy, attractive finish.
There you have it! Making your own wood marquetry is one of the most rewarding and satisfying projects you can do. With some patience and practice, you can easily build a beautiful and unique piece that will add character and charm to any room in your home. So go ahead, why not give wood marquetry a try?
Gather Your Materials
Gather your materials for this project, friends! You may think your hands are all the tools you need but trust me, you’re gonna want to get a few others for this one.
First up: a jigsaw! We’ll be doing some carving and cutting to get the shapes we need, so a nice sharp jigsaw will definitely come in handy. If you don’t have one, they’re surprisingly affordable, so go check them out.
Next, we’ll need some wood strips! Different colors and grain patterns will work great together here and make your project look extra snazzy. You can grab real wood strips, but thinner versions are usually a bit more affordable in the long run.
Next, you’ll need some wood glue. Not just any glue, though! Make sure to grab wood glue specifically, since it’s designed to bond wood together nicely. Otherwise, your pieces won’t stay together and it won’t look very nice in the end.
Finally, you’ll need a few tools to help assemble your pieces. A chisel, a hammer, and some sandpaper are a few of the essentials you’ll need here.
Now that you’ve got everything you need for this project, it’s time to get started! All that’s left to do is mark and cut your pieces, apply your glue, and assemble those pieces. Then, after you polish up your work, the finished product is sure to be something beautiful!
Mark and Cut Your Pieces
Ah, it’s time to put your skills to the test. Before we can start creating a stunning wood marquetry, we have to mark and cut our pieces. Get your drive and determination ready – it’s time for some hard work.
Before you can begin, make sure you’ve set up your work area, gathering all the materials you’ll need. Now, it’s time to get to work!
Take a deep breath, becase this is a really important part of the process. We need to make sure we get it right. Start off by carefully sketching out our design. Don’t worry if it’s not perfect – art isn’t supposed to look like it’s come right off an assembly line, after all.
Once you’re happy with the design, we’re ready to start cutting the wood. If you’ve never used a saw before, it can be really intimidating, so don’t worry if you’re feeling a bit nervous. Just take it slow and steady. Grab your saw and start following your design, carefully making sure you’re cutting along the lines. Oh, and make sure you’re wearing appropriate safety gear, like goggles and gloves, of course.
When you’ve finished cutting, it’s time to file down any rough edges and sand the wood until it is perfectly smooth. Gently sanding the wood with a fine-grit sandpaper will give your pieces a beautiful finish. For an extra special effect, you can also use a router to create shapes and curves.
Once you’re finished with the wood, it’s time to start tiling. This involves carefully cutting out little pieces of tile that you can use to create your design. Try to stick to a consistent pattern – it’s really satisfying when it all comes together in the end.
Once you’re finished with the tiling, you can move on to the next step – applying the glue. Hopefully all that sawing, filing and sanding was worth it!
Apply Your Glue
Alright, now that you’ve got all the pieces cut to perfection and laid out in the way you have them in your mind – it’s time to glue it all together! Some people prefer to use all sorts of fancy glues and what not but when it comes to wood marquetry, simple wood glue works just fine, my friend.
So go ahead and break out the glue – but whaddya know, all you see is a big ol’ glue-filled mess. That’s right, there’s all types of glue out there and it can be a bit of a minefield trying to figure out which one to use. Let’s not forget the amount of glue you’ll need too, don’t want to use too much and make a huge mess with the excess glue, do ya?
But fear not, I got you covered! To help you properly apply your glue, here’s a few steps you should follow. Firstly, make sure your pieces lay evenly and then start applying small amounts of glue in the thin cracks between pieces. This will help the pieces stick together and give you a nice clean bond. A little bit of glue can also be applied where the pieces mate together for a better glue joint.
When you’re done with the gluing process, you should clean and dry the wood before you start using any tools. Then, using a damp cloth and some gentle pressure, lightly swab the excess glue from the surface. This way, it won’t affect the finish of the wood or any of the other materials.
In the end, the trick to an effective wood marquetry isn’t just the amount of glue you use but also the technique. So with the right approach and ability to multitask – go ahead, apply the glue and take your project to the next level!
Assemble Your Pieces
Hey, y’all! If you’re reading this, you must be making your very own wood marquetry – and I’m here to help you successfully assemble your pieces.
It’s time to get your piece together. Now, if you have a jigsaw puzzle or some Legos lying around and have experience with those, then you already have a good idea of how to do this. If not, here’s the gist of it.
First, you’ll need to find and decide on an attractive sequence for your pieces. Pay attention to the colors, design, and figures to make sure that your project will look perfect once it’s assembled. Once you’re happy with the arrangement, it’s time to assemble.
To actually put the pieces together, you’re going to want to use a good quality glue to bond them together. Make sure the adhesive you use is strong enough to hold all the pieces together since the last thing you want is for the marquetry to fall apart.
Once you’ve glued each piece together, you’ll need to press them down to ensure a perfect fit. You can use a few heavy books or your rolling pin to make sure the pieces are firmly in place.
After you’re done with that, you can check and see if all the pieces are together. Once everything looks nice and secure, you can move on to the next step (polishing your work!).
It’s easy to get scared when it comes to making a wood marquetry, but don’t worry! As long as you take the time to assemble your pieces correctly and in an aesthetically pleasing way, you’ll be amazed at just how beautiful your project will turn out. Good luck!
Polish Your Work

Congratulations! You finally made it – you have successfully created your beautiful wood marquetry! The final step of this project is polishing it to perfection. Here’s what you need to do:
First of all, get yourself a nice quality polishing cloth to make your wood marquetry shine. Fold it neatly and use it to buff your wooden creation. Make sure to use mild cleaning solutions to keep your work spick and span.
Next, you can use a mixture of natural linseed oil, beeswax, and petroleum jelly to bring out the natural colors and grains in your wooden pieces. Apply a thin layer of the mixture to the surface of your marquetry. Let it sit for about 10 minutes and then use a soft cotton cloth to wipe off any extra mixture on the surface.
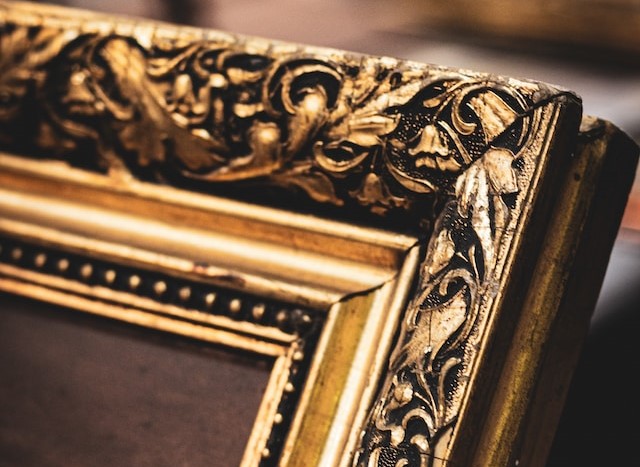
Finally, the last step of polishing your marquetry is to give it a protective coat. You can use a polyurethane or lacquer to do this. Apply a thin layer over your wood marquetry and buff with a soft cloth. This will seal in the colors of your wood and also protect it from moisture and dirt.
And that’s it! You now have a beautiful wood marquetry that you can proudly display in your home. With a little bit of effort and some careful polishing, you can create a beautiful masterpiece that will last for years to come. So don’t forget to polish, protect, and display your work – and enjoy the admiration of your family, friends, and visitors!