How To Create A Stunning Wood Inlay For Your Project

Wood inlays are a beautiful way to add intricate and eye-catching designs to your woodworking projects. By cutting and fitting contrasting wood pieces into a base wood, you can create stunning patterns and designs that will elevate your project to the next level.
In this article, we’ll share step-by-step instructions on how to create a stunning wood inlay for your project. We’ll cover everything you need to know, from selecting the right wood species and colors, to cutting and fitting the inlay pieces, and gluing them into place.
Whether you’re a beginner or an experienced woodworker, this guide will help you add a unique and personalized touch to your projects. So, let’s dive into the world of wood inlays and discover how to create a stunning masterpiece for your next woodworking project!
The Basics of Wood Inlay
Greetings folks! Looking to jazz up your boring old woodworking project? Look no further than a stunning wood inlay! It might sound daunting, but don’t worry! I’m here to help. In this section, I’ll be breaking down the basics of wood inlay, so let’s get started.
First, what is a wood inlay? Well, it’s a decorative process where you embed pieces of materials into a surface. Typically, we use wood for inlays, but you can use pretty much any material you’d like. Common materials include metals, plastic, stone, and anything else you can get your hands on.
Now let’s talk about selecting the wood. Depending on the type of inlay you’re creating, you may want to pick out a wood grain or material that will give you with the right surface quality. Be sure to also consider the thickness of the wood to ensure there is enough depth when the inlay is complete. Don’t forget that you’ll need to cut the wood into uniform shapes and the different pieces will affect how the inlay looks and fits together.
Not sure where to start? Look up some wood inlay designs and see what catches your eye. Keep in mind that you’ll likely need several pieces of wood to create the design so budget for extra pieces.
Next up – creating the inlay! This is where the fun starts. You’ll need to cut the wood pieces into the shapes of your design, creating small uniform shapes that fit together. Make sure to keep a steady hand and focus on precision cutting. Work slowly and take your time to ensure your inlay looks exactly how you want.
Once the shapes have been cut out, it’s time to start gluing them together. Use a quality wood glue to make sure the pieces stick together properly. You may also want to consider a wood filler to ensure a smooth finish. Be sure to let the glue dry fully before moving onto the next step.
Finally, all that’s left is the finishing touches. Sand and level the inlay to make sure it has a smooth, even surface. Add any finishes you’d like, whether it be paints, stains, waxes, etc. Depending on the project, you may also need to apply sealers and polys to protect the inlay from damage.
And there you have it, friends! That’s the basics of creating a wood inlay. Now go out and show the world your inlay-making prowess!
What is a Wood Inlay
Hummmm, what is a wood inlay? Well, let me tell ya, it’s like a work of art, grownin’ in wood instead of paint. It’s like takin’ a plain piece of wood and havin’ it transformed into a beautiful decorative pattern. In wood inlay the colors of the wood blend and the small pieces come together to form the pattern.
So when you look at it, you feel like you’re starin’ at a tiny little puzzle. You can make any number of designs, if your imagination runs wild enough. You can choose to use a combination of colors and grains to express your masterpiece, or you can stick to a single color or shade.
The process of wood inlay combines multiple pieces of woods or other materials together to form a pattern or design. You can create geometric patterns, abstract designs, or animal figures in the design to make it pop out. It’s incredibly fun and is definitely a way to bring out your artistic side if you have it.
Wood inlays are a great way to spruce up your decor and furniture. You can add a modern touch to a classic piece of furniture, or give a bland room a more elegant look. The use of wood inlay to enhance your furniture or project is something that is becoming increasingly popular. There’s a ton of resources available online to get you started on your very own project.
So, if you’re lookin’ to add something special to your design, a wood inlay it is. It’s an incredibly easy and fun way to add some extra fabulousness to your project. Now you know what a wood inlay is, so go ahead and start dreaming up your very own design. With a little creativity and determination, you can create a stunning inlay that will last for years to come!
Selecting the Wood
Like any job, when creating a stunning wood inlay, the right tools are the secret to success. When it comes to selecting the perfect wood for the job, you need to choose your materials wisely.
Let’s face it: when it comes to wood, there’s a ton of choices out there, from oak to mahogany, from pine to walnut. But which one do you choose? And why?
Well, if you ask me, the key lies in finding the right combination of grain, hardness, and stability. All three are important factors when deciding the type of wood to use in your project.
For example, oak is a popular choice for wood inlays because it’s relatively hard and stable. It’s also easy to work with and has a nice grain pattern. But if you’re looking for a softer wood with more dramatic grain, then walnut is the way to go.
Another important factor to consider is the thickness of the wood. If you’re creating an inlay, it’s important to use thin slices of the same type of wood. This is because thin slices of the same type of wood will have similar grain patterns and will be more uniform when it come to cutting and gluing the pieces together.
Finally, don’t forget the aesthetics. After all, you’re creating a stunning wood inlay, so you want to make sure it looks as beautiful as possible.
This means taking the time to pick out wood that has the right color and grain for the project. This can make all the difference in the end result.
So, now that you know the basics of selecting the right wood for your inlay, it’s time to start shopping around. Just remember: find the right combination of grain, hardness, and stability, and you’re sure to create a stunning piece of art!
Creating the Inlay
Creating a stunning wood inlay for your project is a great way to add a unique visual appeal to your artwork. Whether you’re a novice or an experienced craftsperson, it’s important to understand the basics of creating an inlay so your end result is eye-catching, structurally sound and durable.
Let’s start by discussing the basics of creating the inlay. The first step is to select the wood that you’ll use to construct your inlay. Generally, hardwoods are a preferred choice since they are stronger and last longer than softer woods. The species of wood you choose will depend on your skill level and the desired finished look of the inlay.
Now, it’s time to start cutting the wood for your inlay. This is the part where you get to be creative! You’ll use the pieces of wood you’ve selected to craft a unique pattern that will become the inlay. This part of the process requires patience, as you will need to ensure that the pieces fit together perfectly.
Once you have the pattern set, now it’s time to start gluing the pieces together. You’ll want to use a wood glue that is designed specifically for woodworking projects. Make sure that the pieces fit snugly together and there are no gaps. This will ensure that the inlay is structurally sound and will hold up over time.
Once your inlay is assembled, it’s time for the finishing touches. After the glue has dried, you’ll want to take the time to sand and level the pieces. This will give the inlay a smooth, polished look. After that, you can finish the inlay with a variety of finishing options such as stains and sealers to give the inlay a more natural appearance.
So, there you have it! With a few tools, the right materials and a bit of patience, you can create a stunning wood inlay for your project. Now go out there and get creative!
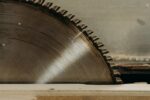
Cutting the Wood
Hey folks, let’s talk about cutting the wood for that stunning wood inlay project you’ve got in mind! Now, one way to go about this is to use your old friend and mine, the jigsaw. But if you want something a bit more precise, and if you don’t want to wreck your jigsaw, you should be using a scroll saw.
A scroll saw will let you cut intricate details for more precise designs. Now, this means that the edges of the wood that you cut will be smooth as butter, so no filing is necessary. Remember, if it’s a complex pattern that you want to create, it makes sense to use a scroll saw.
When you’re cutting with a scroll saw, you’ll want to use a clamp that supports the wood, making the cutting process easier. You should also make sure that you have good lighting and that the area is free of any distracting noise or movement.
Once you have your pieces cut, it’s time to start gluing your pattern together. Before you do that, however, you’ll want to give the pieces a light sanding so they’ll fit together better. With all that taken care of, you’re ready to get your inlay project underway.
It’s essential to have plenty of patience when it comes to cutting the wood for your inlay. Get it right the first time and you’ll be sure to have a beautiful looking finished piece. Good luck and happy creating!
Designing the Pattern

Are you ready to design your stunning wood inlay? Great! Now, it’s time to get creative and start designing a beautiful pattern for your project.
Before you start, you’ll need to decide on the size and type of patterns you want to use. Do you want to create a complicated mosaic, or something more simple and geometric? This is where your imagination comes in-you get to play around with different shapes and sizes to create the perfect pattern that you envision.
There are a few tips and tricks that you can use to help you get started. Begin by sketching out your pattern on graph paper. This is a great way to plan out your design before you start cutting the wood pieces. You can play around with different sizes and shapes to make sure they fit together just the way you want.
If you don’t feel comfortable with drawing your own pattern, don’t worry. You can find plenty of printable templates or stencils online that you can use. Or, you can get creative and use something like a cookie cutter to create a unique shape for your inlay.
Designing your pattern isn’t the only step in creating a stunning wood inlay. Now, you’ll need to start collecting various sizes and shapes of wood for your masterpiece. Take your time and shop around for the best deals-you may be able to find high-quality wood at a thrift store or a garage sale. Once you’ve got all your materials, you’re ready to start cutting and gluing those pieces together!
Gluing the Pieces Together
Now, gluing the pieces together is the trickiest part of the process. Sure, it looks easy, but there are a few secrets you need to know before diving into this step.
First and foremost, you’ll want to make sure that you’ve cut your wood pieces to the right size and shape. This is key, as you don’t want pieces that won’t fit together or are the wrong size. As the old saying goes, “Measure twice, cut once!”
Once you’ve checked your cuts, you’ll want to select the right glue. There are so many different types of glue out there, but for this project, you’re going to want a glue that is strong and waterproof. Epoxy or polyvinyl acetate (PVA) are both great choices for this.
Now that you know the kind of glue you need to use, it’s time to get down to business. Start by marking where you want all your pieces to go, and then, starting from the center and out to the edges, place each piece of wood in its designated spot. Take extra care to ensure all your pieces fit snugly together, as any gaps between pieces will show upon completion.
When all your pieces are in place, start to apply glue. Make sure to apply enough glue to each piece, but not so much that it oozes out all over the place.
Once your pieces are glued down, you’ll want to press them firmly together with some clamps or a C-clamp to ensure everything is secure. Allow the glue to fully dry before you move onto the next step.
And with that, you have completed the gluing portion of this process. Now that wasn’t so hard, was it? Just remember, take your time, use the right glue and make sure all your pieces fit together properly and you’ll be on your way to a stunning wood inlay.
Finishing Touches

Ahhhh, the finishing touches are the most important part of any wood inlay project; this is your chance to shine and show off your work. The key is to make sure the inlay looks smooth and stunning, and that’s achieved with sanding and adding the right finishes. Let’s break down all the steps you need to take to complete the inlay.
First, we’ll start with the sanding and leveling of the inlay. Imagine if you didn’t sand down the surface of the inlay and it was bumpy and uneven; woof, now that would be an ugly piece of work! Sanding is essential to make sure the surface is smooth and consistent. Depending on the type of wood, you may need to use multiple grades of sandpaper to achieve the desired smoothness.
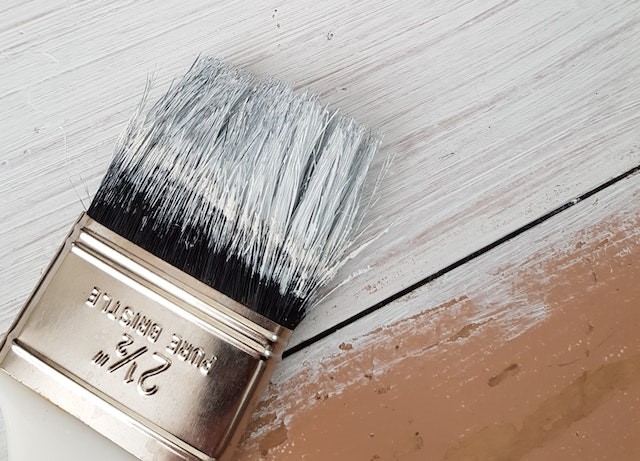
Once you’ve achieved the smooth surface you want, it’s time to add some finishes. Finishes are great for sealing in the wood and giving it a nice shine. You can use stains and sealants, oils and waxes, or lacquers or shellacs. It all comes down to your preference and what type of wood you’re working with. You can experiment with different options until you get the outcome you desire.
Last but not least, you want to seal in your inlay and protect it from the elements. Options like polyurethanes will help keep your work looking nice and shiny. It’s essential to apply multiple layers of sealers to ensure your inlay is well-protected.
Alright, we’ve made it to the end! Now you have a beautiful, stunning piece of work that is sure to wow your visitors. Everything from selecting the wood to the final touches took real skill and patience. It wasn’t easy, but your hard work paid off in the end. Now you get to have the satisfaction of knowing you created something truly special. Congratulations!
Sanding and Leveling the Inlay
Sanding and Leveling the Inlay? That’s easy peasy! Let me give you a few pointers to make sure your wood inlay design looks perfect and professional.
First things first, you need the right tools for the job. Get yourself a good fine grit sandpaper and make sure it’s soft enough to avoid scratches and marks on your wood inlay. You also need something to hold the sandpaper, like a small piece of plywood or mdf.
Now you’re ready to sand and level your inlay. To start off, put the sandpaper on top of the inlay and start to lightly sand it. Use long, smooth, steady strokes and make sure you sand the entire surface evenly. If there are any bumps, dips, or nooks, make sure to sand them down.
Next, you’ll want to use a higher grit sandpaper and repeat the sanding process. This will help smooth out the wood and give you a more professional look. Make sure to use light pressure when sanding so you don’t remove too much wood.
Once you’ve finished sanding and you’re happy with the way the wood looks, it’s time to level it out. To do this, get a few pieces of wood and place them on the inlay. Use some clamps to press the wood against the inlay and slowly start to align the pieces. It may take a little bit of time but you’ll eventually get the inlay to look perfectly level.
Finally, once you’re satisfied with the way the inlay looks and feels, it’s time to put a finish on it. This will help make the inlay look amazing and protect it from wear and tear. So, let’s get to work and make it look stunning!
Adding Finishes to the Inlay
Ahhh what do we have here? The finaaaaaaaaaaal step! I’m gettin’ pretty excited! I love adding those finishing touches to my projects and if your goal is to create a stunning wood inlay, this is where the magic really happens.
So, if you’ve made it thus far, pat yourself on the back, because you’re an absolute champion and you’re gonna be able to stand out from the rest of the woodworkers with your finely crafted wood inlay.
To add finishes to the inlay, you’re gonna need to choose your materials – and for that, I personally prefer to use oil-based stains, paste wax and mineral spirits. Oil-based stains will give your wood a deeper, richer colour that will create a wow factor.
Once you’ve chosen the material, you’ll want to follow the manufacturer’s instructions for applying the product. Start by wiping the inlay with a cloth soaked in mineral spirits. Allow the mineral spirits to penetrate the wood, and then wipe off any excess.
Apply a light coat of the oil-based stain if you want to achieve a subtly muted colour. This can be done using a small brush, or you could even get a bit fancy and use a sprayer. I always avoid using too much on the inlay, as it can end up looking too dark or messy.
Once the stain has been applied and had time to dry, you can now apply the paste wax. It’s always a good idea to make sure the area is clean first, and then apply a light coat of the wax. It will act as a sealant, which will help protect the inlay from water damage and scratches.
And there it is – congratulations champ! You’ve just successfully added the finishing touches to your wood inlay and you can now sit back and admire your work. I’m sure you’ll be nothing short of proud.
Applying Sealers and Polys
OK, so you’ve gotten your wood inlay looking perfect. You designed the pattern with precision, cut the wood like a magician, and glued the pieces together with masterful skill. Now it’s time to seal it all in and make sure your beautiful creation doesn’t get damaged. This is where sealers and polys come into play.
When applying sealers and polys to your wood inlay, you want to make sure you use the right stuff. Don’t grab some cheap sealer from the nearest home improvement store. You want something that is made specifically for woodworking. That way, you know it will protect your project and give it the professional and polished finish you are looking for.
When you’ve got the right sealer, you want to carefully apply it to the inlay. Don’t forget the edges and corners and make sure to use plenty of it. You don’t want it to dry out. Let it sit for at least 30 minutes, and then you’re ready for the next step.
Once your sealer is dry, you can apply the polyurethane. Apply it with a brush or a foam brush for best results. Be sure to coat the entire inlay and again, pay special attention to the corners and edges. Let your poly dry, and then you can sand it down for a smooth finish.
The last step is to put a sealer over the entire project. This will make sure your inlay is extra protected and looks even more stunning. Apply the sealer in thin coats and be sure not to get any bubbles. Let it dry, and then you’re all done!
If you’ve followed these steps, you’ve now got yourself a stunning wood inlay that you can proudly show off for years to come! It might have taken some time, but the results will speak for themselves. Time to put your feet up and admire your work, my friend. Congratulations!