How To Make A Perfect Box Joint For Your Woodworking Project

Hey everyone, today I’m going to show you how to make a perfect box joint for your woodworking project! A box joint is the kind of joint that you get in a box or drawer which has the appearance of interlocking fingers. It’s not just for wooden furniture either, this joint can be used for a lot of different pieces.
First, you’ll need to get the appropriate tools and materials. You’ll need a saw, chisel, saw blades, drill, and measuring tape. Once you’ve got all the equipment, you’re ready to get started.
Next, you’ll need to shape the joints. There are two options here: you can use a straight chisel or a curved chisel. If you use the straight chisel, you’ll need to make a 90 degree angle between two pieces of wood. With the curved chisel, you can create an angle that is not square. This is a more complex technique and requires a bit more experience, so beginners might want to try the straight chisel method first.
Now that you’ve got the joint shaped, it’s time to make the cuts. Start by measuring the length and width of the joint, then use your saw to make the cuts. Be sure to use the correct blades for the type of wood you have, or else you could end up with a sloppy joint.
Once you’ve made the cuts, you’re almost finished. All you have to do now is make sure that the pieces fit together perfectly. Sand down any rough edges, then glue and clamp the joint to secure it. Once it’s dried, your box joint is ready to be used.
The last step is troubleshooting. If you find that the joint isn’t as tight as you’d like or if you notice gaps, then go back and re check your measurements and cuts. It is also possible that you might have to re shape the joint with the chisel if it needs a bit of adjustment.
And that’s it! You now have a perfect box joint for your woodworking project. Just remember to be careful, take your time, and use the correct tools, and you’ll be good to go. Happy woodworking!
Preparing the Equipment

Ah, preparing the equipment for any woodworking project. It might sound complicated, but I’m here to tell you that it’s really not so bad. All you have to do is make sure you have the right tools for the job! For making a perfect box joint, you’ll need a few common-sense items.
First thing’s first: you’ll need a saw for making the cuts. I’d recommend a jigsaw for the job because it’ll give you the most control and allow you to make tight, clean cuts. The blade should be wide enough to cut a full width of the wood, depending on the thickness of the wood you’re cutting. Don’t forget to wear protective eye-wear while operating any type of saw.
In addition to the jigsaw, you’ll need a miter saw and a drill. Both don’t have to be fancy, though make sure they’re capable of cutting and drilling through the wood you’re working with. For example, if you’re working with hard oak wood, you’ll want to make sure you’ve got a saw and drill that can handle that kind of load.
You’ll need a few clamps for sealing the box joint boards, and a few scraps of wood to use as spacers. Once again, your scrap wood should reflect the size and thickness of the actual workpiece. And don’t forget something to measure the boards with when you’re cutting the dovetails. A fastidious woodworker will use a combination square or T-square, while the lazier workers might rely on the 45-degree markings a miter saw provides.
Finally, you’ll need glue. Again, make sure it’s appropriate for the wood you’re working with. Some glues will gum up when trying to bond harder woods together.
That’s about it for your tool arsenal! I bet you’re feeling a bit more confidant about moving onto the next step. But hey, don’t get too cocky! Just remember to be safe and maintain your tools. You don’t want them getting rusty or dull. Alright, let’s get to work!
Shaping the Joints
Ok, so let’s talk about shaping the joints!
For those of you who don’t know, a box joint is an interlocking type of joint that can easily be used to hold two or more pieces of wood together for a woodworking project. It’s a great way to ensure that your project is sturdy and secure.
But how do you actually go about making a box joint?
Well, the first step is to prepare the wood that you want to use. You need to make sure that it’s cut to the exact same size and angle so that the joints can fit perfectly when you put them together.
Once the wood is cut, it’s time to start shaping the joints. This is actually quite easy. All you need is a chisel and a mallet. Use the chisel to carve out small divots in the wood. These divots create the interlocking design of the box joint. You just have to make sure that each divot is the same size as the one next to it so that the joint comes together nicely.
Now, this may sound like it’s a lot of work, but it’s really not. Once you’ve done it once or twice, it will become second nature. You’ll be forming perfect box joints in no time!
Another tip for shaping the joints is to practice on scrap wood first. This way, you can get a feel for the technique before you start shaping your project wood. This is an important step. It ensures that when you finally get to your project wood, you’ll be confident in your ability to form a perfect box joint every single time.
I always like to remind myself that practice makes perfect when I’m forming these joints. Once you’ve got a few under your belt, you’ll be an expert in no time!
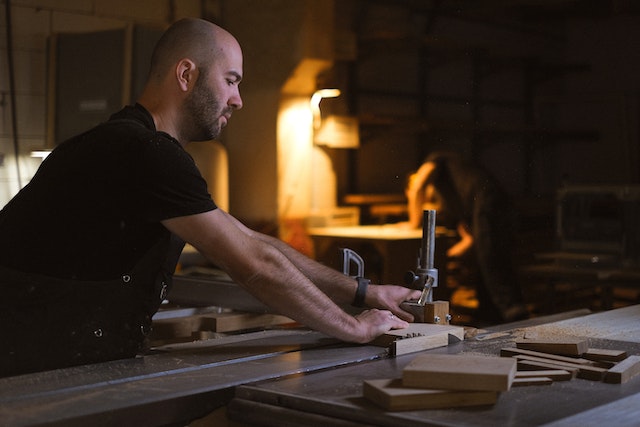
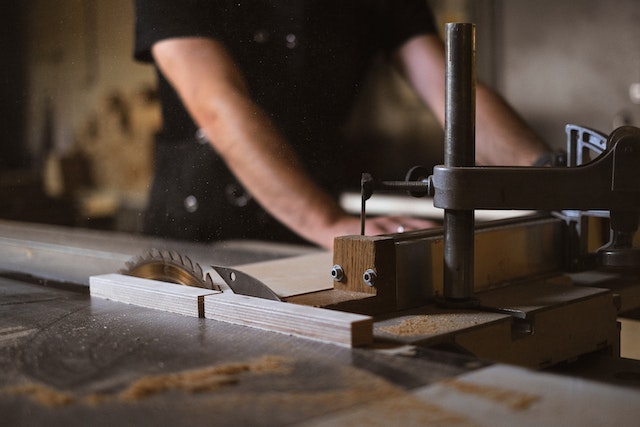
Making the Cuts
Welcome to the part of the process where you’re actually going to be making the cuts! If this is your first time doing this, don’t be scared. I promise it’s not as hard as it looks. Plus, I’m here to guide you every step of the way.
So the first thing you gotta do is take out your saw. Been a long time since I used one of these gadgets! No matter what type of saw you use, make sure it’s the right one for the job. If you don’t, you’re likely to make a mess of the project. That’s the last thing we want.
Now it’s time to make the actual cuts. Take your time here and be sure to measure twice and cut once! Don’t rush yourself either, because it’s really important that you get these cuts right. The key is to be meticulous, and try to use the same technique and speed on each cut.
If you’re left handed, you may want to start on the right side so you don’t accidentally make an uneven cut. But if you’re right handed, then you can just get started on the left side. That’s all you gotta do. Just take your time, focus, and make sure you measure twice and cut once.
You’re almost done! Now go ahead and double check your work to make sure everything is looking the way it should. If it all looks good then congratulations! You have finished the hardest part of making box joint for your project.
Still having trouble? Don’t worry about it – I’m here to help. Just shoot me an email, and I would be more than happy to walk you through the process step by step. We’ll get your perfect box joints dialed in in no time. Have fun, and happy woodworking!
Finishing Touches

Ah, finishing touches, the important final step of your perfect box joint project. Here at the Woodworking World, we’ve put together some simple tips to make your box joint look spectacular. No matter if it’s for a side table, a skill saw cabinet, or even a cupboard, these finishing tricks will take your woodworking to the next level.
First, make sure you sand the edges of the box joint. This will help to keep the joint smooth and make sure the pieces fit together snugly. Go over it a few times with some fine-grade sandpaper to really make sure it’s perfectly smooth. If you’ve still got some rough edges after the first attempt, use something like a pneumatic sander to really get those edges looking great.
Second, use some kind of sealant on the finished joint. This will help protect it from moisture and keep it looking its best. A light wood wax is a great choice, but you can also use a wood sealer that’s already been pre-mixed. Whatever you choose, make sure you apply a thin coat over the finished product. Give it a few minutes to soak in, then buff it off until you’re happy with the way it looks.
Third, you may want to add some decorative elements to your box joint. A coat of paint or stain can really bring out the beauty of the wood grain and make the joint stand out in any room. Feel free to get creative here, experiment with different colors and finishes, and see what looks best with your box joint.
And lastly, have fun! Making a box joint is a creative process, and often times the best part is coming up with something unique. See what you can come up with, and make sure to enjoy the journey from start to finish. Remember, at the Woodworking World, we’re all about having a good time. So have fun, and enjoy the results!
Troubleshooting
Ah troubleshooting – perhaps the most important part of any woodworking project, you know? If something doesn’t look right when it comes to box joints, it’s time to stop and take a look at what’s up.
First, you’ve got to make sure you got the right measurements. The depth of the blade, the width of the joint – they’ve all gotta be right. If they’re not, it’s gonna be pretty obvious once you see it mated up together. You don’t want a joint that’s too shallow, or one that’s too deep – neither one of those looks anywhere near as good as the perfect joint.
Next, you’ve gotta check your saw. When you’re making all these intricate cuts, you need an extremely sharp saw, otherwise the cuts just won’t look right. Be sure to sharpen that blade whenever you feel it’s necessary and you’ll be golden.
Finally, you’ve got to pay attention to your wood. Soft pink wood likes pine won’t hold up as well to cutting as something nice and hard like cherrywood. Plus, it’s important to pay attention to the grain pattern when you’re cutting and how it’s going to look when put together. A perfect joint can be ruined if the grain is off.
There ya go, there’s your troubleshooting. That’s what you do when your joint just isn’t quite coming out right. If you follow these guidelines, you’ll be able to get the perfect box joint out of your project every time.