The Top 10 Woodworking Projects For Beginners

Woodworking is a satisfying and rewarding hobby that can be enjoyed by people of all ages and skill levels. Whether you’re a complete beginner or an experienced woodworker, there are plenty of projects you can tackle to improve your skills and build your confidence.
In this article, we’ll share the top 10 woodworking projects for beginners. These projects are simple, yet functional, and offer a great introduction to basic woodworking techniques. From a rustic wooden picture frame, to a stylish and functional bookshelf, these projects will help you build your skills and gain confidence as a woodworker.
So, whether you’re looking to start a new hobby, or simply looking to improve your existing woodworking skills, these projects are a great place to start. Let’s dive into our top 10 woodworking projects for beginners!
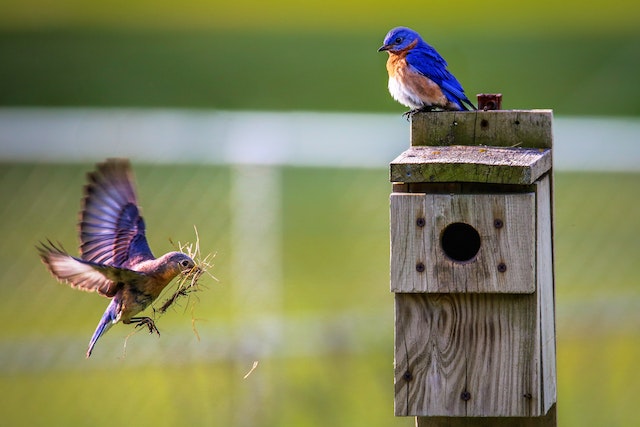
How to Make a Simple Birdhouse
Hey, what’s up friends, we are gonna talk about one of the coolest woodworking projects for beginners – How to Make a Simple Birdhouse. If you have been looking for a project that will keep you busy for a few hours and will give you an awesome result, then you’ve come to the right place.
First off, let me list down all the materials and tools you’ll need for this project. Well, you’ll need some pine boards that measure about five inches by about eight inches for the birdhouse, some screws and pieces of string to attach the perches and finally some waterproof glue to seal the whole thing.
For tools, you’ll need a circular saw, electric drill, clamps and of course, some sand paper. You’ll also need a pencil to mark the wood and a ruler to measure it.
Now, once you have all the materials and tools, you can start with this project. Start by cutting the wood into two identical triangles. Make sure that the bottom is flat and the sides are flush with each other. Once you have the two main pieces, attach them together with screws and strengthen them with waterproof glue.
Next, cut a hole in the top for the door and cut two small holes for the perches. Attach the perch by threading a string through the holes, then use some glue to secure it.
Finally, complete the birdhouse by sanding the wood carefully and staining it with waterproof paint. You can also use other fun embellishments like pieces of twigs, wood pieces, and leaves.
And that’s it! When you’re done, your birdhouse will be ready to welcome the little birds. So why wait, start building and make your avian friends happy!
Building a Rustic Shelf
Welcome, woodworking beginners and all aspiring furniture makers! Today, I’m here to help and guide you in building a beautiful and rustic shelf from scratch. This is a great project for many reasons – you’ll get to work with some interesting materials, you’ll get your hands a bit dirty, and you’ll get to show off your most treasured items for everyone to admire.
With the right materials and tools, constructing this rustic shelf will be a breeze. So, let’s get started!
The Materials Needed:
For this project, you will need 2x4s, matte board, 2x6s with ends cut at 45° angles, 2x2s, drywall screws, 1/2 inch plywood, and 2-inch wooden screws.
The Tools Needed
To complete this project, you will need a miter saw, drill and drill bits, table saw, mallet, and a carpenter’s square.
Instructions
- Start off by attaching the 2x4s to the interior of your wall using the 2x6s. Use a mallet to make sure the wood is flush against the wall.
- Cut the matte board in 4×8 sheets and build your frame. Attach the matte board to the frame with the 2-inch screws.
- On the side perpendicular to the frame, attach the 2x2s to give the shelf additional support. Finally, attach the 1/2-inch plywood to the frame, securing with drywall screws.
- Once you have built the frame and the plywood is attached, set the shelf into the wall. It’s important to make sure it’s secured in place with the 2x4s.
- Finally, you may need to sand the shelf and then stain it. If you’d like to give the shelf an extra touch, you can add decorative touches of your choice.
And there you have it! Your beautiful rustic shelf is complete. Show it off and make sure people know that you created this project with your own two hands! Good luck and happy woodworking!
Building a Wine Rack
Hey, this wine rack project is pretty easy and it won’t take long to complete. All you need is just some materials, tools, and of course a good glass of wine! Here’s what you’ll need:
Materials Needed:
– Two 1x3x6 boards
– Two 1x3x8 boards
– Two 1x2x8 boards
– Two 1x2x6 boards
– 1 ¼ inch finish nails
– Wood glue
– Pocket-hole screws
Tools Needed:
– Table saw
– Hammer
– Miter saw
– Drill
– Pocket-hole jig
– Clamps
– Paint brush
– Sandpaper
– Wood finish
Instructions:
- Measure and mark the 1x3x6 boards for the sides and for the bottom shelf of the wine rack. Using a miter saw, carefully cut the boards at a 45-degree angle and attach them at the top to form the angled sides of the wine rack.
- Secure the sides together with strong wood glue and finish nails.
- Measure and mark the two 1x3x8 boards for the top portion of the wine rack. Attach the boards together with pocket-hole screws to form a rectangular shape.
- Measure and mark the two 1x2x6 boards for the bottom shelf. Cut the boards and nail them to the underside of the bottom shelf of the wine rack to provide additional support.
- Measure and mark the two 1x2x8 boards for the back of the wine rack. Secure the boards together with the pocket-hole jig and the pocket-hole screws.
- Apply a finish of your choice to the wine rack. Paint it, stain it, or leave it natural. If you would like to get more creative, you can add decorative details like an ornate handle.
And there you have it! Your very own stylish and practical wine rack. Perfect for storing your favorite bottles of wine. Now, you can celebrate the completion of your project with a delicious glass of your favorite wine! Cheers!
Modular Birdhouse
Now, if you are a true woodworking newbie, then you’ll want to start off with an easy project like building a modular birdhouse! All it takes is a few simple materials and some basic tools, so you won’t waste a lot of time or money on this one.
So, let’s get started! Before getting to work on this project, you’ll need to gather up the following materials: some outdoor plywood, a few pieces of wood siding, some wood glue, wood screws, and wood stain. You’ll also need a saw and drill to make the cuts and holes that you’ll need.
Once you have all of the materials together, get to work! Start by cutting two pieces of the plywood into 10 inch by 6 inch sections. Now, glue the pieces together, making sure that the edges are aligned properly.
Next, cut four pieces of the wood siding into 6 inch by 4 inch sections. Then, glue two of the pieces along the sides of the plywood. Do the same with the other two sections for the front and back.
Now, create the opening of the birdhouse by drilling a one-inch diameter hole through the middle of the front piece of wood. Make sure that the hole is just large enough to fit a standard birdhouse hole opening.
Next, attach the roof of the birdhouse by screwing the two pieces of siding together, making sure the roof is level. And, don’t forget to finish the birdhouse by applying either a wood stain or paint.
And, that’s it! Not too difficult, right? That’s why modular birdhouses are perfect for beginner woodworkers. Not only do they look great, but they’re also much less expensive than buying an already finished product. So, good luck and have fun building some birdhouses!
Make a Mantel Clock
Ah, the famous mantel clock project. It’s a classic! Whether you’re a complete beginner or a woodworking novice, this project is a great way to get your feet wet and get the ultimate sense of accomplishment that comes from completing a woodworking project. Looking to impress your friends and family with something unique and special? Give this mantel clock a try!
So what materials do you need to make a mantel clock? First off, hardwood or plywood is best. While pine or spruce can work in a pinch, you’ll get the best performance out of a better wood. You’ll also need a drill and drill bits, an assortment of screws, clamps, and a router with a straight bit.
Tools-wise, your usual wooden-working set-up will do here just fine. Your shopping list should include saws, chisels and a few other hand tools. Don’t forget sandpaper, too so you can get a nice smooth finish. If you’re willing to take that extra step, look into a power sander too.
Now let’s get right into the task of building your mantel clock. The first part of this project requires a solid piece of wood. You’ll want to measure and mark each side so it’s a square shape. Cut out each side, butt the edges together and glue them together. To make sure the corners stay together, use a few screws and clamps to secure them. You should end up with a unique rectangular shape.
The next step is to route the side out and create the corners. Figure out the shape you want for your mantel clock before routing them out. Be sure not to make the corners too thin or your clock might be shaky in the long-run.
After the sides are routed, it’s time to give the piece some shape. Start by drilling holes in each corner and use a chisel to create small grooves to make it look like a wave. Make sure to sand down the handles and the corners after you’re done carving them out. Also, use sandpaper to make the clock look perfectly smooth and even.
Finally, drill a small hole in the center of the clock’s bottom. This is where you’ll put the Y-shaped hook to hang it on your mantelpiece. Once that’s done, you’re ready to stain your mantel clock how you want it. After the stain dries, attach the hands and the circular plate. Voila, you are the proud owner of a professionally-crafted mantel clock!
So there you have it, Guys and Gals — the Mantel Clock! It’s a simple but incredibly satisfying woodworking project. It’ll look great on your mantelpiece and be a great conversation starter when people come over. Just make sure you have all the materials and tools you need and follow the instructions, and you’ll be done in no time!
Lathe Turned Bowl
Bowls are one of the most common and easy to make woodworking projects, so this is a perfect choice for a beginner looking to start a woodworking project. This one requires the use of a lathe, so it’s a great choice for someone who is interested in learning how to work a lathe.
Materials Needed:
– Wood of your choice, I recommend using oak or cherry wood
– Lathe
– Sandpaper
– Glue
– Finish of your choice
Tools Needed:
– Lathe
– Drill
– Saw
– Screwdriver
– Sander
Instructions:
- Start by measuring the wood to the size you’d like your bowl to be. Once you’ve done that, use a saw to cut it out.
- Next, use a drill to create a hole in the center of your wood. Make sure the hole is a bit bigger than the size of your lathe.
- Now it’s time to get your lathe up and running. Secure the wood to the lathe by screwing it in place and make sure it’s secure before you begin. Once the wood is secure, start the lathe and slowly move the wood around until it gets the shape you want it to have.
- Once the bowl has taken shape, it’s time to start sanding. Using sandpaper, sand until the surface of the bowl is smooth.
- After you’re finished sanding, it’s time to apply the finish. You can do this by applying a thin layer of glue to the surface of the bowl and waiting for it to dry. Once it’s dry, apply the finish of your choice and you’re all done!
And that’s how you make a Lathe Turned Bowl for all you beginner woodworkers out there! It may seem like a daunting task, but with a bit of patience and practice, you’ll be able to craft a beautiful bowl in no time!
Building a Picnic Table
My dad used to spend hours toilin’ away in his workshop, building BBQs and picnic tables. When I was younger, I’d watch from the sidelines as he brought his projects to life! I remember how proud he’d be when he finished one, and how excited we’d all be to use it. So I’m here to pass on what he taught me: how to make a picnic table out of wood!
Now, if you’re like me, this might seem like a daunting task. But trust me, it ain’t that hard when you know what you’re doing and have the right tools! So, gather up your materials and get ready…it’s time to build that picnic table!
The materials you’ll need are relatively simple. You’ll need 3 pieces of wood, each cut to measure 4 ft by 8 ft. You want to make sure the wood is good quality so it’ll last a long time, without cracking or splitting. You’ll also need 8 lag bolts of 6cm, 8 washers and 8 nuts, 2.5cm, a drill and drill bits.
Once you have all your materials, it’s time to start building! Start by taking two of the pieces of wood, and using the lag bolts, attach them together at the edges so you form a rectangle, one side being 4 feet and the other being 8 feet. Then, lay the 8 foot length of the table against the picnic table, making sure it’s centered, and attach the third piece of wood with the lag bolts, washers, and nuts.
Now that your table top is complete, it’s time to build the base. Take the remaining wood and cut it into 4 equal lengths that are 4 1/2 feet long. Attach them to the picnic table, making sure that they are flush and even with the edge of the table.
Lastly, use the drill to create four holes in each corner of the table and base, and insert lag bolts to fasten the whole thing together. That’s it – you’re ready to enjoy your picnic table!
Now you’ll feel like a real handyman, just like my dad used to do. I bet your friends and family will be impressed when you pull out your picnic table, and you can proudly tell them that you built it yourself. Happy building!
Wooden Toolbox
Hey everyone! In this part of the article, I want to talk about how to go about making a wooden toolbox. It’s a great beginner’s project, as it doesn’t require a whole lot of tools, and you can make your toolbox look as basic or as fancy as you want it. Let’s dive in!
First, let’s talk about the materials you’ll need. You’ll want some basic wood – plywood works well, but you can use something like mahogany if you want your toolbox to be built to last. Plywood is just fine for something like this. You’ll also want to pick up some glue and a few screws. If you have a toolbox lid or handle you’d like to add, make sure to get those as well.
Next, you’ll need to get the tools you’ll need. A saw and drill will be the most important ones, but you’ll also need a hammer, a measuring tape, and some sandpaper. If you’d like to add hinges for the toolbox lid, make sure to get some.
Now that we have all of our materials, let’s get to work! Start by cutting the plywood – you want two equal size pieces for the box body and one smaller piece for the lid of your toolbox. You definitely want to measure twice, so you don’t end up with two short pieces of wood. Measure the pieces you cut, and write your measurements down – this will come in handy as we go along.
Before you start gluing, use sandpaper to smooth out the edges of your wood. Make sure you finish one side of the wood for the box body and both sides for the lid of your toolbox. Then, you can go ahead and start gluing – start with the sides of the box, measuring as you go to make sure the pieces are equal in length on all sides. When you’re done with this, turn your attention to the lid – you may need to drill some holes at this point if you’re adding hinges or a handle.
Finally, it’s time to put it all together! Use screws to attach the box body and lid. Also, if you’re adding a handle or hinges, this is the time to do it. Once everything is secure, use your sandpaper to give the box one last touch-up.
And that’s it – you’ve made a wooden toolbox! Congrats! This is a great beginner project, but if you want to make things even more complicated, why not try adding a few compartments or drawers to your toolbox? Have fun with it!
Crafting Adirondack Chairs
Hi! Today I’m going to teach you the art of Crafting Adirondack Chairs – a great piece of furniture that is a must-have in any backyard, deck, or patio. Whether you are looking to give a unique touch to your home or just trying to learn a new hobby, this is the perfect project to get you started.
To craft an Adirondack chair, one needs a few materials to get started. For starters, you’ll need a few pieces of lumber such as cedar or spruce. Depending on the length and width of your chair, you might need a few more pieces than the two listed here. Additionally, you will need some appropriate screws, lag screws, and steel staples, as well as an electric drill and screwdriver for the construction.
Also, it would be wise to bring along a few clamps, along with a sharp chisel and jigsaw, to aid you in cutting the wood. And of course, some basic wood-finishing tools such as sandpaper and a square should also be brought for smoothing and aligning the chair.
Now that your supplies have been gathered, the next step is to begin assembling your Adirondack chair. Take the two main pieces of wood and connect them using the lag screws and appropriate screws. Afterward, attach the armrests and the backrest and then firm them up with the steel staples.
Next, it’s time to add the finishing touches of your chair. Start by cutting and sanding the pieces so they fit together properly and then begin to apply the finish. A good finish to use is a clear lacquer finish that will help to protect and preserve the Adirondack chair. Once this is done, you are done!
After the assembly of the Adirondack chair is complete, it’s time to enjoy the benefits of your work. Adirondack chairs are the perfect place to sit, relax, and enjoy the outdoors. So, go ahead and sit back, relax, and enjoy your first woodworking project!
Building a Coat Rack
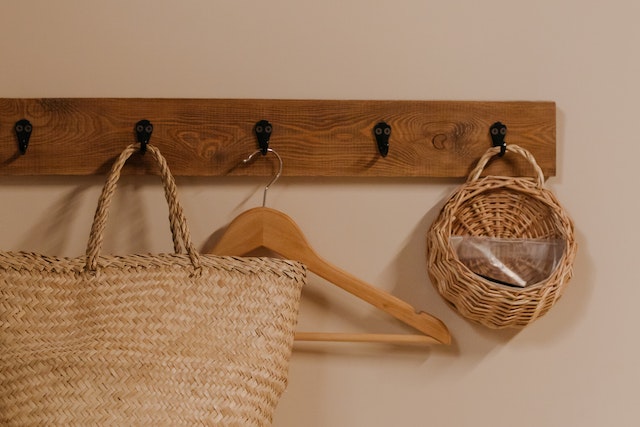
Welcome to the wild and wonderful world of woodworking, where true masterpieces emerge from just a few simple tools and materials! Today we’re going to be looking at the top 10 woodworking projects for beginners, and our first is a super-simple yet incredibly practical project – making a coat rack.
For this project, you’ll need a few materials and tools. First, you’ll need some wood. Now, wood can come in all shapes and sizes, so whatever fits your creative vision! You’ll also need a saw, a drill, some screws, and a few hooks.
Once you’ve got all your supplies, it’s time to get to work! First, you’ll need to decide on the design of your coat rack and cut the wood accordingly. Then, it’s time to drill some holes into the wood and attach the hooks to it. If you feel confident enough, you can even do some engraving or decorative work on the wood!
Once you’re all done, you’ll have an awesome coat rack you can use for a long time! Now, the beauty of making a coat rack like this is that it can be as big or as small as you want. For example, you can make a single coat rack for one person, or multiple racks for a whole family. The possibilities are virtually endless!
And that’s it – you’re done! Now, if you’re not feeling up to this project yet, don’t worry – you can always practice a few times before you get it just right. The great thing about woodworking is that even if you make a mistake, you can always start over or fix it.
So there you have it – woodworking made easy! Grab your supplies, follow the instructions and you’ll have a beautiful, sturdy coat rack in no time. Best of luck!
Materials Needed
Hey, everyone! If you’re like me, you’re itching to get started on your next woodworking project. But before you can get going, you’ve got to get the materials! Here’s a breakdown of the top 10 woodworking projects for beginners, and the materials you’ll need to get going.
For the simple birdhouse, you’ll need one and a half 8-foot-long boards, one and a half 6-foot-long boards, three 1-inch by 4-inch by 8-foot boards, 1 4-inch by 12-inch board, 2 ½ -inch exterior-grade screws, 6d common nails, and heavy-duty half-round gutter guard.
For the rustic shelf, you’ll need two 8-foot long boards, a 4-foot long board, two 2 ½ -inch exterior-grade screws, 12d common nails, a power drill, and a saw.
Building a wine rack? You’ll need two 4-foot long boards, one 4-inch by 8-foot board, two 8-inch by 8-foot boards, eight 2 ½ -inch screws, wood glue, wood glue, wood dowel pins, an electric drill, and a saw.
If you’re up for making a modular birdhouse, you’ll need three 8-foot long boards, two 4-foot long boards, an 80-inch exhaust band, two 2 ½ -inch screws, wood glue, wood dowel pins, an electric drill, and a saw.
To make a mantel clock, you’ll need one 4-inch by 6-foot board, one 4-inch by 3-foot board, four 6-inch diameter clock faces, six ¼ -inch finish nails, one ½ -inch by 6-foot dowel, one ½ -inch by 3-foot dowel, sandpaper, wood glue, an electric drill, and a saw.
To make a lathe turned bowl, you’ll need one 4-inch x 4-foot board, four 5-inch diameter circles, two 2 ½ -inch exterior-grade screws, heavy-duty half-round gutter guard, an electric drill, and a saw.
Building a picnic table requires four 8-foot long boards, three 2-foot long boards, four 6 ½ -foot long boards, one 4-inch by 10-foot board, six2 ½ -inch exterior-grade screws, wood glue, sandpaper, a hammer, an electric drill, and a saw.
To make your own wooden toolbox, you’ll need three 8-foot boards, one 4-foot board, one 4-inch by 12-foot board, four 2 ½ -inch exterior-grade screws, wood glue, sandpaper, an electric drill, and a saw.
Crafting your own beautiful Adirondack chairs is as easy as gathering four 8-foot long boards, two 4-foot long boards, eight 2 ½ -inch exterior-grade screws, wood glue, wood dowel pins, an electric drill, and a saw.
Finally, for the Coat Rack, you’ll need one 6-foot long board, two 4-foot long boards, four 2-inch by 4-foot boards, eight 2 ½ -inch exterior-grade screws, wood glue, sandpaper, clamps, a hammer, an electric drill, and a saw.
So there you have it, folks! Now you know what you’ll need to make the Top 10 Woodworking Projects for Beginners. So get out there and get crafting!
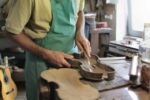
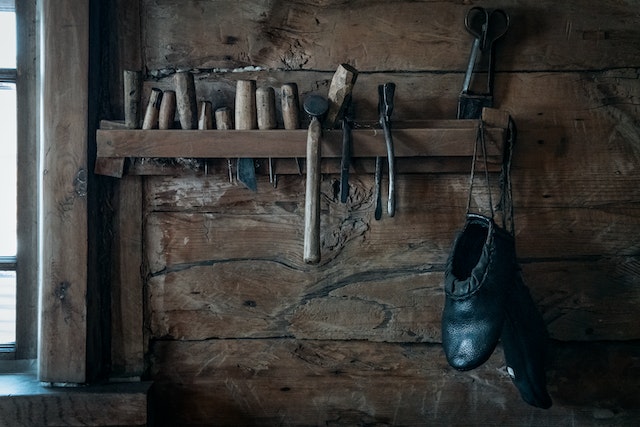
Tools Needed
When it comes to woodworking as a beginner, you need the right tools to get started. Lucky for you, the tools you need won’t break the bank!
For a simple birdhouse, all you’ll need are a drill, a saw, a hammer, wood glue, screws, a sanding block and sandpaper. For drill bits, you’ll want a 3/8” bit, a 3/4” bit, a countersink bit, and a screw tip bit.
If you are building a rustic shelf, you’ll need a hammer, saw, screws, drill, a tape measure, drill bits, springs and latch. A miter saw is a great addition if you want to get really detailed in your cuts.
When building a wine rack, you’ll need a drill, saw, sandpaper, pocket hole jig, clamps, drill bits, sanding blocks, a tape measure and Kreg screws.
When making a modular birdhouse you’ll still need a saw and drill, but possibly more depending on the complexity of the project. You’ll need a drill and drill bits, screwdriver, sandpaper, paintbrush, jigsaw, pliers, hand saw, level, countersink bit and multimeter.
To make a mantel clock you’ll need a saw, drill, drill bits, fine-tipped brush, wood glue, sandpaper and a ruler.
To make a lathe turned bowl you won’t be able to get away without a lathe, but you’ll also need clamps, a face mask, glue, chisels, a gouge, and a rasp.
If you decide to build a picnic table, you’ll need a saw, hammer, drill, miter saw, drill bits, sandpaper, wood screws, wood glue, a level and a tape measure.
To make a wooden toolbox you’ll need an electric drill with screwdriver and drill bits, a scroll saw, sandpaper, wood glue, router, clamps and an adjustable wrench.
For Adirondack chairs you’ll need saws of various sizes, a drill, drill bits, a screwdriver, wood glue, finish, wood screws, sander and sandpaper.
Finally, when building a coatrack, you won’t need too much. You’ll need a drill, drill bits, drill screwdriver, saw, box joints, sandpaper, clamps and wood glue.
With these tools and some hard work, you’ll have the perfect project for any beginner woodworker!
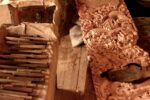
Instructions
If you wanna know how to build something from wood successfully, you gotta have the Instructions written down. Don’t worry, I’ve got you covered. Here’s the instructions for ten of the highest rated woodworking projects for beginners.
- How To Make A Simple Birdhouse: For making this one, you’ll need to drill a hole where the entrance should be, then pre-drill two holes on each side to attach the frame. To make the roof, cut two panels slanted and then use screws to attach one to either side. Glue the remaining pieces together and you’re done!
- Building A Rustic Shelf: Here’s an easy one that will help store some of your stuff. To begin, cut two panels on both sides of the shelf and drill into the wall. Now attach the shelf to the wall and then add the panels and shelves.
- Building A Wine Rack: This one can be a bit tricky, so take care not to screw anything in too far. Start by making the box, then attach the shelf and braces. Drill holes in the top of each shelf and thread the bottle through it. You’re done!
- Making A Modular Birdhouse: To start, you’ll need to cut out the sides, top and bottom of the birdhouse. Once cut, attach the sides and top to the bottom using screws. Now you can assemble the modular sections and attach them all to the house. Finally, attach the roof and the birdhouse is complete!
- Make a Mantel Clock: To make this project, first you’ll have to attach the back and sides of the clock with wood glue and wood screws. Then, attach the face and hour and minute hands. Add the decorative trim and attach the movement and pendulum.
- Lathe Turned Bowl: You’ll need to have access to a lathe for this one. Place the wood on the lathe and turn the bowl shape. Use a chisel to finish off the outside of the bowl. Once smooth, add the finish, sand it and you’re done!
- Building A Picnic Table: To get started with this project, you will need to pre-drill holes in each piece of the table and bench. Add brackets to connect the pieces and then add the seat boards. Secure the brackets with screws and you’re done!
- Crafting A Wooden Toolbox: Cut the bottom piece of the toolbox and drill two large holes at its end. Attach the sides of the box and add the handle. Add the small shelves and now your toolbox is ready.
- Crafting Adirondack Chairs: Start by cutting out the front and back legs of the chair. Attach these pieces to the chair frame and make sure everything is level. Add the seat and back slats for the seating area. Finish it off with sanding and staining the pieces and you’ll have a perfect Adirondack chair!
- Building A Coat Rack: Cut the 2×4 piece of wood in an L-shape and attach it to the wall. Attach the coat hooks and your coat rack is done!
See? Wasn’t that easy? Now go break out the tool box and get to work!