How To Create A Beautiful Wood Coffee Table For Your Living Room

A coffee table is an essential piece of furniture for any living room, providing a functional and stylish surface for holding drinks, books, and other items. While there are many coffee tables available for purchase, there’s something special about creating your own custom piece that perfectly matches your decor and personal style.
In this article, we’ll guide you through the process of how to create a beautiful wood coffee table for your living room. From choosing the right type of wood and tools, to step-by-step instructions and design tips, we’ll cover everything you need to know to create a stunning and functional coffee table.
Whether you’re a beginner or an experienced woodworker, this guide will help you create a beautiful piece of furniture that you’ll be proud to showcase in your home. So, let’s get started on creating the perfect wood coffee table for your living room!
Materials Needed to Create A Wood Coffee Table
You’ve decided to spruce up your living room with a sweet new wood coffee table, right? Well good news to ya, I’m here to show you exactly what you need to get the job done.
First off, let’s talk tools. To make a coffee table, you’ll need some basics, like a saw and a drill. That’s a no-brainer. But you’ll also need a jig saw, chisels, clamps, measuring tape, and a leveler – to make sure your table top is just right. Additionally, you’ll need some finishing tools, like sandpaper, screw-punchers, and a nice paint brush. It may seem like a lot, but trust me, it’s part of the fun!
Second, you’ll need some wood material. If you want that classic wood look, go for high-quality oak, cherry, or walnut. Make sure you get enough to build the entire table. Don’t forget to pick up some wood glue too – that’ll help put the whole thing together.
Lastly, you’ll need some furniture pieces to really make the table shine. Decorative feet, legs, or a shelf are all excellent additions that could give your coffee table a unique look. Plus, these elements will help provide that perfect balance and stability.
There you have it! Now you have all the materials you need to make a beautiful wood coffee table that will transform your living room into a masterpiece. Let’s keep this lesson going! In the next section, I’ll help you learn how to prepare the wood for assembly. Stay tuned!
Tools

When it comes to creating a beautiful wood coffee table for your living room, it’s important to invest in the proper tools. Having the right tools for the job can make the difference between a wobbly, wonky table and something you can proudly display in your space.
First, you’ll need a saw. A saw is a must when it comes to cutting the pieces you need for your coffee table. Whether it’s a hand saw, a miter saw, or something in between, it’s essential you be precise when cutting the wood. It’s worth spending a bit of money on a good quality saw so you get a clean cut every time.
Next up is clamps. These are necessary for holding the pieces of wood together while the glue sets. There are many different sizes of clamps, so be sure to get some in different lengths to suit your project.
After that, you’ll need a drill and some screws. A drill ensures you can secure the pieces of the table together securely. Invest in good-quality drill bits, so they don’t bend or break while you’re drilling. The screws will also help secure your pieces together and prevent them from coming apart easily.
Other handy tools to have include sandpaper, a chisel, and a drill press. Sandpaper can smooth out sharp edges or make your pieces look more uniform. A chisel will help you create decorative elements, like groves and crevices. And a drill press will help you make precise holes in the wood for the screws.
Though it’s worth investing in the right tools for the job, don’t go overboard. You don’t need every single tool out there, especially if you don’t have the space to store them. Start with the basics and then assess what else you might need to get the job done. With the right tools, creating a beautiful wood coffee table for your living room can be a simple and stress-free endeavour.
Wood Material
When it comes to creating your beautiful coffee table, you’ve got to put in some hard work and make sure that you have the right materials. The most important material, of course, is the wood! Now for all you budding carpenters out there, you need to make sure that the wood you are using is of the highest quality so that your coffee table won’t be falling apart after a few months.
Start out by looking at different wood types; my favorite is undoubtedly oak. Not only is it beautiful, but it’s also incredibly durable too. But, of course, in the end it really comes down to what works best for your project and how much money you want to spend.
You should also consider any reinforcements you might need to add to the wood, like an MDF or plywood sheet for extra strength. It’s also worth keeping a special eye out for any knots in the wood – any knots can weaken the grain and may require extra effort to get the coffee table looking absolutely perfect.
Finally, always keep in mind that wood is a natural material and it’s best to buy wood that has been treated with sealants or varnishes. You wouldn’t want your coffee table to rot, now would you?
So, while it doesn’t hurt to experiment and try out different types of wood material, make sure you have all the right supplies to create a beautiful and sturdy coffee table. With a bit of hard work and effort, you can create a stunning coffee table to match the decor of your living room!
Styling Furniture Pieces
Ah yeah, now we’re getting to the fun part – styling up the furniture pieces which are going to bring your new wood coffee table to life. You’re going to want to start by grabbing yourself some wood glue. Now you’ve heard of wood glue right? Well, get it real good, because you’re going to need it.
Next, you’re gonna wanna grab yourself some screws. Now, I’m no expert on this, but I think you should get the small ones so you don’t create a big ol’ hole in the table top. You don’t want to do that, no sir!
After that, you’re gonna need washers and lag bolts, because you want the legs of the coffee table to be extra sturdy. Shoot, you don’t want it to come toppling down by itself. That would be real embarrassing.
Now here’s where you get to get really creative – find yourself some eye-catching decorative pieces that you can place on your coffee table. I’m talking about things like drawer pulls and other little doodads that you can put around the table. You can even put in some nice furniture knobs, just don’t go overboard.
You can also choose to add some storage elements, if you want to. It’s all up to you, but remember to make sure that the elements you choose are lightweight. You don’t want the whole thing to look too bulky, do you?
Finally, you should pick out some nice trim to frame your coffee table. This will give it a real classy look. Some people even like to add a few small carpet tacks around the trim, just to give the trim a really nice, ornate look.
Now that you’ve got all your styling pieces together, it’s time to start building your beautiful new wooden coffee table. Good luck, and have fun!
Preparing the Wood for Assembly
Planning to spruce up your living room with a fancy new coffee table? Then you’re gonna need to know how to prepare the wood for assembly. Here’s a easy guide on what you need to do for this step.
First, you’ll need to start by measuring and marking the wood material you’ll be using. This will help you figure out how much you need and what size you want it to be. Don’t forget to add a measuring tape to your list of materials.
Next, it’s time to start cutting out the exact pieces you want based on the measurements you’ve taken. If you’re not experienced in woodworking, then you might want to consider asking a professional carpenter to help you with this step.
Once the pieces are cut, you’ll need to sand them down to perfection. This will help you to make sure that the pieces have smooth surfaces for when you start constructing the table. And, don’t forget to add sandpaper to your list of materials.
Ta-da! These three steps – measuring and marking, cutting, and sanding – will help you prepare the wood material you’ll be needing for your coffee table. Now, on to the construction part!
Measuring and Marking
If ya makin’ ya own wood coffee table, ya gonna need to know how to measure and mark your wood materials. It’s kinda like a surveying for wood class. Listen here, if you mess up the measurements, it’ s not like a math exam where you can erase your mistakes. You’ re gonna have to start over and redo it.
So, for measurements, ya need something that’ll measure angles and lines, like a try square or a ruler. You can also use a torpedo level to make sure your lines are straight. Choosing the right measurements is important. If ya whack a mistake, ya gonn’a waste ya money getting more wood material. Just keep in mind that ya gotta measure twice and cut once.
And don’t forget to mark where ya need to cut, drill, or whatever. How ya gonna do this? With a pencil! Some people use a machinist’s square but it’s just as easy to use a pencil. Just make sure ya draw it lightly and keep the lines straight. Mark off only the parts ya need so you don’t get confused. If ya go too heavy on the marking then it’s gonna be hard to sand off.
After you measure and mark, it’s time to cut the wood. Ain’t nothin’ like a cut wood project to make ya proud. Just keep these tips in mind when ya do it. Have fun, but do it safely and accurately for the best results.
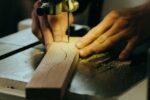
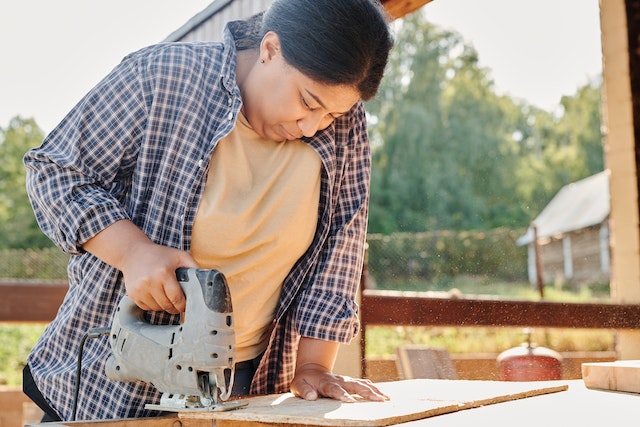
Cutting
When cutting the wood for your coffee table, it’s important to be as precise as possible. You don’t want to end up with pieces that are too big, otherwise they won’t fit together correctly. That would be a disaster! So breaking out the ruler and measuring twice will help ensure the success of your coffee table.
But when it comes to actually cutting the wood, that’s a whole different story. There are so many tools you could use — a saw, a chisel, a jigsaw, etc — and it can be overwhelming to choose the right one. Honestly, it doesn’t matter as long as you don’t go too crazy and end up with wood that’s tooshort, too wide, or too thin. That would be a real mistake.
Now, when you do begin cutting, make sure you don’t cut too fast. You don’t want the wood to splinter or chip, which can happen if you cut too quickly. You also want to be careful when cutting not to hit your hand or your fingers. That would really hurt! And if you lose a finger, well, you won’t have any problem finding it — it’ll be right in the wood with the rest of the sawdust.
Once you’ve cut the wood to the right size, you can go ahead and start sanding it. That will make the wood smoother and ready for assembly. But don’t forget to wear protective eyewear when cutting and sanding. You don’t want to end up with sawdust in your eyes!
Sanding
Listen up, if you’re trying to make that perfect coffee table and make it look like a million bucks, you can’t just jump right into the rest of the construction process. Nope, first you have to sand the wood.
Now, this isn’t some painful, horrific process – even though it may seem that way. It’s more of a necessary step in the process that allows you to create a smooth, even surface so that when you start joining the pieces together, your table will look flawless.
But don’t just grab any ol’ sandpaper and get to work. You must have the right kind of paper. If you go too course, you’ll still have trouble getting the wood pieces to be smooth. But if you go too fine, the sandpaper will just clog up and the piece won’t be as smooth as you’d like.
Start off with a medium grit sandpaper and work your way up to a finer grit. It’s also essential that you sand in the direction of the wood grain. Otherwise, when you stain and paint the table, it won’t look right.
Once you’re done sanding, don’t forget to brush off all the excess dust and particles so you can move on to the construction process! Trust me, putting sanding off until the last minute is a rookie mistake, no matter how fast you are at it. Do it right when you’re ready and you’ll have a gorgeous coffee table before ya know it!
Constructing the Coffee Table
All right, now that you’ve got all your materials together it’s time to get to the fun part: constructing your beautiful wood coffee table! This step requires precision and patience so go slow, take your time and make sure everything is lined up and good to go.
Start off by attaching the legs to the table. Find the side of the table that will be most visible when in place and start from there. Use 2-3 screws per leg and make sure the screws are screwed in tight.
Once the legs are in place, it’s time to start gluing the wood pieces together. Grab some wood glue and start applying it on each side of the joints. Make sure to use enough glue on each so you have a strong bond. Use clamps to keep the wood in place while the glue dries.
Now that the table is assembled, it’s time to finish it off. Take some sandpaper and go over the entire table, making sure there aren’t any rough patches. Once it’s nice and smooth, grab some wood stain and apply it to the surface to make it look beautiful. Wipe off the excess and buff it until it shines.
Finally, grab some paint if you’d like to add some personal touches. You can also spray-paint the legs, using a primer as a base and then adding your favorite colors. You can also use stencils to add decorative details to the table.
There you have it – you just made your very own wood coffee table. Put it in your living room and show it off to your friends – it’s sure to make an impression!
Attaching Legs
Oh man! I can’t believe I’m about to do this – I’m going to learn how to build a coffee table. Before we even start thinking about the design, I have to get the materials and tools. Let’s see what we need – tools, wood material, and styling furniture pieces. All right, I’ve got everything I need so now I can start building this beauty.
The next step is preparing the wood for assembly and this is actually quite easy – I have to just measure and mark, cut, and then sand the wood. Wow, this is almost like a real project!
Now I’m ready to start constructing my coffee table. The fun part – attaching the legs! Oh yes, now this is starting to look like a legitimate furniture piece. How do I go about this? Well, the easiest way is to use a drill and some screws. I’ve got the row of four legs ready and prepared, so I can start drilling.
First I have to face the legs towards the edges of the wood and then mark the spots where I need to drill. Next, I can countersink the wood using a drill bit to make a depression for the screws so that the screws sit flush. I’ve got all my 8 screws in place and the legs are attached securely.
Now that I’ve got the legs on, I’m sure my coffee table will look fab! The next step is to glue the wood pieces together, but that’s a story for another day.
Gluing the Wood Pieces
If it ain’t glued, it ain’t glued, ya’ll! This is probably one of the most important steps in creating a beautiful wood coffee table that will have your living room looking like a five-star hotel.
Now, it’s time to get down to business. Take out the pieces of wood that you’ve measured and cut up, it’s time to get them glued together into one piece of furniture.
To begin, it’s important to make sure that you have the right kind of glue. You’re going to want to use a wood glue that is designed specifically for this kind of woodworking project. Don’t skimp on the quality of the glue that you get here, you want something strong enough to work with the weight of your finished coffee table as well as the other furniture pieces that you’ll be putting together in your living room.
Once you’ve got your glue, you’ll want to prepare the pieces of wood that you are going to be gluing. Make sure to properly align them before you start applying the glue, so that your final product looks neat and put-together.
Before you start applying the glue to the wood, it’s important that you make sure that the surfaces of the wood pieces you’re using are clean, dry and free of any dust or debris. You don’t want anything interfering with the stability of your coffee table, after all!
Once your wooden pieces have been properly prepared, you can start applying the glue. Use an even layer along the surface of both pieces, and make sure that you are spreading it evenly and not just glopping on one spot. Give the glue some time to set, around 5-10 minutes, before you start pressing your wood pieces together for the best results.
Once you’ve got your wood pieces securely glued together, leave them alone to dry for up to an entire day. If everything has been done properly, you should end up with a single joined piece of furniture, the foundation of your beautiful coffee table!
So, lay aside your glue and get ready to start customizing. You’ve now successfully completed the step of gluing the wood pieces and you’re on the final track of creating a beautiful coffee table for your living room! So close, so very close.
Finishing
When it comes to finishing off the wood coffee table, all you need is sandpaper and some hard work! Start off by removing all dust particles from the surface of your newly constructed coffee table. This will allow you to smoother out the rough edges and create a smoother, finished look. Keep in mind that traditional sanding techniques are great for removing large chunks, but finer sandpaper is often necessary to get a sleek, finished look. Once you’ve sanded away the large pieces, use a smaller grain of sandpaper for a smoother finish.
At this point, some folks might be thinking, “Well, alright! We’ve got the basics of finishing down and we’re ready to move on, right?” Not so fast! You’ll still need to buff the wood before the final touches. To do this, grab a soft cloth, dip it into some mineral oil, and buff it over the wood in circular motions until you achieve the desired consistency.
Once the wood is buffed, it’s time to add a protective topcoat. Remember, wood is a natural material, so you’ll want to apply a waterproof sealant to the table to protect it from damage and wear. Be sure to pick the right sealant for the job to ensure a lasting finish.
Finally, if you want to take your coffee table up a notch, add some furniture wax to the top. It will give your table a glossy finish, highlighting the beauty of the grain and protecting the table from dirt and scratches.
There you have it! With some sandpaper and a few other tools, you can create a beautiful wood coffee table that’ll last a lifetime. Just don’t forget to invest in a two cup coffee maker to go along with it. Your living room’s never looked better!
Customizing Your Coffee Table
Oh, look at you trying to make a coffee table that looks nice and all. That would look so awesome in the living room, right? But it’s not enough to just make it, right? You gotta make it look good too! So, here’s what you can do to customize your wood coffee table.
First of all, you will need to stain it. Yup, that’s right, stain. This will give your coffee table a cool, rustic or antique look. You can choose a colour that goes with your furniture or maybe just the colour of your heart. Whatever works for you.
If you really want to stand out, you can try painting your coffee table as well. Pick a single colour, or go with multiple colours to give it a unique blend. Again, whatever works for you.
And finally, you can go the extra mile and add decorative details. It could be a nice drawing, some words or even whatever you think looks nice. It’ll be up to you.
See, it’s not that hard! Just take your time and everything will go great. With a little bit of hard work and dedication, you will have the most beautiful wood coffee table in the neighborhood. Don’t forget to show off your masterpiece with your family and friends. And don’t forget to show it off to me when you’re done, too. I love seeing awesome stuff like that.
Staining
Staining is a great way to give your brand new do-it-yourself coffee table the perfect color and style it needs to fit in the living room like a glove. Whether you decide to go for a timeless dark color or a modern pastel hue, it all starts with the staining process.
Now, before we jump headfirst into staining, these are a few tools that you’ll need to pick up from your local store or ask any comrade who is handy with tools: a paintbrush, pieces of cloth, some paint remover, and most importantly, a can of staining which you can often find at the nearest hardware store. Once you have all the materials, it’s time to get down and dirty with staining.
To begin, lightly sand your coffee table to give them a bit of texture and help the staining go on easier. Then, use the paint remover to get rid of any existing paint or coat on your table. After that, get ready to get your hands a bit dirty. When picking up staining oil, you can pick any color that matches with your living room. After you apply the staining oil, use the soft cloth and spread it evenly on the wood. It’s alright if you make a mess. You can always recycle the cloth for other projects!
Once you’re done applying the staining oil, leave the coffee table in a cool, dark place for a few days to let it seep in and get a good coat. Voila! Your coffee table is now ready to be center of attention in your living room.
Staining doesn’t have to be a burden, with the right materials and a bit of skill you’re guaranteed to get the perfect color and finish to match your decor. No need to break the bank to get a professional looking table, just follow the steps and you’ll be ready for some coffee in no time!
Painting
Painting is an easy and affordable way to instantly spruce up your coffee table. Depending on your skill level, you can go for something more bold or go for a more subtle look. Before you start painting, you need to make sure your wood is prepped properly. This means sanding the wood and cleaning any sawdust or debris.
Also, you need to make sure that the paint type you choose is suitable for your wood type. Depending on what type of wood you are working with, you might need to use a primer. For some woods, it’s best to use a water-based paint.
Once you have chosen the paint color you’d like to use, it’s time to start painting. Begin by putting on a pair of rubber gloves and tie back your hair. You don’t want to get any paint in your eyes or on your clothing. Using a paintbrush, apply the paint in small strokes. For an even finish, make sure you are covering all of the edges.
Once you have finished your first coat of paint, let it dry completely before adding a second or third coat. If painting all sides of the wood, make sure you flip it over and begin with the underside. This helps to ensure that all of the sides are completely covered.
Painting can be a fun and creative way to express yourself with your new coffee table. If you’re feeling brave, why not try doing an acrylic pour or creating a faux marble effect. There are endless possibilities when it comes to painting. And you can even change up the look in the future if you feel like a new color scheme.
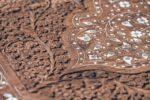
Adding Decorative Details
Ahh, the details, how do I even begin? Decorative details are what really makes a piece of furniture stand out. Whether you decide to go with a rustic vibe, a contemporary look, or something in between, these really add a personal touch.
First, consider your overall design. What do you want it to look like? Is there a specific theme you’re going for? There are a multitude of options when it comes to decorative details. If you’re going for a more vintage feel, consider small spindle details or even hinges. If you’re going more modern, think about glass or metal pieces that can add a bit of sparkle.
Now regardless of what decorative detail you choose to add, there are a few things to keep in mind. Think about the overall look, for one. You don’t want the details to overwhelm the piece or throw off the balance. Also, think about making sure the details you pick blend together well. If you’re using glass, consider using the same color of glass throughout. Or matching the spindle details.
One of the easier details, if you don’t want to do something too over the top, is to just add a nice trim around the sides and top. This adds a great effect when mixed with a tint or stain of your choice. Another detail that can really make it look special is to add round decorative corners in a contrasting color. This adds a unique touch and can also replace the need for adding a trim.
Finally, you will want to add any hardware to complete the look. Hinges, handles and draw pulls can really finish off a look. Also consider if you need any special hardware, such as a lock, to make sure the piece is sturdy and secure.
Have fun with adding your decorative details, think outside the box and make it your own. It’s a great way to show off your personality and make sure your living room has the perfect piece of furniture to show it off.