How To Make A Perfect Half-Lap Joint For Your Woodworking Project
Ok, so you want to know how to make a perfect half-lap joint for your woodworking project? Well, I’m here to help you out, friends! It’s easy, but it’s also easy to mess up, so you gotta be careful.
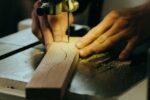
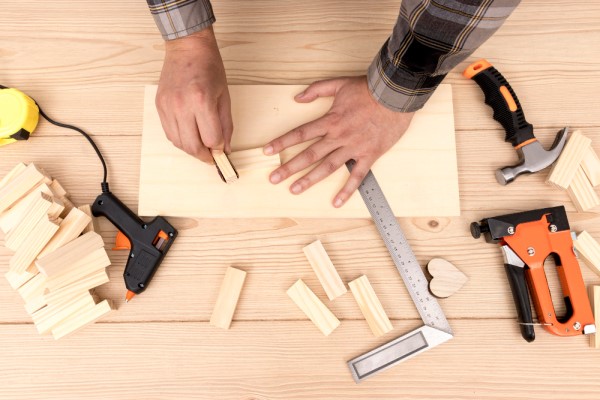
First off, you gotta have the right tools. Got your saw? Check. Got your mitre box? Even better. Sandpaper? Now we’re talkin’! If you got all these tools, you’re ready to go.
Next, you have to measure twice, cut once. You know what, if I’m being honest, measure three times, cut once. That would be a real smart move. Make sure you got all the measurements ready before you start cutting.
Once you got your measurements, it’s a good idea to make a sample cut. Don’t even attempt the real cut until you do a sample. This way you can see if your measurements were correct, and it gives you a chance to practice the cut.
Now, you’re ready to cut the right groove. Take your saw or router, whatever you like, and make the right cut. Deep enough for a good fit, but not too deep or you’ll have some gaps.
After you cut the groove, it’s time to assemble the joint. Line up both sides of the joint and make sure everything is level. For extra security, you can use some nails or glue to hold the joint in place.
Last thing you gotta do is check your work and make sure the pieces are secure. If everything looks good, you can put some finishing touches on it, like staining the wood or whatever you like.
And there you have it, friends, everything you need to know about how to make a perfect half-lap joint for your woodworking project! Now go out there and get yourself some wood and make something beautiful!
Have the Right Tools
If you’re getting ready to start a woodworking project, you’ve probably heard the old adage “measure twice, cut once” and it has never been more true than when making a perfect half-lap joint. Another equally important rule is to make sure you have the right tools.
Let’s face it, you can’t make a half-lap joint without the right tools. Luckily, the list isn’t long, but you have to have the essentials. The first tool you’ll need is the saw. This can be any kind of saw, but a good circular saw is the best option. You’ll also need a saw blade that is at least 4 inches wide.
The next tool you’ll need is a chisel. This is to help you chisel out the extra wood that you don’t need. You’ll also need a freehand router if you’re making a half-lap joint that isn’t perfectly symmetrical.
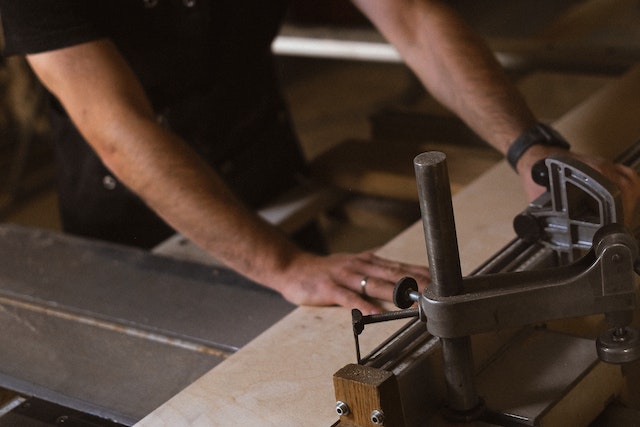
Finally, you’ll need a clamp. The clamp will help hold the pieces together while you are cutting the wood and ensure that everything is perfectly aligned.
Now that we’ve covered the basics, let’s get down to the fun stuff. Before we start, remember to always wear safety glasses and if you’re using a saw, don’t forget to use a push block. Now, let’s move on to the next rule: measuring twice, cutting once!
Measure Twice, Cut Once

Hey, y’all! It’s time to learn rule number two in making the perfect Half-Lap joint:
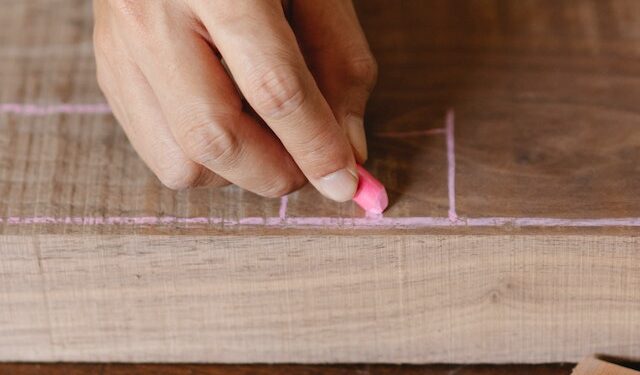
Measure Twice, Cut Once, or – as I like to call it – Measure Twice, Groove, Baby! That’s right, folks – if you don’t take the time to measure twice, you won’t get the groove the second time.
What’s important here is to make sure that your measurements are permanent. Grab a pencil and make sure that you mark off your measurements on the wood, and don’t rely on a measuring tape alone. Those things can sometimes be a bit inaccurate, so be sure to double check your work.
I also want to give you a heads up about cutting too short. That’s a real drag if you aren’t paying attention, and it can set you back a day or two. So, be sure to measure twice, and maybe even three times, if you’re feeling extra careful.
At the end of the day, it’s all about being precise with your cutting. If you take the time to measure twice, you’ll only have to cut once! And when it comes to woodworking, you don’t want to make mistakes – it’s costly and time consuming. So, be sure to pay attention to the details and don’t be afraid to ask questions if you’re unsure.
Make a Sample Cut
Making a sample cut before cutting your pieces of wood is always a really good idea! This can give you a better idea of what your final cut is going to look like and make it easier to avoid any major mistakes when you are ready to make your half-lap joint.
Getting started with your sample cut is actually really easy. All you need to do is start by taking a test piece of wood that is the same type and size as what you will be using for your project. Once you have your test piece ready, it’s time to setup your tools. On a table saw or radial arm saw, set the height of the blade to match the thickness of the wood you will be cutting for your half-lap joint.
A fun fact about making a sample cut is that you don’t even need to worry about the exact measurements. Leave those for the final cut. Instead, the sample cut is simply meant to give you a feel for the cut and to double-check the setup for the final cut. So, if your final cut on the joint needs to be 1/4 inch deep, you can make the depth of your sample cut anywhere between 1/16 and 1/32 inch.
After you have made a few practice cuts, you’ll begin to get a good feel for the cut that you need to make. This will help to ensure that you will do a great job on the final cut.
One more thing you can do to ensure that you have perfect cuts is to use a backer board at the back of the piece of wood you are cutting. This will not only keep your cuts consistent, but also even and smooth.
Once you’ve made a sample cut and gotten a feel for the cut that you need to make for your project, you can move on to the next step – cutting the right groove. Follow these tips, and you’ll be well on your way to making a perfect half-lap joint for your woodworking project!
Cut the Right Groove
Now it’s time for the most important part of making a perfect half-lap joint – cutting that groove! Depending on the size of your workpiece, this process will require different tools. For example, if your joint requires wide, shallow grooves like those used to create a three-way miter, you’ll need a circular saw or router.
For narrower work pieces, you might want to use a jigsaw, and for very detailed, intricate grooves, a chisel and mallet would be the ideal choice. Whichever tool you choose though, the important thing to remember is to stay safe, keep your hands away from the blade and keep a steady hand on the wood.
Now, when it comes to actually cutting the groove in your workpiece, measuring and marking is key. Measure the exact size of the joint you want to create, find the center of the piece, then draw a line with a pencil. That will be your cutting line.
Once you’ve got that down, set your blade to the proper depth and then carefully begin to cut. Make sure you don’t rush it, because a carefully and accurately cut groove is key to making a perfect half-lap joint. It may take you some practice to make it perfect, but once you get the hang of it, you’ll be cutting perfect grooves in no time.
Also, take care to cut the piece evenly on both sides. This can sometimes be difficult and it may require you to swivel the piece when cutting, to ensure that your cuts are equally even on both sides of the joint.
And, when you are finished, make sure the cut is clean with no pieces of wood left sticking out or uneven surfaces. If necessary, use a chisel or sandpaper to smooth out the sides.
Making a perfect half-lap joint may seem daunting, but with a little practice and the right tools, you’ll be creating joint after joint with ease in no time. So don’t fear the groove – embrace it!
Assemble the Joint
If you’ve followed the previous steps of this guide, you should have everything that you need to assemble your half-lap joint. Yup, it’s time to put it all together, and see the fruits of your labor!
First things first – you’ll need your two pieces of wood, and your glue. The glue needs to be applied both to the edges of the pieces, as well as on the rectangular surfaces. Don’t be stingy with the glue – you want it to stick in place!
Once these are applied, it’s time to put the pieces together. Make sure that the part of the wood with the first cut is facing down. Line up the pieces in their proper place, and make sure that they’re square. This is essential for success in assembling your joint!
If you’re confident that everything looks good and the pieces are straight, apply a little pressure for about 30 seconds to make sure that the pieces are connected tightly. Then, grab some clamps or a rubber mallet and hammer the pieces together. Make sure that you’ve lined them up properly, as you don’t want to end up with a wonky-looking joint!
Once this is done, you can remove the clamps and let the joint dry. Here’s the magical part – your perfect half-lap joint is now ready to go! Wait a few more minutes to let the glue fully dry, and now all you need to do is admire your work. Congratulations, you just created a perfect half-lap joint! Your woodworking projects are sure to look great with this new skill!
Check Work & Secure Pieces Together

Before you step away from your half-lap joint and proudly add it to the list of projects you completed successfully, you must — most importantly — double check that you have indeed succeeded.
First off, take a look at the fit of the two pieces of wood. If they fit smoothly and seamlessly together, you can go ahead and pat yourself on the back. After all, this joint only works if your measurements were correct and your cuts were nice and neat. Surely, you want to ensure that every step in the process (including the assembly) was done correctly.
If your joint ended up either too small or too wide, take a look and re-measure your initial miter cut. If this is indeed the case, you’ll need to take a step back before going forward. First, re-make your sample cut. Next, bide some dowel pins to the problem piece. Then, use them as points of reference for your groove cut. Now, your joint should fit without any problem.
Once you’ve successfully achieved the perfect fit, you’re ready to go to the next step — securing the pieces. This part is especially important if the joint will become part of a structural element, like a large desk or bookshelf. Here, the wooden half-lap joint will serve as an armature to hold the pieces together, no matter the load it may have to bear.
For quick – yet reliable – results, use wood glue. Begin by spreading a thin layer of the adhesive along the surface of the half-lap joint, following the diagonal of the joint. Make sure the glue is distributed evenly. Then, firmly press the two pieces together. Once the pieces are secured, apply more glue along the adjacent edges of the joints.
If you want to ensure maximum stability for years to come, use clamps. Place clamps along the diagonal lines of the joint. With the help of a ratchet tool, tighten the clamps so that the pieces of wood are brought to their joining point. Carefully flip the pieces over and secure the other side of the joint with at least two clamps.
Once you’re done securing the piece, the final phase of completing the perfect half-lap joint is to dispose of the clamps and let the glue do its job. Usually, the adhesive needs around 24 hours to become fully cured.
Congratulations! You’ve just put your woodworking skills to the test and succeeded in creating a perfect half-lap joint. As a bonus, this joint can also be used as décor to add some elegance and sophistication to any wooden furniture project. So, go ahead and be proud of yourself!