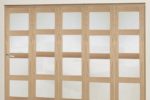
How To Create A Beautiful Wood Serving Tray For Entertaining

Entertaining guests at home is a fun and enjoyable experience, and having the right serving tray can make all the difference. A beautiful wood serving tray not only adds elegance and style to your entertaining, but it’s also functional and practical. In this article, we’ll guide you through the process of creating a beautiful wood serving tray for entertaining. From choosing the right type of wood and tools, to step-by-step instructions and design tips, we’ll cover everything you need to know to create a stunning and functional tray. Whether you’re a beginner or an experienced woodworker, this guide will help you create a beautiful piece that you’ll be proud to use and display in your home. So, let’s get started on how to create a beautiful wood serving tray for entertaining needs!
Gather Materials
Humor me, let’s pretend we’re going to build a beautiful wooden serving tray to entertain with. First things first, you need to get your materials together! It looks like easy enough, right?
Ok, let’s get started. Step one is to obtain the wood. Depending on the style you are going for, you can choose from different woods for this. Hardwood would be best for this project, as it will be sturdier and hold up better. You’ll need to buy at least a plank or two needed measure out the size of the tray. You’ll also need some wooden dowels that can be used for handles if you’re making a tray with a handle.
The next step is to collect the finishing materials. You’ll need a wood finish of your choice, whether it’s a stain or a paint, some sandpaper, a soft cloth and finishing wax. As for the wax, there are many different types on the market, and it is important to choose the right one to match the finish you want to achieve.
Once you have all the materials, you are ready to go and start your tray building. Just make sure to read the directions and warnings that come with each material before you start. You don’t want to end up with a sloppy mess that permanently adheres to your tray!
So now you have all your pieces, and it’s time for the fun part. It’s time to cut and assemble the tray. Let’s get to it!
Obtain the Wood
Ah, the most important step of this whole journey…getting the wood! You don’t want just any old wood for your fancy, beautiful tray – you need the best of the best. Depending on what type of wood you want to use for your serving tray will determine where to get it from. Trust me, you’ll want to get good quality wood, so don’t settle for the lower quality stuff!
If you decide you want to go with hardwood, then you’ll need to find a local lumber yard. Ask around and I’m sure you’ll be able to find one nearby. Let’s just say you’re in the mood for some good, strong oak to use for your tray – pick the size of the pieces you want and buy what you need. It’s important to measure the tray you’d like to make beforehand, that way you’ll know exactly how much you’ll need to buy. Once you get the wood, you can plan out how you want to cut it and get crafting!
If you want to go the route of more artistic looking wood, then you’ll want to find a craft store or even a home improvement store. You can get some amazing woods that are incredible for making funky shapes and designs, like walnut, birch, maple, or even cherry. Make sure to pick the wood that’s right for your style!
At the end of the day, the wood you obtain is totally up to you. Make sure to pick something you love, and that will make a beautiful tray for your guests too! Now that we have the wood in hand, it’s time to move onto the next part…assembling your tray!
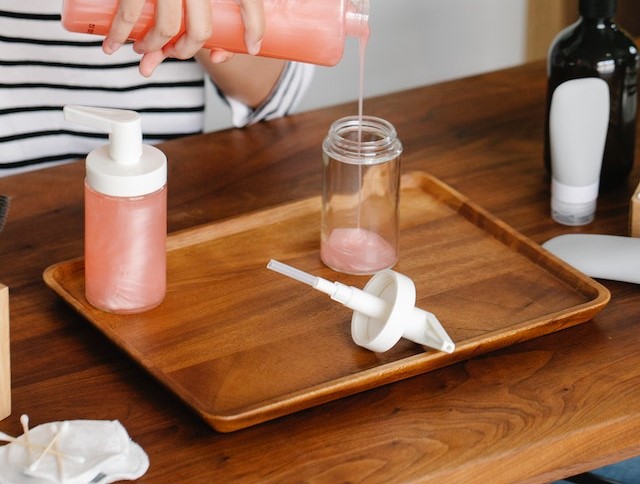
Collect the Finishing Materials
Ah yes, STEP 2! The step for the awesome people who crave an extra flavor for their treasured trays. Here, we need to collect the finishing materials, and there’s only so much you can add to make your tray look, smell and feel like a beautiful masterpiece! Don’t worry, it’s so simple to do. Making it even better: whatever style you choose, it’s a project that can be done with less than $30! Wohooo!
Now, let’s talk about what we need. First up, you need a finish—in other words, something to seal the entire piece. This can be anything from a clear sealer to a stain or paint. You can also choose a wax and polish for a more natural look.
Next, you’ll need some sandpaper. You can also add a steel wool pad to give your tray an extra ‘zing.’
Finally, to really have some fun adding your own personal touch, pick up some decorative details like decorative hardware, stencils, or glitter paint for something a bit more glam.
So there you have it! Collecting the finishing materials is simple, fun, and you won’t burn a hole in your wallet. Let’s move on to the real fun stuff, CUTTING AND ASSEMBLING THE TRAY! Oh yes, don’t you just love getting your hands dirty?!
Cut and Assemble the Tray
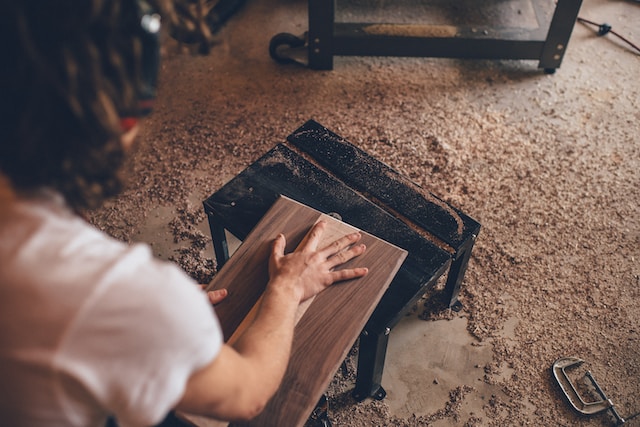
Ladies and gentlemen, are you ready to get your craft on? Well, let’s get to it. Step 1 is to measure and mark the wood for the tray. See, this is a key piece for this whole tray assembly exercise. You need your measurements to be exact or else it won’t look right. Plus, if you don’t measure and mark it, there will be no point of cutting into the wood because you won’t know where you are cutting!
Once you have all your measurements marked, it’s time to cut the wood. Now, if you are feeling particularly brave and confident, you can use a hacksaw to get this done. But, if you’re like me, then you might want to be a bit safer and use an electric circular saw or maybe even a band saw.
Regardless of how you cut your wood, once you have your pieces cut, it’s time to assemble them together. You want to use wood glue to make sure the pieces stay together. If you have any nails, now might be a good time to use them as well.
Once you have everything glued and nailed together, it’s time to get to the fun part – the finishing touches! Start by sanding down the tray until it’s smooth. Then, you can move onto adding the stain or paint of your choice. This is where you decide if the tray is going to be glossy, rustic, dark, or light. Just remember, don’t rush the painting portion, because you will be looking at it for a long time! But, if you are feeling impatient, you can always add a protective topcoat to seal it all in.
Finally, if you want to jazz up your tray a bit more, you can add handles. To do this, mark the spot where you want the handles to attach. Then, glue and nail them down. Finally, you can add some decorations like stencils or other decorative finishes.
And there you have it folks, a beautiful wood serving tray for entertaining that you have created all on your own! You should be proud of all your hard work, and the time, energy, and money you have saved. So, get out there, entertain, and enjoy!
Measure and Mark the Wood
If you thought that making a beautiful and functional serving tray was as easy as measuring, cutting, assembling and finishing, boy were you wrong! The truth is, the step in the process that many overlook is one of the most important: measuring and marking the wood.
I know it’s not the most exciting step, but trust me, it will make all the difference in creating your masterpiece. So, let’s get to it.
To measure, you’ll want to break out your measuring tape. Measure the distance between long sides of the tray, then do the same for the short sides. Take note of all the measurements. Make sure to double check your measurements – nothing’s worse than making cuts that don’t fit!
Now it’s time for marking the wood. Use a pencil to make light marks that will be your guide for cutting. It’s best to mark each of the lines on both sides of the wood for accuracy. Your tray will thank you for it!
That’s it! You have done the tedious (but necessary) part. Now comes the more exciting part: the cutting. Reward yourself for completing this step – maybe a beer, or even an extra slice of pizza? The choice is yours. Now you’re ready to move on to the next step: cutting the wood. Have fun!
Cut the Wood
Alright, now it’s time to take out your saw and ‘Start cuttin’! If you don’t have a saw then you definitely picked the wrong hobby. If you do have a saw, but it doesn’t look like the ones they use on projects like this they don’t have one of those at your local hardware store, then you’re going to need to upgrade it if you want to do this project the right way.
When you start to cut the wood you’re going to want to make sure that you measure twice and cut once. You don’t want to ruin all the hard work you put in to get the materials and assemble the tray. Make sure that you align the saw with the measuring marks that you made earlier and the cut should come out nice and even.
Take your time with this and don’t rush because one wrong move and you can ruin the whole piece and find yourself in a rather embarrassing position. Make sure you practice your cuts on spare pieces of wood before you start to work on the finished tray. Just because it’s a simple cut doesn’t mean you can’t mess it up.
You don’t want to be the person that people point out at the fancy dinner party where your tray was supposed to get the oohs and aahs and instead, it’s a total malfunction. Practice makes perfect, and this holds true when it comes to cutting wood for your project. Take your time, be patient, and most importantly, be precise and you should have no problem making your cuts neatly.
Attach the Wood Piece Together
Once you’ve measured and marked your wood pieces and cut them according to the size you need, it’s time to put it all together. But don’t worry, attaching the pieces of wood together isn’t hard at all, even for a novice woodworker like myself .
The first thing to do is to decide what kind of joinery you’re going to use to attach your pieces of wood together. If you’ve got access to a router then using dovetail joinery is a really nice-looking option. But since I’m the kind who tries to keep things simple and quick, I usually use pocket screws instead.
To use pocket screws all you need is some pocket holes (pre-drilled in your wood pieces) and some appropriate pocket screw joinery. Pocket screws (or pocket hole screws) have threads that cut through the wood and pull together the joint. They also come with a special flat head so you don’t need to worry about having a countersink pre-drilled in the wood.
Once you’ve got all the pieces of wood lined up and fastened together, use clamps to hold them in place until the glue sets. I’ve found that the clamps also help to make sure that the joints are lined up correctly. Once the glue has dried, use a chisel to remove any excess from the edges of your tray and make everything look clean and tidy.
That’s it – you’re almost done. Your tray frame is ready to go and you should now have something that looks something like this: a beautiful wooden serving tray! Now all that’s left to do is to sand it down and add the finishing touches.
Finishing Touches
Ahh, the finishing touches! This step is where the tray really comes alive and begins to look like something I can take pride in.
First, I’m gonna take a sandpaper and give the tray a good smooth rubdown. Don’t forget to use a dust mask unless you are into a rugged, but still sophisticated look.
Once the tray is nice and smooth, it’s time to apply a stain or a paint. Your choice! Just make sure that whatever you choose looks nice with the rest of the materials you’ve already got for the tray. Again, if you’re like me, paint is the way to go!
Once everything’s settled and dried off well, it’s time to sand again and rub on a finish of your choice. This will give the tray that extra nice sheen and protect it from any potential spills. Look out friends – now your serving tray looks like something I would take to a five-star restaurant!
But wait, why stop there? You can always add another protective coating with either a stencil or a paint that adds a splash of color or design. I personally love to add a protective coating with a stencil. That way I can make sure my tray is one-of-a-kind and unique.
Now that’s what I like to call a beautiful wood serving tray! See, told you it was easy.
Sand the Tray
Hey there! It’s time to talk about sanding the tray to get that beautiful finish you’re looking for. Before you start sanding, you want to make sure that your workspace is set up to the safety standards. Make sure you’re wearing a mask, protective eyewear and that you’ve got your sanding tools picked out.
Now, let’s get started sanding! Before we pick up the sandpaper, let’s remove the obvious splinters and rough patches from the wood surface first. This can be done using wood filler or a saw. When that’s done, you’re ready to start sanding!
When you’re sanding, you’ll want to start off with a coarse grade sandpaper and gradually move up to a finer grade as you go. It’s important to move in the same direction when you’re sanding – any diagonal or crosshatched sanding can weaken the wood and make it look shabby.
As you go, use a light hand and go over the same areas more than once if needed to remove any rough spots or inconsistencies. And finally, when sanding is complete, sweep up the dust and vacuum the area well to make sure no dust remains before you move on to finishing. That’s it! Now you’re ready to apply your stain or paint – and you can be sure that your tray will have a beautiful, smooth finish.
Apply the Stain or Paint
You know how people say practice makes perfect? Well the same can be said for applying stain to wood. After cutting and assembling the wood pieces for your beautiful serving tray, it’s time to add the paint or stain. Now, I’m not saying that you need a graduate degree in art history here, but a little practice couldn’t hurt.
The first step is to grab your paintbrush or cloth and start painting or staining the tray. If you’re going to be painting the tray, use a geneal water-based latex paint. This will provide a nice finish and it shouldn’t require too many extra coats. You might want to experiment with a small test piece of wood first so that you can see what kind of finish you’re going to get.
For those of you who prefer to use stain, you’ll need to use an oil-based stain. Start by applying a thin coat of the stain. Allow it to dry for a few minutes before adding a second coat. This will darken the wood and help to bring out the natural hues and grain. Keep in mind that you may need to apply several coats of stain if you want a really dark finish.
Once you’ve applied the paint or stain, it’s time for the fun part. Add a little pizazz to the tray by adding any kind of decorative accents you like. Whether it’s stencils, trim, or even some narrow strips of wood, you can use your imagination and come up with some really unique designs.
Now, after all your hard work you have a beautiful and unique serving tray that’s all ready to show off. Congratulations! I’m sure you’ll be the envy of all of your guests.
So grab some food, set out the serving tray, and prepare to impress. You’ve conquered the challenge and created a gorgeous homemade serving tray that’s guaranteed to be the talk of the party.
Sand Again and Rub on the Wax
Do you think you’ve sanded enough? Not quite yet, my friend. Now it’s time for a special treat you’ve been saving in a secret ingredient stash.
You guessed it, it’s time to rub that wax on! Put on your electric-blue safety glasses, hold the wax in a confident grip and make sure to spread it evenly on your tray.
Imagine the wax like a lova-lova blanket snuggling around your beautiful creation. Put the wax in all the hard-to-reach places, just like mommy did when you were a kid and it was bedtime.
You need to be gentle and precise spreading the wax, but don’t be shy. Yes, rub it in! Show that surface who’s the boss. Daddy don’t play!
Now it’s time to get creative. You can add a little color by waxing with a different hue or tone. You can even create the woodworm effect by adding dark criss-crossing wax lines.
Don’t forget to use a soft cloth to finalize the job and grab the extra wax that might be lingering around. The waxing party is over. All that’s left is to sit back and enjoy the shiny results!
Add Decorative or Protective Coating
Hey guys, so you’ve done the hard work, cut and assembled that pretty wood serving tray and you applied the stain or paint that really makes it “pop”! Now it’s time for the final step, adding the decorative or protective coating. Now there’s a lot of options here, so be sure to use the one that best fits your fancy.
First off, you can opt for a clear coat of sealer. This will help to protect the wood tray from scratches and other damages and also give it a nice glossy finish. However, if you prefer a matte look, then you can opt for a matte sealer. But be warned, matte sealers don’t provide as much protection as a clear coat.
If you want to add a bit of color and personality to your serving tray, you can try a colored glue. This can be used to make patterns and designs on the surface with just a few drops of colored glue. You can also add some sparkle or texture with a glitter or sand finish. You can either keep things simple with subtle sparkles or go for something more daring and choose a brighter, bolder color if you like.
For added protection, you can also opt for a waterproof sealer. This will help lock in the moisture from the wood and will also make your tray last much longer. Just make sure that you apply the waterproof sealer several weeks after you’ve finished painting or staining the tray.
You can also use a wax sealer or polyurethane if you really want the added protection. These will offer the best defense against water damage, scratches, and general wear and tear. However, they tend to be expensive and require more maintenance, so if you’re on a budget, then you might want to skip this step.
And finally, you can also choose a decorative finish. If you have been looking for a way to show off your creative side, then you can use different colored waxes, natural oils, or metallic foils to create something truly unique.
So there you have it, four different types of coatings and finishes to choose from when finishing off your beautiful wood serving tray. Have fun with it and get creative!
Add Handles (Optional)

Does anybody out there like a little bit’a pizzazz on their wood servin’ trays? Well, if you do, have I got a couple of tips for you. The last part a’ creatin’ a beautiful tray has to do with addin’ optional handles. Here’s how you do it.
First, you need to mark the spot where the handles will go. You can measure it and mark it with a marker, or you can eyeball it. Just be sure that the handles are evenly spaced and securely attached.
Once you mark the spot, the next step to addin’ handles is to use wood glue and nails to securely attach them. You can buy the handles in craft stores or hardware stores, or make your own if you’re feeling extra crafty.
Finally, now comes the fun part. You can decorate the handles with stencils, paint, or any other decorative finishes you can think of. And tada! You now have a beautiful, custom-made wood servin’ tray with handles for dancin’ and showboatin’ to your guests.
So, there you go. Now you know how to make your own wood servin’ tray and add handles for fun. Who says functional can’t also be stylish? Let your tray do the talkin’ when it comes to entertainin’!”
Mark the Spot to Attach Handles
So you’ve come to the last part of the tray making journey and it’s time for us to add handles – and you know what? Ain’t nobody got time for weak handles. The handles gotta look good and feel good.
Well, let’s get started. First thing we gotta do is mark the spot to attach the handles. Without marking the spot correctly, the handles won’t look good and the whole tray will be off-balance. Now, I’m sure you can use a ruler and some measuring tape, but I find it easier to just use an old-fashioned eye-balling technique. You gotta guess and visualize where the spot should be.
Think of the handles like an arrow pointing in the direction of the tray. If you can, imagine a line connecting the top of the handle to the bottom of the tray for a polished finished look. Mark the spot where the handle will be placed, then step back and pay attention to how it feels and looks. Make sure you won’t be losing any finger space and the proportions look balanced. Once you get the spot, drill a small hole and be careful not to cut the material too deep. We don’t want any splinters.
Attach Handles with Wood Glue and Nails
Once you’ve marked the spots for your handles, you’re ready to attach them with glue and nails. Before you start, it’s important to make sure you have the right kind of glue. You should go for a waterproof glue specifically designed for woodworking – this is because a good waterproof glue will prevent the handles from getting damaged if they come into contact with liquid.
Once you’ve got the right glue, you’ll need to apply it to the handles and the tray. Make sure you get it into all the nooks and crannies to ensure a strong adhesion. When the glue has been applied, take your nails and start hammering them into the holes you’ve made. Try to make sure the nails are at a 45-degree angle for the most secure hold.
Now, here’s where it gets tricky. You’ll need to use a small amount of physical force to make sure the handle is completely secured. This can be a little bit tricky and there’s a risk involved as you don’t want to break the wood – so proceed with caution! If all goes according to plan, you should have a tray with two handles now attached and ready to go!
Be sure to give your handles a good once-over to make sure they’re firmly in place, and you’re all done! Congratulations, you now have a beautiful wood serving tray with handles that you can use for entertaining. It may feel a little strange after putting in all the effort to make something that you can’t eat – but that’s part of the beauty of the process! Now all that’s left for you to do is show it off – and enjoy your creation!
Decorate with Stencils or Other Decorative Finishes

So, you’ve come to the final steps of your DIY wood serving tray project! You’ve gone through the steps of gathering materials, cutting, and assembling the wood pieces, and then finished with sanding, waxing and other protective and decorative coatings– now it’s time to add the final touches!
If you decide to add a decorative finish to your serving tray, one of the best ways to go about this is to use stencils. As you might have guessed, you’ll want to make sure you have picked out and bought the stencils of your choice to be used on your wood tray. Don’t worry if you don’t know what stencils to use– you can find a whole range of stencils themed around the holidays, nature, animals, geometric shapes, and any other design you can think of! They are also conveniently found online and in craft stores, which is great if you’re stuck in a time crunch.
Once you have selected your stencils, it’s time to get to work! Depending on the material your stencils are made of, you may have to stretch it out first so that it’s easier to use. If it is thin paper or vinyl, be careful not to rip or wrinkle it. If it is a thick plastic, place it over the wood piece and secure it to the wood with masking tape.
But that’s not all! You can also use other materials to create your own decorative finishes, such as intricate carvings, burn markings, or pyrography. Be creative and don’t forget to take safety precautions if you choose to use heat or a sharp tool. Finally, you may also want to add an inlay. This can be done with any small pieces of wood, stones, shells, or even glass for a beautiful effect!
Now that you’ve got all the materials and are ready to decorate your serving tray however you like, you can make it suit any occasion! Showcase your masterpiece the next time you have a dinner party or just enjoy some snacks on the weekend. No matter what, your beautiful DIY tray will bring a unique sense of style to your home and will definitely be the talk of your guests.